
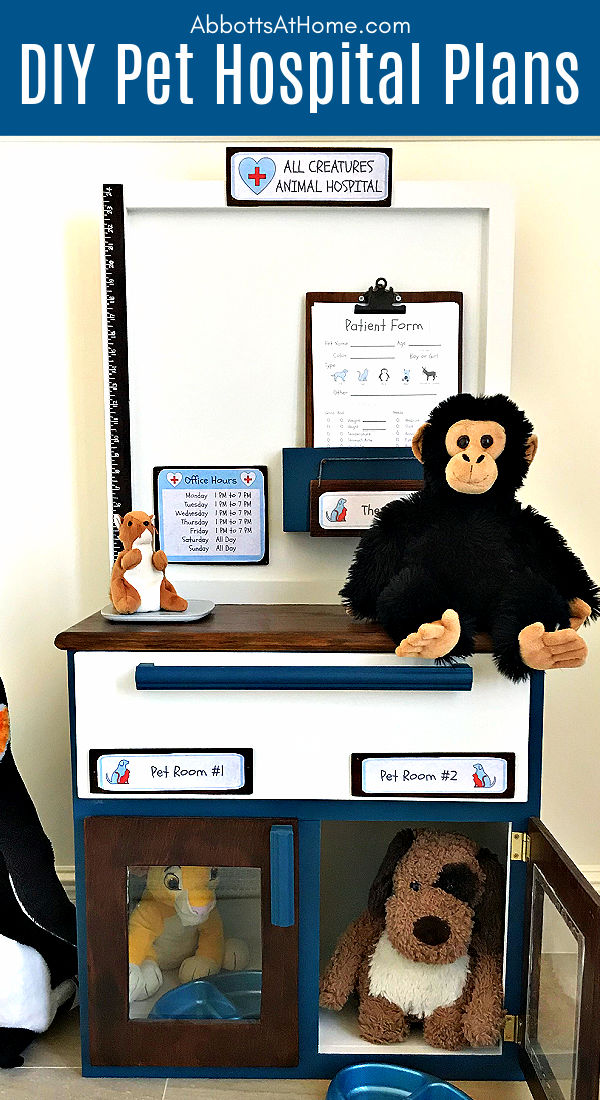
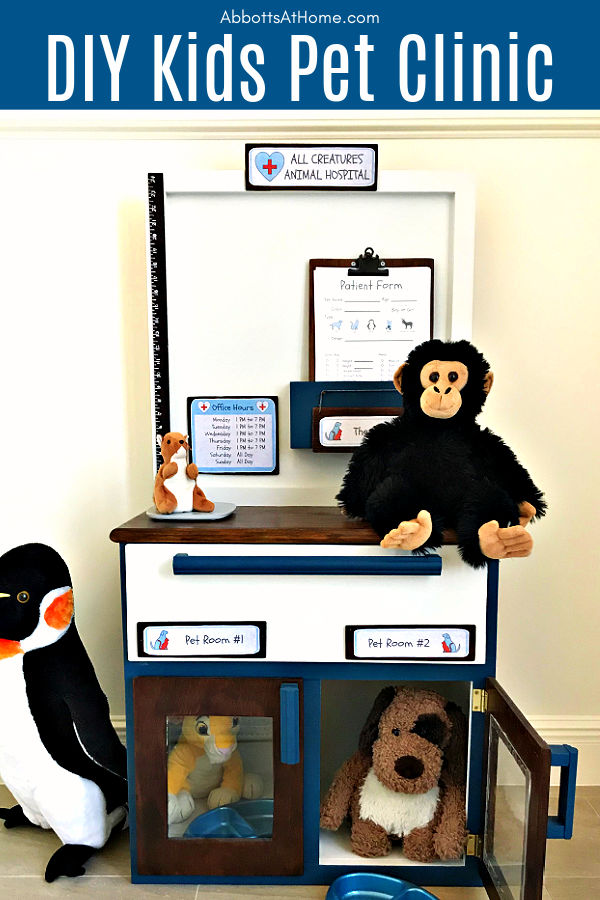
Make your kids this sweet little DIY Kids Vet Clinic. Build steps and printable plans to show you how to make this fun pretend playset.
DIY Kids Vet Clinic
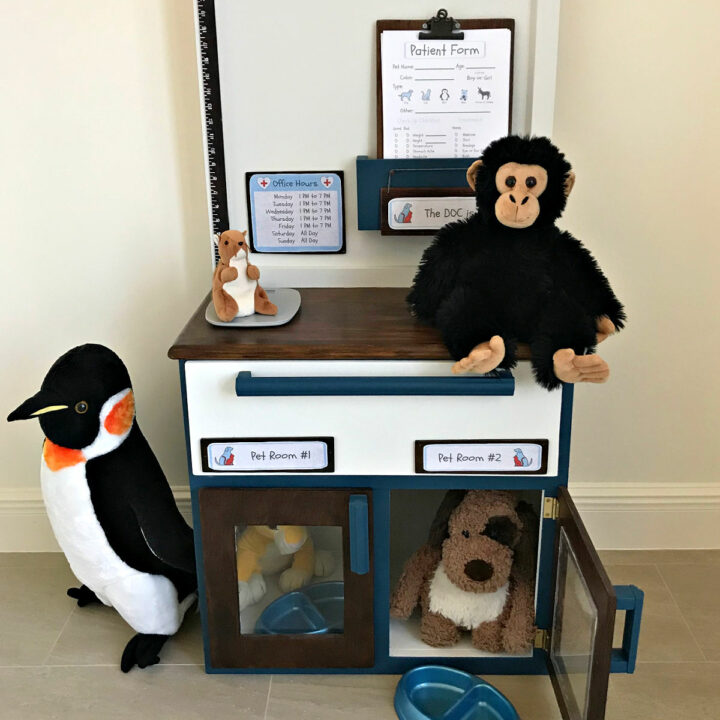
Here’s an easy woodworking project for anyone that has a kiddo that loves shows like Doc McStuffins, has lots of Toy Pets, and loves pretend play and dress up.
This DIY Pretend Play Vet Office has been a popular playset with our little veterinarians, this year.
Within a couple days of getting this Play Pet Animal Clinic, every stuffed animal in this house had been groomed, measured, weighed, and bandaged back to good health. 😉
I think playing doctor and dentist makes the real doctor and dentist visits less intimidating for my little guys. Now, they understand how all of those strange looking doctors tools are used.
This DIY Vet Clinic is a pretty easy build for anyone comfortable with tools. And, I put all of the play hospital signs and the vet office patient forms I made into a PDF. You can find that after the build steps.
Printable woodworking plans are also available at the end of the build steps. With full steps, cut list, and 3D drawings to make this build quick and easy.
Now, let’s get to the build steps for that DIY Play Vet Office. 🙂
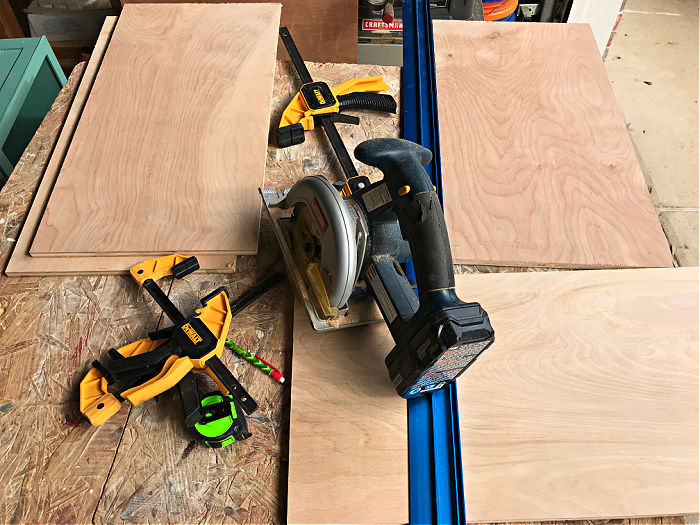
Tools Needed For This Build
- Saw, I used a Miter Saw for the 1×2’s
- Circular Saw, with a cutting guide for perfectly straight cuts, if available
- 1 Set of Side Mount 10″ or 12″ Drawer Slides OR a Center Mount Wood Slide
- Power Drill & Jigsaw
- Clamps
- Brad Nails and Nail Gun (I’ve used this one for years)
- Wood Glue
- Sandpaper
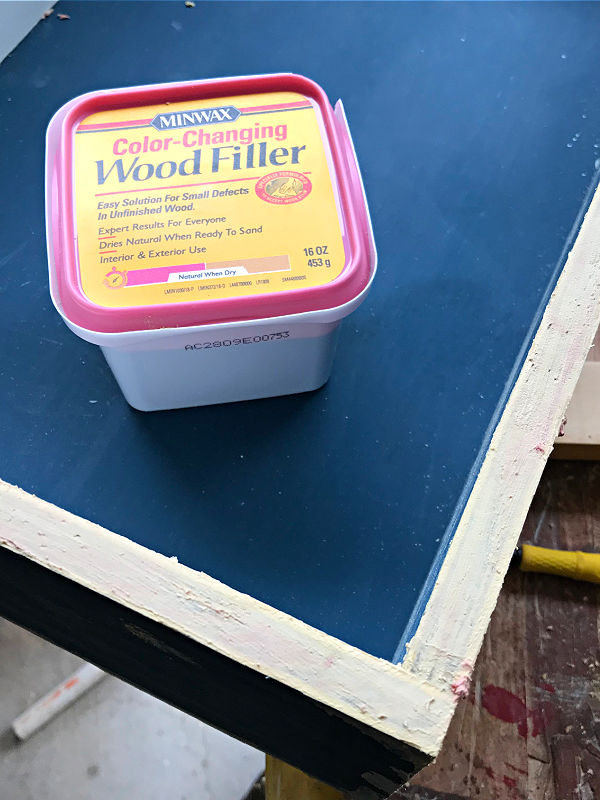
- Wood Filler
- Super Glue or DAP Rapid Fuse
Watch This Build Overview Video
If any of the steps for this DIY Play Animal Doctor Office are confusing, I highly recommend watching the short video. Hopefully this video can help clear up any confusion.
Hello, DIY friends! You can find the DIY Pretend Play Doctor’s Office build plans in my store. The printable build plans also include the Play Animal Hospital Signs and Forms too.
These plans are copyrighted. They cannot be shared or sold without my permission. The PDF plans should be printed in landscape. Please let me know if you have any questions and enjoy your build! 🙂

Build Steps – DIY Pretend Play Vet Clinic
You can find all measurements with build diagrams and cutting guides in the printable build plan available for sale at the end of the instructions.
Step One
Begin by assembling the frame for the DIY Vet Office for Kids. I used ½” plywood so that the build is lighter and a bit less expensive. Use a straight-edge cutting guide for the straightest possible cuts. Join the pieces with wood glue and a brad nailer. Use 1” brad nails on the frame.
I think it’s easiest to build the middle section (2 shelves and divider) before gluing and nailing that onto each side piece.
The easiest way to keep everything straight is to draw pencil lines with a square where the pieces should join. So a straight line on each side of the side pieces is really helpful.
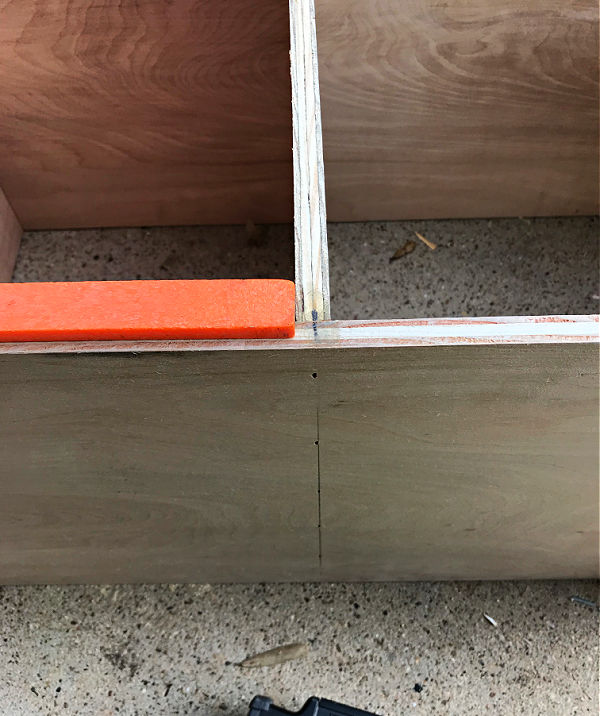
The straight line on the inside of the frame helps you line up the shelves. The straight line on the outside helps you keep the brad nails straight.
I also like to put a few little x’s on the side of the line that gets the shelf or brad nails as a reminder while I’m working. It’s easy to accidentally attach the shelves to the wrong side of those lines.
Step Two
After the plywood frame is built, it’s time to attach the 1×2 face pieces. Use wood glue and brad nails again. This time go with 1 ¼” brad nails.
You want the side pieces to be flush with the outside of the frame. Start nailing at one end. Then add nails every few inches making sure the 1×2 is flush with the plywood as you go. Next, add the 3 horizontal pieces between the long sides you just installed.
Double-check the measurement before cutting your pieces for this DIY Play Animal Doctor Office. If your plywood was even 1/16” off, you might need to adjust the length of these pieces for a perfect fit.
The top edge of the bottom piece should be level with the bottom shelf. The top edge of the middle piece will be level with the middle shelf. The 12” 1×2 should be centered on the face frame and plywood divider.
Apply glue to the length of plywood beneath each piece before nailing it in place.
Step Three
After the 1×2 face is attached, glue and brad nail the plywood top onto the frame. We’ll hide those plywood edges with trim in another step. You can use 1” or the 1 ¼” nails from the last step here.
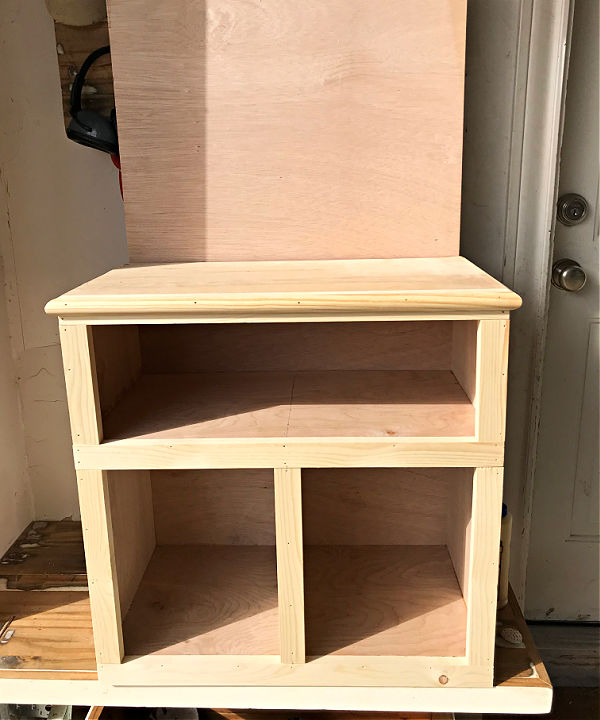
Step Four
Now, you can glue and brad nail the 2×4 Luan Plywood backing onto the DIY Play Animal Doctor Office. I like Luan board because it’s generally just $6 for a 2×4 sheet and it still looks and feels great.
Step Five
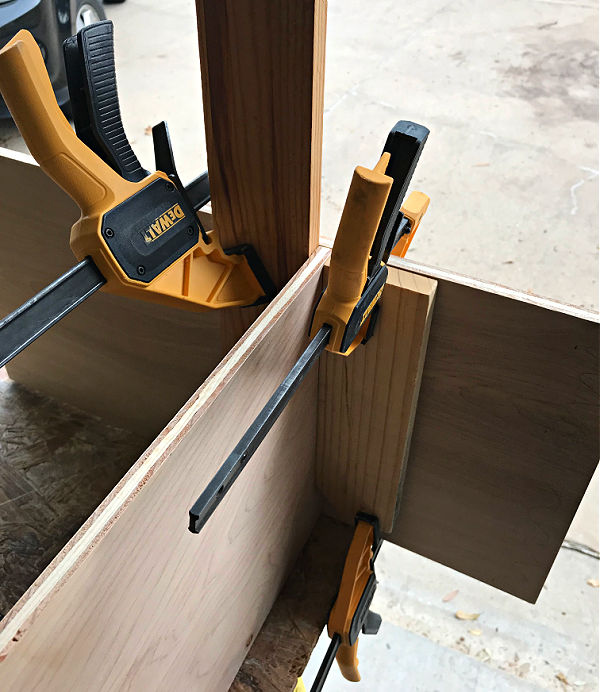
Use glue and brad nails to attach a 1×2 frame to the top half of the Luan board. ¾” brad nails, used from the plywood back side of the build work best here. Start by centering the bottom piece on the Luan board.
Clamp it on each side before using the brad nailer, so that the nails don’t push the 2 pieces apart. Then use a square, resting on the bottom 1×2, to help you keep the side pieces straight when you glue and brad nail them to the board.
Don’t forget to use the clamps before nailing each piece into place. Finally, glue and brad nail the top 1×2 into place.
Step Six
Use glue and brad nails to attach molding around the top edge of the plywood top. I used half round trim for a bullnose countertop look on this DIY Kids Vet Clinic. But you can use whatever you like or have on hand. Pick the best length brad nail for your trim.
For my half round trim, I cut 45-degree miters on the front corners and left the back ends straight.
Step Seven
Now, let’s build your drawer box. The height of the 4 drawer side pieces is 5 ½”. The drawer bottom is inset inside the 4 sides. Use glue and 1” brad nails for this step.
Buy your 10” or 12” long drawer slides BEFORE cutting your pieces and building this box. Check the directions for your slides to find out how much space the slides need on each side of the drawer before building.
The measurements on this drawing are for a 21 ¼” drawer opening with drawer slides that need ½” space on each side of the drawer box. Drawer Slides need exact measurements to operate properly. And, as you probably know, lumber and plywood aren’t really as thick as the general measurement name indicates.
Double check the exact width of the drawer opening on your frame before subtracting the drawer slide allowance and actual thickness of 2 pieces of plywood.
Step Eight
Once the drawer box is built, install it into the opening on your DIY Play Animal Doctor Office. You’ll need to use 2 pieces of scrap ½” plywood behind the drawer slides to install them flush with the opening.
This drawer has an overlay front, so the end of the drawer slide should be installed near the front edge of the 1×2 face frame. The drawer front is also ½” plywood.
I think it’s easiest to get the drawer front straight and centered by installing the slides and drawer box first. Then using wood glue and brad nails to attach the drawer front onto the drawer box while the drawer box is inside the frame.
But use whatever method you are used to to get that drawer face installed.
Step Nine
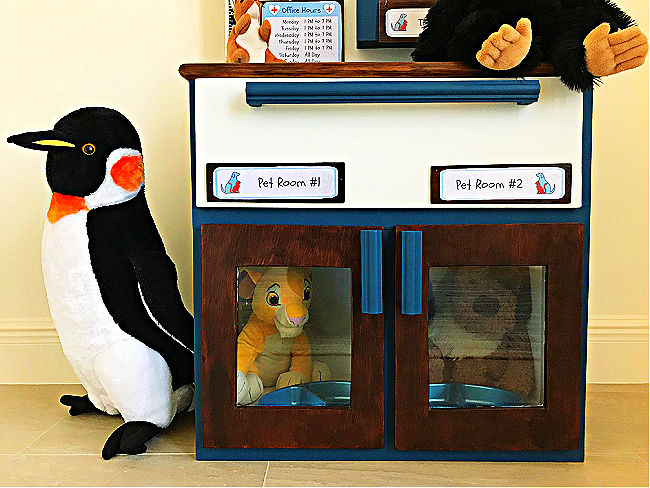
You’re getting close to the end now! It’s time to make easy cabinet doors for the “pet patient rooms”. Cut 2 pieces of ½” plywood with a 7”x8” opening into each door.
The best way to cut the opening is to draw the opening onto the plywood with pencil. Then drill a large hole inside that opening that you can use to put your jigsaw blade into. Then cut that opening as straight as possible with that jigsaw.
You can apply painters tape to the lines before cutting, to reduce splintering. Once the openings are cut, set them aside for now.
Step Ten
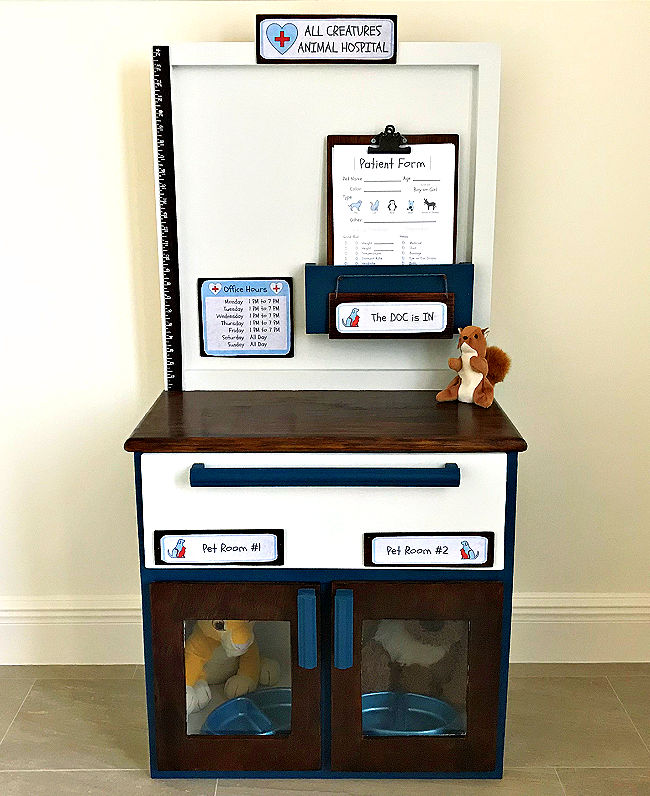
One last build step on this DIY Play Animal Doctor Office! Build this little half box to attach to the upper half of the Luan board. This will be used to hold the patient forms on a clip board.
Use glue and 1 ¼” brad nails to build this half box. Cut the 5 ½” x 12” plywood. Then attach 1×2’s along the 2 sides and bottom.
Once that is built, Glue and brad nail that onto the Luan board. You want it about 6” above the countertop and to the side against the 1×2 face frame on the Luan board.
How I Painted My Play Animal Hospital
That’s it for the build. Time to finish the cute little DIY Kids Vet Clinic with your favorite paint and stain colors. Start by using wood filler anywhere that needs it, then sanding to 150-grit everywhere.
To get the wood stain look on my countertop and cabinet doors, I used General Finishes Java Gel Stain. It gives a beautiful wood stain color, even on WHITE plywood.
The blue I used is Magnolia Homes by Kilz color Signature. The white I used is Magnolia Homes by Kilz color One Horn White.
After finishing you can install drawer and cabinet door pulls. Use store-bought or build your own (I used scrap trim to make mine). The cabinet doors are installed with 2 hinges on each door. The doors each have an 8×10 sheet of plexi-glass superglued to the inside of the door
Hello, DIY friends! You can find the DIY Pretend Play Doctor’s Office build plans in my store. The printable build plans also include the Play Animal Hospital Signs and Forms too.
These plans are copyrighted. They cannot be shared or sold without my permission. The PDF plans should be printed in landscape. Please let me know if you have any questions and enjoy your build! 🙂
What Comes in the Free Printable Signs & Forms Download?
You can download JUST THE FREE PRINTABLE SIGNS And FORMS here. The build plans are not part of this download. That download is available above.
These printables are free to email subscribers and for personal use only. They cannot be shared or sold without my permission. Print more badges and patient forms as you need them. The printable for this DIY Play Animal Doctor Office includes the following…
- All Creatures Animal Hospital Sign
- The Doc Is In and The Doc Is Out (not shown)
- 2 Blank Badges
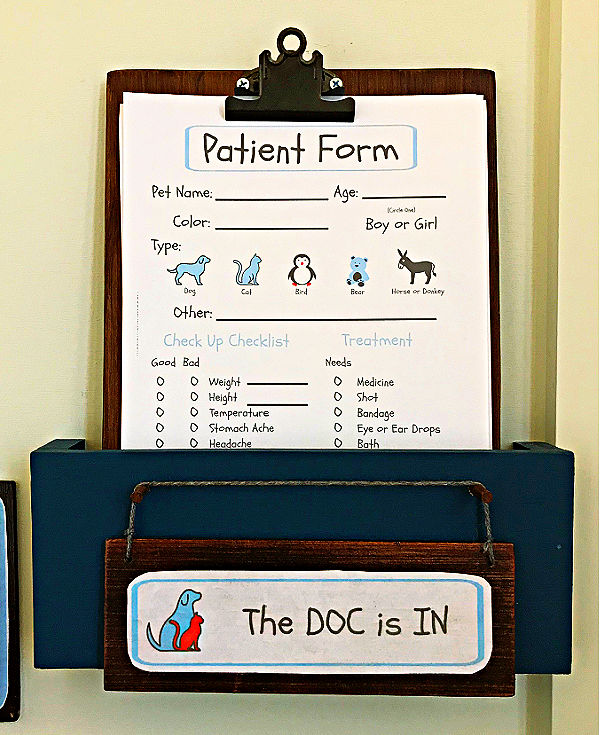
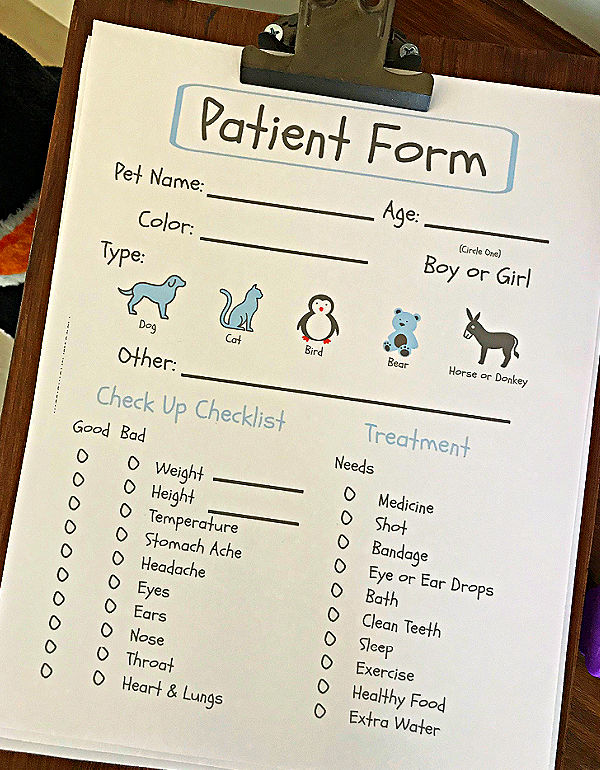
- Pet Patient Form
- Clinic Hours Sign
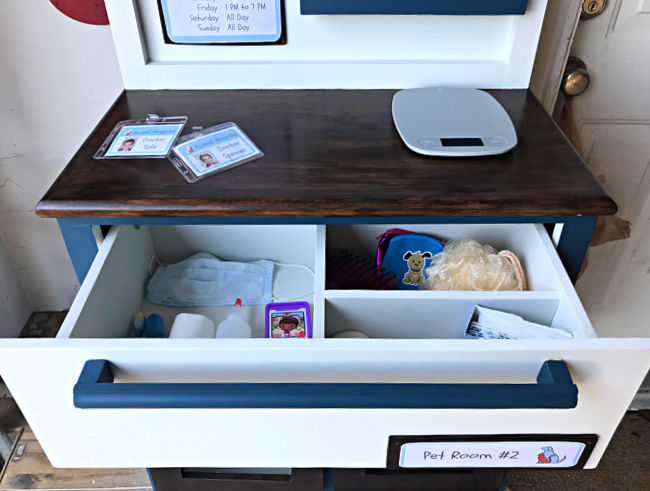
- Pet Room 1 and Pet Room 2 Signs

Adding Printable Play Veterinarian Signs
I designed some fun printable signs and vet office forms for this DIY Play Animal Doctor Office. They are included in the printable build plan PDF available in the section above.
To make the signs really pop, I cut scrap 1/4″ plywood a little bigger than the signs. Then I sanded the scraps and used General Finishes Java Gel Stain on the plywood.
Once the Gel Stain dried, I applied the printable signs with Mod Podge. Put a layer of Mod Podge on the plywood then apply the sign to it.
Once that Mod Podge dries, apply a layer of Mod Podge over the paper and plywood front to seal the sign. Then, I used DAP Rapid Fuse to quickly glue the signs in place after they dried.
Print out as many Patient Forms as you need. I usually print 20 and then reprint a couple months later when they run out.
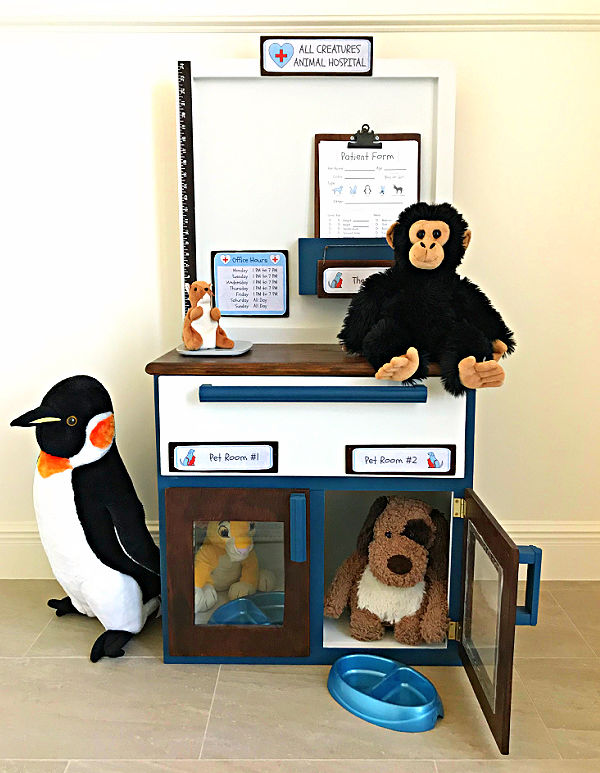
Fun Accessories for Your Kids Pet Hospital
Here are a few fun ideas for accessories that go along with the DIY Play Animal Doctor Office theme.
- Kids Doctor Costume with Working Stethoscope
- Play Doctor and Dentist Kit with Costume
- This little Play Doctor Set with Costume is Cute Too
- This Small Kitchen Scale For Weighing Pets
- Cheap Wooden Yard Stick for Measuring Height
I cut my yard stick in half, then stained it with the General Finishes Java Gel Stain. Once that dried, I used a tiny artists paint brush to paint white acrylic paint in the lines and numbers.
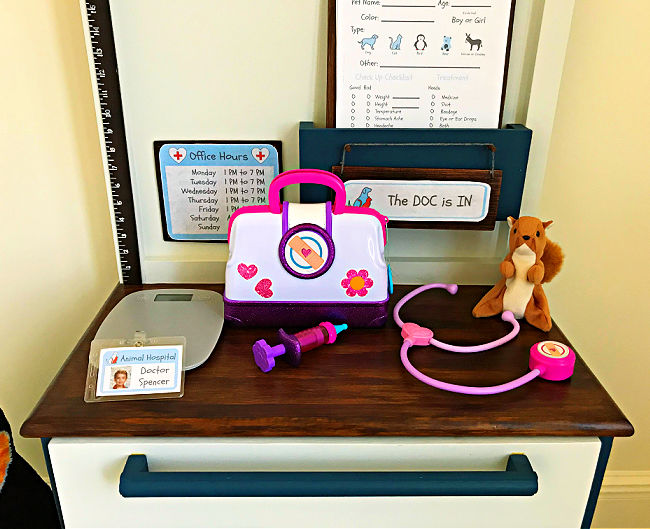
I also added these things from my local grocery store to add to the Veterinarian Office and Grooming Station imaginary play.
- A Box of Band-aids (My Kids Loved Having Their Own Band-aids!)
- Small Brush & Comb
- Toothbrush
- Body Wash Poof & Wash Cloth
- Shallow Plastic Container to Use as a Play Bath
- Cotton Balls and Cotton Pads
- Craft Sticks (for tongue depressors)
- Sports Wrap or Long Bandage Wrap
- Old Medicine Syringes and Measuring Cups
- Small Pet Food and Water Bowels for the Pet Rooms
That’s it, guys. Thanks for checking out the tutorial for this beautiful DIY Play Animal Doctor Office.
Looking for more DIY Beginner Woodworking Projects? Check out this DIY Beginner Woodworking Video playlist on YouTube or check my DIY Furniture Build Plans post for a look at all of my builds.
More DIY Projects For You
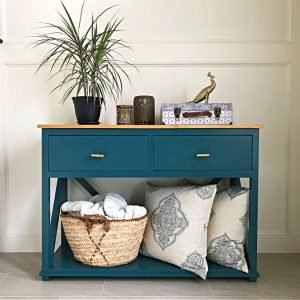
I love this beautiful DIY Console Table Plan with Drawers too!
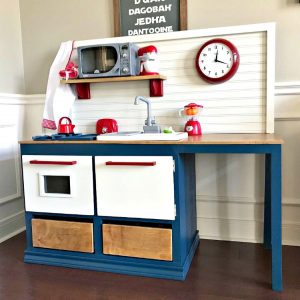
Check out this tutorial for a pretty DIY Play Kitchen for Kids.
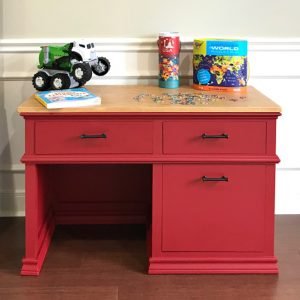
This Elementary Kid-Sized DIY Childrens Desk Plans with Storage is a great build for homeschooling or kids arts and crafts.
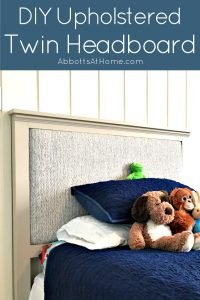
I also love this DIY Upholstered Twin Headboard tutorial.
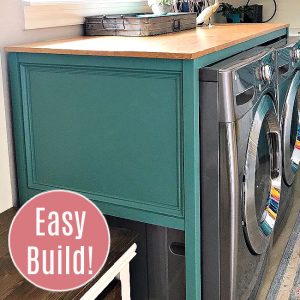
Check out this DIY Over Washer and Dryer Laundry Table with free printable build plans.
You might also like this DIY for How to Whiten Tile Grout. It’s a Game Changer!

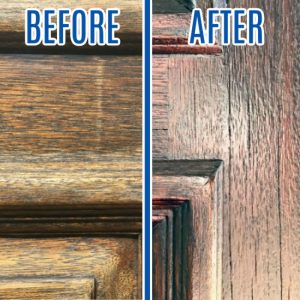
And, if it is time to Stain your Front Door, check out these steps for how I restain a front door without stripping it or removing it. 🙂
Feeling inspired? Now that you’ve read the build steps for this DIY Kids Vet Office, you can do it too. Let me know if you have questions.
Don’t forget to sign up for the Abbotts At Home email newsletter to get DIY, Remodeling, and Crafty ideas in your inbox.

Stephanie Abbott has been remodeling homes, updating & building furniture, and working on DIY home maintenance and cleaning tips for over 20 years. Her remodeling has been featured in Better Homes and Gardens Magazine. And, her DIY YouTube channel has had more than 8 million views.
Most of the DIY tutorials and videos on this site focus on beginner to intermediate level DIY Projects that can be done in an affordable way without high-end, expensive tools. All of the cleaning tips on this website have been tested in her home.