
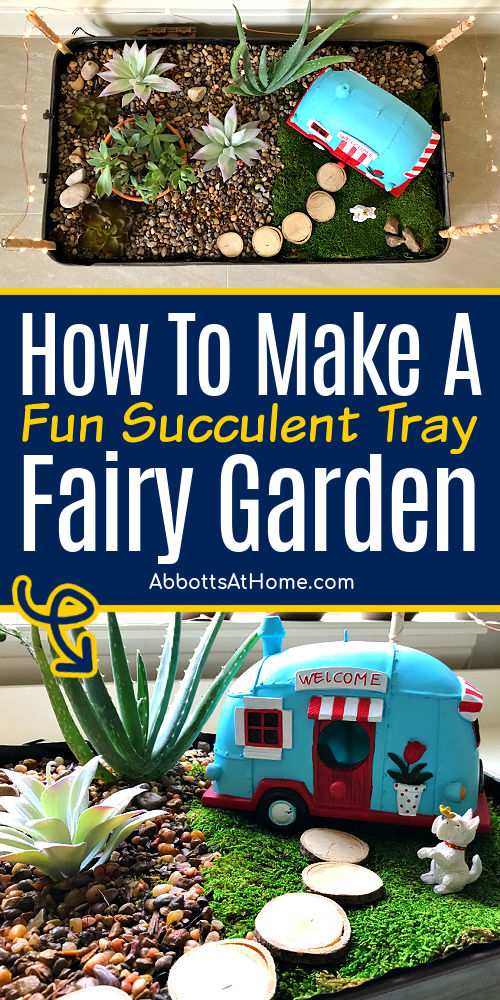
How CUTE is this indoor succulent fairy garden tray?! It’s a simple DIY. Here’s the easy steps to make your own fairy garden with succulents.
DIY Indoor Succulent Fairy Garden Idea
I know, I know. I just built a Fairy Herb Garden a few months ago and I loved that too. But I just couldn’t resist designing a new one with succulents and a vintage camper theme.
Right after writing up my directions for the fairy herb garden, I found a vintage camper on Amazon and recommended it as a cute option for the same tray.
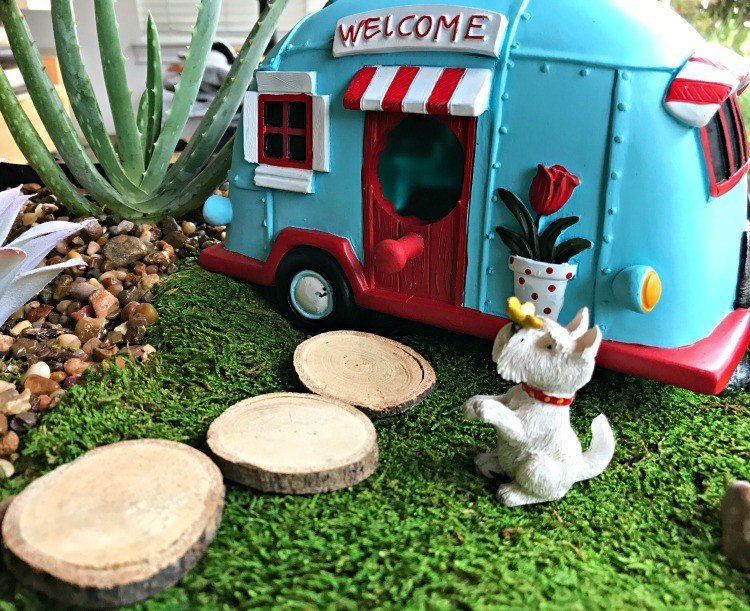
Then, I stumbled upon this cute vintage camper at Hobby Lobby and I new I had to design an indoor fairy garden around it! And, this time I decided to use succulents.
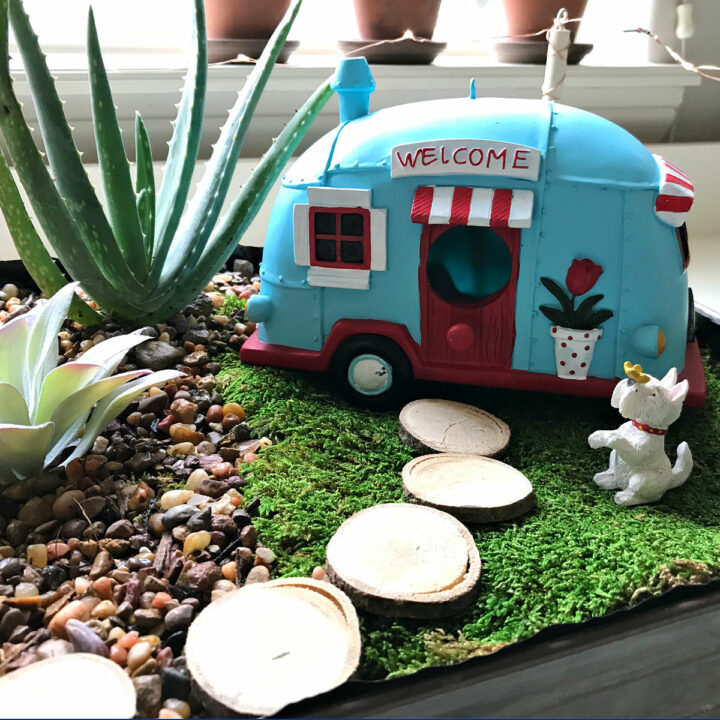
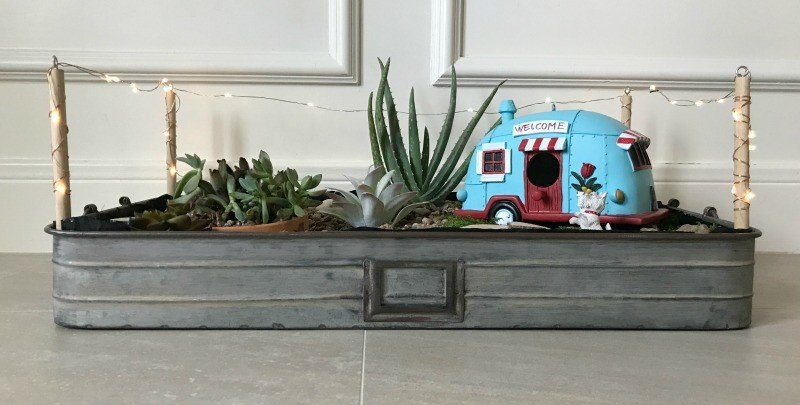
Since succulents remind me of the rocky landscaping in the Southwest and campers remind me of, well camping, I decided to go with a camping in the Southwest theme.
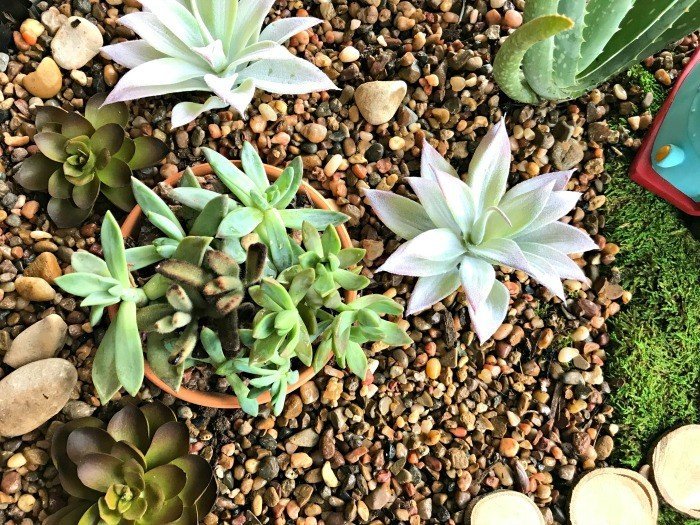
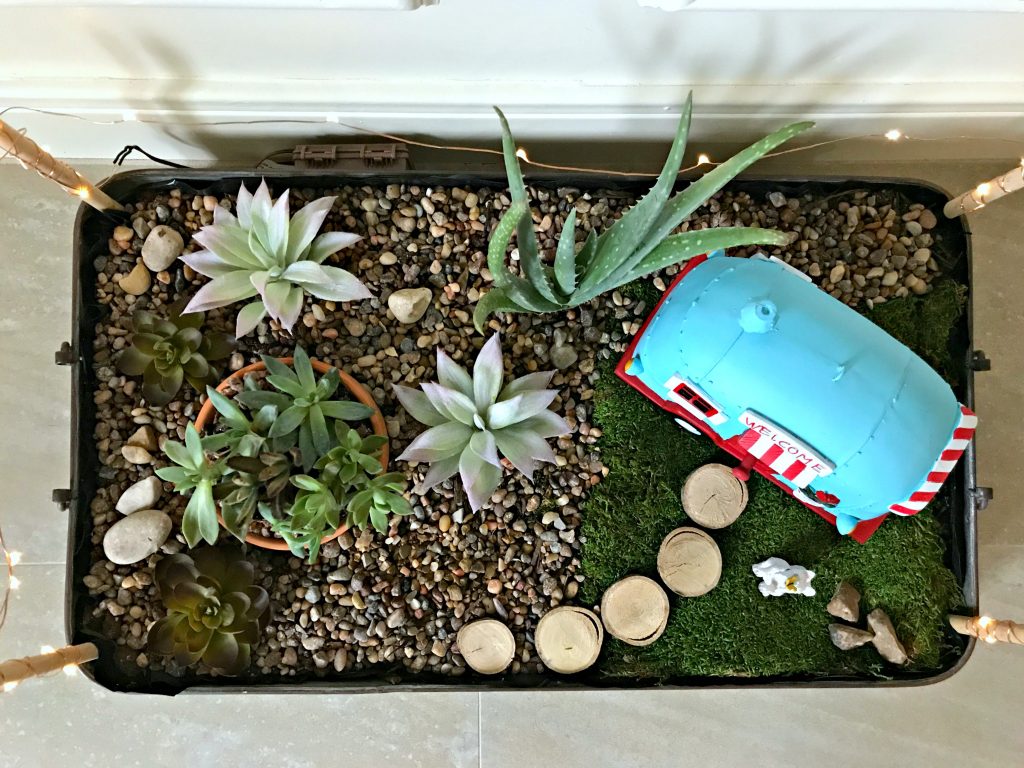
To give this mini succulent garden more visual appeal, I mixed a sheet of moss with pea gravel to make the terrain. Then I added some fake succulents with a little pot of real succulents.
I also grabbed an aloe to give the tray a little height and because aloe’s are just awesome. This whole indoor fairy garden tray can be made in less than an hour. It’s super easy.
If you buy all real succulents, I recommend keeping them in a separate small planting dish inside the tray. That’ll make it easier to water them separately. And the soil is ready made for succulents!
Now, let’s get to how I made this DIY fairy garden with succulents.
What You’ll Need
- 1 tray deep enough for your plants and decorative items, like this galvanized plant tray
- A vintage truck or this vintage camper bird house would be adorable
or maybe a vintage VW Van or old red schoolhouse
- Succulents, fake or real
- Heavy Duty Garbage Bag
- Rocks to Line Bottom of Tray
- Potting Soil AND/OR A Bag of Pea gravel
- Sheet of Moss
- Decorative items – rocks, wood discs, etc.
- Fairy Garden Light Poles
- 1 Dowel Cut into 4 – 8″ sections
- 4 Screw Eye Hooks
- 1 set of wire LED mini lights
(between 7 and 12 feet is best for this project)
Here’s a quick look at how to make your own DIY Succulent Fairy Garden on my YouTube Channel.

How To Make A Fairy Garden With Succulents
Quick Note: Some of these pictures are from the original DIY indoor Fairy Garden post, but the set up is pretty similar. Just ignore the herbs in some of the pictures. 😉
Quick Step Guide
- Prep The Tray
- Add Gravel For Drainage
- Make The Light Poles
- Add The Plants & Decorations
Prep The Tray
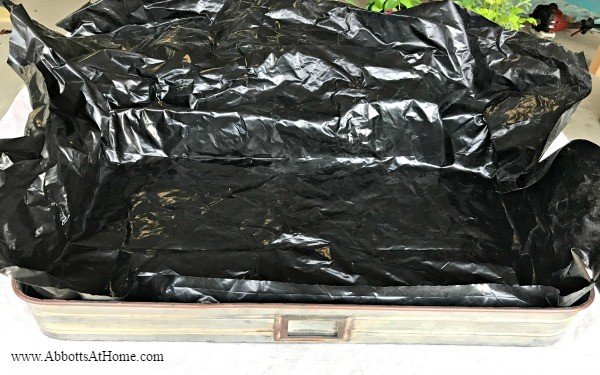
Cut your heavy-duty garbage bag so that 6 inches or so hangs over all 4 sides. Leaving extra long sides now makes it easier to fill the tray without worrying about the plastic shifting.
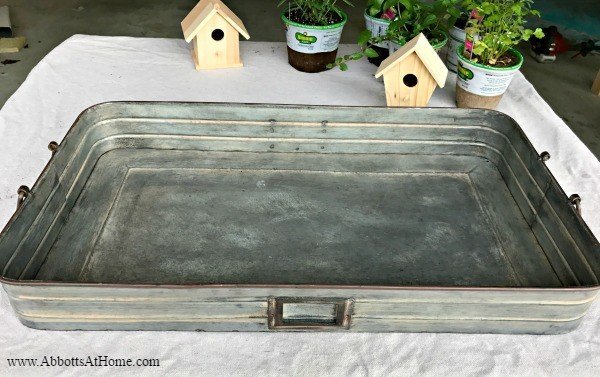
Lay the plastic on top of the tray and push it flat along the bottom and into each corner. You will have extra material sticking up on the edges for now.
Add Gravel For Drainage
Put a 1″ layer of gravel along the bottom of the tray. Then add a couple of inches of the best soil for the type of plants you’ve chosen.
Make sure the tray has enough soil to be firm all across the tray and around the plants. Add the plants and cover the soil in a light layer of pea gravel and moss to suit your design.

OR, if you are using real succulents already in small shallow planters or fake succulents for your design. You can just fill the whole tray with pretty pea gravel, since you won’t need soil.
Trim away the extra plastic along the edges of the tray.
Make The Light Poles
Screw an eye hook in one end of each of the 4 dowel sections. Stick a dowel in each corner of the tray, eye hook end up. I also hot glued my dowels into the corners of the tray.
Start the lighting by hiding the battery pack for the lights behind the tray or between the liner and tray. You can use 3M Command Velcro Strips to keep it in place.
Make sure to never let the battery pack get wet, it is not waterproof.
The wire and the lights on most of these mini LED lights are waterproof though, be sure to double-check the instructions included with yours.
Wind the wire LED mini light around each dowel and through the eye hook to secure the wire in place. Depending on the length of your wire, you may need to do 1 or more dowels twice.
Just be sure to always start and end each dowel with the eye hook to make it look more like the lights around a campground.
I left the front of my tray free of lights. I didn’t want to obstruct the view of the camper and succulents.
If you are designing this as a centerpiece, you can always change the layout of the lights so that they are across the center of the tray or even shorten the dowels to keep the lighting along the edge of the tray.
Add The Plants & Decorations
Once the lighting is done, place your vintage camper (more birdhouse campers on Amazon) and other bits of decor inside the tray. You could really have fun with this idea and make it into anything you can imagine.
If your family is into fairies, mice, butterflies, horses, etc., go with that as a theme. You could use gravel to make a dry creek bed. Create little mailboxes from craft wood.
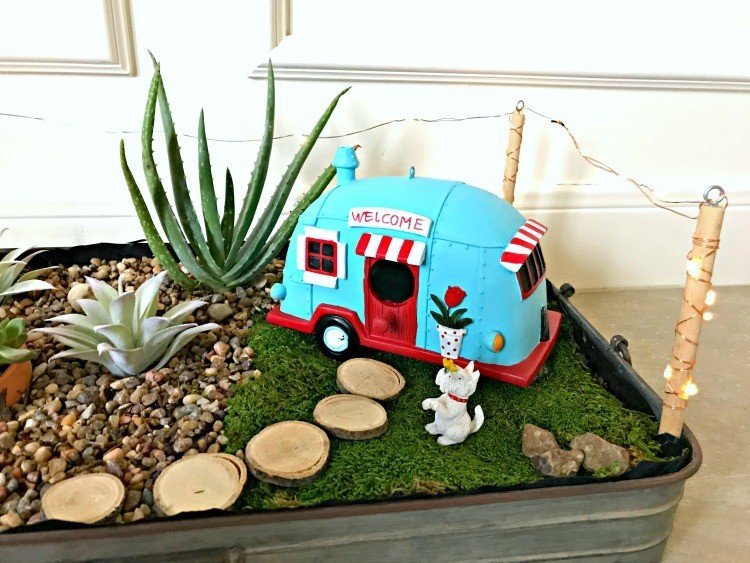
Or even use fairy garden decor for your little garden. Have fun with it. I made my wood discs from a branch I found in our yard. I used my miter saw to quickly cut it into slices.
After I had the scene set up the way I wanted it, I was able to pick the best spots for the plants in the open areas.
Tips for Indoor Plants to Use in a Shallow Tray
There are lots of plants that work well in shallow planters, like a tray. Just do a quick google search on what you want to use to double check before buying.
Many types of herbs, succulents, indoor ivys, bonsai trees, pothos, and even strawberries will work.
JUST BE SURE to pick the right potting mix, sunlight, and drainage for your plants.
That’s it for this DIY Shallow Planter Tray Idea. Here’s a few more projects you might like!
- 25 Scenic Landscape Wallpaper Murals: Beautiful Vintage Art and Realistic Nature
- How to Wrap A Picture Frame with Gift Wrap: Easy Christmas Wall Art
- I LOVE This Easy DIY Scrapbook Paper Wall Art Idea – It’s Beautiful!
Check out the 20 Best DIY Projects Using Chalkboard Paint. These are fantastic, guys!

Looking for more cute DIY Decor ideas? Have you tried DIY Acrylic Pour Art? It’s super fun and totally addictive, guys.

And, you might like this popular DIY for faux metal patina finishes. This DIY is so incredibly easy. I even use these paints on old decor and mirrors for a cool new patina metal look.
I love this beautiful DIY Acrylic Paint Pouring Wall Art tutorial.

Feeling inspired? Ready to design your own Fun Indoor Succulent Fairy Garden Idea? Have fun and let me know if you have questions. Or post pictures of your work and tag Abbotts At Home on FB, I’d love to see it!

Stephanie Abbott has been remodeling homes, updating & building furniture, and working on DIY home maintenance and cleaning tips for over 20 years. Her remodeling has been featured in Better Homes and Gardens Magazine. And, her DIY YouTube channel has had more than 8 million views.
Most of the DIY tutorials and videos on this site focus on beginner to intermediate level DIY Projects that can be done in an affordable way without high-end, expensive tools. All of the cleaning tips on this website have been tested in her home.