
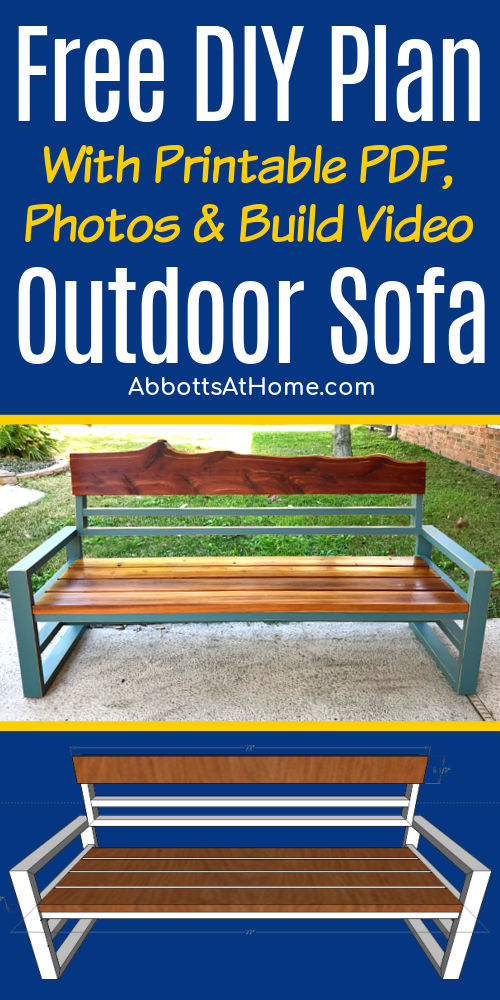
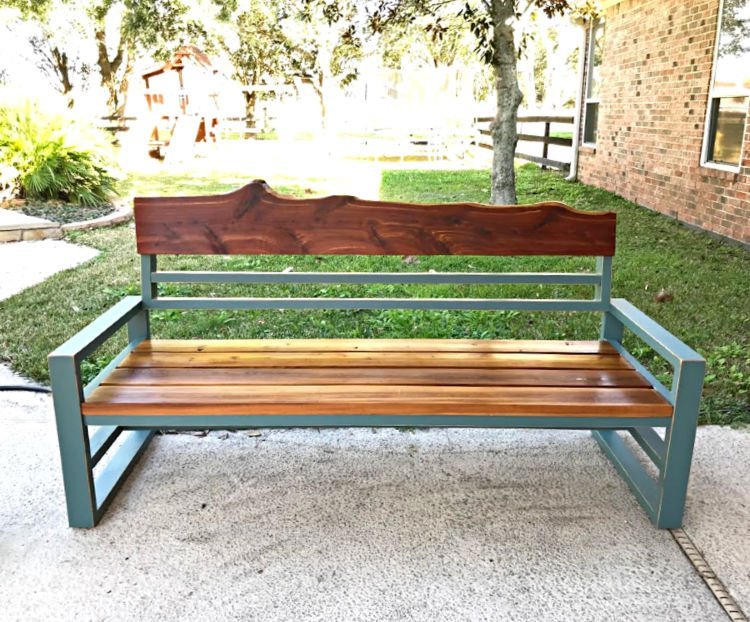
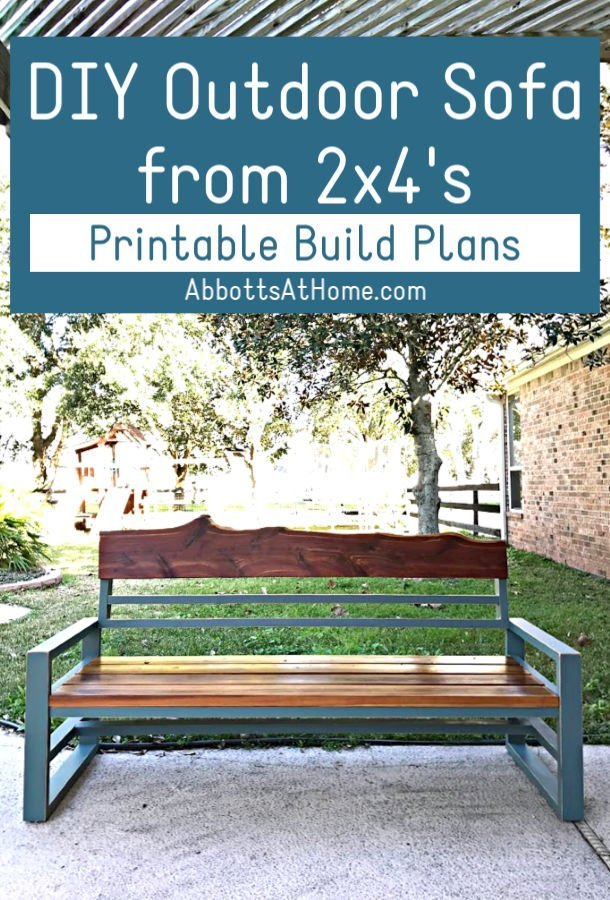
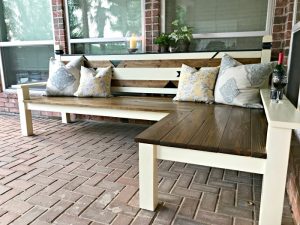
Easy to follow steps, free printable build plans, and how-to video for this beautiful DIY Outdoor Sofa made from 2×4 and 2×6 lumber.
DIY Outdoor Sofa from 2×4 Pine – Build Plans
I’m so excited to be sharing the build steps and printable plans for this DIY Outdoor Sofa from 2×4 Pine and Cedar lumber with you all!
I built this a few months ago, but haven’t had time to put the plans together until now.
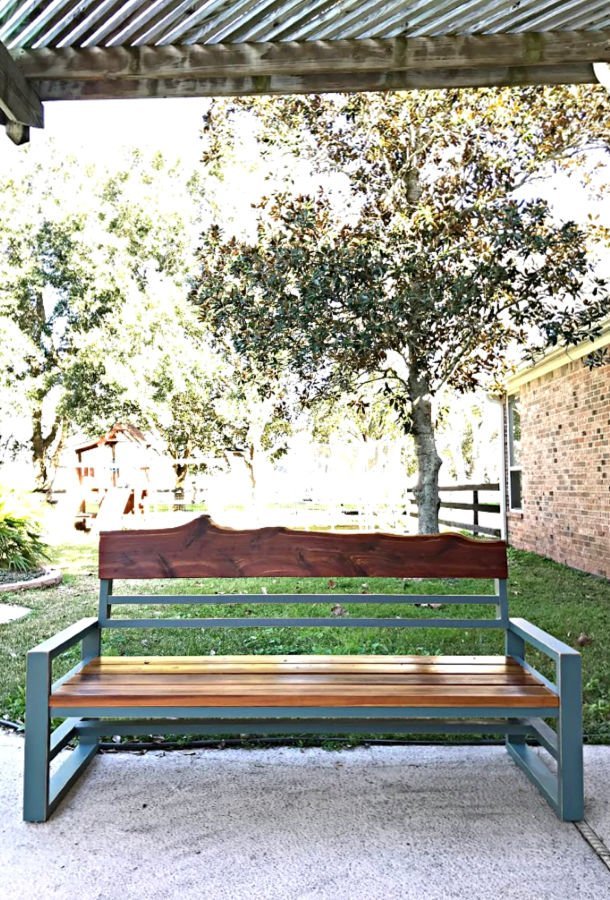
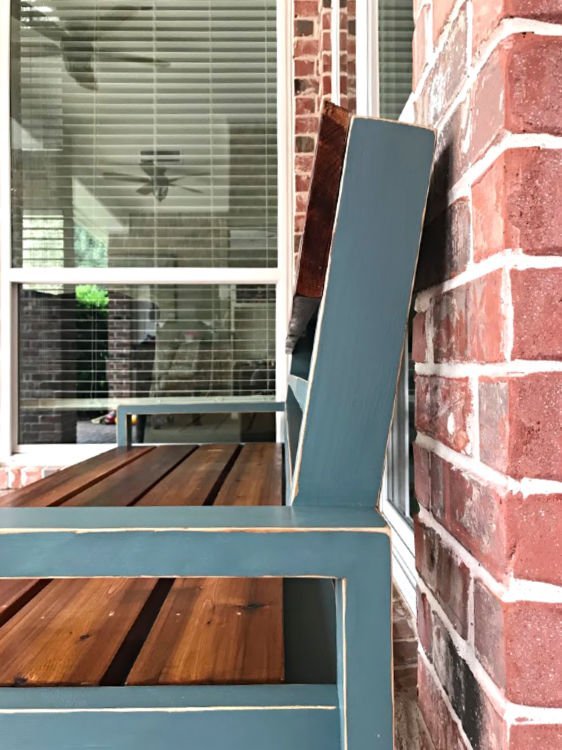
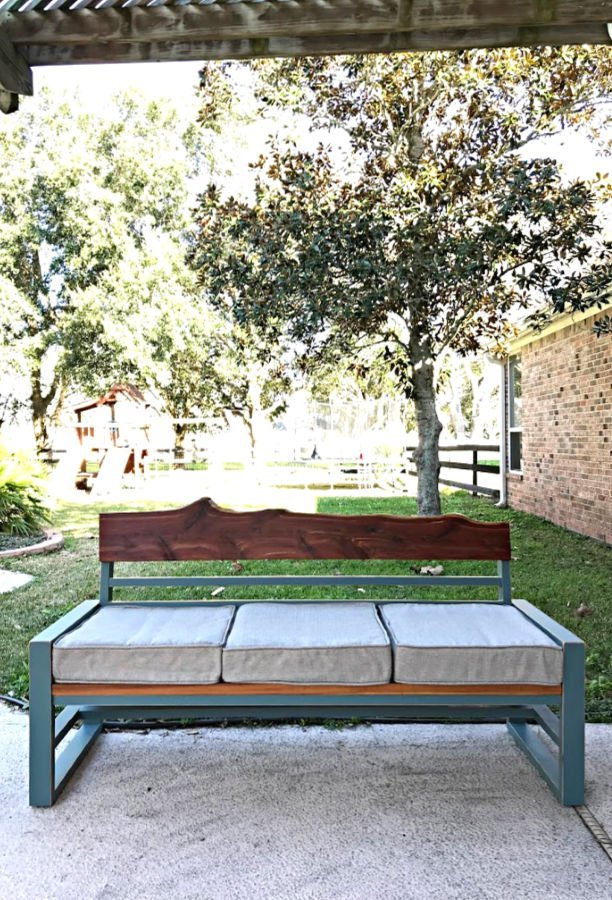
I absolutely love this outdoor bench. It’s comfortable and eye-catching. Whenever someone sees it they always comment on it and want to touch it.
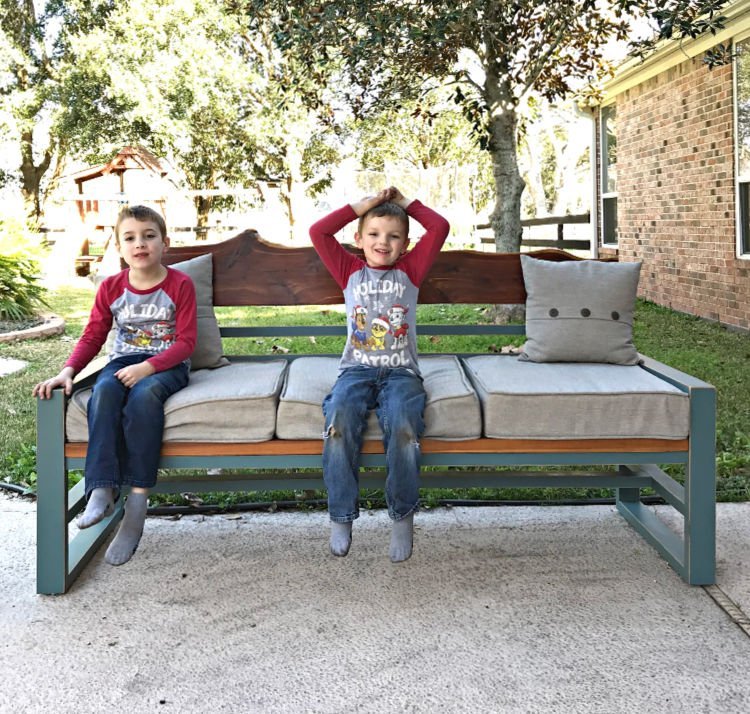
I can always tell that someone really likes one of my builds when they have to touch it and look at me in disbelief when I say I built it. 🙂
Now, just in time for Spring, I can tell you how to build your own eye-catching bench that people won’t stop touching. I used Pine 2×4’s and Cedar to make this outdoor bench.
But you can save money by building this entire bench with just Pine, using the same printable build plans.
See 10 Helpful Tips For Planning An Outdoor Seating Area You’ll LOVE to see why I decided this size and design would work best for our space.
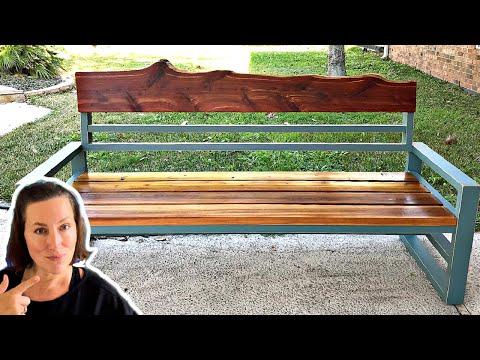
Watch the DIY Outdoor Sofa from 2×4 Build Overview Video
Seeing someone do something always helps me. Here’s a short video that goes over the entire build.
Here’s What You’ll Need
- 10 – 8‘ x 2″ x 4″ Pine Framing Lumber
- Pick straight boards with the least amount of knots.
- 5 or 6 – 8’ x 2” x 6” Lumber – Pine or Cedar
- Build Diagram for 5 and 6 Board options below. I recommend 5 if you’re planning to cover the seat with cushions, 6 if you’re not going to use cushions. I have diagrams and details for both options in these plans.
- Pick straight boards with the least amount of knots.
- Table Saw and Miter Saw
- Kreg Jig R3, Kreg Screws, and Power Drill
- Optional: Brad Nailer
- Wood Glue and Wood Filler
- Clamps
Hello, DIY friends! You can download the DIY Outdoor Sofa from 2×4 lumber plans here. These plans are for personal use only. They cannot be shared or sold without my permission. Please let me know if you have any questions and enjoy your build! 🙂
Click on the link below to download the Printable PDF plans. 🙂


DIY Outdoor Bench Design Notes
Let’s talk bench cushions!
I bought my cushions at ‘At Home’. They sell them in a dozen colors and styles. Amazon also has some that are similar (like these). My cushions are 25” wide, 24” long, and 6” deep. I designed this bench for those cushions.
If you want to use cushions with your bench, I recommend buying them before you build. Then line them up, tightly in a row, and measure the width.
My bench seat is 72” wide. The cushions are actually about 73” when pushed together. Building the frame a little tighter holds my cushions in tight and keeps the seat firm. You may need to adjust the dimensions for this bench, if you’re cushions aren’t a very similar size.
Now, let’s talk costs!
I don’t always breakdown costs on my free plans. But, I thought it might be helpful on this DIY Outdoor Sofa from 2×4 build. The 10 Pine 2×4 framing studs cost less than $30 in my part of the US.
I used indoor, kiln dried pine because I knew I was finishing the wood and because my bench is protected from the rain and sun on my porch.
If your bench will sit in the rain, sun, or snow, you might want to use Pressure Treated 2×4’s. Just remember, you may need to let them dry out before building with them AND your Pine will have that yellow PT tint.
So, pick your stain or paint finish based on that. I’ve had great results staining PT Pine with Minwax’s Jacobean Wood Stain (on my L-Shaped Backyard Bench). Be sure to use wood conditioner before staining pine.
Oil-based Spar Urethane is ideal for sealing outdoor furniture, but it yellows the finish. So, only use it over stain. Pick a good water-based spar to protect over paint.
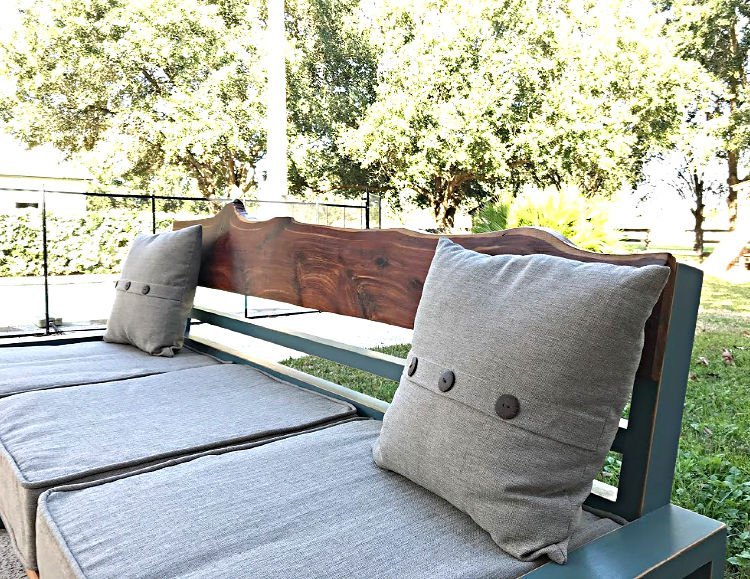
I used Red Cedar as the seat and back on my bench, mainly because I had the Live Edge Cedar already and wanted to carry that wood to the seat. 2×6 Red Cedar costs about $20 per 8’ board, that’s $100 to $120 total for 5 or 6 boards.
2×6 pine costs about $4 per 8’ board, that’s just $20 to $24 total for 5 or 6 boards. So, the total lumber costs for Pine with Cedar will be $130 to $150. And, the total lumber costs for all Pine is just $50 to $54. I just thought I’d point that out before you buy.
RECOMMENDED: 13 Best FREE PDF Furniture Build Plans And 12 Popular Woodworking Projects
Now, let’s get to the DIY Outdoor Sofa from 2×4 build!
Steps to Build this 2×4 Outdoor Sofa
The finished dimensions for this Outdoor Bench are 37″ high, 78″ wide, and 28″ deep.
Step One – Cut and Resaw your Lumber
First, use your Miter Saw to cut the pieces for your bench sides. You’ll need 10 pieces: 4 – 28” long with 45 ends, 4 – 23” long with 45 ends, and 2 – 25” long with 90 ends.
Next, resaw both 1 ½” sides (edges) of your cut 2×4’s on your table saw. You want to remove the rounded corners. Take about ¼” off each side. You want the final width of the boards to be 3” wide. Use a newer table saw blade with a high number of teeth to get the smoothest result when resawing. You can see me doing this step in the build video.
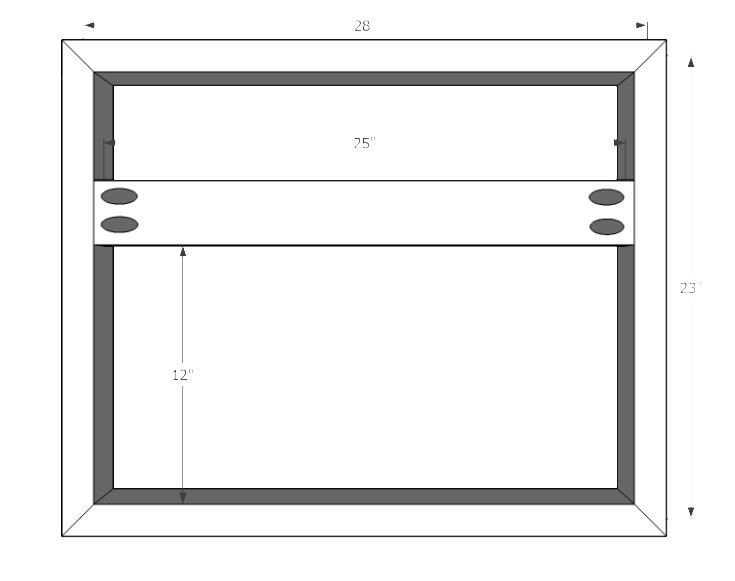
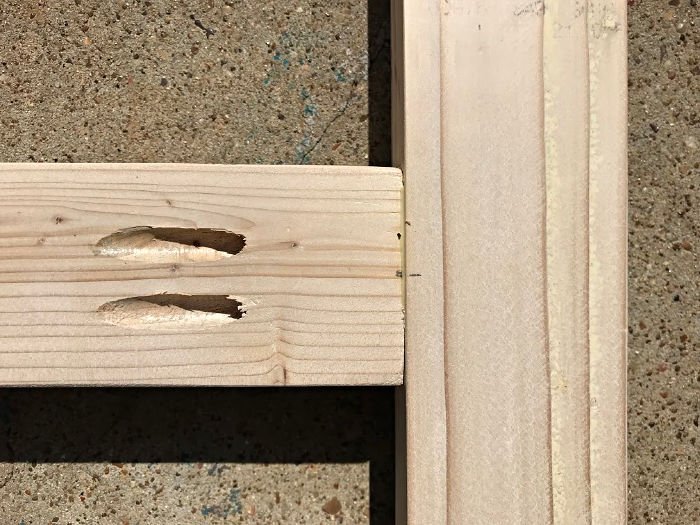
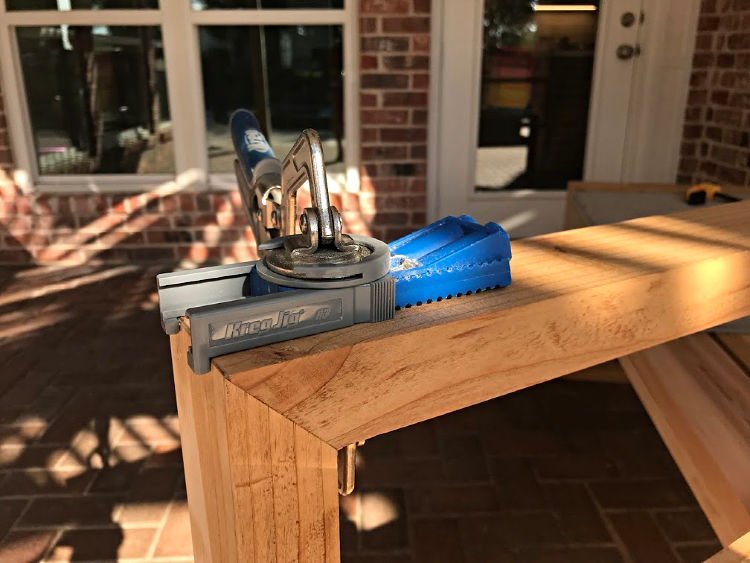
Step Two – Assemble the Sides
I used wood glue, strap clamps and my brad nailer to join the outside square sides of this DIY Outdoor Sofa from 2×4. Then, I used Kreg pocket holes and wood glue to join the 25” board. That board should be 12” from the inside of the square (13 ½” up from the ground). This board will hide the ends of your seat frame and should be flush with the edge of the frame.
Once the glue dries on the sides, use wood filler on the pocket holes and joints. Let that dry then sand the sides smooth with 100, 120, and 150-grit sandpaper.
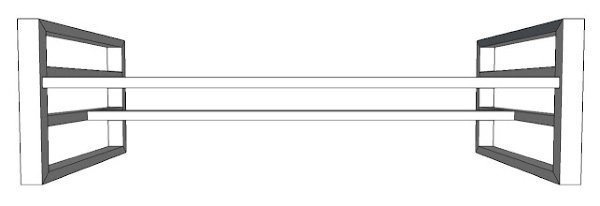
Step Three – Build the Stretcher
Cut 2 – 25” lengths and 1 – 72” length of your 2×4’s. Then resaw the 72” board to 3” wide, to square off the edges. And, just this time, resaw the 2 – 25” lengths to 2 ½” wide. Cutting these boards slimmer adds more depth and detail to the sides. It’s just a design element.
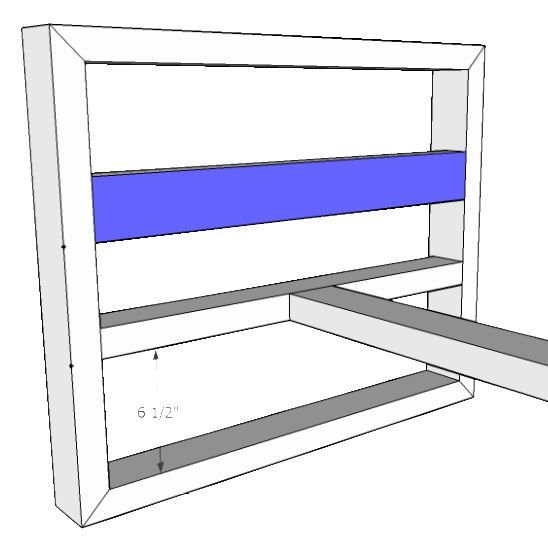
Step Four – Join the Stretcher
Use 2 Kreg Pocket Holes on each end of the 72” board and wood glue to join it with the 2 – 25” boards. Center the 72” board on the 25” boards. Join the 3 boards, then sand them smooth with 100, 120, and 150-grit sandpaper. It’s easier to sand what you can before assembly.
Then you’ll use 2 pocket holes on the 25” board ends and wood glue to join the stretcher to the bench sides. You can HIDE ALL OF THOSE pocket holes by joining everything upside down. Turn the sides upside down and the stretcher upside down.
If any of these steps are confusing, download the printable plans to see more diagrams of the DIY Outdoor Sofa from 2×4 build. The bottom the stretcher should be 6 ½” up from the inside of the frame (8” up from the ground). MAKE SURE that the flush side of the 25” board (in blue) in the middle of each side is ON THE INSIDE of the bench.
Step Five – Build the Seat Frame
Cut 2 – 72” long boards and 4 – 21” long boards on your Miter Saw. Then resaw those to 3” wide. Join the 21” long boards to the 72” long boards with wood glue and Kreg Pocket Holes (in grey). 1 – 21” board should be flush with each end of the 72” boards. The other 21” boards are 18” in from each side. Join the 6 boards, then sand the seat frame smooth with 100, 120, and 150-grit sandpaper before attaching it to the sides.
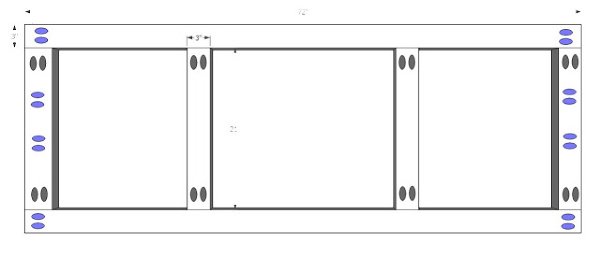
The blue pocket holes are used to join the seat frame to the bench sides. Again, I recommend keeping all of the pocket holes on the bottom. So, attach the seat frame to the sides upside down for the nicest result.
That bench seat frame should be even with the bottom of that 25” board in the middle of each side. That way that 25” board hides the frame and the bench seat boards that will sit on top of it.
Step Six – Build the DIY Outdoor Sofa from 2×4 Bench Back
Cut 1 – 69” board, 2 – 15” boards with 45-degree ends and 2 – 72” boards with 45-degree ends. Then resaw them to 3” wide.
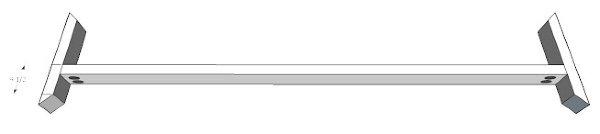
Step Seven – Join the Bench Back
Glue and screw the 69” board to the 15” sides first with 4 pocket holes. Doing this part first lets you keep those pocket holes on the bottom side of the bench back. Then glue, clamp, and brad nail the top and bottom boards on to the bench back. Again, sand this bench back smooth with 100, 120, and 150 grit, once the glue dries and you can unclamp it.
Step Eight – Join the Bench Back to the Frame
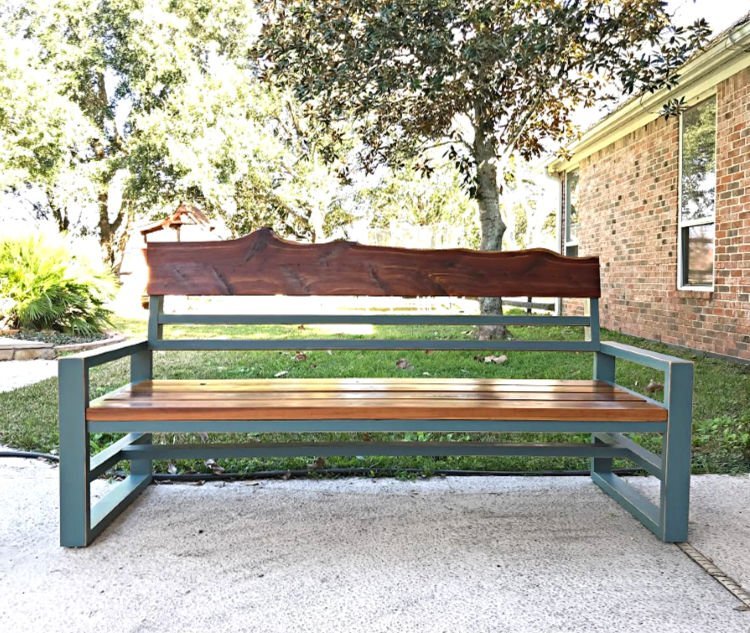
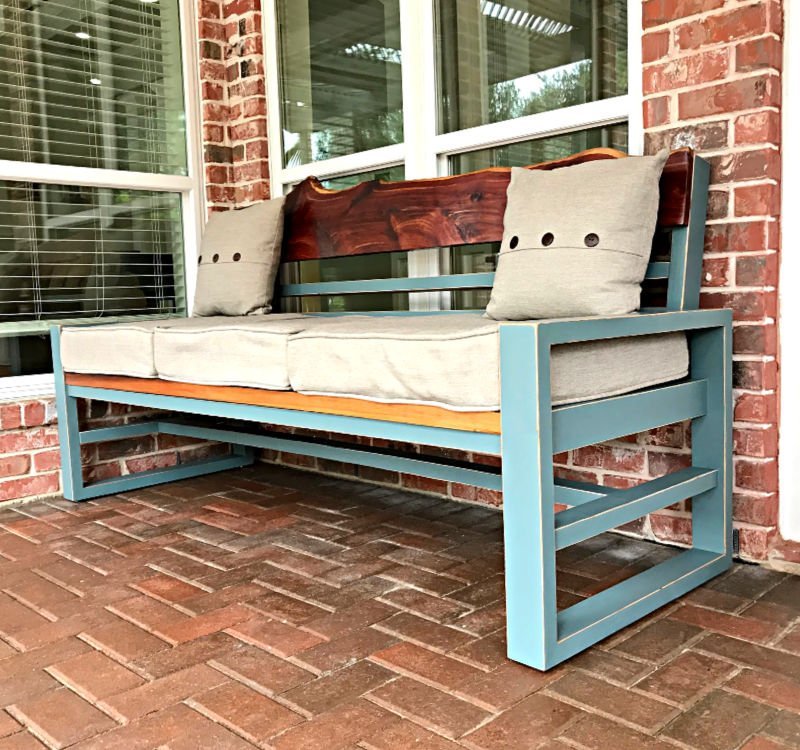
Use glue and 2 Kreg pocket holes on each side of the bottom of the bench back to attach the bench back to the sides. It’s not shown in the drawing, but I slightly angled my bench back to make it more comfortable to sit in. All you need is a little angle to make it more comfortable. Check out this photo of my DIY Outdoor Sofa from 2×4 to see the angle on my bench back.

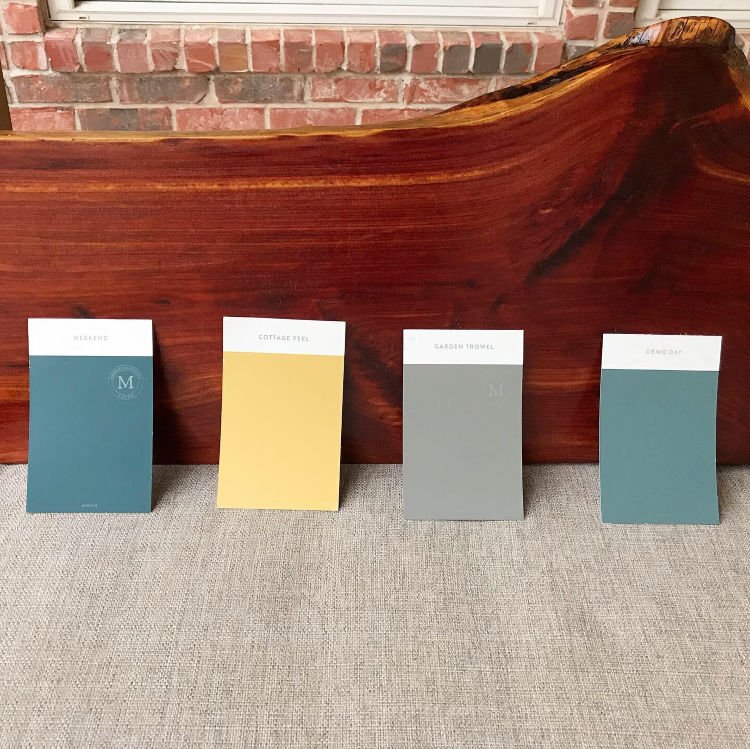
Step Nine – Finish this Frame
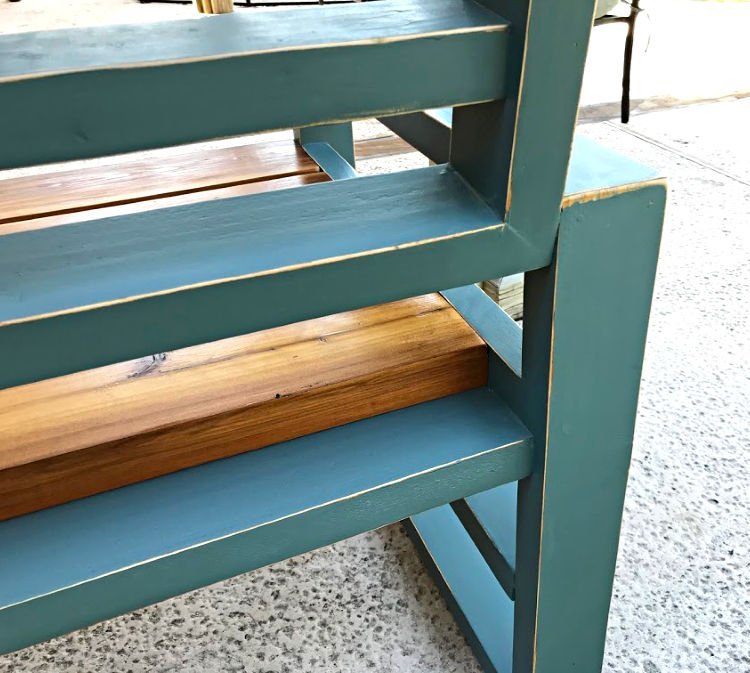
Use wood filler on all of those pocket holes and anywhere else that might need it. Let that dry, then sand everything to 180-grit with a sanding block. You should paint or stain the frame now. You can see the steps and how-to video for the Blue Distressed Paint Finish I used here. I finished and sealed every part of this frame, top and bottom. That sealer helps to protect the bench from rain, snow, humidity, and any other moisture that it might be exposed to.
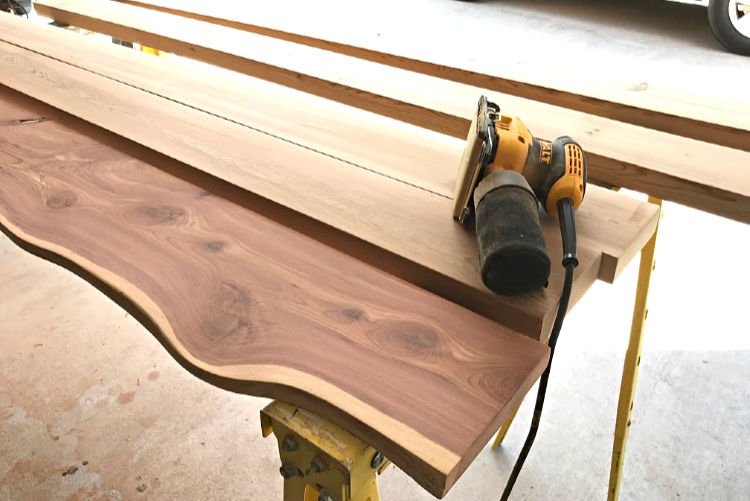
Step Ten – Prep your 2×6’s
If you use 2×6 Cedar, it comes pretty rough. You’ll need to sand it smooth. Or, you can save a lot of time using a planer. I used my Dewalt Hand Planer to smooth out all 4 sides. Then I cut them to size and prepped them for finish by sanding them with 120 and 180-grit.
If you are using 2×6 Kiln Dried Pine, Fir, or similar, cut your boards to size and prep them for finish by sanding them with 120 and 180-grit.
The opening between the 2 sides should be 72”, I’d cut your 4 or 5 seat boards to 71 ¾”, That’ll leave an 1/8” gap on either side. Cut the board for the bench back to the exact width of the frame (should be 72”) or 72 ½” to have a pretty ¼” overhang on either side of your DIY Outdoor Sofa from 2×4 bench back.
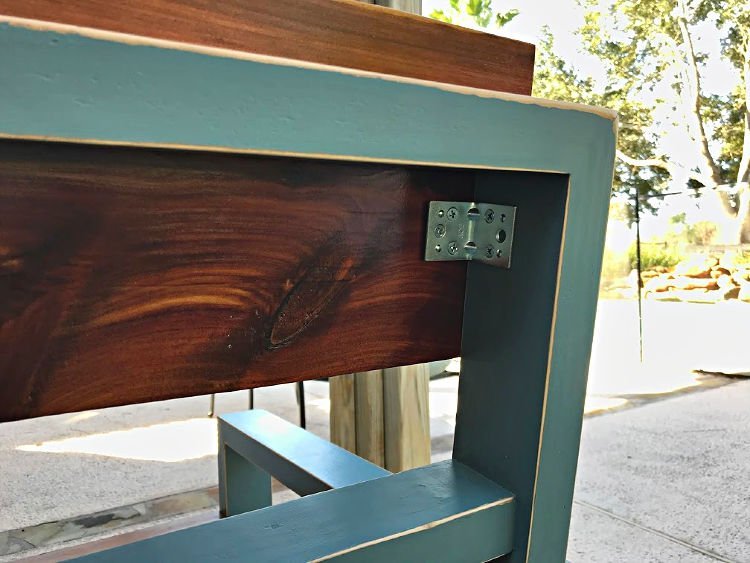
Step Eleven – Attach the Bench Back Board
I attached my back with 2 corner (angle) brackets. 1 on each side. You could also put one in the middle. Clamp the board in place before attaching the brackets. That’ll hold it tightly in place while you screw everything in. It’s easiest to attach the brackets to the bench frame first, then clamp the bench back in place and screw those into place. Drilling pilot holes will make the job easy.
Step Twelve – Attach the Seat Boards – With Cushions Option
If you plan to always have cushions on this bench, or if you just prefer this look, you can go for just 4 boards across the seat. I’d leave an 1/8th inch gap on each side when you cut your seat boards. So, 71 ¾” boards in the 72” opening between the sides.
Have all 4 sides and the ends sealed before attaching. Start the first board ¼” back from the front of the sides. Leave a ¾” gap between each board. Use exterior screws or glue and brad nails to attach the boards to the frame. You can fill the brad nail holes with a matching wood putty, for a cleaner look.
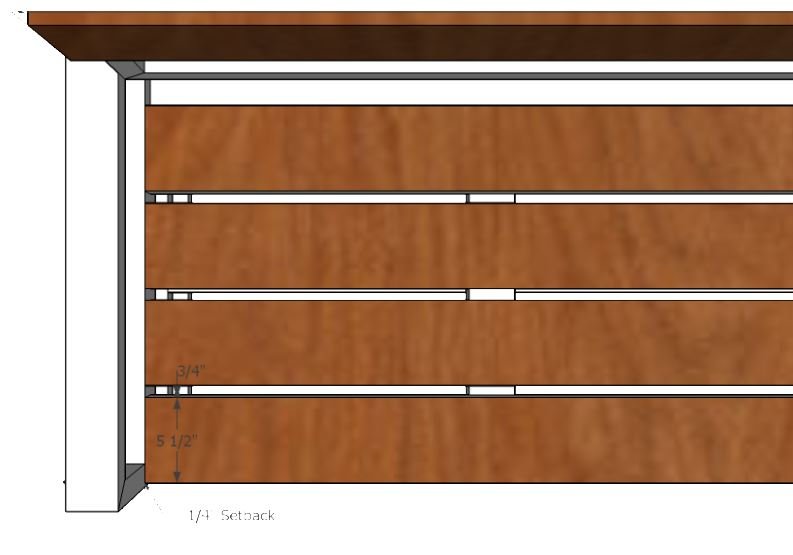
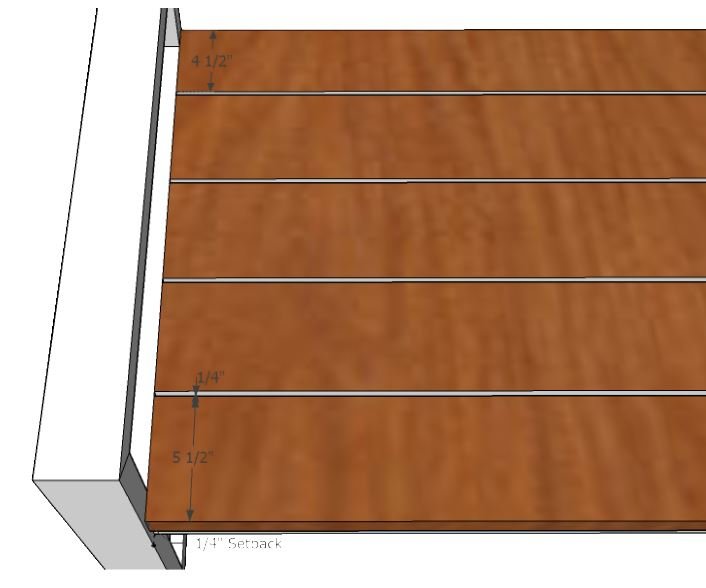
Step Twelve – Attach the Seat Boards – Without Cushions Option
If you won’t be using cushions on this bench, or if you just prefer this look, you can use 5 boards across the seat. I’d leave an 1/8th inch gap on each side when you cut your seat boards. So, 71 ¾” boards in the 72” opening between the sides.
Have all 4 sides and the ends sealed before attaching. Start the first board ¼” back from the front of the sides. Leave a ¼” gap between each board. The 5th board should be cut to just 4 ½” wide, before sanding and finishing. Use exterior screws or glue and brad nails to attach the boards to the frame. You can fill the brad nail holes with a matching wood putty, for a cleaner look.
That’s it. Your new DIY Outdoor Sofa from 2×4 pine and cedar is finished. Keep scrolling for more pictures of my finished bench.
Hello, DIY friends! You can download the DIY Outdoor Sofa from 2×4 lumber plans here. These plans are for personal use only. They cannot be shared or sold without my permission. Please let me know if you have any questions and enjoy your build! 🙂
Click on the link below to download the Printable PDF plans. 🙂
More pictures of this DIY Outdoor Sofa from 2×4 Lumber
More DIY Projects For You
Looking for more DIY Build Projects? You might like this DIY Outdoor Corner Bench Build, just $130. Or the more rustic and cheaper Easy DIY Rustic Outdoor Bench from 2×4’s.
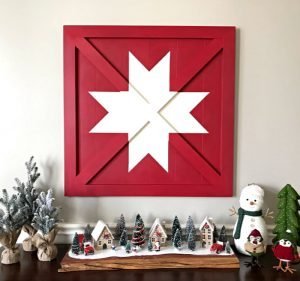
Check out this DIY Barn Star Quilt Tutorial.
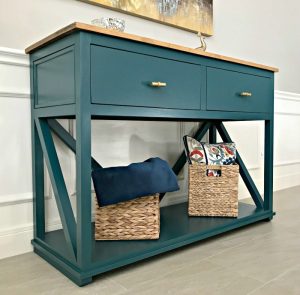
Or this great DIY Farmhouse Console Table tutorial. Those deep drawers are a must-have for me.
And, this DIY Table Over Washer and Dryer is always popular.

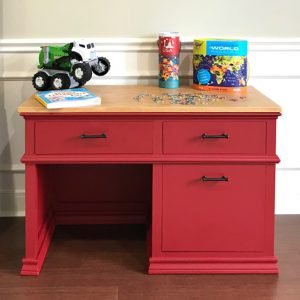
If you need a great little desk for your elementary age kids. Check out this DIY Childrens Desk with Storage Drawers.
Feeling inspired? Now that you’ve seen this DIY Outdoor Sofa from 2×4 tutorial, you can do it too. Let me know if you have questions. Don’t forget to sign up for the Abbotts At Home email newsletter to get DIY, Remodeling, and Crafty ideas in your inbox.

Stephanie Abbott has been remodeling homes, updating & building furniture, and working on DIY home maintenance and cleaning tips for over 20 years. Her remodeling has been featured in Better Homes and Gardens Magazine. And, her DIY YouTube channel has had more than 8 million views.
Most of the DIY tutorials and videos on this site focus on beginner to intermediate level DIY Projects that can be done in an affordable way without high-end, expensive tools. All of the cleaning tips on this website have been tested in her home.