
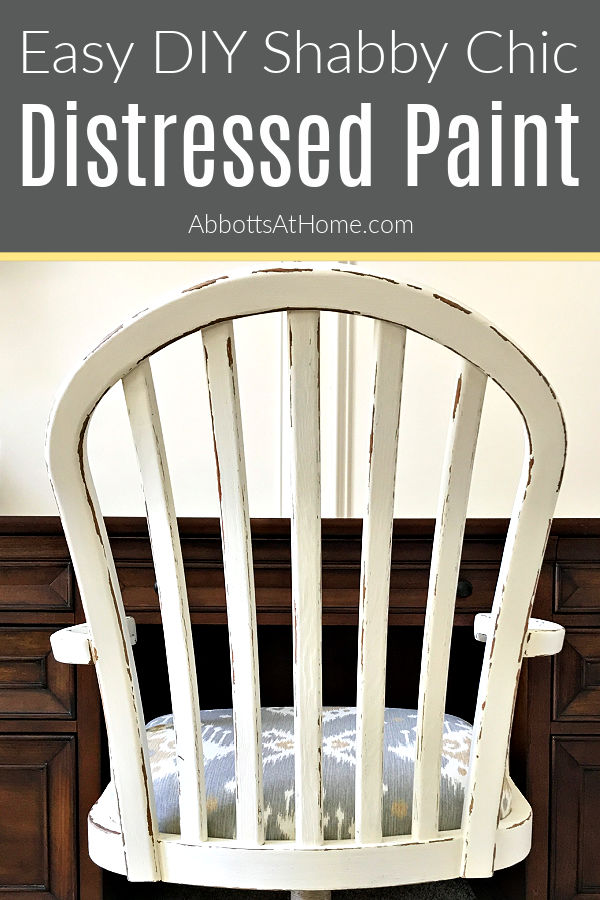
Get the perfect DIY White Distressed Chalk Paint look with these easy to follow steps. Go for a light distressing to a rustic or shabby chic look. It’s up to you!
DIY White Distressed Chalk Paint Furniture Makeover
Do you remember when Shabby Chic paint was the hottest trend on furniture? I still love that look.
Distressed white chalk paint on furniture is a classic look that never goes out of style. And, it’s super easy to get that look with Chalk Paint.
Chalk Paint cures (hardens) fast, dries fast, and sands like a dream. So, it’s my favorite paint to use when I want to distress painted furniture.
You can find lots of great chalk paint colors on Amazon or at stores like Michael’s and Hobby Lobby. Or, you can make your own chalk paint from latex interior paint using this chalk paint recipe.
Homemade chalk paint works just like the store bought stuff. But, it’s cheaper and you can make it from any color at the paint store.
How to Use Vaseline to Distress Chalk Paint
I love how easy it is to get the perfect distressed chalk paint look with Vaseline. That’s right, I said Vaseline. Otherwise known as Petroleum Jelly.
People have been using Vaseline for years and years under paint or between layers of paint to make it easy to sand paint off the exact spots where you want to remove it.
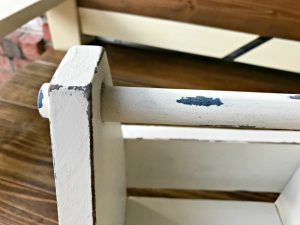
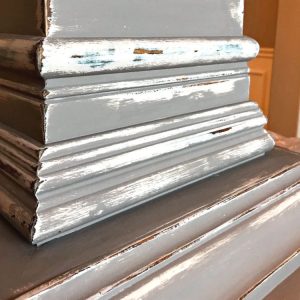
You can use your finger tip or a Q-Tip to apply a light layer of Vaseline to just the exact spots you want to distress. I usually use Vaseline on all of the corners, edges, and any raised details or curves I want to highlight.
You can use the Vaseline over stained wood or chalk paint. You can also use it on bare wood that is sanded and ready to paint with chalk paint.
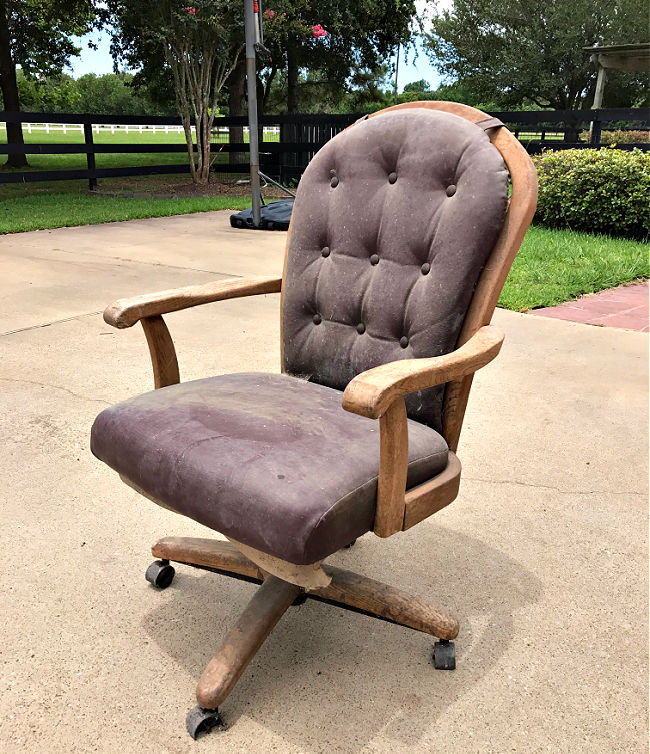
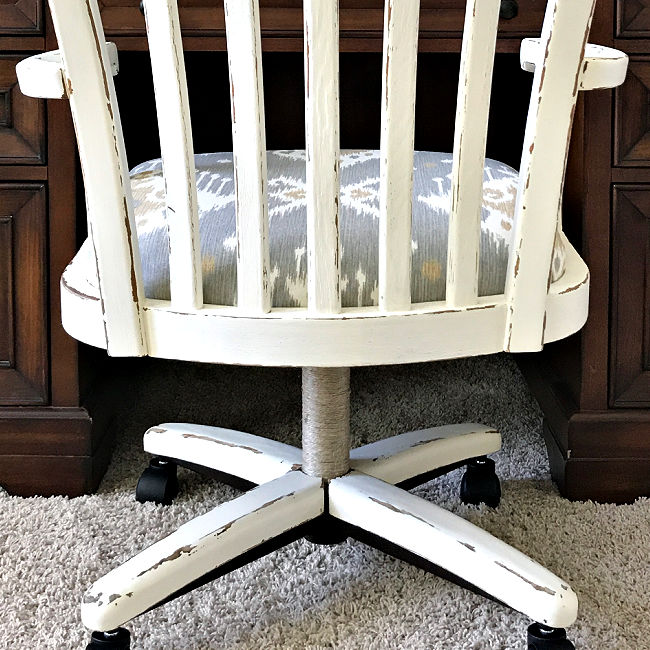
Before Photos for this Furniture Makeover
I found this beaten down chair in my neighbor’s trash. It was so, so dirty, guys. You can see all of the steps behind this DIY Office Chair Makeover in another post. Just click the link.
This DIY Office Chair Makeover turned out even more beautiful than I had hoped. Let’s get started on how I gave this chair a beautiful new DIY White Distressed Chalk Paint Look.
DIY Shabby Chic Paint – Quick Step Guide
Here’s a quick overview of the steps I used in this DIY White Distressed Chalk Paint Makeover. Detailed explanations of each step are below.
- Clean the existing finish.
- Strip Off Paint, if needed.
- Light sanding and dust off.
- Apply Vaseline on any spots you want to distress.
- Apply 2-3 coats of White Chalk Paint.
- Distress with a Sanding Block or Sand Paper.
- Protect with 2-3 coats of a water-based poly.
Materials for this Furniture Makeover
- Chalk Paint, I used Behr’s Polished Pearl mixed into a chalk paint with my recipe
- Vaseline
- Rust-oleum Matte Varathane
- 120-grit sandpaper or sanding block
How to Clean Furniture Before Painting
I like to use this easy homemade wood cleaner on dirty furniture. This cleaner worked amazingly well. Even on this super dirty office chair.
You can also use store bought cleaners that are safe for wood. Liquid TSP is great cleaner that can be used on furniture before painting.
How to Shabby Chic Distress with Chalk Paint
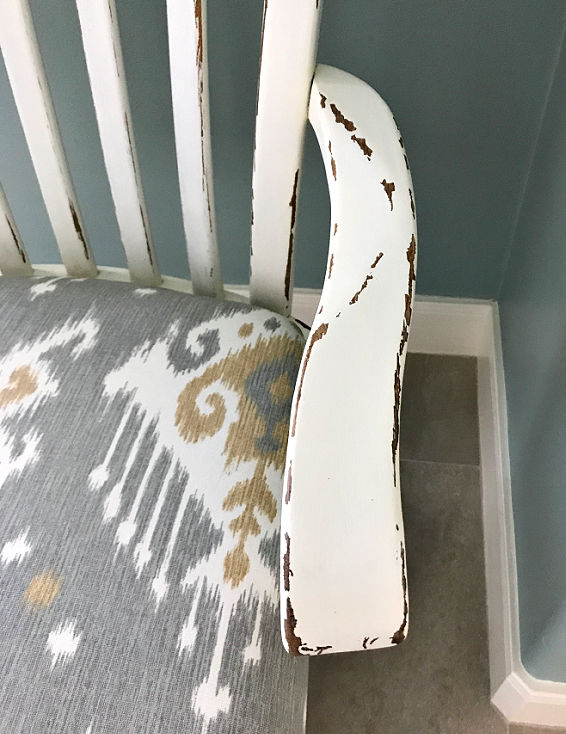
I wanted a shabby chic distressed paint look for this office chair. I thought that extra chippy white chalk paint over stain would look great with the fabric I picked out for the seat. Here’s how I got this look.
Get the Shabby Chic Look
If necessary, strip off old varnish or paint. This chair had old stain on it. Which is perfect for this look. I wanted wood to show through under the paint.
That wood can be bare, sanded wood that is ready for paint or already stained wood. I was able to just lightly sand this chair with 120 grit sandpaper. It was pretty smooth already.
Wipe off all dust, then apply Vaseline on edges and raised areas that would naturally get chipped or worn with use. You can use a Q-tip or your finger tip to apply the Vaseline.
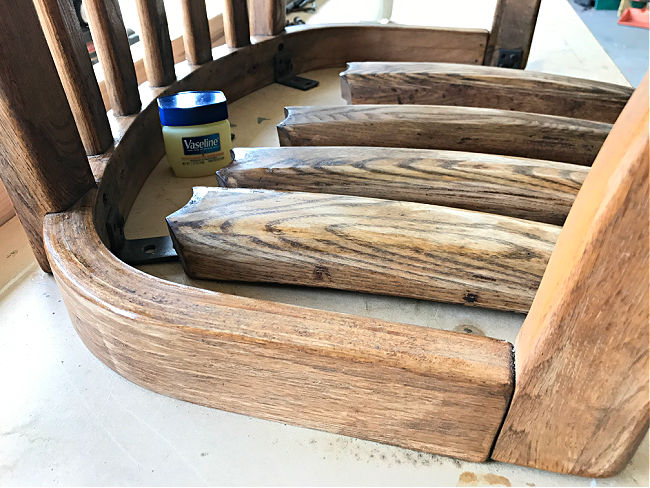
The Vaseline will stop the chalk paint from bonding to the furniture anywhere you apply it. So, be sure to only use it where you want to reveal stain later.
I applied wide lines of Vaseline on this chair because I wanted to expose a lot of the wood. Usually I just apply thin lines of Vaseline for a more subtle DIY White Distressed Chalk Paint Look.
You can see an example of thinner distressing lines with Vaseline in this DIY Distressed Blue Chalk Paint Look.
Next, I painted all of the wood with 3 layers of chalk paint to get a fully covered finish. Allow proper drying between layers.
If you want to save money, you can use this DIY chalk paint recipe from latex paint. That homemade chalk paint works just like the pricey store bought chalk paint.
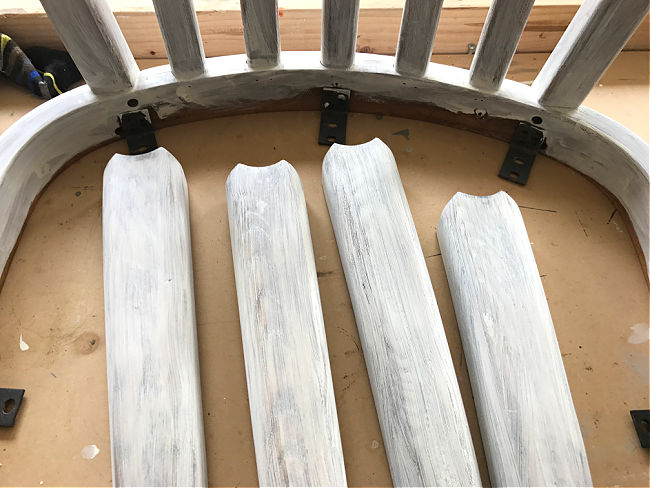
Wet Sand The Chalk Paint
Once the last layer of chalk paint dries, distress the areas you put Vaseline on with a slightly damp sanding block. This is called Wet Sanding.
Wet sanding is one of my favorite tricks for getting a super smooth finish with chalk paint too.
Stop distressing a spot when you like the amount of stain showing through. Distressing furniture is all about personal preference.
Some people like just a little stain showing through. Some people love that super distressed shabby chic, vintage look.
Wipe off all of the chalk paint residue with a clean, damp rag. Then protect all of the wood with 2-3 coats of a water-based poly. I love the Matte finish and extra smooth feel of this fast-drying Matte Urethane.
Unfortunately, I did this White Shabby Chic Paint look before I started my YouTube Channel. But, if you want to see an example of how I use Vaseline, stain, and chalk paint to get a layered, distressed look watch this video. You can find the written steps for that DIY Distressed Blue Chalk Paint Makeover here.
Scroll down for a printable version of this tutorial.

That’s it for this DIY White Distressed Chalk Paint Makeover. Good luck with your project!
More DIY Projects For You
Check out the tutorial and video for how to paint and distress furniture with Vaseline too.
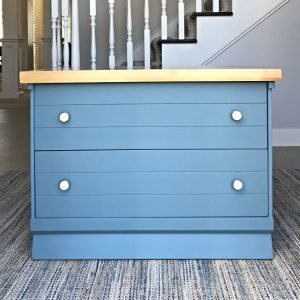
I love this DIY White and Grey Distressed Chalk Paint Furniture Makeover.
This How to Patina Paint Faux Metal Finishes Tutorial is a fun way to make or update decor and furniture.
Try this easy DIY Furniture redo using just paint to get a beautiful new look.
Get this Easy DIY Rust Paint Effect with this tutorial.
DIY White Distressed Chalk Paint
Easy to follow steps for this beautiful DIY White Distressed Chalk Paint Furniture Makeover. I am loving this Shabby Chic look on this Chair! White Chalk Paint Furniture Makeover Idea.
Materials
- White Chalk Paint
- Vaseline
- Sanding Sponge
- Nylon Paint Brush
Instructions
DIY Shabby Chic Paint - Quick Step Guide
Here's a quick overview of the steps I used in this DIY White Distressed Chalk Paint Makeover. Detailed explanations of each step are below.
- Clean the existing finish.
- Strip Off Paint, if needed.
- Light sanding and dust off.
- Apply Vaseline on any spots you want to distress.
- Apply 2-3 coats of White Chalk Paint.
- Distress with a Sanding Block or Sand Paper.
- Protect with 2-3 coats of a water-based poly.
How to Clean Furniture Before Painting
I like to use this easy homemade wood cleaner on dirty furniture. This cleaner worked amazingly well. Even on this super dirty office chair.
You can also use store bought cleaners that are safe for wood. Liquid TSP is great cleaner that can be used on furniture before painting.
How to Shabby Chic Distress with Chalk Paint
I wanted a shabby chic distressed paint look for this office chair. I thought that extra chippy white chalk paint over stain would look great with the fabric I picked out for the seat. Here’s how I got this look.
Get the Shabby Chic Look
If necessary, strip off old varnish or paint. This chair had old stain on it. Which is perfect for this look. I wanted wood to show through under the paint.
That wood can be bare, sanded wood that is ready for paint or already stained wood. I was able to just lightly sand this chair with 120 grit sandpaper. It was pretty smooth already.
Wipe off all dust, then apply Vaseline on edges and raised areas that would naturally get chipped or worn with use. You can use a Q-tip or your finger tip to apply the Vaseline.
The Vaseline will stop the chalk paint from bonding to the furniture anywhere you apply it. So, be sure to only use it where you want to reveal stain later.
I applied wide lines of Vaseline on this chair because I wanted to expose a lot of the wood. Usually I just apply thin lines of Vaseline for a more subtle DIY White Distressed Chalk Paint Look.
Next, I painted all of the wood with 3 layers of chalk paint to get a fully covered finish. Allow proper drying between layers. If you want to save money, you can use this DIY chalk paint recipe from latex paint. That homemade chalk paint works just like the pricey store bought chalk paint.
Once the last layer of chalk paint dries, distress the areas you put Vaseline on with a slightly damp sanding block. This is called Wet Sanding.
Wet sanding is one of my favorite tricks for getting a super smooth finish with chalk paint too.
Stop distressing a spot when you like the amount of stain showing through. Distressing furniture is all about personal preference. Some people like just a little stain showing through. Some people love that super distressed shabby chic, vintage look.
Wipe off all of the chalk paint residue with a clean, damp rag. Then protect all of the wood with 2-3 coats of a water-based poly. I love the Matte finish and extra smooth feel of this fast-drying Matte Urethane.
Feeling inspired? Get out there and do your own DIY White Distressed Chalk Paint Makeover. Have fun and let me know if you have questions. Or post pictures of your work and tag Abbotts At Home on FB, I’d love to see it!

Stephanie Abbott has been remodeling homes, updating & building furniture, and working on DIY home maintenance and cleaning tips for over 20 years. Her remodeling has been featured in Better Homes and Gardens Magazine. And, her DIY YouTube channel has had more than 8 million views.
Most of the DIY tutorials and videos on this site focus on beginner to intermediate level DIY Projects that can be done in an affordable way without high-end, expensive tools. All of the cleaning tips on this website have been tested in her home.