
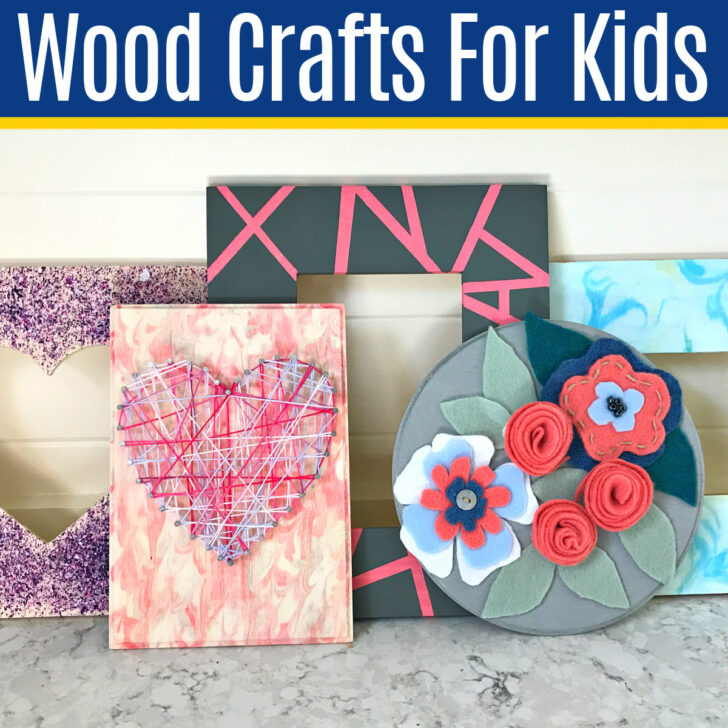
Looking for a fun, cheap and easy wood crafts for kids? Here’s 6 cute wood craft ideas using things like wood frames and wood plaques.
Cheap & Easy Wood Crafts For Kids
After finishing up a woodworking project last week, I needed a little break from the garage. So, I decided to get crafty with my favorite 3-year old.
I came up with 6 easy & cheap wood crafts for kids using those great dollar store or Walmart wood plaques and frames.
Taking a day to be creative and have some fun crafting with my toddler was a nice change of pace.
Most of these crafts are easy enough for a 3-year old (with a little help), but can be totally entertaining for teens or even crafty grown ups.
Just pick colors you love and create your own look! Hopefully these 6 cheap kids crafts help to inspire your kids to get creative and have fun with arts and crafts too.
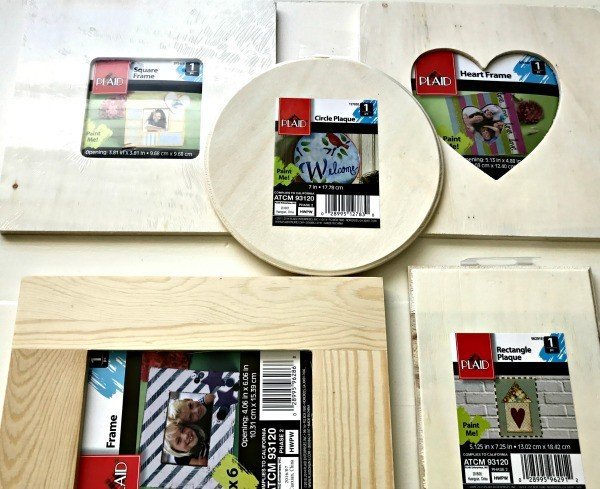
Where to Buy Cheap Wood Plaques and Frames for $1
To start, we took a trip to WalMart and found these cute wood frames and plaques for about $1 each. I grabbed a bunch. The same aisle at our local store has acrylic paints, embroidery floss, glitter, buttons, etc.
You can grab anything you need for these projects at WalMart or your favorite Dollar Tree. Or if you want to avoid a trip to the store, Amazon Prime is always my best friend when it comes to shopping.
I’ve added links for everything I used to make these kids crafts, if you need them. 🙂
6 Cheap Wood Crafts For Kids
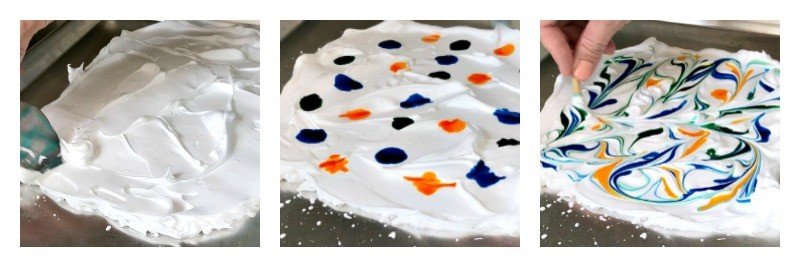
1. Marbling with Shaving Cream on Wood
Have you seen those fun marbling videos using shaving cream and food coloring? They looked so easy, I had to give it a try. I ended up trying it 2 ways.
Marbling with Food Coloring
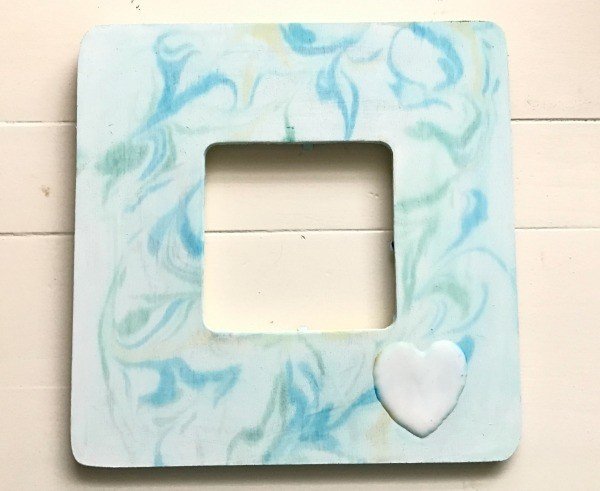
The first time with food coloring, the second with slightly watered acrylic paints. Both worked great, but the food coloring colors were much stronger.
For this project, grab a cookie sheet, shaving cream, a spatula or something with a flat edge, food coloring or slightly watered acrylic paint
, a toothpick, a paper towel, and your wood.
Spray shaving cream onto the cookie sheet. To use less shaving cream, just make your pile big enough for your wood. Spread the shaving cream as smooth as possible with the spatula. You want it about 1/2″ thick.
Put random dots of your dye or paint all over the top of the shaving cream. The more color you use, the less wood that will show through in the end. When I tried this with food dye, I didn’t use that much so about 1/2 of the bare wood was still visible.
Covering the whole area in color will make sure the wood is covered too. After you’ve covered the shaving cream in random drips of color grab the toothpick. Lightly drag the toothpick in lines or curves around the shaving cream.
 for this one. Then use a toothpick to create a pattern.
You just want to mix up the colors to create an interesting pattern. Once you have everything mixed up, carefully place your wood on top and lightly press down until you’re sure the whole piece is covered.
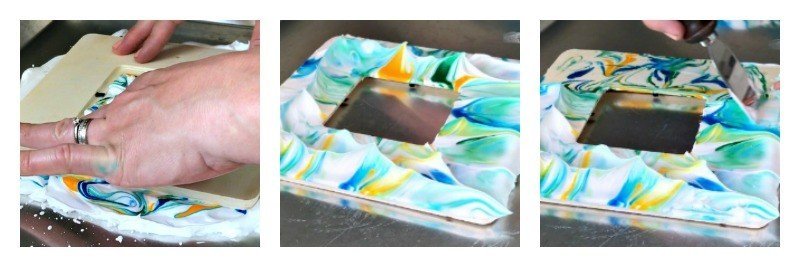
Pull it out of the shaving cream and turn right-side up. Scrape all of the shaving cream off with the spatula. You’ll want to wipe the shaving cream off after each pass, so use that paper towel or just scrap it on the edge of the cookie sheet.
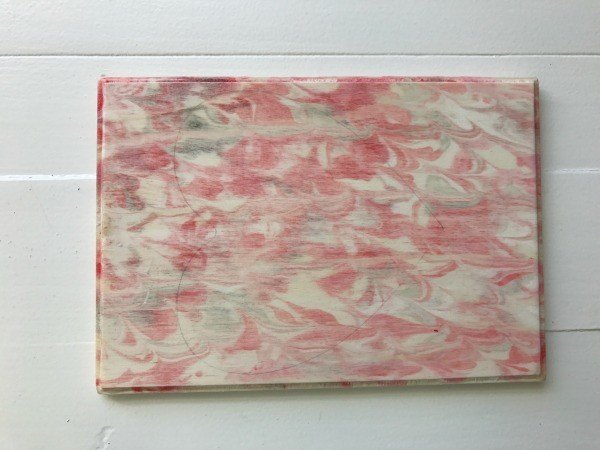
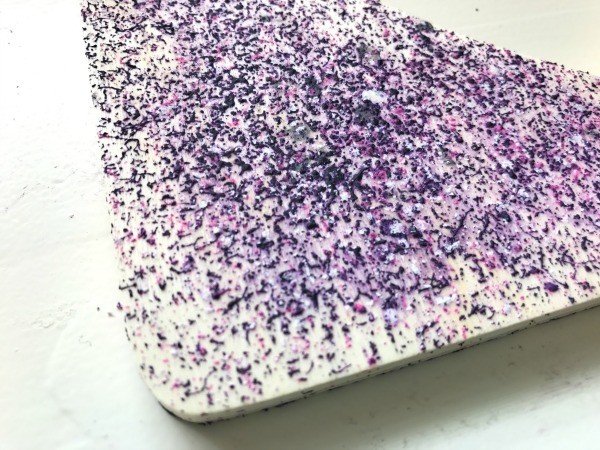
Check out that beautiful marbled wood! Clean off any left over bits with the paper towel and let it dry. If you want to marble more wood or paper, spread the shaving cream out apply a new, thin layer on top and repeat the process.
Marbling with Acrylic Paints

 I mixed each with a bit of water so that it would be a bit runnier. I used an old medicine syringe to drip the paint, but dripping it on with a spoon works too
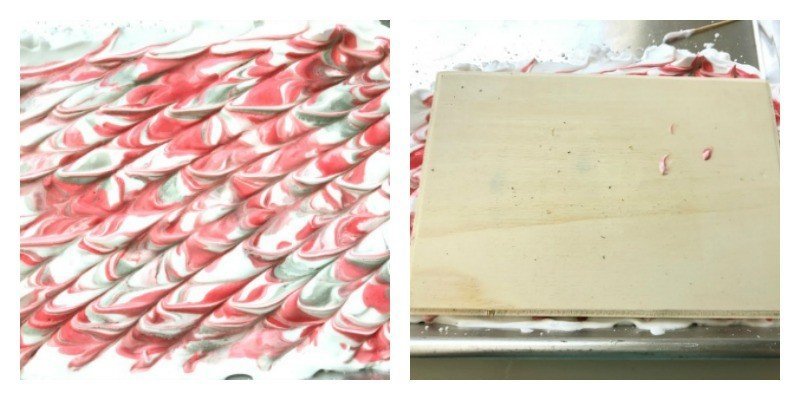
2. Glitter and Glue Wood Frames for Kids
Of course, this is an old favorite for kids. They are always looking for an excuse to use glitter and glue, but using them together may just blow their minds.
Trace a design onto the wood for the younger kids. Older kids may be brave enough to just freehand something. I chose a simple heart. Start with drawing the outline with glue, then fill it in.
Grab the glitter and go to town shaking it all over the glue. Then let this amazingly simple piece of art dry for a few hours. This is a good project to do outside or over a cookie sheet. We want to contain that mess indoors. 🙂

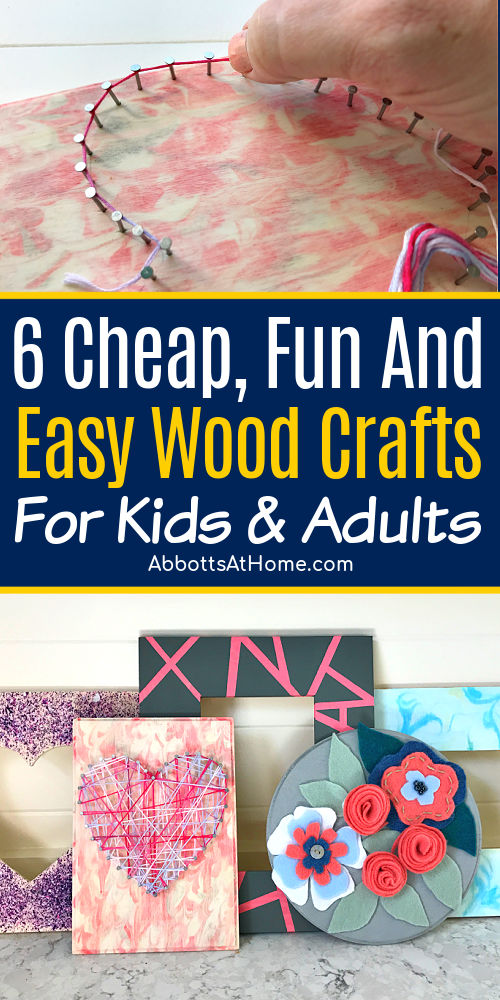
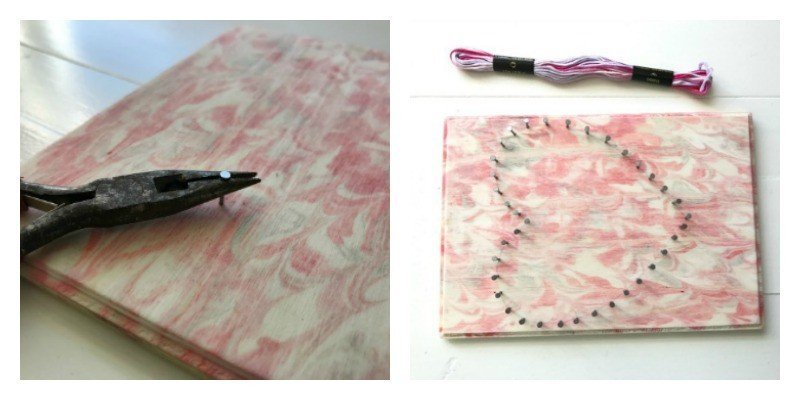
3. String Art on Dollar Store Wood Plaques
For this kids craft, you’ll need your wood, small wire nails, needle nose pliers, a hammer, pretty embroidery floss or hemp, and a pattern.
I used my pencil transfer method to transfer a printed heart onto my wood. You can also print out a heart or another simple pattern to cut and trace onto wood. After you have the pattern in pencil on the wood, you can start hammering in the nails.
You’ll want to space them about a 1/4″ apart to make sure the pattern stays rounded and distinct. The further apart you have nails on rounded sections, the less round that section will look.
Use your pliers to hold these little nails while hammering. That will save your fingers and makes the process go much faster. Once all of the nails are in, tie one end of your string to the very bottom of the heart.
Leave a couple inches there for tying off when you are done. Now hold the string taut and pull it from the inside of the heart around a nail and up to the next. Pulling from the inside of the pattern gives it a more distinct line. You want to wrap all the way around the outside of the heart before moving into the middle.
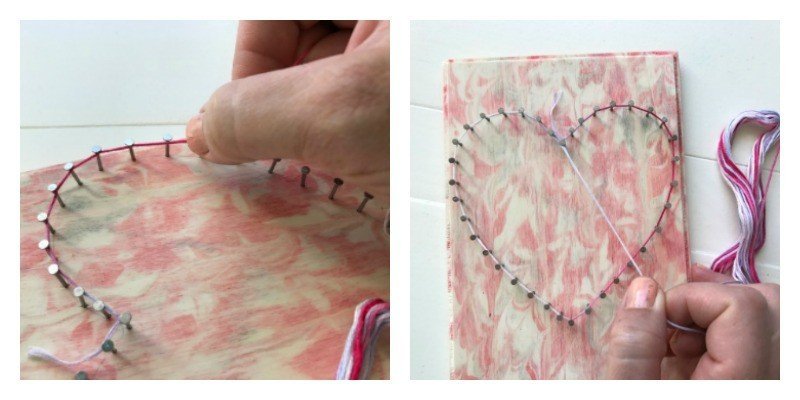
Once the outline is done, start moving across the middle. You can just pick random nails or try to make a pattern as you go along. This really depends on the kids age and skill level.
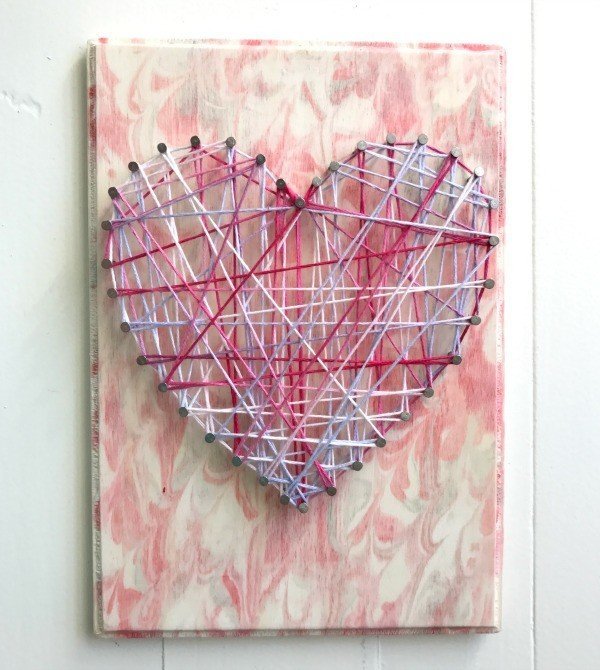
Search string art on Pinterest to see some of the amazing patterns people have made. When you’re happy with the inside of the heart, tie it off where you started and trim the ends off. Voila, amazing heart string art.
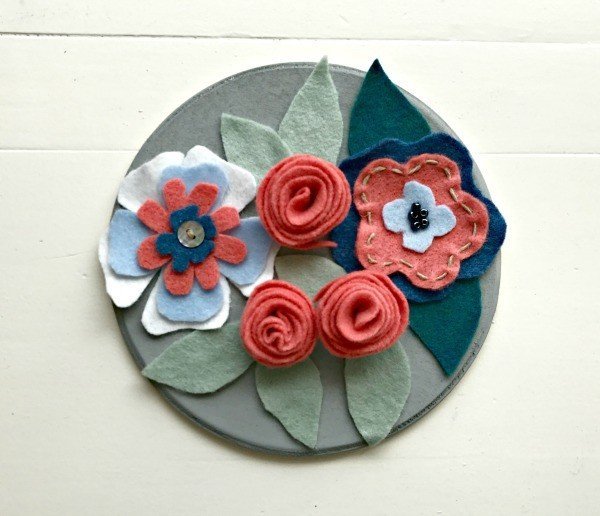
4. DIY Felt Flowers on a Wood Plaque
Felt flowers are fun. They can be simple and sweet or very detailed with beads, buttons, and embroidery floss. You can freehand them or find Felt Flower Patterns on Pinterest. Either way, they are fun.
You’ll need a variety of felt colors, scissors and glue for this one. You can also add acrylic paint, embroidery thread, hemp, beads, and buttons for more detail.
The circle rose is the easiest pattern for the young kids. An adult may need to help with the cutting, but they can probably wrap it on their own. Start by folding the middle of the circle in half, then wrap the rest of the circle around that from the inside out.
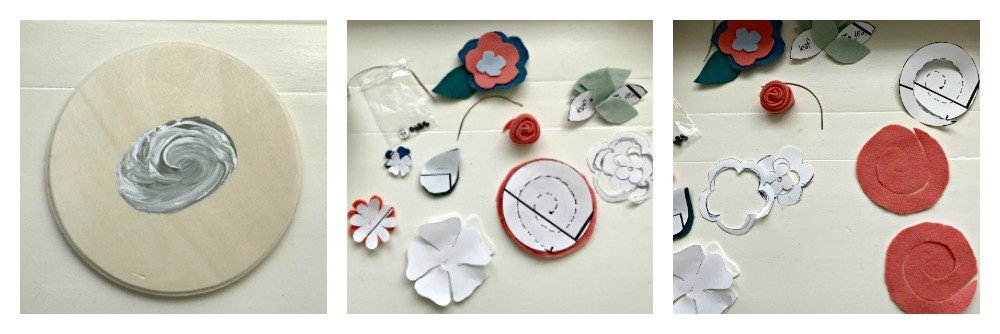
I used another pattern for the second type of flower. Just print and cut out the paper. I just held the cutout on the felt and cut. You could also trace the image onto the felt. Whichever is easier. I like to have different colors for each layer of flower. I sewed each layer together with a button in the center.
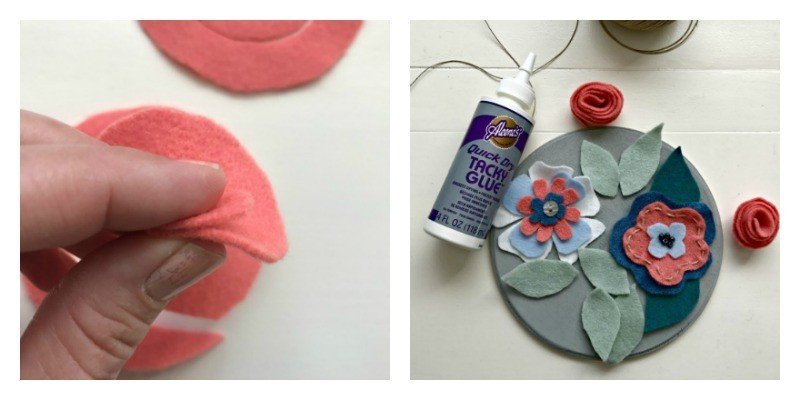
The third flower I just free handed. I drew the larger, bottom layer on paper, then drew 2 more inside that flower. Cut those out and use those to cut out the felt. I attached these with 5 beads in the middle. Lay all of the flowers and leaves out on the wood and figure out a layout you like before gluing down. I used quick drying tacky glue.
5. Melted Crayon Kids Craft
I love this one and it’s so simple. I used my cookie sheet again with a sheet of parchment paper under the wood. This will contain that mess again, hopefully.
You can either shave, shred, or cut up tiny bits of crayon. If you are mixing light and dark color together, use less of the dark so that it doesn’t over power the lighter colors. I happened to have an old lemon zester that I decided to use for this. That made lots of sand-sized little bits.
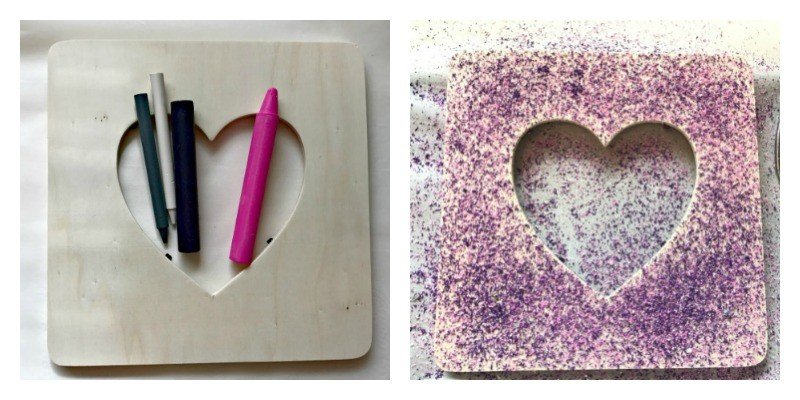
But larger shavings or even tiny chunks will work too. They’ll just take a little longer to melt and will create a different design. Cover as much of the wood as you’d like in crayon bits. Then transfer the tray to an oven heated to 250 F.
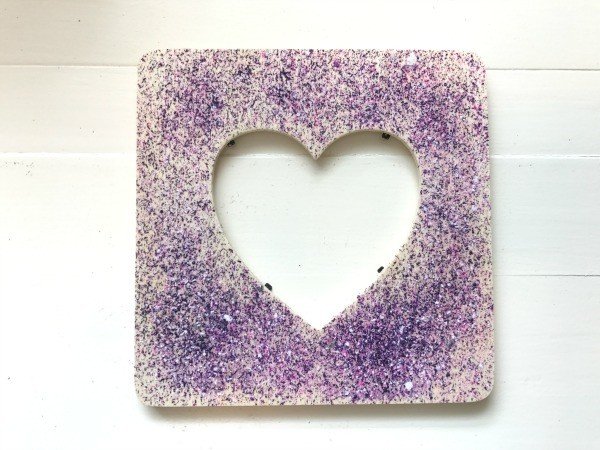
Mine was melted and ready to come out after 15 minutes, but larger sized crayon bits will take longer to melt. Just keep an eye on it. Let it cool after removing from the oven. You can also use a hot blow dryer to melt the crayons. Just start with a really low speed setting or you’ll just blow your crayon bits right off the wood.
6. Layered Paint and Tape Designs
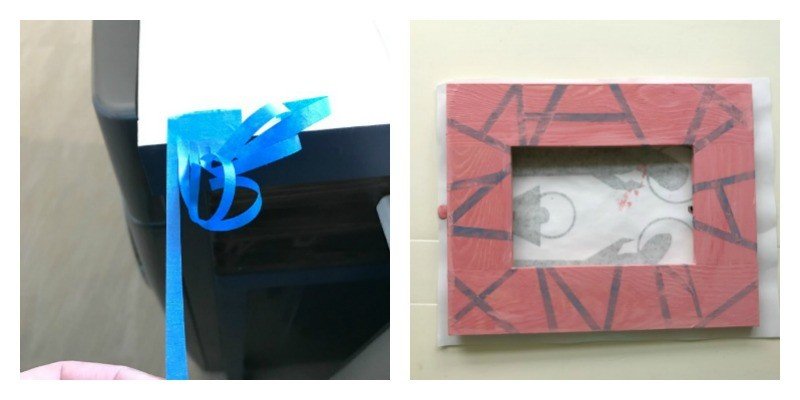
This project just uses acrylic paint, scissors and painters tape. Easy right? First, paint the wood completely and allow to dry. Then take your painters tape and cut into thin strips. Tape each strip randomly around the wood.
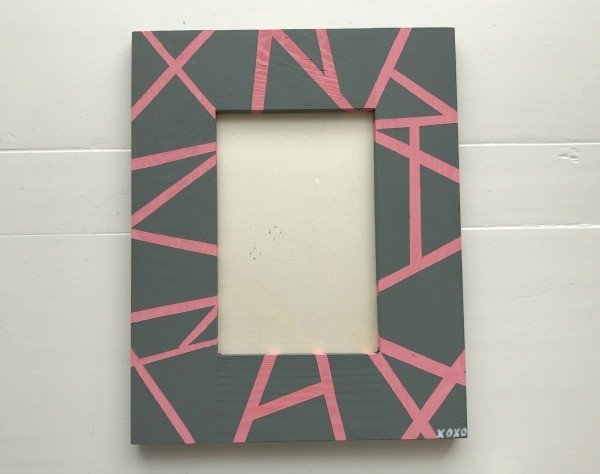
When you are finished, paint over the wood and tape with the same color as the first coat. This will seal the tape edges and prevent paint from bleeding underneath. Once that dries, paint the whole piece in the second color. Wait for it to dry again and have fun peeling all of that tape off. You’re beautiful new modern art is revealed!

More Projects For You
- 20 DIY Patina Paint Faux Metal Painting Techniques (Bronze, Copper, and Rust)
- DIY Activity Wall For Toddlers, Kids, & More (With 20 Fun Board Ideas)
- DIY Resin Tray Art Idea! (Easy Instructions Using EnviroTex Lite Resin)
- 12 Fun And Easy Handmade Christmas Ornament Ideas For Kids And Adults
- Is It Cheaper To Build Your Own Swing Set? (Cost of DIY vs Kits)
Looking for Home Cleaning tips? Check out my popular DIY Home Cleaning Videos on YouTube or the Cleaning Tips on this blog.
Looking for another fun craft idea? Try these 6 Fun & Easy DIY Christmas Ornament Ideas this Christmas.
If you like woodworking projects, check out my DIY Play Kitchen for Kids – Build Plans.
Feeling inspired? Want to create your own Cheap Kids Crafts on wood? You can find the supplies for these crafts at stores like WalMart, Dollar Tree, and Amazon online.
Have fun and let me know if you have questions. Or post pictures of your work and tag Abbotts At Home on FB, I’d love to see it!

Stephanie Abbott has been remodeling homes, updating & building furniture, and working on DIY home maintenance and cleaning tips for over 20 years. Her remodeling has been featured in Better Homes and Gardens Magazine. And, her DIY YouTube channel has had more than 8 million views.
Most of the DIY tutorials and videos on this site focus on beginner to intermediate level DIY Projects that can be done in an affordable way without high-end, expensive tools. All of the cleaning tips on this website have been tested in her home.