
I LOVE this EASY DIY Christmas Table Centerpiece Idea. Make a FUN Red Truck Christmas Village everyone will enjoy, with steps & how-to video.
Easy DIY Christmas Table Centerpiece Idea
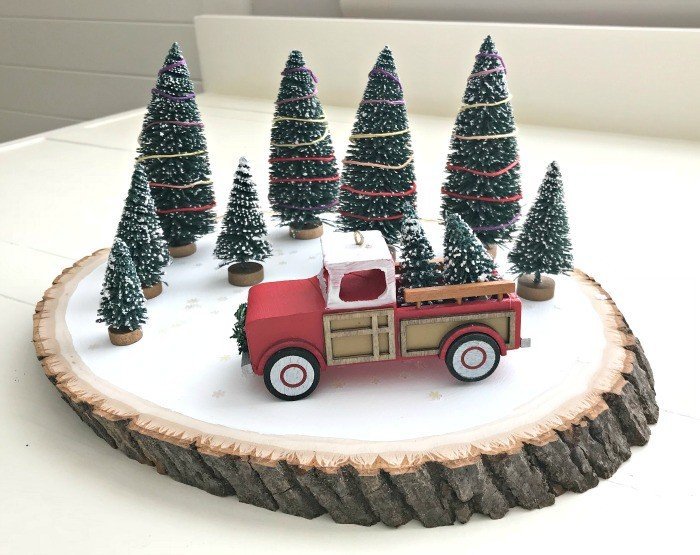
A couple of years ago, I shared a smaller version of this Red Truck Christmas scene on a wood slice.
I absolutely loved that little Red Truck decoration. So, I wanted to go bigger this Christmas and turn that idea into a big Vintage Christmas Truck Centerpiece inspired by classic Christmas Villages.
I LOVE this bigger version even more than the original. And it was so easy, guys!

Be sure to watch the video to see just how easy it really was to make. And, of course, I’ve got the exact steps and details about what I used in the tutorial below.
But, don’t get too caught up in using exactly what I used. Because sometimes it’s hard to find the exact same items.
It’s more about the idea behind it and recreating the Modern Farmhouse Christmas-y vibe with the little red farm truck Christmas décor pieces that you find. 🙂
Now, let’s get started with this DIY Christmas Table Centerpiece Idea!
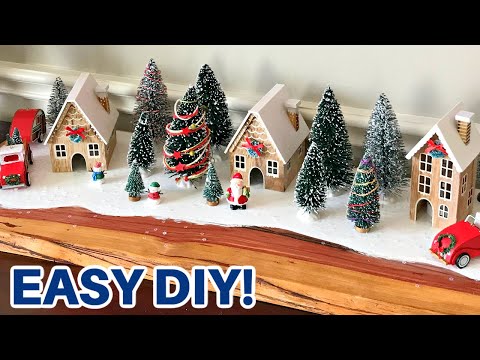
Christmas Truck Centerpiece Video
If any of the steps below are confusing, you can see exactly how I made this little table top Christmas Truck Centerpiece in this short step by step video.
Here’s What You’ll Need
- 12 to 18″ wide x 24 to 36″ long board, like my Live Edge Cedar or Common Pine from Lowe’s or Home Depot OR Butcher Paper
- Stain and/or Water-Based Poly (see Step One for details)
- White Acrylic Craft Paint and Foam Brush
- Snowflake Glitter/Confetti and Matte Mod Podge
- Christmas Village Houses and LED Tealights
- A Variety of Bottle Brush Trees
- Vintage Red Vehicle Ornaments
- Mini Santa and Snowman Ornaments
- Optional: Hot Glue

DIY Red Truck Christmas Table Centerpiece Steps
Step One
Prep your wood. I got really lucky and found a piece of Live Edge Cedar for $5.
But, you can find cheap Common Pine or Whiteboard at Lowes and Home Depot with really pretty knots and grain to use for this project. Or use Butcher Paper instead of wood.
If you use Butcher Paper instead of wood as the base, move on to step two.

Sand it to 120 or 150-grit then dust off. Then you can either just seal it with a water-based poly or stain it, then seal it.
On my Cedar, I used Watco Danish Oil in Medium Walnut to stain the wood a warm, medium brown shade. I use Danish Oil a lot because it is super easy to apply and it hardens the wood a bit.
I love that extra durability in a finish. Then I sealed it with this Water-Based Wipe On Poly. Easy again, I love anything that gets me great results, faster.
Be sure to follow the directions for application and dry times on what you use, for the best results.
Step Two
Once that wood is prepped, it’s time to paint this Red Truck Christmas Table décor.
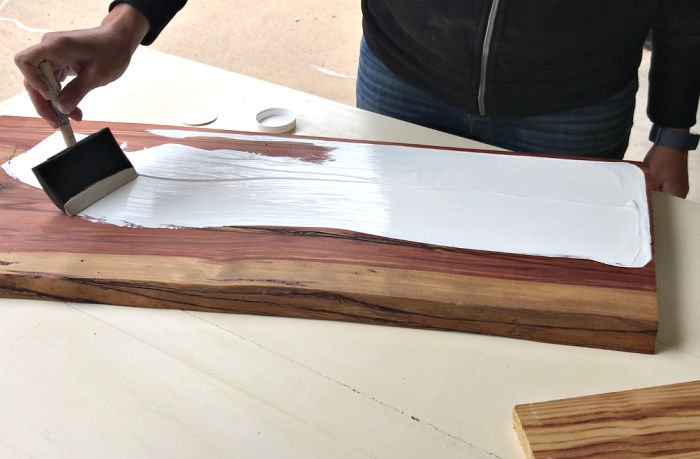
I applied 3 layers of White Acrylic Craft Paint with a 3″ wide foam brush. This is supposed to look like snow. So, you want the edges to be rounded and imperfect, like things are in nature.
I also like to keep wood showing all around the paint, just because I think that look at the wood all around is pretty.
Once you have your painted snow looking good. It’s time to add some sparkle to your DIY Christmas Table Centerpiece.
I used snowflake confetti/glitter that I found at the Target Dollar Spot in a small jar. But, Amazon has some great Snowflake Confetti options too.
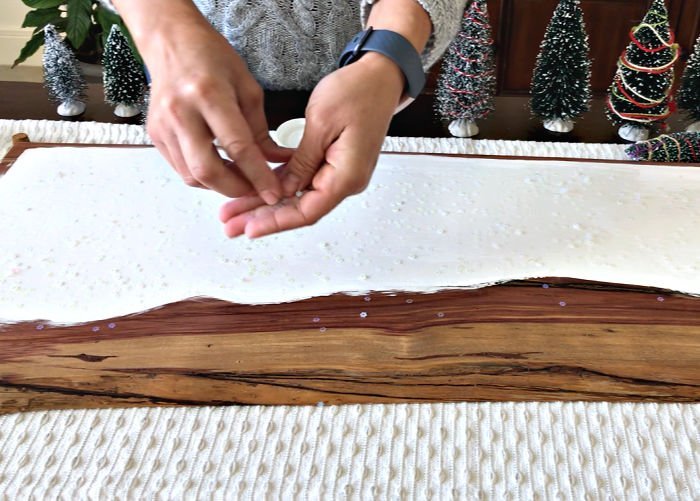
To get my confetti to stick, I apply a layer of matte mod podge and sprinkle on the confetti while it’s still wet.
I worked in 3 sections to do this before the mod podge could dry. You can see me doing this in the video.
Now, it won’t be perfect. You’ll still have some loose confetti. But, hey, that just adds to the Christmas magic, right? 😉
Step Three
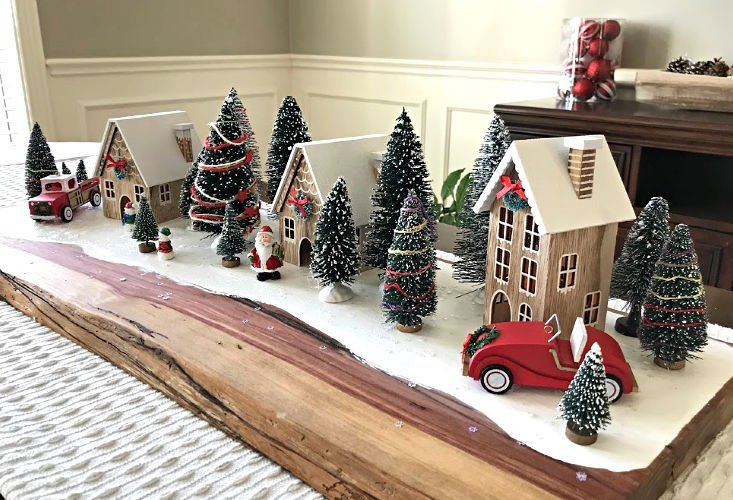
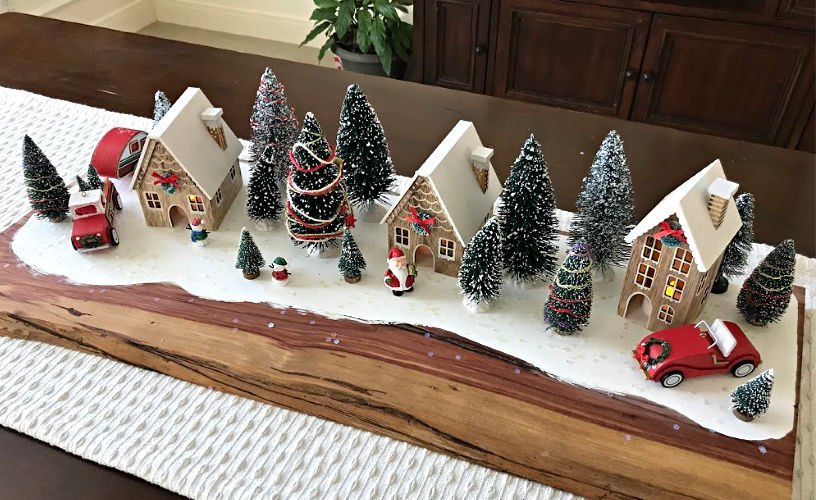
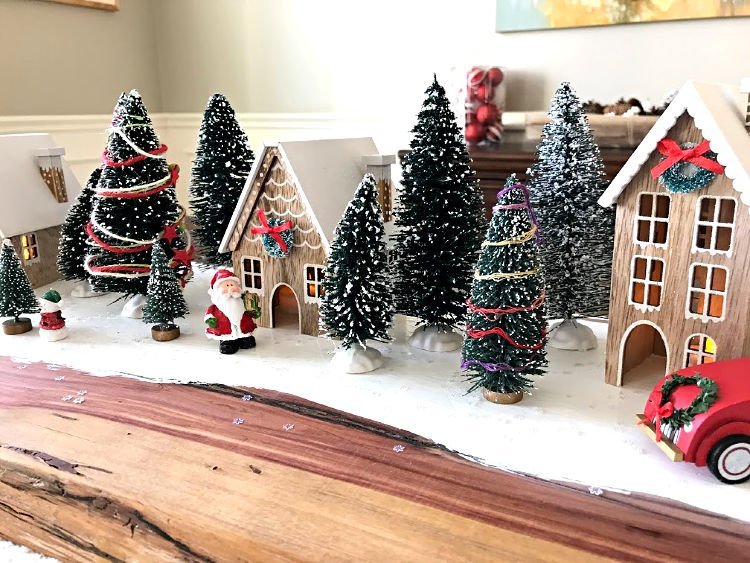
Time to decorate your DIY Red Truck Christmas Centerpiece! I think it’s easier to get a balanced look by starting with the bigger items, then move down to the smallest things.
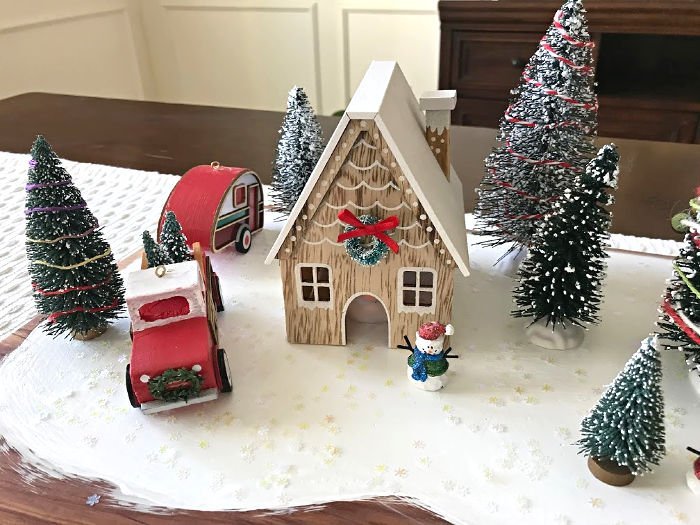
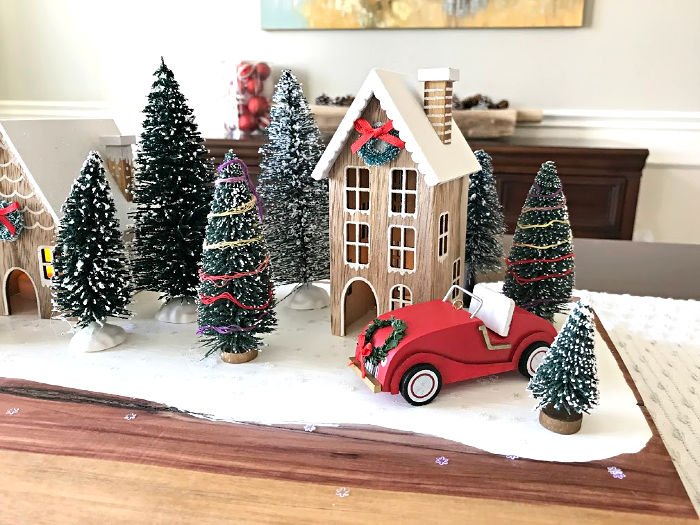
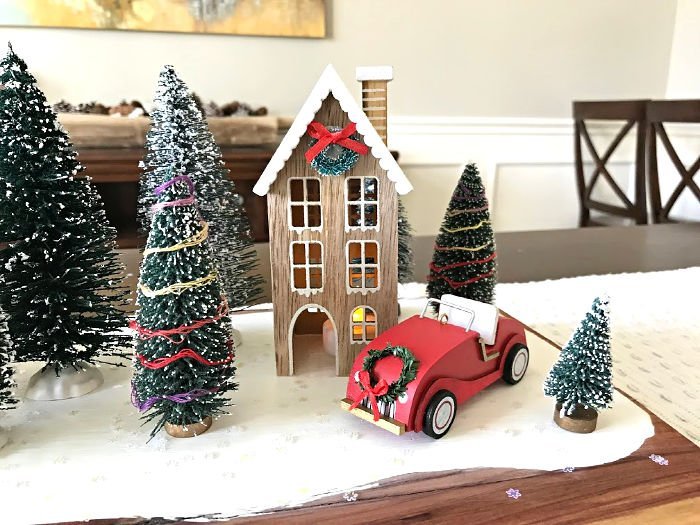
So, I set my Christmas houses first, then bigger bottle brush trees. Next, I added the Vintage Red Truck, Camper, and Car ornaments and medium-sized trees.
And, I finished with the mini trees, Santa, and snowmen.
Where I Found Everything
Now, just so you know, I found the Christmas houses and some of the bottle brush trees at the Target Dollar Spot.
I also found the mini Christmas wreaths at the Target Dollar Spot and glued those onto my 3 houses.
If you can’t find those houses at Target, then you can use traditional Christmas Village Houses, Christmas ornament houses, birdhouses, or these unfinished wood houses would look cute.

Pop little LED tea lights inside the houses to create a warm, Christmas-y glow. You can find tea lights pretty easily. Here’s LED tea lights on Amazon too.
Make sure to use LED’s so that they don’t heat up and create a fire hazard.
The rest of the bottle brush trees are from WalMart. But, you can find bottle brush trees just about everywhere these days. Amazon even has a ton of Bottle Brush Christmas Trees.
I like to wrap some of them in colorful embroidery floss or gift twine to make them look like decorated Christmas Trees.

Now, that vintage red truck and car are actually Christmas ornaments from Target.
You can also find cute versions at Hobby Lobby and WalMart. You’ll spend about $3-5 each on these, so this whole DIY Christmas Truck Centerpiece can be done pretty cheaply.
The little mini Santa and 2 snowmen are miniature ornaments from Hobby Lobby. I think that covers everything.

One final, optional step, you can tack down all of that décor with a small dab of hot glue. That’ll stop little hands from moving things around, but you’ll still be able to take it apart when you need to.
More Pics of this DIY Christmas Table Centerpiece Idea
Thanks for checking out my DIY Red Truck Christmas Table Centerpiece tutorial. Have fun crafting and Merry Christmas!

More DIY Holiday Projects
Looking for more homemade Christmas Inspiration? I have 40+ DIY Christmas Projects, Crafts, and Home Decor Ideas in one big Christmas-y post.

I also LOVE this post for How to Make Yarn Tassels for Home Decor Projects for Christmas projects.
Or this great tutorial for How to Wrap A Picture Frame with Wrapping Paper.

And, check out the Cute and Easy 3D DIY Christmas Card Ornaments too.

What about some Halloween inspiration?? Check out How to Hang Giant Spider Decorations on a House.

Feeling inspired? Now that you’ve seen this DIY Red Truck Christmas Table Centerpiece tutorial, you can do it too. Let me know if you have questions.
Don’t forget to sign up for the Abbotts At Home email newsletter to get DIY, Remodeling, and Crafty ideas in your inbox.

Stephanie Abbott has been remodeling homes, updating & building furniture, and working on DIY home maintenance and cleaning tips for over 20 years. Her remodeling has been featured in Better Homes and Gardens Magazine. And, her DIY YouTube channel has had more than 8 million views.
Most of the DIY tutorials and videos on this site focus on beginner to intermediate level DIY Projects that can be done in an affordable way without high-end, expensive tools. All of the cleaning tips on this website have been tested in her home.