
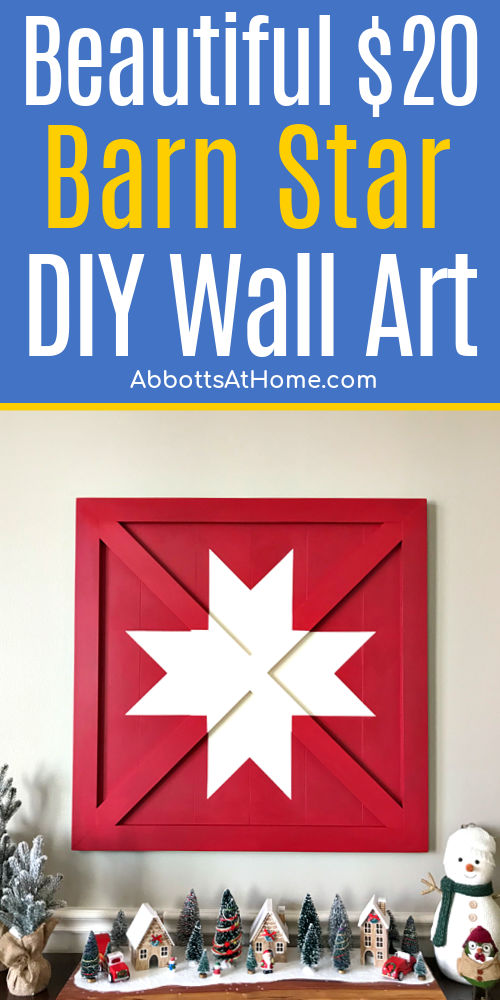
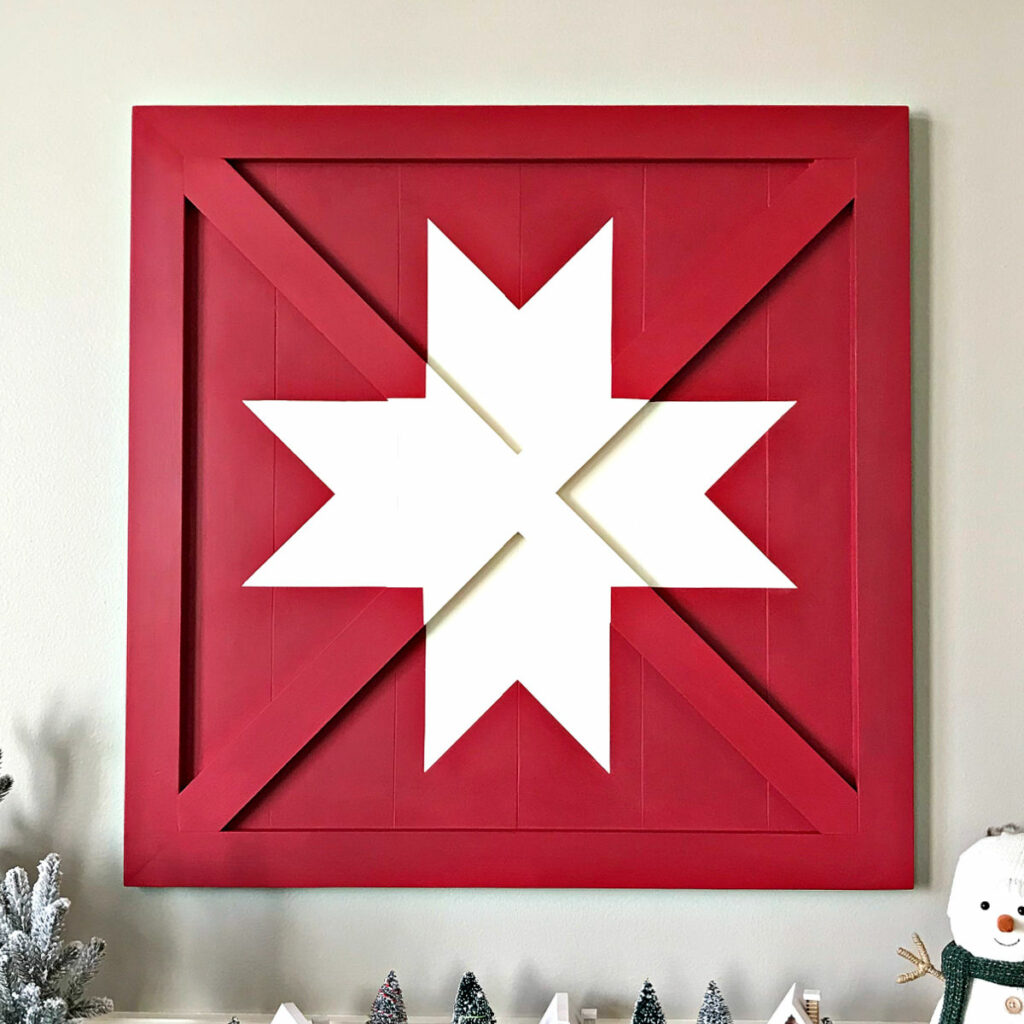
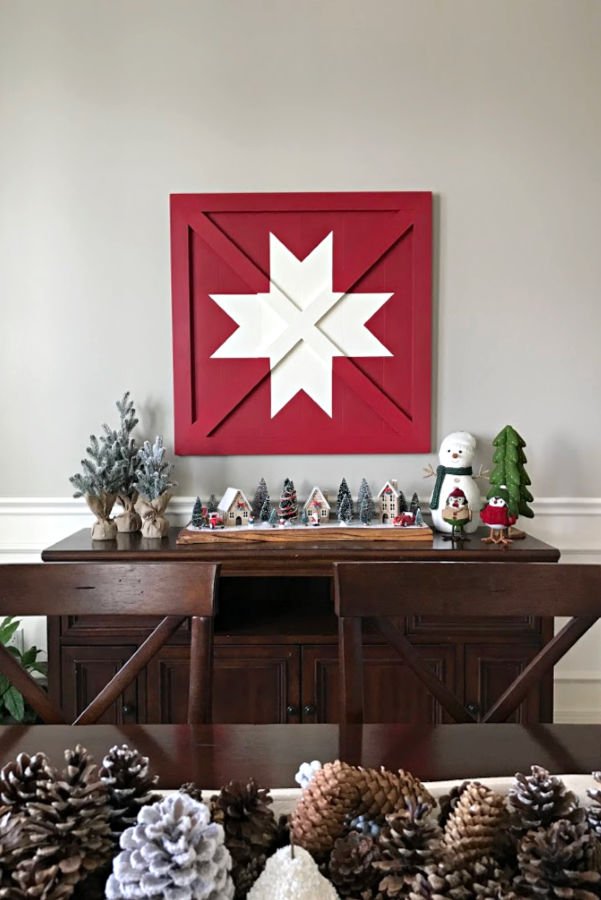
I LOVE this BEAUTIFUL DIY Wooden Barn Star Quilt Art. It’s an easy woodworking project you can build for less than $20 in lumber. Yay!
DIY Wooden Barn Star – Barn Quilt Wall Art
Guys, this easy DIY Barn Star Art is my latest obsession. I’ve been obsessing over it ever since I saw the Pottery Barn Christmas catalog. Have you seen it?
This Barn Star Quilt is absolutely stunning in those photos. And, I think it turned out pretty stunning in mine too. It is just so so beautiful.
AND, the best part is the price! I spent about $20 on the lumber for this easy build. Pottery Barn sells theirs for $399. Happy Dance!
If you are comfortable with a Miter Saw, you can do this build. If you are a beginner woodworker, DIY Wooden Wall Art and DIY Barn Quilts are a fun way to be creative.
My DIY Scrap Wood Wall Art is another fun woodworking project that looks beautiful on walls. Be sure to check it out too!
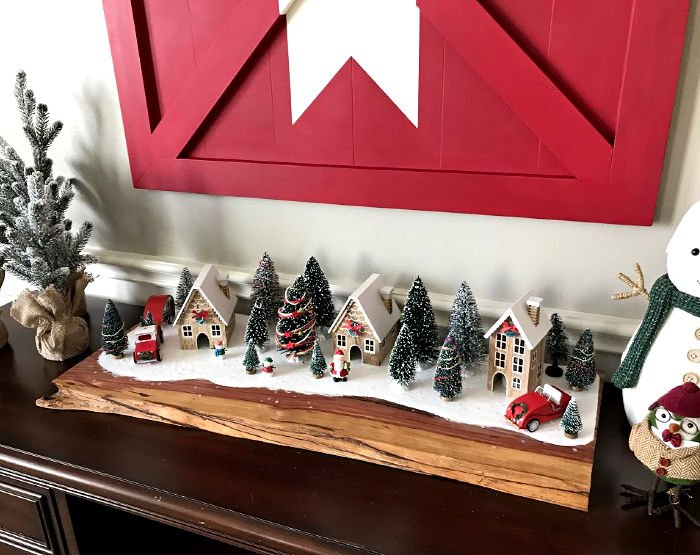
This DIY Barn Star Quilt Art isn’t just for Christmas. I’ll be moving it into the Family Room after Christmas. It’ll fit in perfectly with the fun colors and feel in there.
Especially since I used that exact same red paint on the DIY Kids Desk with Drawers and DIY Kids Play Kitchen.
Let’s get to the build now.
Here’s What You’ll Need
- 3 – 8′ 1×3 Common Pine or Whiteboard Dimensional Lumber
- 3′ x 3′ of 1/4″ plywood or beadboard
- DecoArt Rouge Chalk Paint or Waverly Chalk Paint in Crimson (at WalMart)
- White Chalk Paint or your White Trim Paint
- Minwax Finishing Paste Wax in Natural or Water-Based Polycrylic in Matte Finish
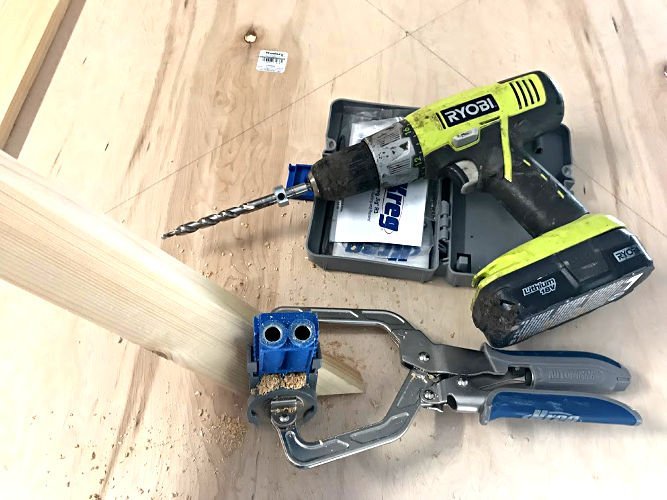
- Miter Saw, Brad Nailer, Kreg Jig R3 and Power Drill
- Wood Glue and Paintable Caulk
- 2″ Nylon Brush and 1″ Foam Brush
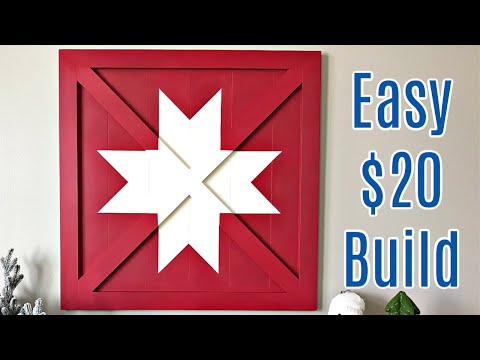
How To Make A Wooden Barn Star – Video
The written build steps are below. But, if any of the steps are confusing, you can see the build steps and how to draw and paint a barn star quilt in this video.
How to Make A Barn Star
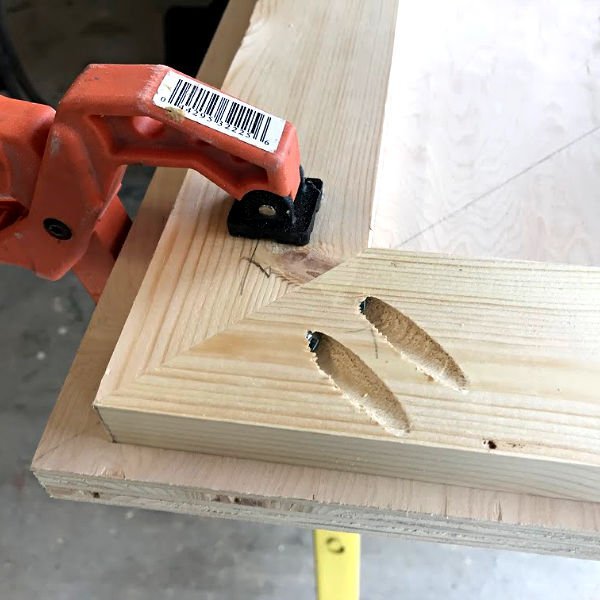
Step One – Build the Frame
Cut 4 pieces of your 1×3 dimensional Lumber with 45-degree angles on each end. Each side should be 3′ long.
Put 2 pocket holes on each end of 2 of the boards. Then use glue and screws to assemble your 3′ square.
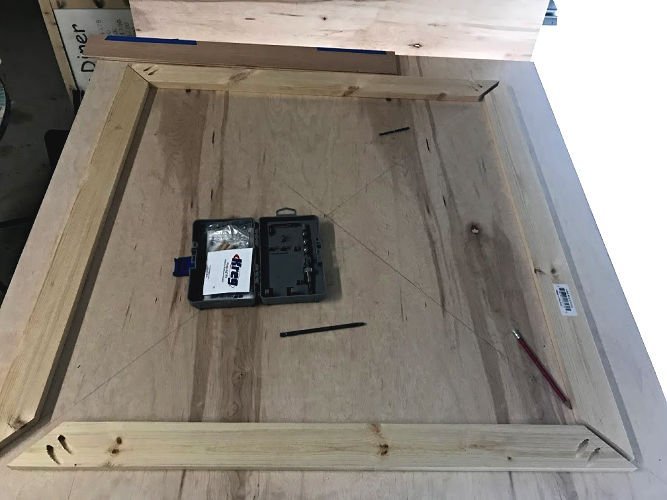
Step Two – Attach the Back
Start by attaching a 1/4″ thick back to the frame. I happened to have 5 3/4″ wide strips of primed plywood leftover from my DIY Planked Plywood Ceiling.
So, I cut those to 34″, then glued and brad nailed them to the back of the frame.
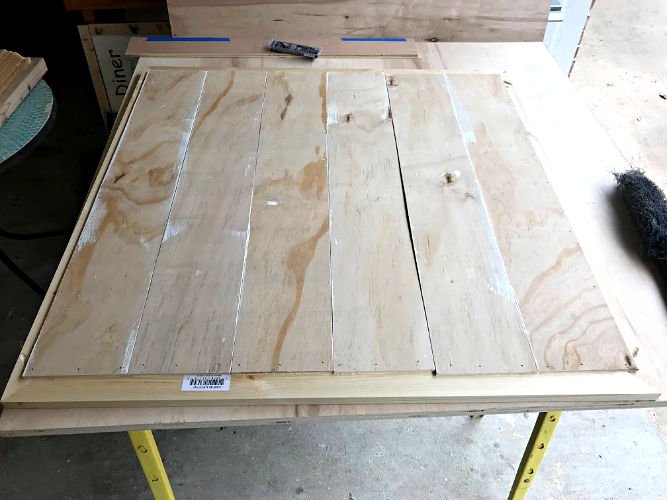
I think varying the widths of the plywood strips or using a flat plywood panel would look good on this Barn Star Quilt too. So, go for your favorite look or whatever you have on hand.
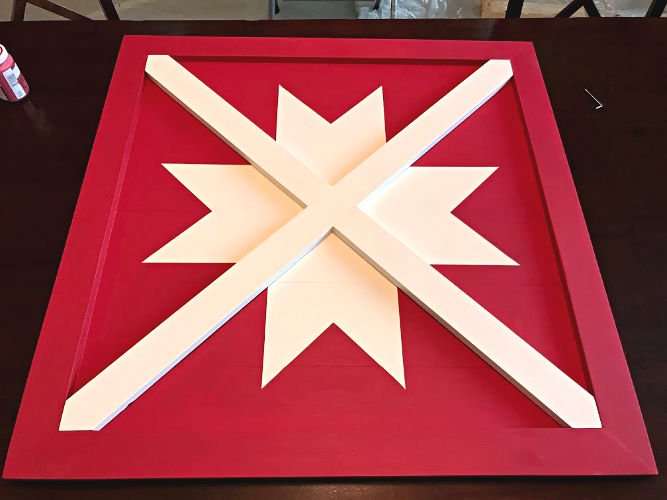
Step Three – Build the X
Now, we can build the X. I find it’s easiest to cut one side with a perfect end. Then lay that over the frame to pencil mark the other end for cutting.
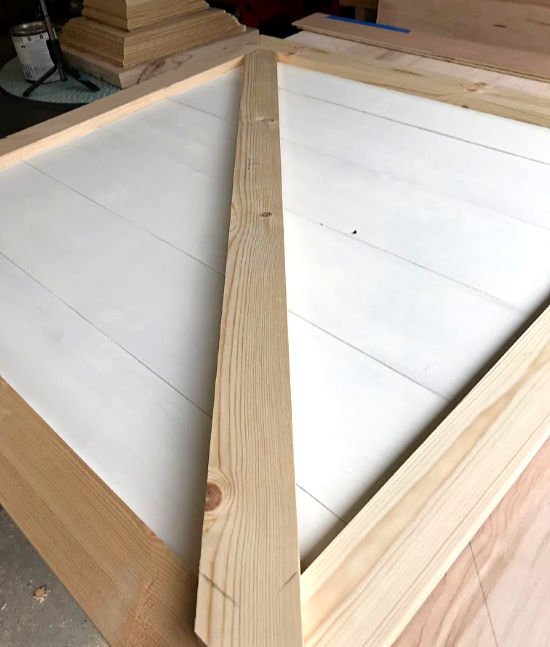
After that is cut and sitting in the frame. I measured and marked the center of that board. That makes cutting the shorter sides of the X easier to line up.
I then marked the center of the short arms and used that to lay the board on the frame and cut that end.
Do NOT attach the X to the backing of the Barn Star Quilt yet.
Step Four – Caulk the Backing
I used paintable caulk on the front of the Wooden DIY Barn Star Art between each plywood strip for a seamless look.
Let that caulk dry, then paint the whole back with 2 coats of the white chalk paint. Letting it dry between coats.
Step Five – Use Wood Filler on Frame and “X” Pieces
Use wood filler as needed and sand the wood frame X pieces with 150-grit (or similar) to smooth any rough spots and the corners of the frame.
Step Six – Draw the Barn Star
Use a straight edge to draw the barn star with a pencil. Then use painters tape to tape off the star shape.
After the taping is finished, seal the tape edges with 1 coat of the white paint. Keep it nice and smooth so that your paint job doesn’t look lumpy or rough.
Watch the DIY Video Above to see exactly how to draw the Barn Star. It’s much easier to explain on video than in writing. But, it’s easy to do. No worries.
Step Seven – Paint the Red Sections
Once that dries, paint the frame and all of the back outside of the barn star with the red chalk paint. Red always takes 3 or 4 coats to get a nice, even color. Let that dry completely between coats.
When the red chalk paint is even and dries, you can slowly and carefully peel the tape off.
Then carefully paint over the pencil marks with white chalk paint. Touch up any imperfections with a foam brush. They’re perfect for painting straight lines.
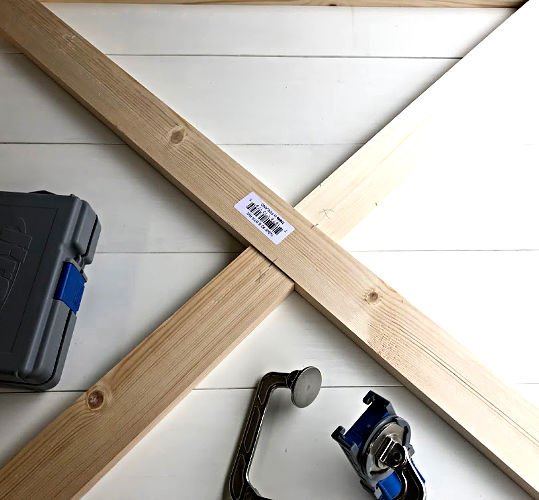
Step Eight – Attach the “X” Pieces
Now, it’s time to add that X across the front.
Normally, I would have added this before doing any painting. But this Barn Star Quilt shape is a little complicated. So, I decided it would be easier to draw the barn star without the X pieces attached.
Glue the X into place, then flip over the Wooden DIY Barn Star Quilt to brad nail the X onto the frame.
Step Nine – Paint the X Red
Use painter’s tape to make straight lines on the “X” pieces where they need to be painted red. Then paint those parts of the X with red paint.
Step Ten – Seal the Art
Finish your new Wooden DIY Barn Star Art with a good coat of a non-yellowing sealer. I used Minwax’s Natural Wax, but I also recommend this Minwax Polycrylic in a Matte Finish.
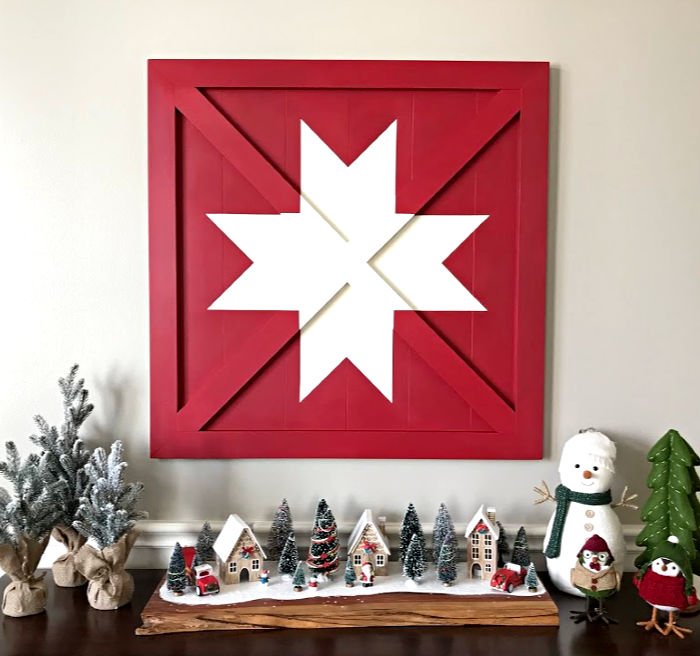
That’s it for the build. Here’s more photos of the finished Barn Quilt.
More Pictures of this DIY Wooden Barn Quilt
Have fun making your DIY Barn Star and Merry Christmas!
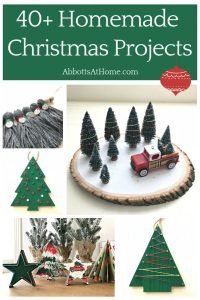
Looking for more homemade Christmas Inspiration? I have 40+ DIY Christmas Projects, Crafts, and Home Decor Ideas in one big Christmas-y post.
You might also like this Before and After Family Room Makeover On A Budget!

And, I think everyone should know how to How Do I Get Rid of Cable And Still Watch TV.

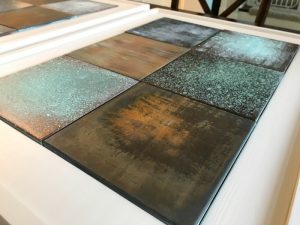
Or, have a look at how to faux paint 20 different metal patina looks.
I love this beautiful DIY Acrylic Paint Pouring Wall Art tutorial.

Feeling inspired? Now that you’ve seen this DIY Wooden Barn Star Quilt Art tutorial, you can do it too. Let me know if you have questions.
Don’t forget to sign up for the Abbotts At Home email newsletter to get DIY, Remodeling, and Crafty ideas in your inbox.

Stephanie Abbott has been remodeling homes, updating & building furniture, and working on DIY home maintenance and cleaning tips for over 20 years. Her remodeling has been featured in Better Homes and Gardens Magazine. And, her DIY YouTube channel has had more than 8 million views.
Most of the DIY tutorials and videos on this site focus on beginner to intermediate level DIY Projects that can be done in an affordable way without high-end, expensive tools. All of the cleaning tips on this website have been tested in her home.