
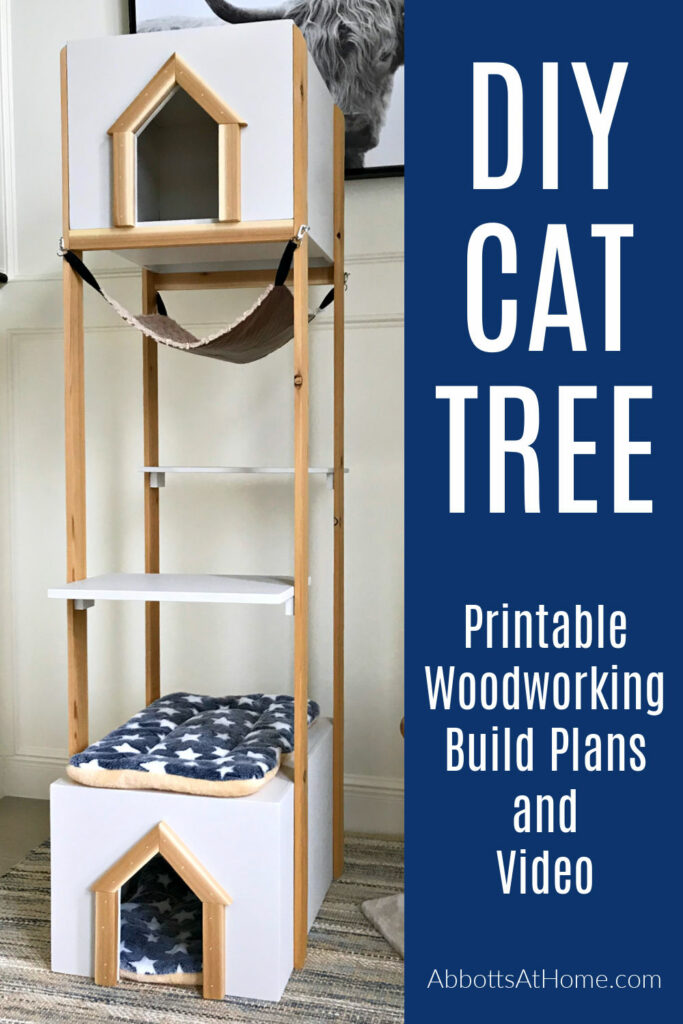
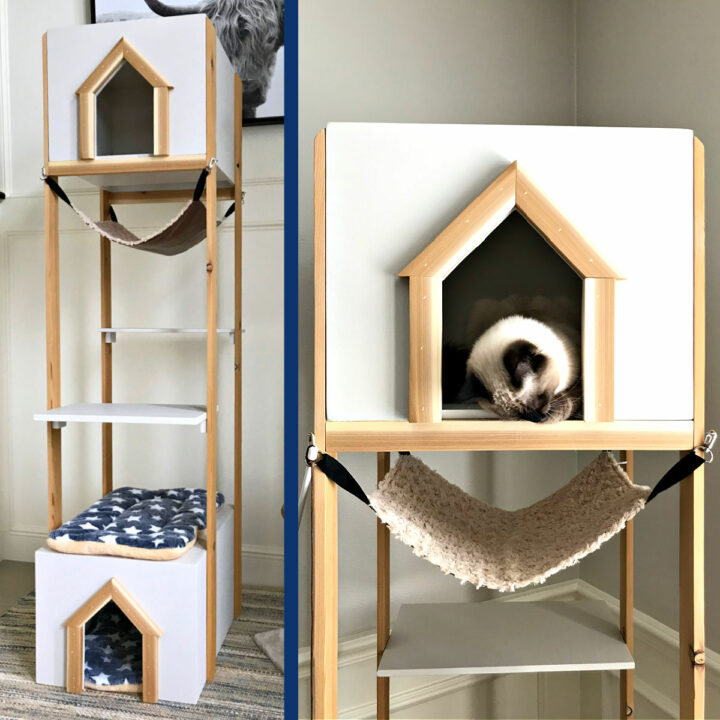
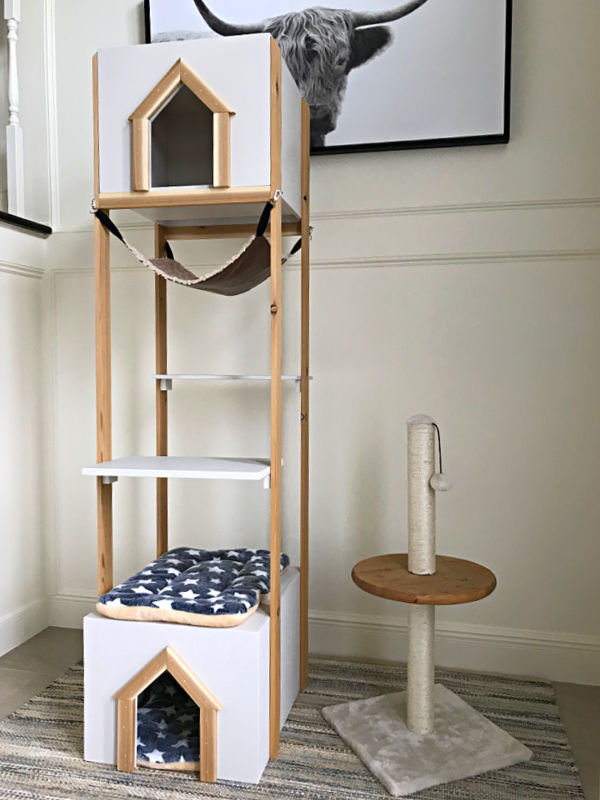
Here’s a quick and easy woodworking project for cat lovers. I love how this DIY Cat Tree Wood House – Cat Tower turned out. And, it’s a lot cheaper and prettier than those store bought Cat Tree’s!
DIY Cat Tree Build Plans
We finally got our kids the pet they’ve been begging for over the last 5 years. And, I’m so happy to say she’s the sweetest kitty ever. I know, I know everyone thinks their pet is the best. But ours actually is the best. 😉
I’ve been a lifelong cat owner and lover. They’re just great, low maintenance pets for a busy home. I love dogs too. But, I prefer a pet that I don’t have to bathe regularly, walk, and let out for frequent bathroom trips. I’m a busy gal.
I lost my last cat just before getting married, 10 years ago. And, I assumed that I’d never have one again, due to my husbands allergies.
BUT, during a weak moment with our boys the hubby promised them a cat. LOL.
And, I immediately got to work researching the best cats for someone with allergies. Turns out Siamese breeds generally have less of the proteins that cause allergic reactions. And, female cats tend to produce less than males.
So, I crossed my fingers and headed to our local pet rescue. The very first kitten I saw that day was this sweet, female Siamese mix. She let me hold her and was purring up a storm. That was good enough for me. I adopted her on the spot.
She’s been a member of our family for 4 months now and we are all crazy about her. And, luckily, my husband hasn’t been reacting to her. So, I’m not sure if it’s because she’s part Siamese or not. But, it’s fantastic news.
More DIY Cat Projects and Cat Owner Tips
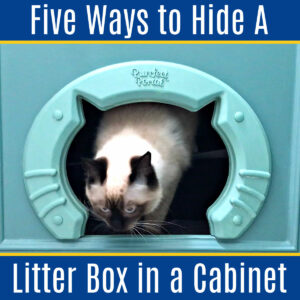
I have a few DIY videos for cat owners about how we are hiding a litter box in a cabinet, keeping her out of the trash with a DIY Cabinet Door Mounted Garbage Can, and stopping her from tearing up our furniture with plastic caps. Be sure to check those out.
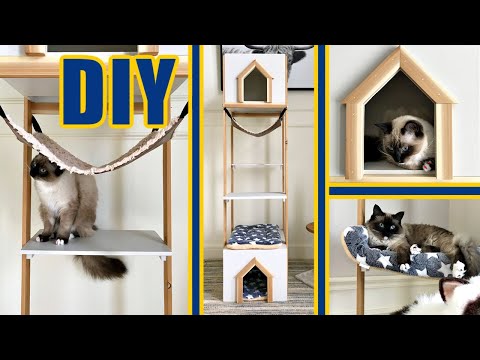
Today is all about the DIY Cat Tree Wood House or Cat Tower I designed and built for her. Be sure to watch the build video too. And, I have printable build plans available for purchase below.

DIY Cat Tower Build Plan Overview Video
Watch this video to get a good look at how I built this easy DIY Cat Tree Wood House or Cat Tower. It’s a pretty easy build using just a few power tools.
Beginner woodworkers who are comfortable with power tools can follow this build plan.
Is It Cheaper To Build Your Own Cat Tree?
Yes, it can be a lot cheaper to build your own cat tree.
And, most of the cat trees or cat towers you can build at home will be bigger, sturdier, built from better, longer lasting materials, and definitely prettier than most of the cat trees they sell online.
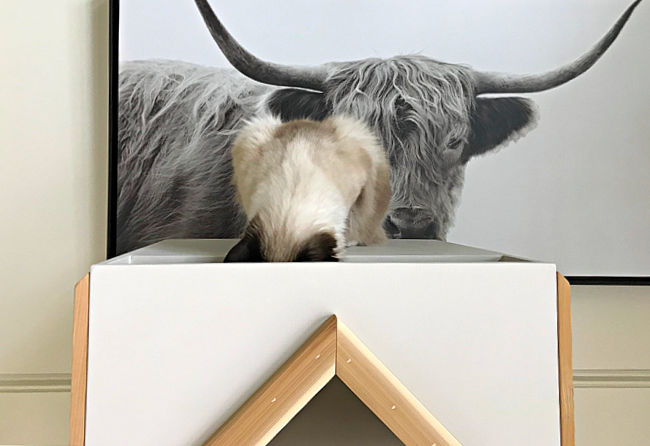
You can build this cat tree for between $63 and $90, depending on what materials you want to use. This DIY cat tree wood house and cat tower combo is pretty tall at 71″. So, cats love that they can get up high on this cat tree.
Many cat tree’s and towers online look tall in pictures but when you check the dimensions, they’re only 4 or 5 feet high.
And, even if they are taller than that, most store-bought cat trees are made from cheap materials that fall apart quickly or just look bad.
In fact, most of them are covered in pretty ugly carpet colors that never match anything. I work hard to make my house look nice. I don’t want to buy a giant cat tree that looks cheap and not at all stylish. Right?!
That’s why I decided to design and build my own DIY Cat Tree Wood House / Cat Tower. 🙂

What You Need To Build This Wood Cat Tower
As of May 2021, buying the ½” plywood, 1×2, and 4 1×3’s will cost about $90 in Texas. Or, you can use Cedar fence pickets instead of the 1×3’s and the total cost will only be $63. But you will need to resaw each picket into 2 – 2 ½” wide pieces.
Tools Needed
- Miter Saw
- Circular Saw, with straight-edge cutting guide (if available)
- JigSaw
- Brad Nails & Nail Gun (I like this one)
- Wood Glue, Sandpaper or Sanding Blocks, Wood Glue
Materials Needed
- 1 – 4’x8′ 1/2″ Thick Cabinet Grade Plywood
- 1 – 8′ Long 1″x2″ Cedar Board
- 4 – 8′ Long 1″x3″ Cedar Board (Home Depot Sells These)
- OR 2 – 6’ Cedar Fence Pickets
Hello, DIY friends! You can find the DIY Wood Cat Tree Build Plans at a great low price here. These plans are for personal use only. They cannot be shared or sold without my permission. Please let me know if you have any questions and enjoy your build! 🙂
The printable plans include Full Steps and Measurements, 3D Drawings, Cutting Guide, and Materials List.

DIY Cat Tree – Steps to Build
Quick Step Guide
- Cut the Plywood Pieces and Sand
- Build the Upper Cat House
- Build the Lower Cat House
- Paint the Cat Houses & Shelves
- Cut the Cedar Parts & Sand
- Attach the Wood Cat Houses with the Posts
- Attach the Shelves to the Cat Tower
Please Note: The full steps, with measurements, are only available as a download. BUT, the steps below will give a pretty good idea of how to build this tree.
Step One
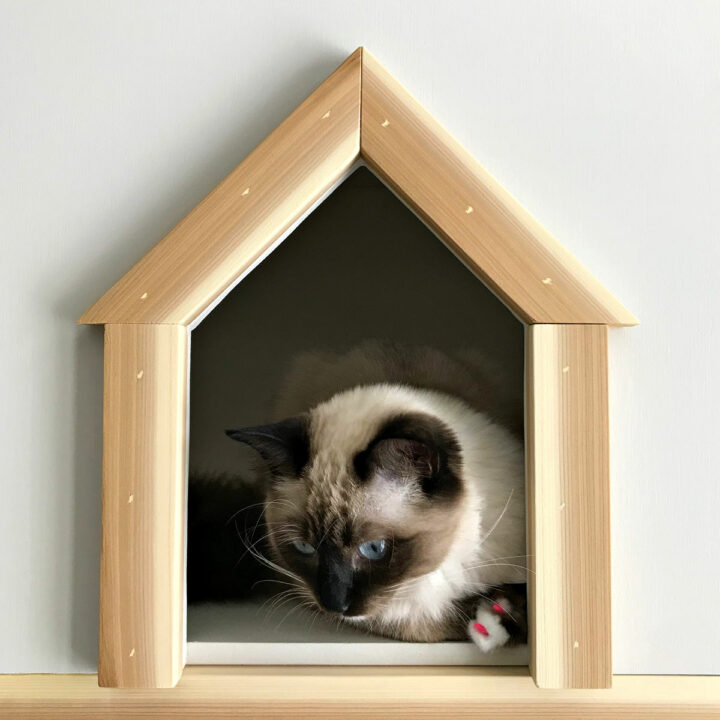
Start by cutting the 1/2″ plywood pieces for the 2 Cat Houses. The lower cat house is a few inches longer than the top.
Each cat house has 2 or 3 openings in different spots to make it more fun for the cat(s). And, to give them different ways to jump around on this DIY Cat Tower.
Sand all of the plywood pieces with 150 grit to smooth the faces and edges.
Step Two
Start by building the upper, smaller box. I used my brad nailer and wood glue to assemble this box. The back of the box sits between the side pieces.
Start by gluing and nailing the side pieces to the back piece. You can see how I managed to do this without help in the build video, above.
Then I attached the bottom of the box. Again, this piece sits inside the sides. There will be an opening behind this piece to let the cat get into the box from underneath. Use glue and brad nails on the 2 SIDES.
The easiest way to attach the bottom is to just slide the bottom into place on a flat surface. Make sure the front edge of the bottom is flush with the front edge of the sides.
After the bottom is attached, flip the box over to glue and nail the top into place, along 3 SIDES. Again, this piece sits inside the side pieces. BUT, the top should be attached all the way back against the back of the box. This will leave an opening at the front of the box on the top. That will give your cat access to climb on top of this box.
Next, mark the house cut out on the front piece. I have an easy diagram for this in the PDF build plans. After cutting out the opening with a Jigsaw, glue and brad nail the front onto the rest of the box.
The front sits in front of the sides and bottom. Be sure to use glue and nails on all 3 sides for a strong box.
Step Three
Now on to the lower, larger box that works as the base for this DIY Cat Tree House. The dimensions are slightly different but the build steps are the same.
Use a Brad Nailer and wood glue to assemble this box. The back of the box sits between the side pieces. Start by gluing and nailing the side pieces to the back piece. You can see how I managed to do this without help in the build video.
The back on this box doesn’t go all the way up. This gives your kitty a fun secret escape out of the back of the lower box.
Attach the top of this box with wood glue and brad nails. The top sits inside of the side pieces. You can flip the sides and back upside down, then slide the top into place on a flat, level surface to easily install the top.
Cut the same house shaped opening in the front of this box with your jigsaw. Then glue and brad nail the front onto the box.
The lower box doesn’t need a bottom, just be sure to build the box carefully so that all 4 edges sit on the floor nice and flat.
If you complete this build and find that the bottom isn’t sitting flat on your floor, you can level it by adding a bottom. Or, even just setting it on a rug could eliminate any slight wobbliness.
Step Four
Now that both boxes for this DIY Cat Tree Wood House and Cat Tower are built, fill all of the nail holes with wood filler. Let that dry, then sand the patched holes and edges of the house shaped openings you cut with the jigsaw with 150-grit sandpaper or a sanding block.
I went with a mix of painted plywood and cedar on this build. In this case, I decided it was easier to paint both of my plywood boxes before attaching the cedar.
I dusted the boxes clean. Then painted both boxes, inside and out, with 2 coats of an off white Homemade Chalk Paint that I make with Latex Wall Paint and Plaster of Paris. Chalk Paint is easy to work with because it doesn’t require a primer, dries fast, cures hard, and it sands nicely.
Paint the 3 shelves you’ve cut with 2 coats of chalk paint too. You’ll also need 6 blocks to use as supports for those shelves. You can use ¾” blocks of Cedar or scrap wood you have leftover from previous projects.
I used 1×2 scraps that I cut to 2” long. If you don’t have scraps, use cuts off the 1×3 cedar.
Step Five
The last step on the boxes is to glue and brad nail on the 1×2 cedar frame around the house cutouts. The easiest way to cut the cedar pieces is with a Miter Saw.
Cut the pieces out, sand them smooth with 150-grit, and dust them off. Then use glue and your brad nailer to attach the pieces to the front of each box.
You can fill the holes with wood filler, let dry, then sand and seal the Cedar. OR, you can use a matching wood putty AFTER sealing the cedar with a water-based poly. I used this Matte poly.
Cut 4 – 71” long cedar boards that will be used as the posts on this DIY Cat Tree Tower. Use either 1×3’s or 2 ½” wide strips of ½” thick cedar pickets.
Cut the top of each board with a 45 degree angle. Then sand the posts to get them ready for assembly.

Step Six
It’s time to build the cat tower. Glue and brad nail the 4 boards onto each box. The boards should be flush with the back of each box.
If you’re working alone, the easiest way to do this is to lay the top and bottom boxes on their sides to easily line up and glue the boards into place on one of the sides.
The board closest to the front will be lined up with the edge of the smaller, top box. That will make it 3 ½” back on the larger box. Repeat the gluing and nailing of the other 2 – 71” boards on the other side of the Cat Tree Tower.
Stand the Cat Tree up for the next part of this step. Then cut 2 – 18” long pieces of 1×2 to glue and brad nail into place under the upper box at the front and back.
These will help to support the weight of the upper box. It may be overkill, since the 4 “legs or posts” support the weight of the top box. But, better safe than sorry. And, that little bit of extra cedar looks nice anyway.
Fill the holes with wood filler, let dry, then sand and seal the cedar. OR, you can use a matching wood putty AFTER sealing the cedar with a water-based poly. I used this Matte poly.
For this project, I only sealed the cedar. I didn’t need to seal the chalk paint. It’s tough enough on it’s own. But you can give it a top coat with the same poly, if you want.
Step Seven
Now you can add the 3 shelves. I spaced these out so that it makes going up and down the Cat Tree easy enough but still a little exercise.
Glue and brad nail the blocks that will support the shelves onto 2 of the posts. Use a level to make sure they are level. Then glue and brad nail the shelves to the supports.
Make sure the shelves are off center on the supports so that only 3” of the shelf sits in the space between the posts.

Some Fun Add Ons
You’ve finished this DIY Cat Tree Build Plans. Step back and admire your amazing talent and beautiful new Wood Cat House and Cat Tower. 😉
I want to suggest some fun optional additions to customize your cat tree.
You can make the shelves and tops of the 2 boxes less slippery by stapling down carpet remnants, using Mod Podge to glue down burlap, or by hot gluing some jute placemats down.
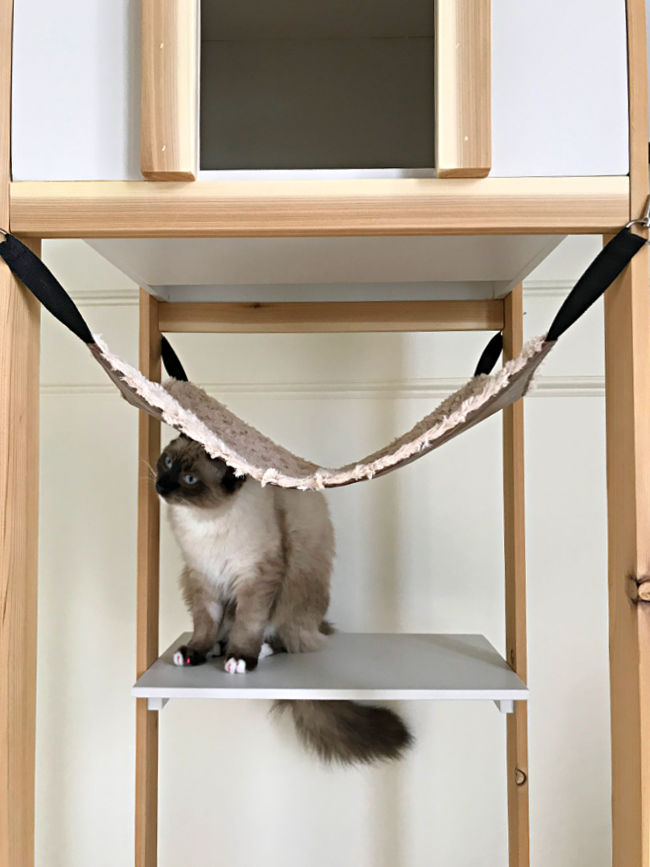
Add a soft cat bed inside the bottom level, like my star covered bed. You can also replace a shelf with a fun hammock, if your cat likes those.
You can hang some cat toys from the shelves or off the boxes. Or, add a scratching pad on top, nearby, or even build it onto the side to use as a ramp.

Download the Printable Woodworking Plans
Hello, DIY friends! You can find the DIY Cat Tree Wood House Build Plans at a great low price here. These plans are for personal use only. They cannot be shared or sold without my permission. Please let me know if you have any questions and enjoy your build! 🙂
The printable plans include Full Steps and Measurements, 3D Drawings, Cutting Guide, and Materials List.
Don’t forget to follow my channel on YouTube to see my latest DIY woodworking, home decor, and home maintenance projects. You can always ask questions there, if you need extra help. 🙂
Check out ways to hide a kitty litter box in a cabinet too. 4 are safe and easy for RENTER’S!
Do Claw Caps for Cats Work? Yes!! Keep your skin and furniture safe from scratching with this easy DIY.

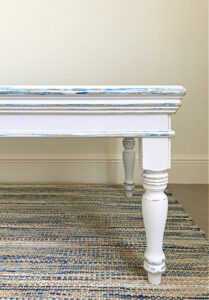
How about another DIY Furniture Build Plan? Check out this beautiful DIY Coffee Table Build Plan. The store bought turned legs are budget-friendly but they make this build look high end.
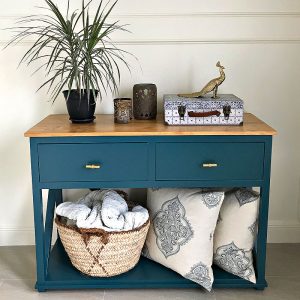
And, I love this DIY Console Table with Drawers!
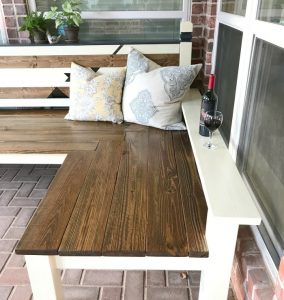
Or this beautiful, large L-Shaped Bench for your backyard.
And, this DIY Table Over Washer and Dryer is always popular.

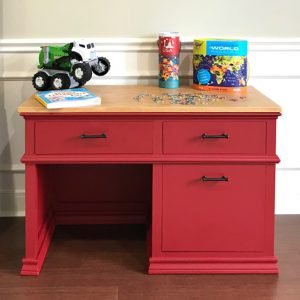
If you need a great little desk for your elementary age kids. Check out this DIY Childrens Desk with Storage Drawers.
Feeling inspired? Get out there and build your own with these DIY Cat Tree Build Plans.
Have fun and let me know if you have questions. Or post pictures of your work and tag Abbotts At Home on FB, I’d love to see it!

Stephanie Abbott has been remodeling homes, updating & building furniture, and working on DIY home maintenance and cleaning tips for over 20 years. Her remodeling has been featured in Better Homes and Gardens Magazine. And, her DIY YouTube channel has had more than 8 million views.
Most of the DIY tutorials and videos on this site focus on beginner to intermediate level DIY Projects that can be done in an affordable way without high-end, expensive tools. All of the cleaning tips on this website have been tested in her home.