
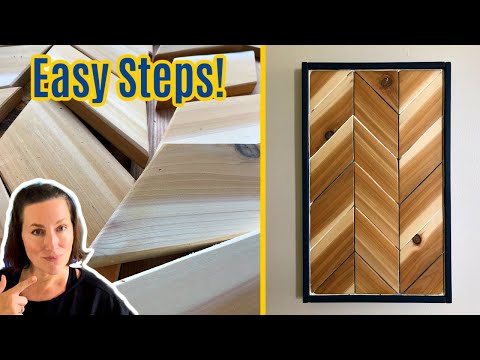
Hi, guys! I am LOVING this beautiful DIY Chevron Wood Wall Art. I made mine with Cedar for less than $20. And, this woodworking project is easy enough for beginner woodworkers!
Chevron is a classic pattern that has been used in home design for hundreds of years. You can find it used in tile design, outdoor paver layouts, on brickwork, it’s used in wood flooring, and in just fabric patterns.
If you like this chevron wall art, check out the chevron wood table top I designed for this DIY Farmhouse Coffee Table with 6 Top Options and PDF Plans.
DIY Chevron Wall Art – Build Video
If any of the written steps below are confusing, watch this short build overview video.
OK, let’s get started with how to cut a chevron pattern with wood.
How Do You Make a Chevron Pattern with Wood
You can make a Chevron Pattern with wood by making 45-degree angle cuts on a Miter Saw. Then you can lay the chevron pieces in columns that run in the same direction.
Alternate that direction for the columns next to it to create a repeating chevron pattern design. Chevron pieces can be cut any size depending on how many columns you want and how big you want it to be.
Since I’m using Cedar and it only has 1 smooth side, I have to make my cuts in 2 different directions. If your lumber looks nice on both sides, you can make all of your cuts in one direction, then just flip the boards to make columns.
For my project, I cut all of the chevron pieces for one column direction pretty quickly by clamping a guide to my Miter Saw. That makes it easy to cut the chevron pattern pieces the same size
Once all of the chevron pieces for one direction are cut, flip the scrap wood guide to cut the pieces for the columns that go in the opposite direction.
How to Make Chevron Wall Art
Materials Needed
- 2 – 8′ long 1″x4″ dimensional lumber boards (I used Cedar)
- 1 – 8′ long 1″x2″ dimensional lumber boards for the frame
- 1 – 14 1/2″ x 24 1/2″ wide 1/8″ thick plywood or MDF for the back
- Miter Saw and Circular Saw
- Power Sander with 120-grit and 220-grit sandpaper
- Brad Nailer and 1″ or 1 1/4″ Brad Nails
- Wood Glue
- Clamps
- Poly Top Coat and a good nylon brush
Step One – Cut The Chevron Wood Pieces
Start by cutting a chevron pattern on your Miter Saw. Chevron boards have 45-degree angles on each end. The ends of each piece are cut in the same direction.
So, you can easily cut a bunch of pieces in a row without changing your Miter Saw settings.
Using a piece of tape to mark the Miter Saw fence or clamping a board to the Miter Saw fence will help you make sure each piece is exactly the same size.
DIY Tip: Always pick the straightest boards with nice crisp edges for wall art, to get the tightest fit between the pieces.
- Cut 12 – 6 7/8″ long Chevron pieces with the Miter Saw set to 45-degrees on the Right Side
- Cut 6 – 6 7/8″ long Chevron pieces with the Miter Saw set to 45-degrees on the Left Side
- Lastly, Cut 1 – 14 1/2″ x 24 1/2″ wide 1/8″ thick board for the back with a Circular Saw
Step Two – Cut Straight Lines At The Top And Bottom
Clamp a straight-edge board, level, or something to your work table or base. Line up your chevron pattern pieces the way you want them.
Once the pattern pieces are lined up straight and tight together, use a straight edge to mark cut lines across the top and bottom pieces.
Mark your line so that it’s only across 3 pieces, you want to leave the pieces in the next row full (uncut). Then, use your Miter Saw to cut the pieces on those lines.
Check out this post with tips for 4 Easy Ways To Safely Cut Small Pieces Of Wood On A Miter Saw, if you aren’t sure how to make these cuts safely.
Step Three – Sand Your Chevron Pattern Pieces
Now, it’s time to sand the pieces. Be sure to keep them in order, in case they aren’t quite square when put in a different order. Sand the top smooth with 120-grit sandpaper.
If using Cedar, lightly sand off rough spots on the sides and bottom. You don’t need the bottom smooth. You just want it to lay flat.
Be careful, over-sanding the sides could effect how tightly the pieces fit together. Using 220-grit sandpaper, sand the top again.
Then smooth the sharp corners on all 4 edges. This is my way of putting a rustic Chamfer edge on boards.
Step Four – Clean And Apply Top Coat
Wipe away all dust and splinters on each piece with a tack cloth or scrap cloth. Once each piece is clean, apply 3 coats of a good water-based polyurethane, like the one I used.
Be sure to let each coat dry completely before doing the next. And lightly sand with a 220-grit paper or block before the next coat to get the smoothest finish. Don’t forget to clean the dust with that tack cloth again too.
I applied the poly before painting to completely seal the wood and prevent paint from seeping into the wrong spots. Also, it brought out the grain of the wood in a nice way.
If you’re not painting, I still like to poly the pieces individually so that I can easily brush with the grain. And prevent a bunch of poly from building up in that Chamfer between the pieces.
When poly is applied too thick, it can dry with a cloudy white look. If it were to pool in between the pieces, you’d probably end up with that cloudy finish.
Step Five – Glue Up
With each piece sealed and dry, you can now glue them to the base piece of 1/8″ Plywood or MDF. Clamp your straight edge to the table top you’re working on again.
Clamp the second straight edge again, to form a 90-degree angle.
Place the base about an 1/8″ away from the 2 straight edges. It’s actually slightly smaller than all of the pieces will be. You don’t want the base wider than the pieces, because it will block the frame.
So, be careful to keep the base fully covered by the pieces on all 4 sides.
Squeeze a good amount of glue across the base. A good layer of glue will make sure each piece will have a strong hold. Start putting the pieces on the board with the row along the longest, straight edge.
You’ll have about 5 minutes or so to get the pieces lined up nice and tight before the glue starts getting too tacky to move easily.
Once all the pieces are lined up perfectly and tightly together, leave the DIY Chevron Wood Wall Art to dry. I left mine overnight, just to be safe.
Step Six – Frame It
Time to frame your wall art. Measure each of the short sides to get the exact measurement for the 1″x2″ frame for that side. Cut the wood, sand with 120-grit sandpaper and place it tightly against the art.
Once each short side is ready, measure for each long side. This time, include the width of the 2 short side frame pieces in the measurement. Cut and sand these pieces too.
You might want to paint, stain, or poly the frame before attaching it. It’s up to you, and what works with your design. If you’ll paint or stain the frame a different color than the chevron pieces, I’d do it before attaching the frame.
This’ll just make it easier to get full coverage on the frame without worrying about messing up the chevron pieces.
Before attaching the frame, place the Chevron board onto some 1/4″ scraps. This will reduce how far the frame sticks out from the Chevrons.
And it will also provide a 1/4″ deep gap across the back of the art, perfect for the hardware you pick to hang your Chevron art.
Glue and brad nail that frame to the Chevron board. Start with the short sides, then attach the long sides. Fill the nail holes with wood filler. I used Drydex Wood Filler.
Let it dry, then lightly sand it smooth with a fine grit sandpaper. Give that Drydex another 30-minutes to dry again, then patch or apply your finish.
Five More DIY Wood Projects For You
- How To Make Beautiful DIY Scrap Wood Wall Art (Easy Steps & Video)
- 28 Best Small Scrap Wood Projects With Easy To Follow DIY Steps & Videos
- Beautiful DIY Geometric Wood Table Top Design: Steps and Video
- DIY Coffee Table Makeover With A Cool Mosaic Wood Pattern: Steps and Photos
- Beautiful DIY Wood Mosaic Table Top Design: Steps and Video
Hang Your Chevron Wood Wall Art As-Is OR Add More Detail???
So, some of you might love this DIY Chevron Wood Wall Art as it is. If so, you’re done, yippee!!! Get that beautiful art work hung with a Sawtooth hanger.
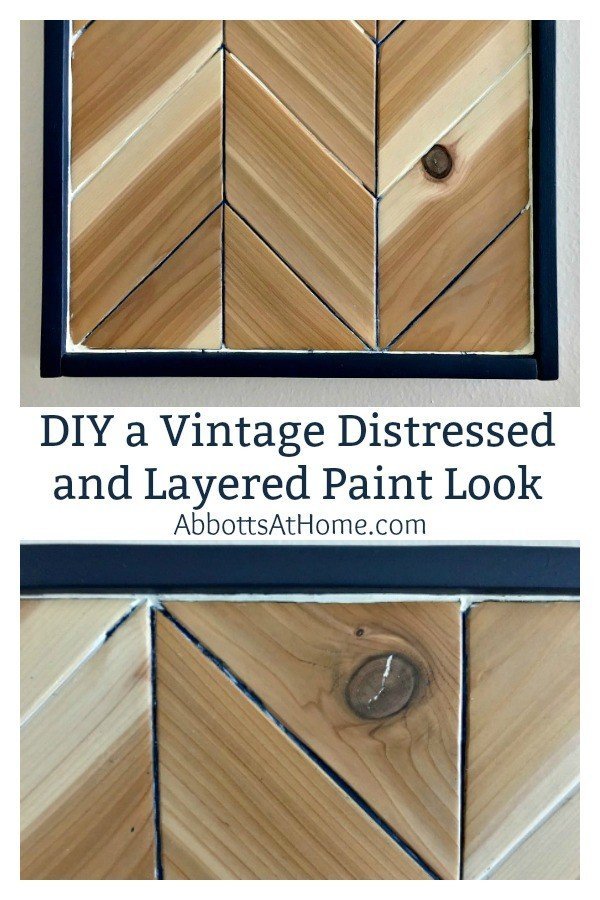
If you want to try the distressed, layered paint look I used in the chamfer, then follow the steps below.
Materials for the Distressed, Layered Paint Look
- A Selection of Artists Brushes to paint in the Grooves
- 2 or more different colors of paint
- Spray Polyurethane
- A Small, flat hand sander like the Gator Micro Zip or the Gator Sanding Sponge with the holder, I used
I was hoping to recreate the look of old wood art that has been stripped of years of layered paint. So, I wanted thicker paint in the grooves and edges. That’ll add to the look of paint that was in places that were too hard to remove.
Step One
First, I painted the frame dark blue and the groove all along the edge where the frame meets the chevron blue.
Don’t worry about paint pooling in places or moving into the grooves running away from the frame. This’ll add to the aged, distressed look.
Try not to get too much paint outside the grooves. It’ll just be less work for you later. After that dries, grab a damp rag and scrub the acrylic paint off of the face of the chevron pieces.
Don’t worry about the grooves too much. Just get the face of the DIY Chevron Wood Wall Art as clean as possible.
Step Two
Now, apply 2 coats of poly to the frame only. Make sure to allow it to completely dry between coats.
Step Three
Once the poly has dried. Wrap the inside of the frame with painters tape. I left about a 1/4″ ring exposed around the edges so that the white paint I used would form a pretty ring all along the inside of the frame.
Next, I used some of my homemade chalk paint, mixed from Behr’s Polished Pearl Eggshell Latex, to fill in a thick layer all along the outside edges and all of the rest of the grooves in the chevron.
As you work in small sections, use damp paper towels to wipe the chalk paint off the face of the boards.
You’re going to have to be extra careful here. Use a small artist brush to keep as much of the paint in the grooves, as possible.
I started with a foam brush and switched to an artists brush after the first coat. You want quite a bit of paint in the grooves, but not too much on the boards.
Chalk paint won’t scrub off of those poly’d chevron pieces, like acrylic did. But don’t panic if you leave some chalk paint on the chevron pieces.
The 3 layers of poly you applied to them earlier will protect them when we gently sand the chalk paint off.
Step Four
After the chalk paint fully dries, check out your grooves, do they need another coat of chalk paint to get a nicer look?
I used more of that Drydex Wood Filler in a few of the grooves between the Chevron pieces that had gaps and lines showing up in the chalk paint.
Use a nice rubber straight edge to push the Drydex into the grooves, without overfilling them. Then wipe that smooth with a damp cloth. Let that dry. Then apply a second coat of chalk paint where needed.
Step Five
When the white layer of chalk paint is dry and looks finished, remove the painters tape from the frame around the Chevron Wall Art.
Then use a fine grit sandpaper, like 220, to gently scrub the chalk paint off of the face of the boards and a bit into the grooves to remove the paint around the top of the groove edges.
ry to sand in the direction of the wood grain, so that the scratches in the poly won’t be too obvious. I vacuumed the dust away and wiped everything clean with a slightly damp cloth again.
Step Six
To finish up, I used that artists brush again to add some of that blue acrylic to some of the grooves that ran across the Chevron wood pieces.
I dotted it in a couple of random places and let it run into other grooves in the corners where a few chevron pieces meet. This just added to the aged, imperfectly distressed look.
AND, I touched up the line of white paint along the frame to get rid of spots where the white paint bled under the painters tape. Then I let it dry for a couple hours.
Step Seven
Once dry, wipe away any excess blue paint with a damp cloth again. Do any last bits of sanding to get a look you’ll love with this distressed, layered paint finish.
Wipe away any dust and clean your wall art before applying a final coat of poly.
NOW, I will warn you, acrylic paint can be easily brushed off of a poly’d surface when brushing on another coat of poly. I recommend a spray poly for this last step. Spray the whole piece, then your done.
Time to happy dance!
More DIY Projects For You
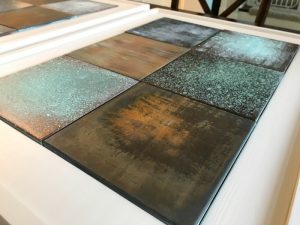
Or, have a look at how to faux paint 20 different metal patina looks.
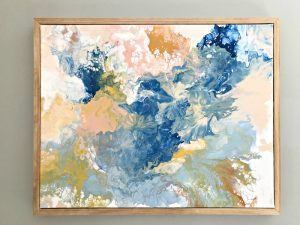
I love this beautiful DIY Acrylic Paint Pouring Wall Art tutorial.
Feeling inspired? Now you know make this DIY Chevron Wood Wall Art. Have fun and let me know if you have questions.
Don’t forget to sign up for the Abbotts At Home email newsletter to get DIY, Remodeling, and Crafty ideas in your inbox.

Stephanie Abbott has been remodeling homes, updating & building furniture, and working on DIY home maintenance and cleaning tips for over 20 years. Her remodeling has been featured in Better Homes and Gardens Magazine. And, her DIY YouTube channel has had more than 8 million views.
Most of the DIY tutorials and videos on this site focus on beginner to intermediate level DIY Projects that can be done in an affordable way without high-end, expensive tools. All of the cleaning tips on this website have been tested in her home.