
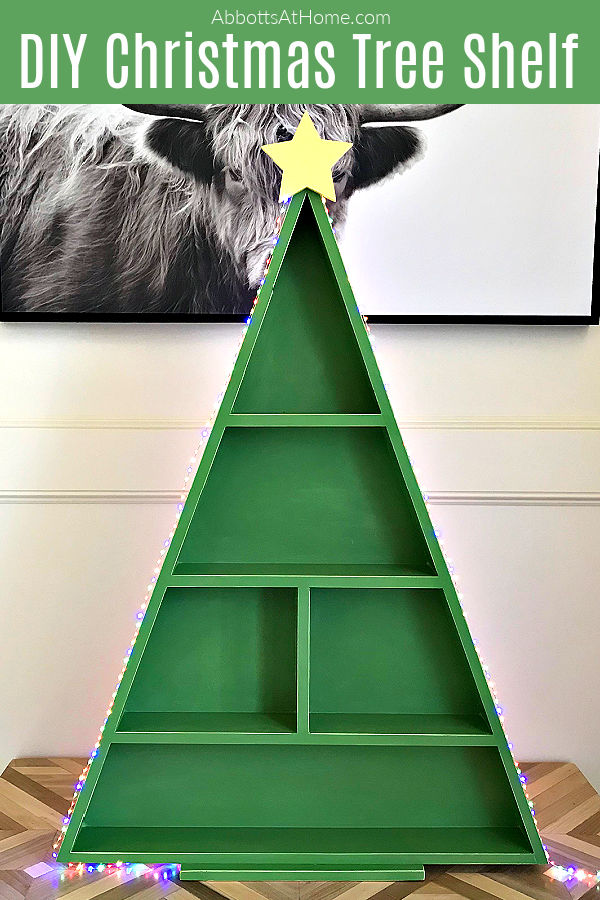
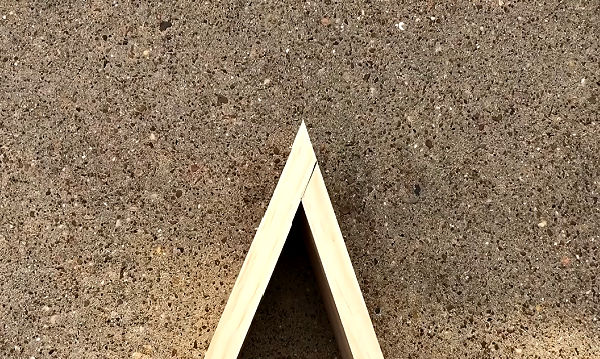
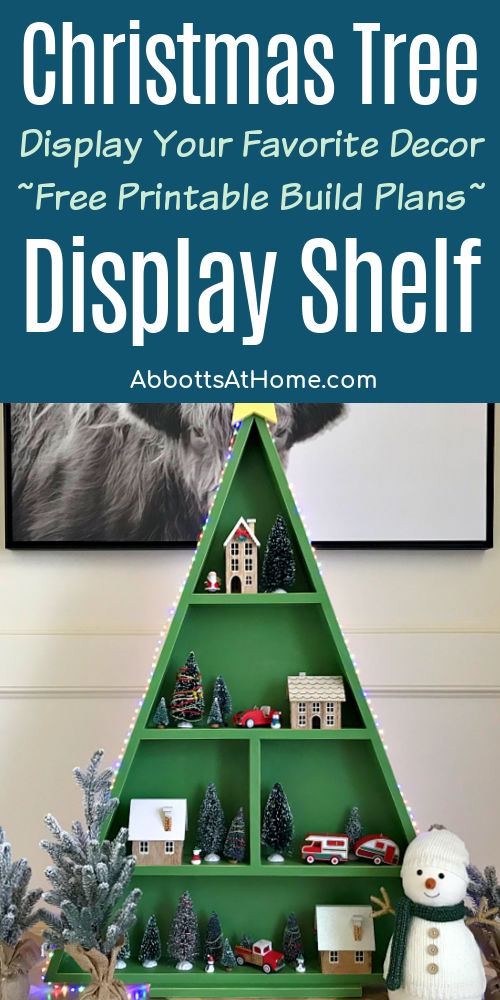
I’m loving this DIY Wooden Christmas Tree Shelf! It’s a great display shelf for Cocoa Bars, Christmas Villages, Christmas Cards and ornaments.
DIY Wooden Christmas Tree Shelf
I’m loving this fun way to display all of my favorite Christmas decorations.
This Wood Christmas Tree Shaped Shelf is a great display for Cookies & Cocoa Bars, Christmas Villages, Advent Calendars, Christmas Ornaments and more.

I designed this to be extra big so that I can use it on a buffet or table top and in front of our fireplace. BUT, you can use the exact same angles from this build to make a DIY Wood Christmas Tree Shelf of any height.
Go bigger for a front porch tree. Or, go smaller for a version that fits on the kitchen counter or in a bedroom. There are so many ways to customize this build!
The plywood backing is optional. You can paint or stain this Christmas Tree Shelf to match your Christmas style and decor. You can use a different type of wood. And, you can even build a deeper shelf than mine.
I used 1×4 Select Pine. But, you can use 1×6, 1×8,1×10, any size you’d like. Pick the size and options that work best for your décor.
I have FREE PRINTABLE BUILD PLANS available at the end of this post. Grab those for your garage to make this DIY Wood Christmas Tree Shelf build as quick and easy as possible.
Instead of babbling on, let’s start building this Christmas Tree Display Shelf build. 🙂
What You Need
- Wood Glue & Wood Filler
- Brad Nailer & Brad Nails
- 2×4 Sheet of Luan Plywood
- 5 – 4′ long 1×4 boards
- Miter Saw
- Circular Saw
- Sandpaper
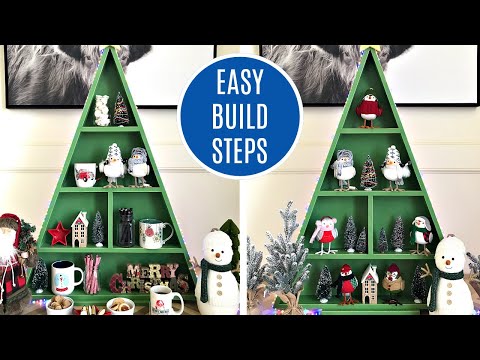
Christmas Village Display Shelf Build Video
If any of the steps for this DIY Wooden Christmas Tree Shelf are confusing, I highly recommend watching the short video. Hopefully seeing it done can help clear up any confusion.
DIY Wooden Christmas Tree Shelf Steps
First, let’s talk about the angles you need to cut to make this Christmas Tree Shelf.
The angles I used can be used to make any size wood Christmas Tree with the same proportions as the one I built. Just be sure to subtract 1 3/16″ inches from the long side.
Also, be sure to get the printable diagram to make the build easier to understand. It’s available at the end of these directions.
Step One
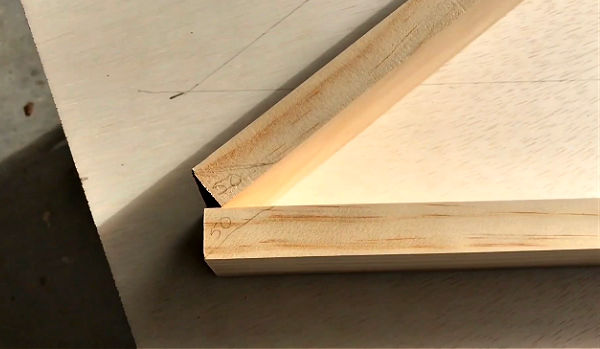
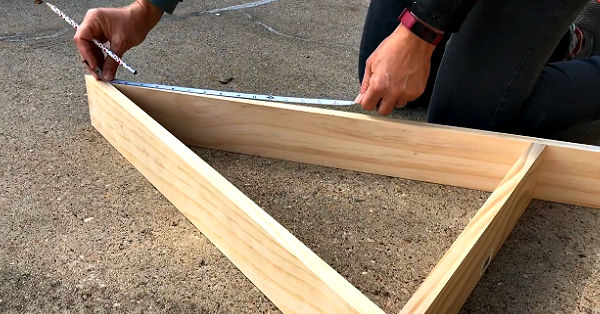
Cut a 50 degree angle out of the end of 2 of the 4′ long boards.
I used my Miter Saw to make all of my cuts. If you don’t have a Miter Saw or will be building with wider lumber, you can use a table saw and a slide to cut your angles.
Then match the pieces up so that it’s easier to see which direction to make the 20 degree angle cuts. Mark the long side with a number 1 in pencil. So that you don’t mix them up later.
Step Two
Then mark the way the angles should go with a pencil. I think this makes it easier to keep the angles straight when you move the boards to your miter saw.
Cut the 20 degree angle out of the longer side of the DIY Wood Christmas Tree Shelf.
Then measure that longer side. If you were able to keep it 48 inches long, then the second side should be cut at 46 13/16″ long (48″ – 1 3/16″).
If your long side isn’t exactly 48″, no worries. Just take the length and subtract 1 3/16″ to get the length for your shorter side. Mark and cut the 20 degree angle for your shorter side based on the length it should be.
When you match up the longer and shorter sides to make the DIY Wood Christmas Tree Shelf they should be the exact same length from the tip of the longer side. If that sounds confusing, watch the build video to see what I mean.
Step Three
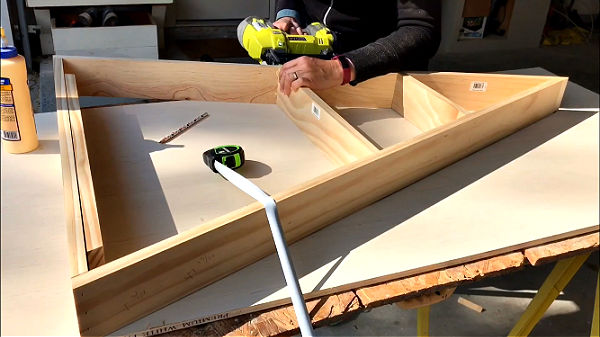
Next, let’s cut the shelves. Each shelf will also have a 20 degree angle cut out of each end.
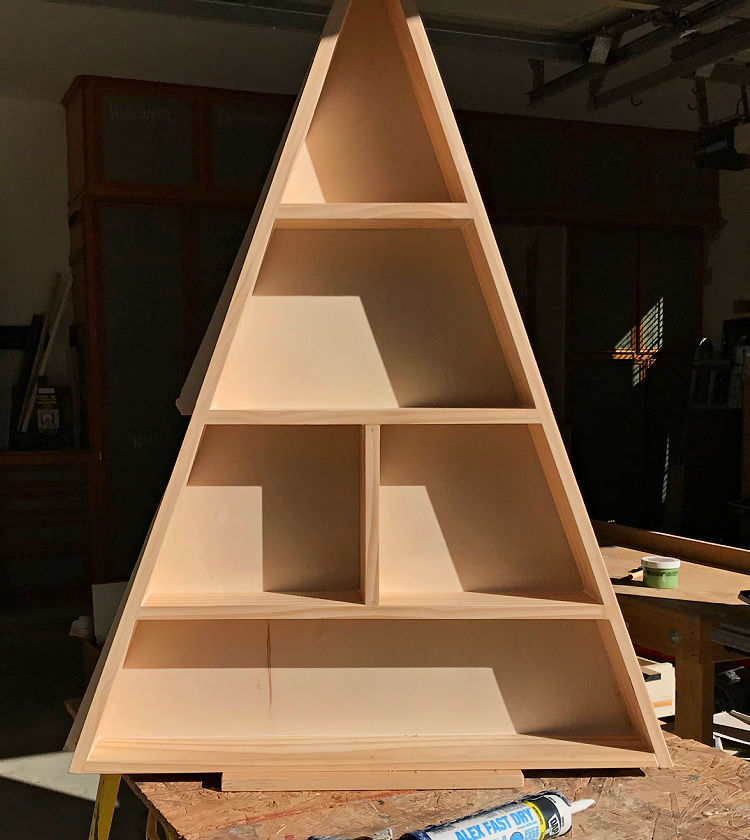
I cut my shelves at 9 1/2″, 17″, and 24 1/2″ wide across the top of the shelf.
The divider I put center on the second shelf up about 9 1/2″ long. BUT, I suggest not cutting this piece until the rest of the DIY Wood Christmas Tree Shelf is assembled. That way you can get an exact measurement after assembly.
Step Four
Now that you have the 2 sides and the 3 shelves cut, we can start assembling the pieces.
Start by using wood glue and a brad nailer to connect the 2 sides. Be sure that you are using the piece you marked with the number 1 as the top piece when lining up the angles. Line up those 50 degree pieces perfectly before nailing.
Once those are glued and nailed. Measure each side from the tip of the tree to double-check that the sides are the exact same length. If they aren’t, your tree will look crooked.
Step Five
Then glue and brad nail the shelves into place. Measure from the center point of the inside of the tree, on each side of the tree, to make sure the shelves are the same distance from the center.
That will make sure they are straight and level before assembling.
Step Six
Once the 3 shelves are attached, measure the length of the opening at the bottom of the DIY Wood Christmas Tree Shelf to cut the perfect size for your tree. You’ll use those 20 degree cuts on each side again.
Glue and brad nail the bottom onto your Christmas Tree Shelf.
Step Seven
Now you can add the vertical divider onto the second shelf up from the bottom. Measure the opening to cut the board to size. Then glue and brad nail it into place.
Step Eight
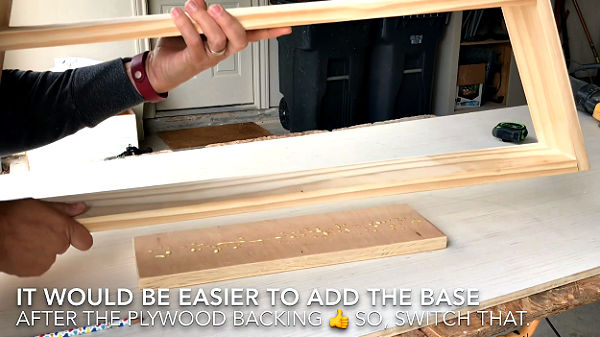
I was able to use 1 piece of 2’x4′ long Luan plywood as the backing on my tree. To do this I traced the tree with pencil for the bottom 2 shelves from the far side of the Luan. And cut that out with my circular saw.
Then I used the leftover to cut the rest of the backing, hiding the seam behind a shelf.
I used my router to trim the plywood flush with the sides of the tree. So, I cut the plywood about 1/4″ wider than I needed.
If you don’t have a router, you can cut your plywood about 1/4″ inside the lines you mark for the sides to make the plywood less obvious.
Sand the front facing side of the plywood with 120 to 180 grit sandpaper. Then, use glue and 3/4″ long brad nails to attach the plywood back.
Step Nine
The last step is to add a base to the shelf. It’s optional but I think it adds more detail and looks nice. I used scrap wood for mine. You can use a 16″ long 1×6 instead.
Glue and Nail it to the center of the base of the DIY Wood Christmas Tree Shelf.
Painting My Christmas Tree Shelves
I used wood filler on all of the brad nail holes on the sides and shelves of my DIY Wooden Christmas Tree Shelf. Once that dried, I sanded the the wood filler smooth and sanded the entire piece with 180-grit sandpaper.
I also like to knock the sharp edge off of all corners. I think that slightly rounded edge looks better. But, go with whatever you like.
After cleaning off all the dust, I painted everywhere with 2 coats of a green chalk paint that I custom mixed. You can find a nice selection of affordable chalk paint colors at somewhere like Hobby Lobby.
Or, you can mix your own DIY Chalk Paint from Latex Paint. Using latex paint to make wall paint makes it easier to get a color you love and it’s generally cheaper than store-bought chalk paint.
After painting, I distressed the corners with a light sanding with my little Gator Micro Zip and Coarse Sandpaper. Then cleaned the dust off again and sealed the Christmas Tree Shelf with 2 coats of a water-based poly.
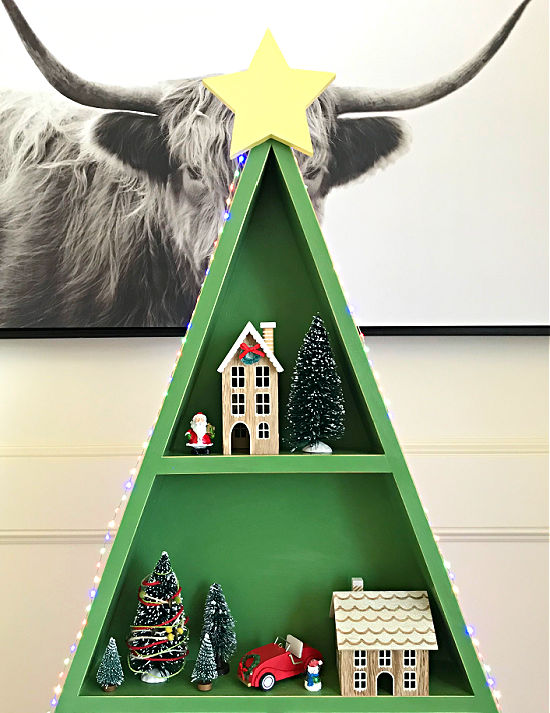
I also added a wooden Christmas star ornament to the top of my tree with a string of mini LED lights.
Ways to Use this Christmas Tree Display
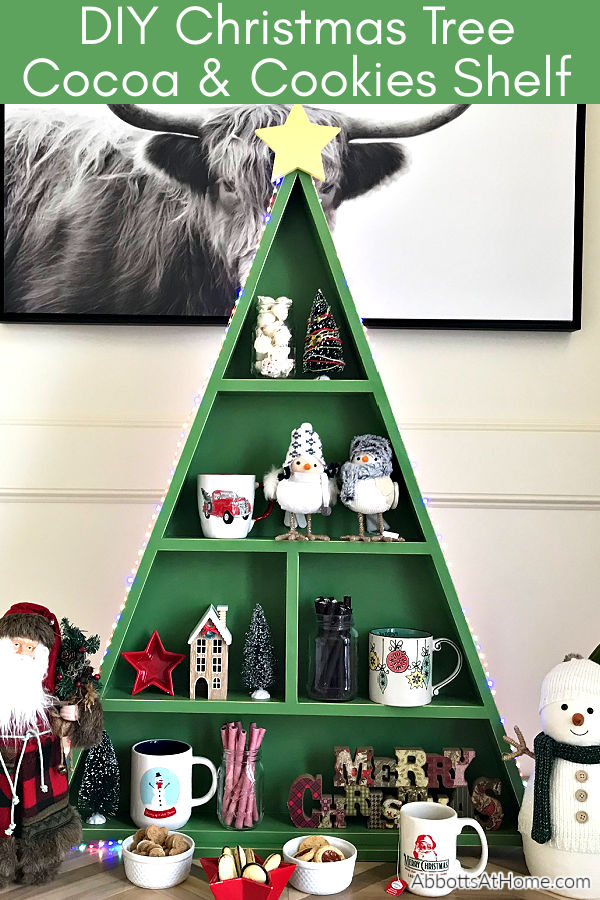
DIY Christmas Hot Cocoa and Cookies Bar
This DIY Wood Christmas Tree Shelf makes a fun cookies and hot chocolate bar for family parties. Just fill the shelves with Christmas mugs, cookies, and all the fixings for hot chocolate.
I think I’ll set this up on Christmas Eve morning and just let my kids have 2 whole days of making their own hot chocolate and cookies. They’ll LOVE it! 🙂
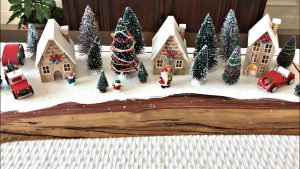
DIY Christmas Village Tree Display Shelf
I’ve been setting up my own Red Truck Christmas Tree Village in different ways every year. It started with this small little table top version of the DIY Red Truck Christmas Decor Idea. Last year, I went for a big DIY Red Truck Centerpiece display that I absolutely loved!
This year, I’m loving all of that nostalgic Red Truck Christmas Village goodness on this DIY Wood Christmas Tree Shelf. Each section or shelf is it’s own little scene.
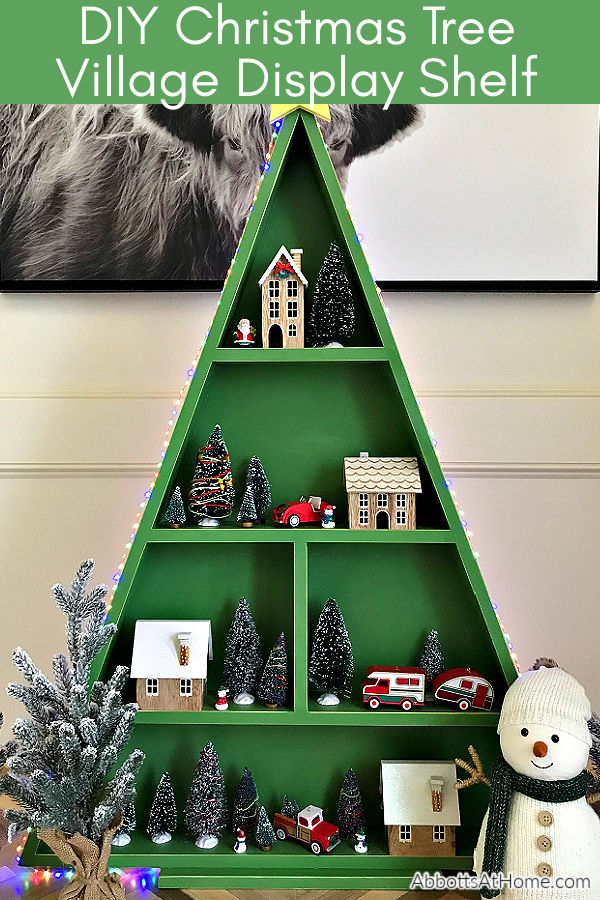
My son thinks it would be cool to have each section show a different scene of Santa making and delivering toys. That would be so cute. I’ll have to see if I can find something like that for next year.
If you have those great little Christmas Village scenes and want to use this as a display for them, measure how deep they are. Then use the right depth dimensional lumber to build this Christmas Tree Shelf to display your village.
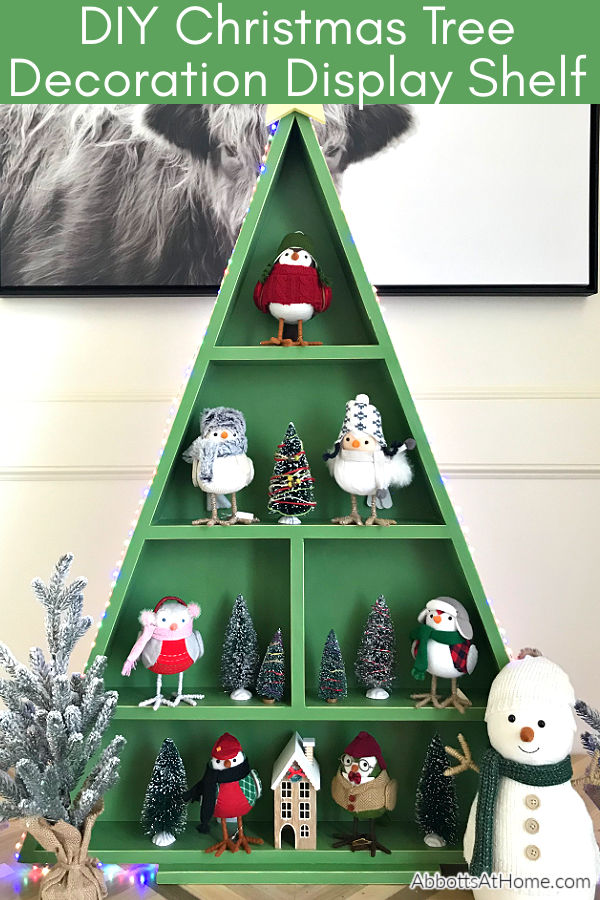
DIY Christmas Decor Display Shelf
I’m a sucker for all of the cute Christmas décor Target comes out with every year. Those sweet Christmas birds are one of my favorites from Targets Christmas line. They have new versions of them every year.
This shelf is a great way to set up a collection of favorite Christmas decorations, like these birds. I’d love a Christmas Snow Globe display on this shelf too.
DIY Advent Calendar Display Shelf
I built this too late to use it as an advent calendar this year. But, next year I’ll be lining these shelves with cute little numbered boxes and bags to use as an Advent Calendar display for my boys. I’ll be sure to share a pic of that next year.
That’s it, guys. Grab the plans below, have fun building. And, Merry Christmas!
Hello, DIY friends! You can download the free printable DIY Christmas Tree Shelf plans here. These plans are for personal use only. They cannot be shared or sold without my permission. Please let me know if you have any questions and enjoy your build! 🙂

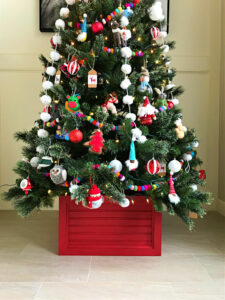
You might also like this Beautiful DIY Christmas Tree Box Stand. Looks great under your tree AND stores your ornaments the rest of the year.
Looking for more homemade Christmas Inspiration? I have 40+ DIY Christmas Projects, Crafts, and Home Decor Ideas in one big Christmas-y post.
You might also like this great DIY Red Truck Christmas Table Centerpiece.
Check out my favorite Vintage Christmas decoration ideas on Amazon too.

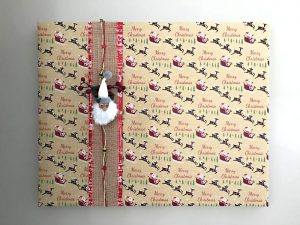
Here’s how to wrap a picture frame with wrapping paper for an easy Christmas update.
And, this DIY Table Over Washer and Dryer is one of my favorite builds.

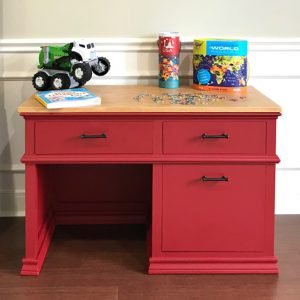
If you need a great little desk for your elementary age kids. Check out this DIY Childrens Desk with Storage Drawers.
Feeling inspired? Now that you’ve read the steps for this DIY Wood Christmas Tree Shelf, you can do it too. Let me know if you have questions.
Don’t forget to sign up for the Abbotts At Home email newsletter to get DIY, Remodeling, and Crafty ideas in your inbox.

Stephanie Abbott has been remodeling homes, updating & building furniture, and working on DIY home maintenance and cleaning tips for over 20 years. Her remodeling has been featured in Better Homes and Gardens Magazine. And, her DIY YouTube channel has had more than 8 million views.
Most of the DIY tutorials and videos on this site focus on beginner to intermediate level DIY Projects that can be done in an affordable way without high-end, expensive tools. All of the cleaning tips on this website have been tested in her home.