
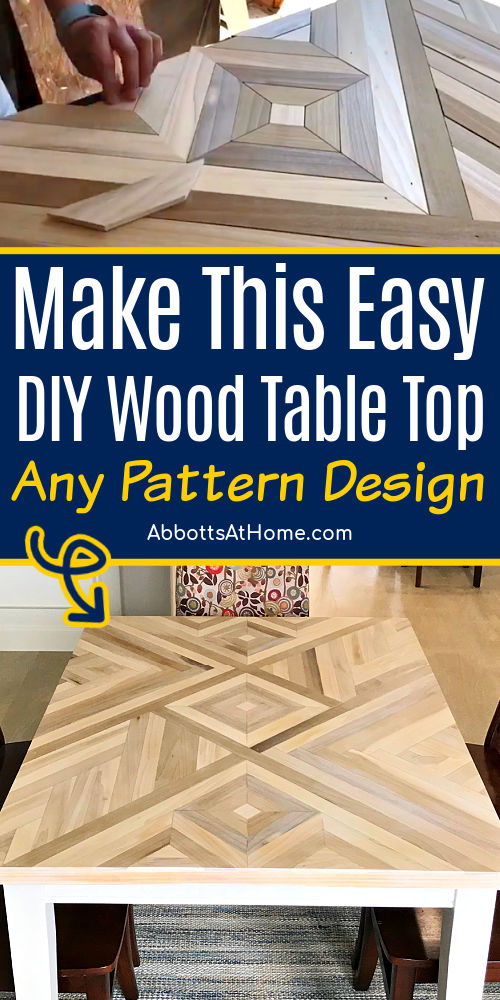
Easy To Follow Steps & Video for this beautiful DIY Geometric Wood Table Top Design. Use Poplar, Oak, Reclaimed Wood, Cedar, and more.
DIY Geometric Wood Table Top Design
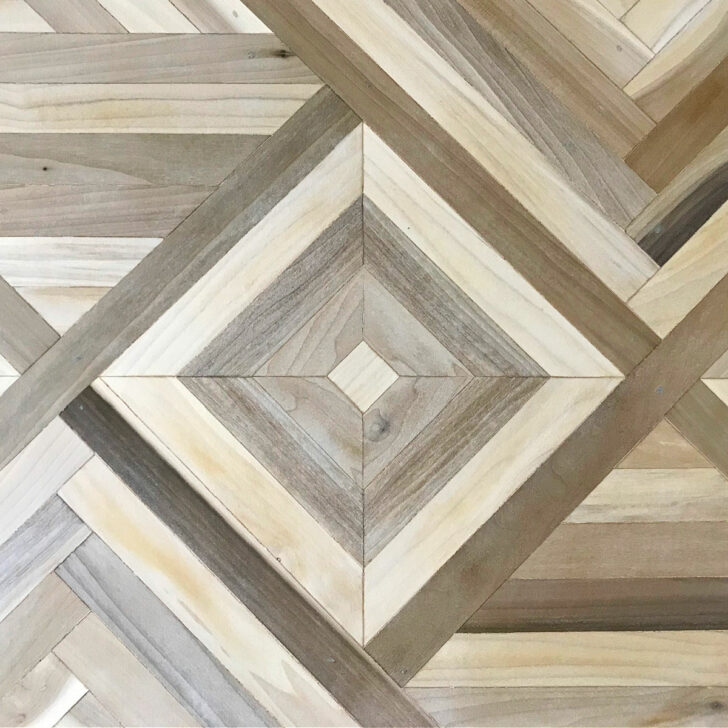
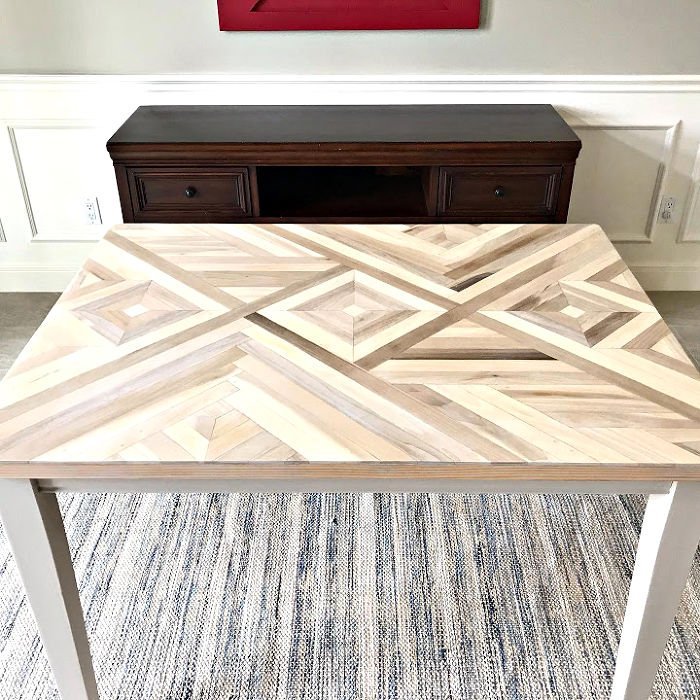
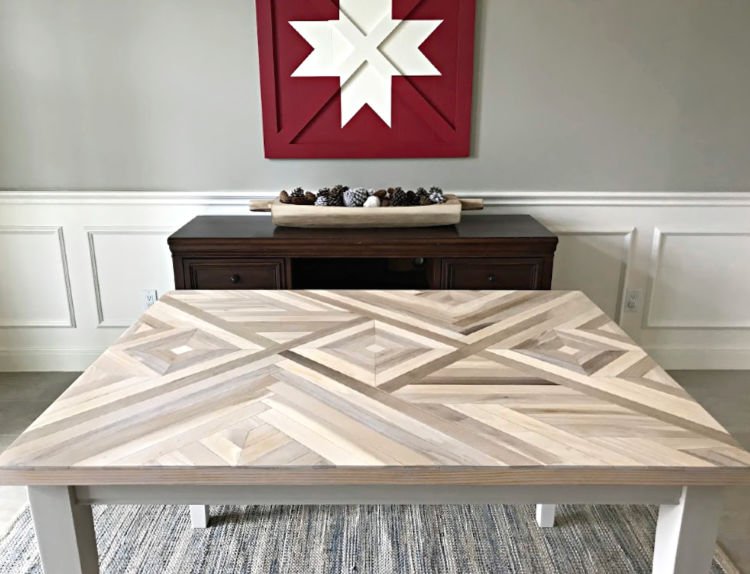
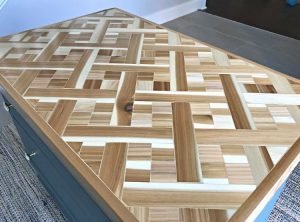
Last month I shared the how-to steps for a DIY Cedar Mosaic Tabletop. I loved that one so much that I just had to give our old kitchen table a new look with this DIY Geometric Wood Table Top using Poplar.
Cedar and Poplar dimensional lumber are both available in Lowes and Home Depot, so they’re easy to find. And, they both have great variations in color and grain, which adds beauty to any design.
Now let’s talk about how I made this DIY Geometric Table Top Design. 🙂
Supplies Needed
- 1/4″ x 2″ Poplar Craft Boards or Another Type of Wood
- A Miter Saw and a Power Sander with 120 and 180 grit sandpaper
- Titebond 2 Wood Glue or similar
- Flush Trim Router Bit
- General Finishes Flat Out Flat
- White Chalk Paint mixed with water
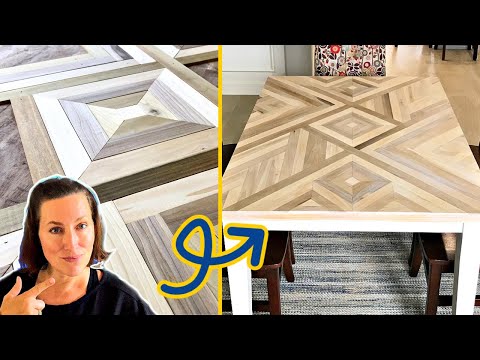
DIY Wood Table Top Build Steps
Watch this video to see the exact steps I used to make this DIY Geometric Table Top Pattern. All of the steps are shown in the video. Scroll down for build tips.
4 Tips for this DIY Wooden Table Top Design
Tip One – Pick The Right Base
I recommend that you use a plywood or MDF board as the base for your table top, even if you have to make it.
I have had this table for 8 years, so I know it doesn’t have wood movement issues. And, it’s a veneered plywood or MDF.
Most table tops screw off of the legs. So, if you don’t already have a plywood or MDF table top, you can always use the legs on your table and replace it with a new plywood or MDF base for this project.

Tip Two – Use Enough Glue
Make sure to use enough glue. You want a lot really. I have gotten so used to gluing the pieces that I can tell by looking that the glue I put on will spread across the entire bottom of the piece.
But, I realize you can’t tell that I’m doing that in the video. So, make sure to use enough glue to cover across the bottom of the board.
You might want to spread it across the board with something like this wood glue roller. If too much of a piece doesn’t have glue, it could pop or warp.
Tip Three – Plan Your Design Before Making Cuts
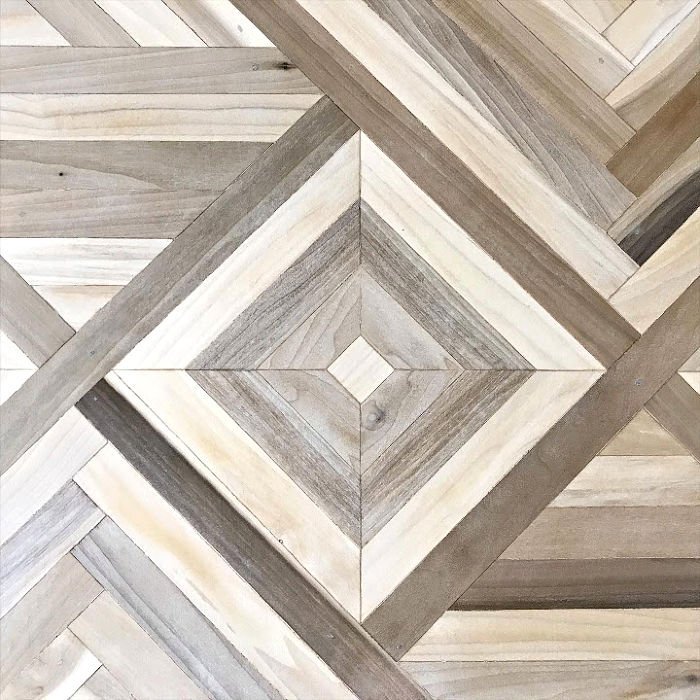
Designing the layout for your DIY Geometric Wood Table Top is half the fun. Make sure you plan the layout in sections before you make the cuts.
I like to lay the boards on top to help me picture whether or not I like the design. I try to avoid making small, awkward looking cuts by changing the direction on pieces before a row can end on a small piece.
You can find 4 Tips for How to Safely Cut Small Wood Pieces on a Miter Saw in another post.
Tip Four – Use Epoxy As The Filler
The final tip is to use epoxy resin over the wood and wood filler, or even instead of the wood filler.
The epoxy is another way to keep the wood and wood filler from shifting during expansion and contraction of the wood.
One of the wood fillers I used for a similar project raised slightly above the wood, in a couple of spots. I didn’t use epoxy resin on that table.
I think pouring a layer of epoxy resin over the entire surface after using wood filler and sanding the table top smooth and clean would prevent most, if not all of that movement.

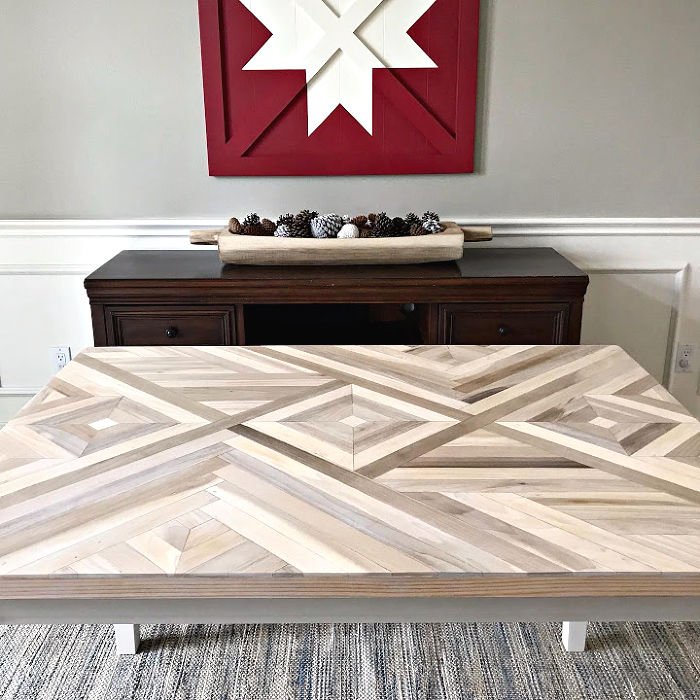
Update: This DIY Geometric Wood Table Top has been in my kitchen for almost 4 years without any wood movement or wood filler issues. I’m sure the epoxy I used on it has something to do with that. 🙂
More Pictures of this DIY Wood Table Top Design
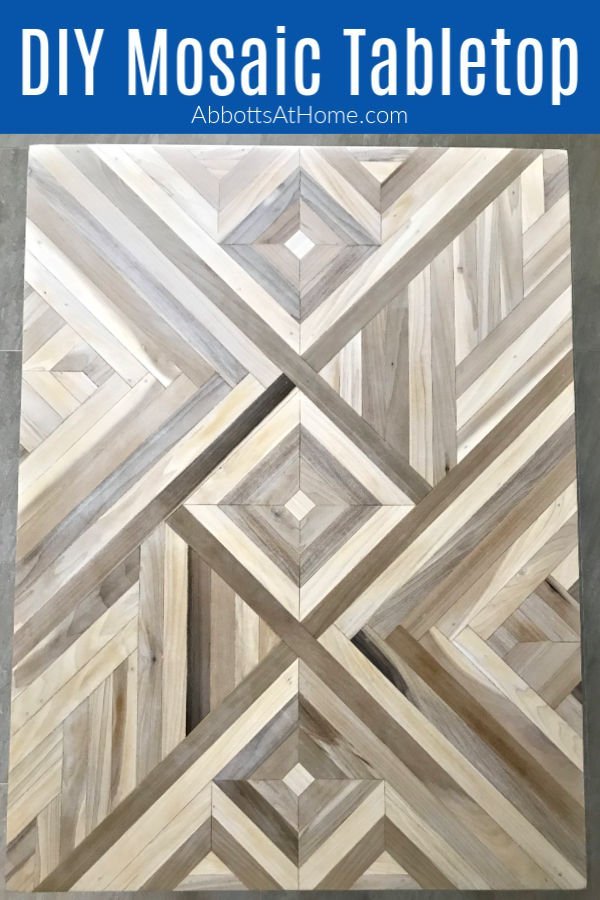
Planning the layout before you make cuts and glue the boards down is the key to getting a DIY Geometric Table Top design you love.
I used Amy Howard Chalk Paint in Linen on the table base. Then, I used Amy Howard Spa White as the 50/50 mix with water to whitewash this DIY Geometric Wood Table Top.
I think the next time I make one of these geometric wooden designs, it’ll be to make wall art or a headboard.
You Might Also Like These DIY Projects
- How To Make Beautiful DIY Scrap Wood Wall Art (Easy Steps & Video)
- Easy DIY Chevron Wood Wall Art Tutorial: Steps and Video
- 28 Best Small Scrap Wood Projects With Easy To Follow DIY Steps & Videos
- How To Clean Kitchen Cabinets: 3 Best & 3 Bad Cleaners For Cabinets
- 10 BEST Ways To Add Height To Kitchen Cabinets (So Many Beautiful Options)
You can see more of this DIY Mosaic Wood Table with build steps and tips in a previous post.
Or, another Cedar wood project that I’m all heart-eyes about. This DIY Outdoor Sofa from 2×4 and Cedar is beautiful!
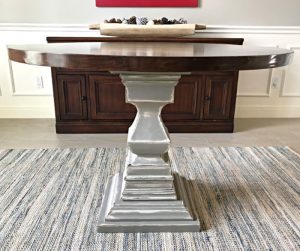
This DIY Round Kitchen Table Pedestal with it’s DIY Round Plywood Table Top is a beautiful looking woodworking project.
And, this DIY Table Over Washer and Dryer – Laundry Table is one of my favorites.

Feeling inspired? Now that you’ve seen this DIY Geometric Wood Table Top tutorial, you can do it too. Let me know if you have questions.
Don’t forget to sign up for the Abbotts At Home email newsletter to get DIY, Remodeling, and Crafty ideas in your inbox.

Stephanie Abbott has been remodeling homes, updating & building furniture, and working on DIY home maintenance and cleaning tips for over 20 years. Her remodeling has been featured in Better Homes and Gardens Magazine. And, her DIY YouTube channel has had more than 8 million views.
Most of the DIY tutorials and videos on this site focus on beginner to intermediate level DIY Projects that can be done in an affordable way without high-end, expensive tools. All of the cleaning tips on this website have been tested in her home.