
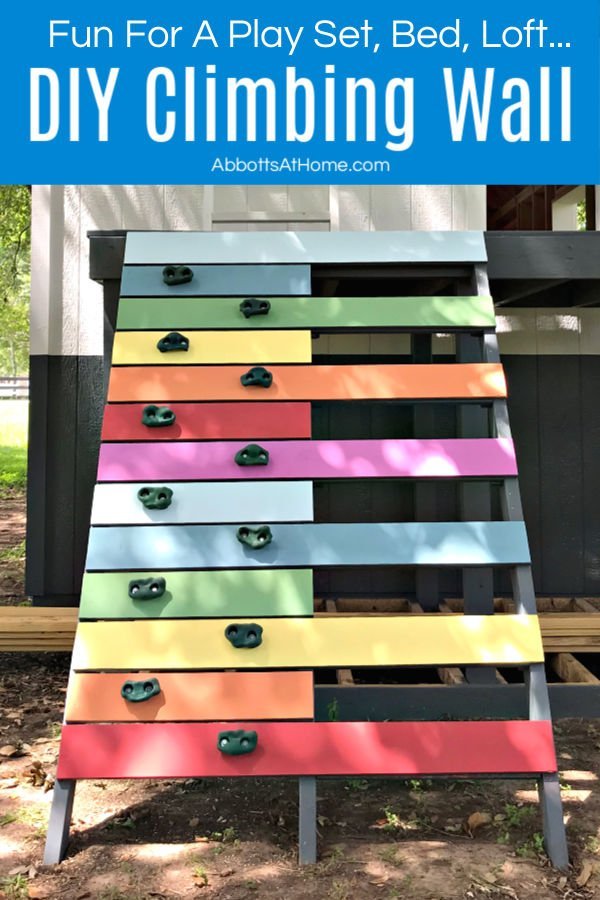
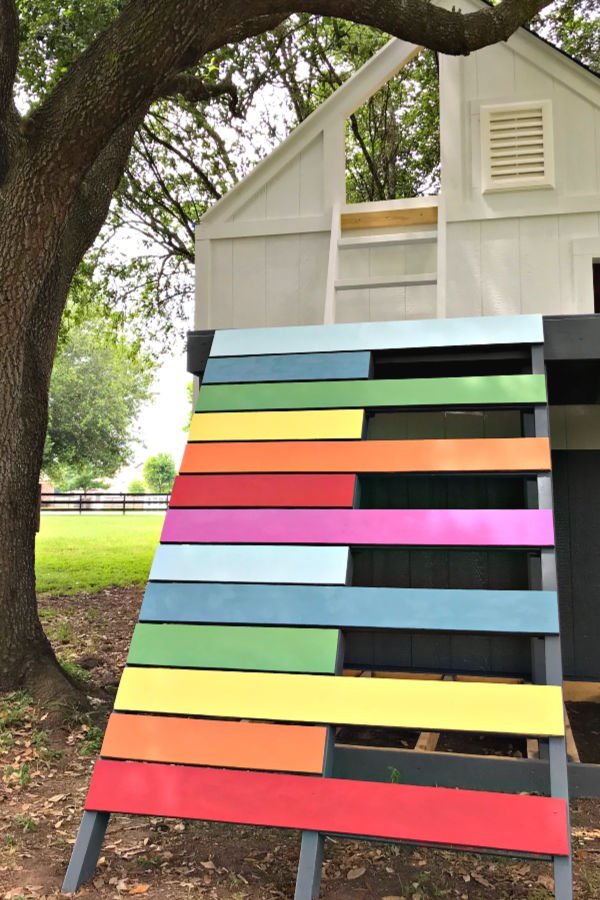
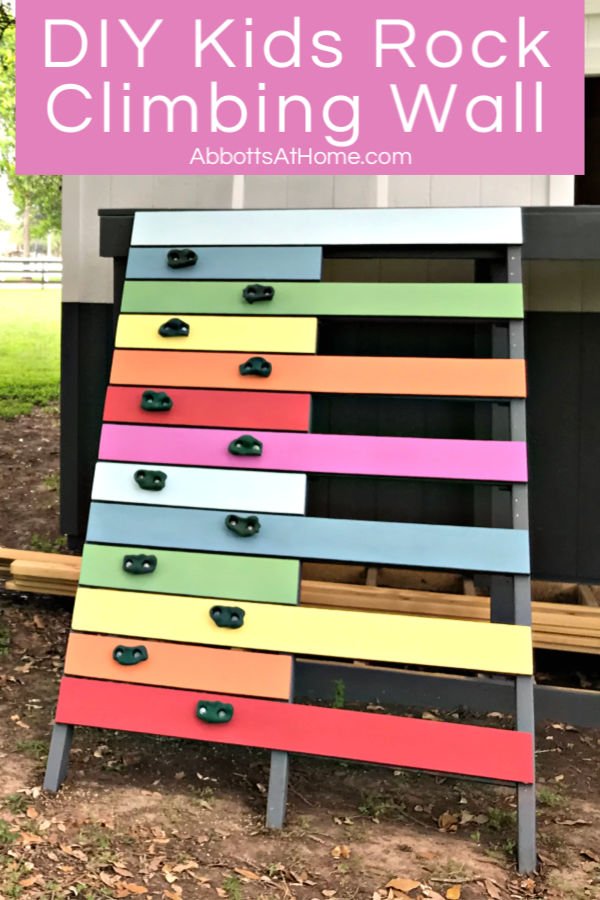
Build a FUN kids rock climbing ramp for your backyard playset or playhouse. With easy to follow DIY steps, pictures, and build video.
How to Make a Kids Climbing Ramp
Hi guys! Lately, I’ve been busy building my kids a huge playhouse with an upper tree house deck and lots of fun backyard play set elements.
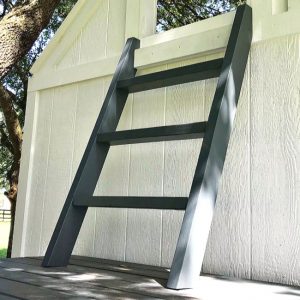
Today, I’m going to show you how to make a kids climbing ramp or wall with an easy to use ladder on one side and climbing rocks on the other.
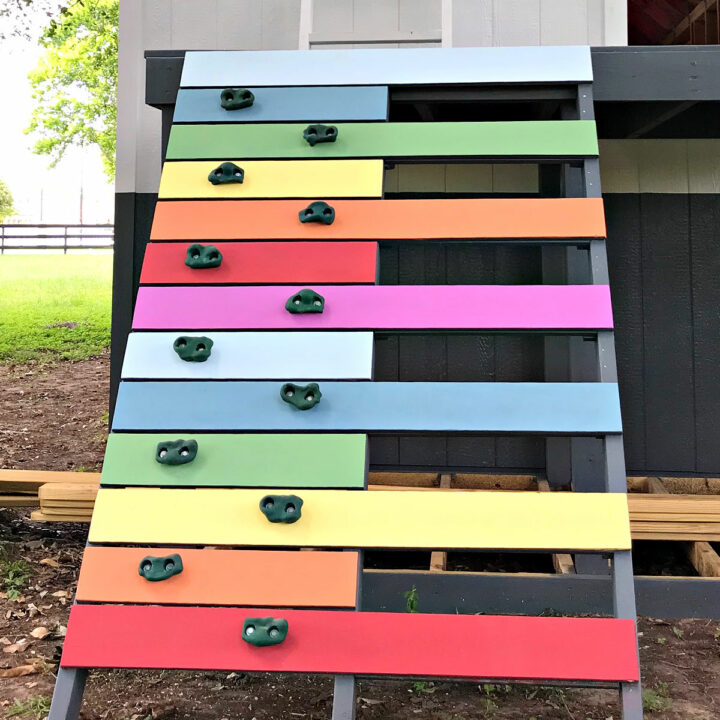
You can build this as a climbing ramp with an easy to climb angle, like mine. Or skip the angles, to build a kids rock climbing wall for your backyard play set or playhouse.
I love the ladder side of this climbing ramp. It makes getting to the top of this playhouse super easy for grown ups, like me. 🙂
Now, here’s how to make a kids climbing ramp or wall for your backyard play set, fort, or playhouse.
What You’ll Need
- Frame Supports: Pressure-Treated 2×4’s or Exterior Cedar 2×4’s
- Ramp or Wall Boards: Pressure-Treated 2×4’s, Exterior Cedar 2×4’s, Pressure Treated 3/4″ Plywood Strips (what I used), or similar strength, exterior-grade lumber
- Climbing Rocks
- Deck Paint or Stain
- Chalk Paint to Add Color
- Self-Tapping Deck Screws
DIY Kids Rock Climbing Wall
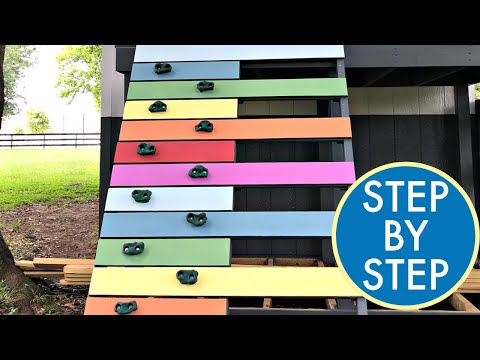
Watch this short video for a quick walk through of how to make this kids rock climbing ramp for your backyard playhouse or even indoor playroom. 🙂
Backyard Playset Climbing Ramp Build Steps
Cut the First Angles for your Climbing Ramp Frame
To make a kids rock climbing ramp, you start by cutting your supporting frame 2×4’s. I avoid calculating angles for this climbing ramp with a few easy tricks.
You can see me explaining these steps in that how to video above, watching that video should make things easier to understand. 🙂
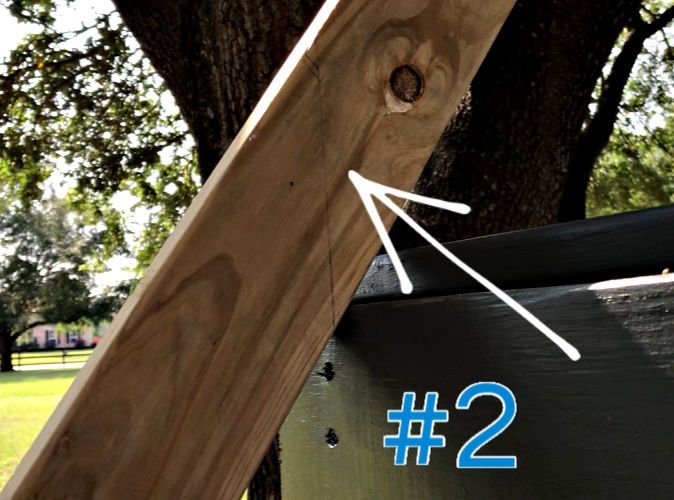
First, I set one 2×4 against the spot where I’ll be attaching it, to pick the slope I want my climbing ramp to have.
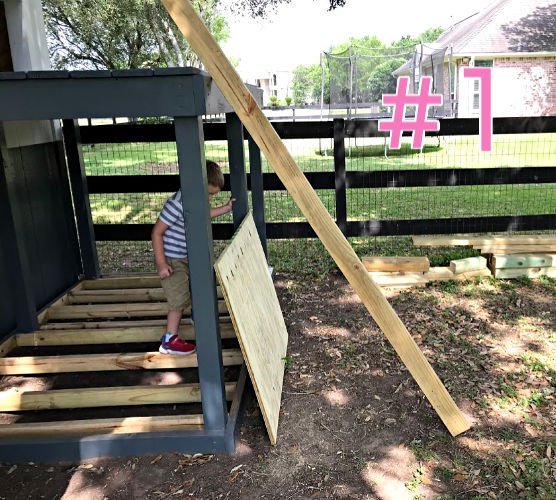
Once I have a slope I like, I hold a flat board or spirit level against the face of the board I’ll be attaching my climbing ramp to. And, I mark that straight line with a pencil.
This marks the EXACT ANGLE you picked without making any angle calculations. Yay!
And, it leaves extra length on the other end of the board to use a similar trick to find that angle.
Now, on to the next step to make a kids backyard rock 0climbing ramp.
Cut that first angle you just marked, then put it back up against the spot where you’ll install it.
Mark and Cut the Next Angle
Measure how far the very top of that board sits above where you want it.
Use that measurement to find how much to cut off the bottom.
So, if it sticks 5″ above where you want it to stop, you MIGHT want to remove 5″ from the bottom.
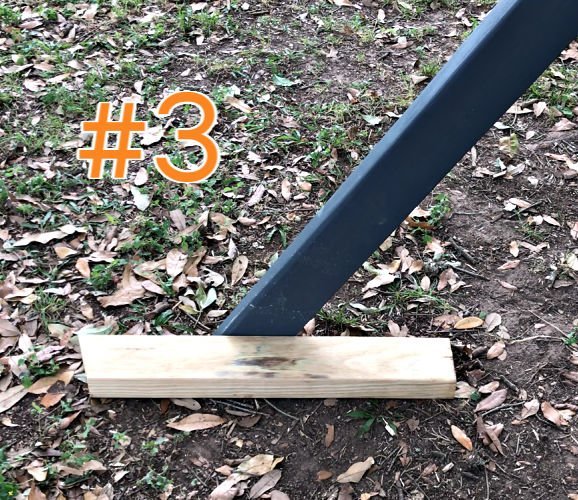
You can do that by laying a couple boards stacked up on the ground and marking your angle.
If your boards are 5″ high, you can cut that line. If the boards are shorter, just add the difference and transfer that exact line up the board .
BUT, INSTEAD OF CUTTING the full 5″, you might want to just cut a few inches off and recess 2″ into the ground.
That’s the easiest way to make a kids climbing ramp level with the ground without worrying about whether or not one side needs to be longer than the other.
You can use that 2×4 as a template to cut your next 2 – 2×4 frame supports.
If you want a vertical kids climbing wall with this design instead, it’s easy. Skip the angles and just cut 3 – 2×4 boards to the correct height for your space.
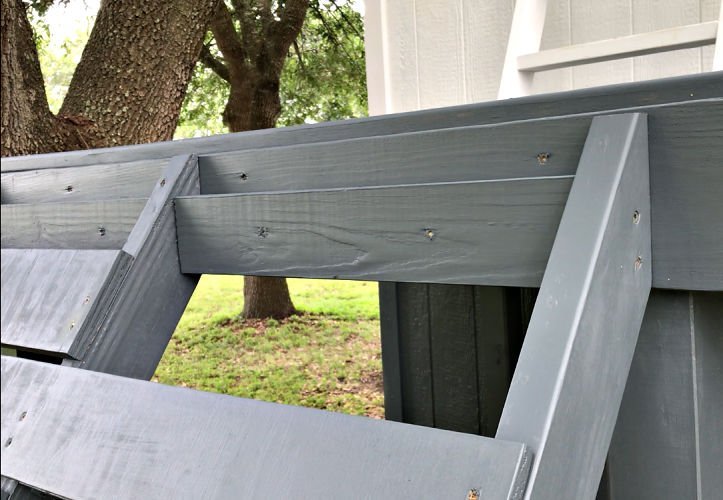
Add the Climbing Ramp or Wall Boards
Now that you have 3 – 2×4 frame supports cut, the next step to make a kids climbing ramp, or climbing wall, is to cut your climbing boards.
Decide how wide your rock climbing ramp will be. Use those measurements to cut your boards.
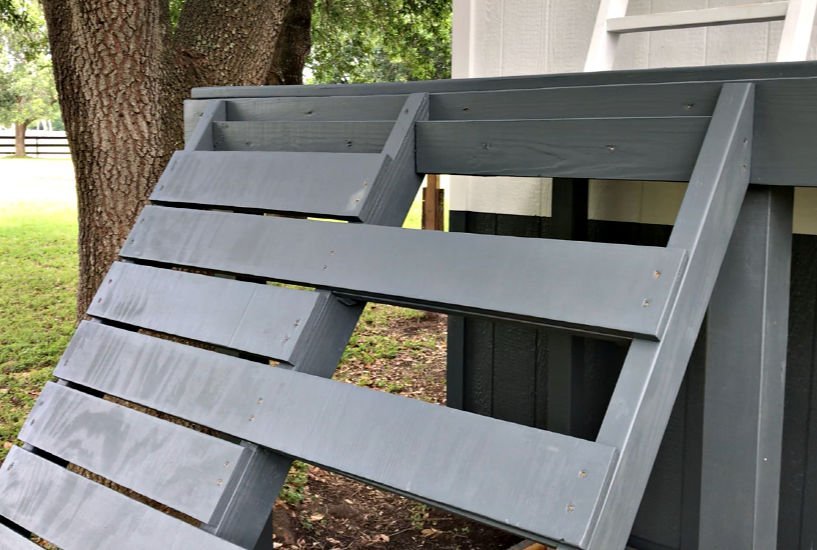
Every other board will go all the way across 3 supports, the boards between those will only stretch across 2 supports.
I recommend using pressure treated 2×4’s for the boards, for the easiest build and strongest build.
As you can probably see, I used 3/4″ pressure treated lumber because I had a lot left over from another part of this DIY Kids Playhouse build.
I had to reinforce the ladder side of this kids climbing ramp with another 3/4″ board to make it strong enough to support adults. 2×4’s would have been strong enough on their own.
To make a kids climbing ramp or rock climbing wall last longer, I also recommend painting or staining the supports before assembly.
That way you seal all sides of the lumber from sun and rain damage.
Use Self-Tapping Exterior Screws
Use self-tapping exterior deck screws to attach the boards to the supports. I’d use 3″ or longer screws on 2×4 boards. Or, 2 1/2″ or longer on 3/4″ thick boards.
To make a kids climbing ramp or wall strong enough for years of use, attach each board to each support with 2 screws. Stay about 1 1/2″ away from the edges and ends of boards to avoid splitting the board.
The boards that go all the way across the climbing ramp should have 6 screws total. The shorter boards should have 4.
I spaced my boards about 1/2″ apart for a pretty look and to allow for easy rain drainage and drying.
Don’t attach the top board until you attach the assembled rock climbing ramp to the play set, deck, fort, or whatever it is you’re attaching it too. 🙂
How to Attach the Kids Rock Climbing Wall
Use 3″ to 4″ deck screws to attach 2- 2×4’s to the area you’ll attach the ramp to. Those 2×4’s should fit the spaces between the 3 supports.
It’s easier to get a stronger connection with this trick.
Those 2×4’s are screwed securely to the deck. Then 2 screws on each side can secure the frame supports to those 2×4’s. The middle support was also screwed into the deck I attached my ramp to.
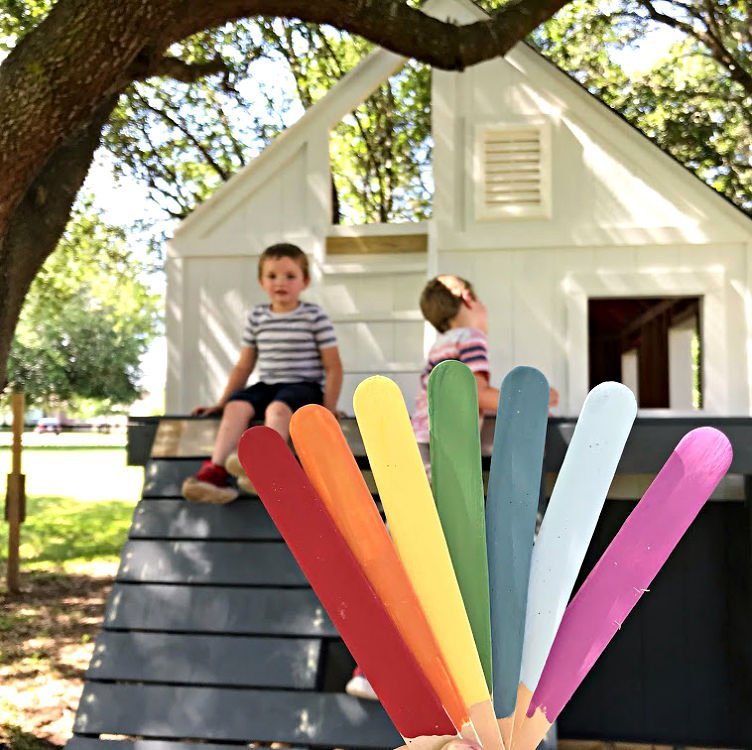
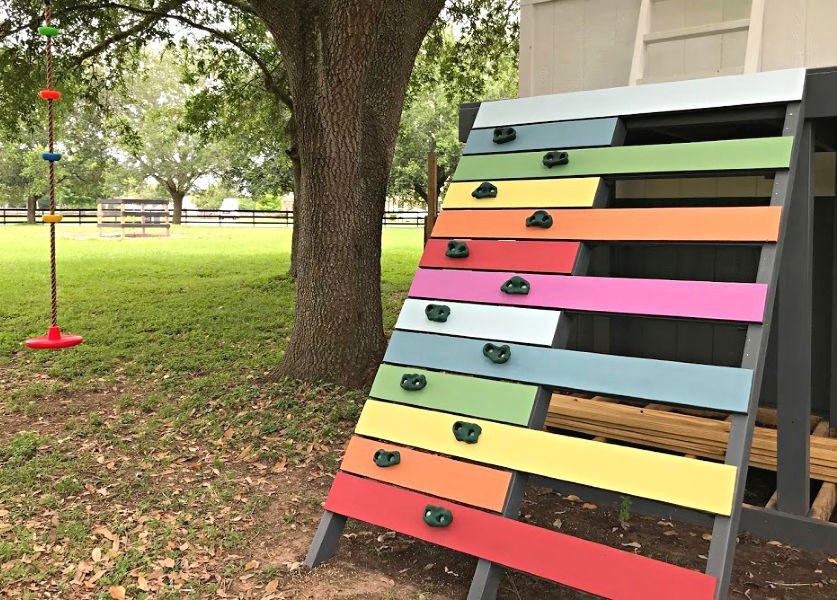
Add Some Color to your Play Set Ramp
I filled the screw holes on the ramp boards with exterior caulk. Just because I think it looks better. But, it’s not necessary. Let that dry according to the directions before painting
This is the first time I have used chalk paint outside. But, I have heard from a lot of reliable sources, that it holds up very well outside.
You can find cheap chalk paints at WalMart, Hobby Lobby, and on Amazon. DecoArt Outdoor Living Chalk Paint comes in a lot of fun colors.
OR, you can buy those little samples at Home Depot or Lowes of Latex Paint colors you love and use those to make your own DIY Chalk Paint Recipe with plaster of Paris.
I found some Amy Howard chalk paint on sale at Ace, but had to mix some of my own colors to make them really match.
You can also use my chalk paint recipe to mix your own chalk paint from normal Latex Wall Paint.
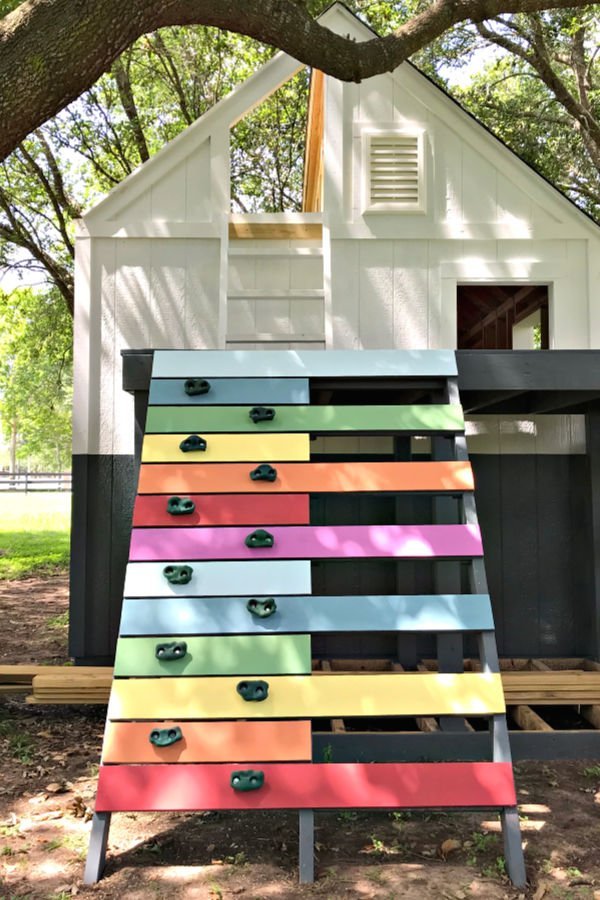
After adding some fun color, it’s time to add the climbing rocks. Use galvanized or stainless steel bolts, nuts, and washers on the climbing rocks.
More Photos of This Build
And, that’s it. That’s how to make a kids climbing ramp or wall that they’ll love for years and years. 🙂
How to Make a Kids Climbing Ramp Wall

Easy to follow steps and video to make a kids climbing ramp, or rock climbing wall, for that backyard playhouse, fort, or play set.
Materials
Instructions
Cut the Angles for your Climbing Ramp Frame
- To make a kids climbing ramp, you start by cutting your supporting frame 2×4’s. I avoid calculating angles for this climbing ramp with a few easy tricks. You can see me explaining these steps in that how to video above, watching that video should make things easier to understand.
- First, I set one 2×4 against the spot where I’ll be attaching it, to pick the slope I want my climbing ramp to have.
- Once I have a slope I like, I hold a flat board or spirit level against the face of the board I’ll be attaching my climbing ramp to. And, I mark that straight line with a pencil. This marks the EXACT ANGLE you picked without making any angle calculations. Yay! And, it leaves extra length on the other end of the board to use a similar trick to find that angle.
- Now, on to the next step to make a kids climbing ramp. Cut that first angle you just marked, then put it back up against the spot where you’ll install it. Measure how far the very top of that board sits above where you want it. Use that measurement to find how much to cut off the bottom.
- So, if it sticks 5″ above where you want it to stop, you MIGHT want to remove 5″ from the bottom. You can do that by laying a couple boards stacked up on the ground and marking your angle. If your boards are 5″ high, you can cut that line. If the boards are shorter, just add the difference and transfer that exact line up the board .
- BUT, INSTEAD OF CUTTING the full 5″, you might want to just cut a few inches off and recess 2″ into the ground. That’s the easiest way to make a kids climbing ramp level with the ground without worrying about whether or not one side needs to be longer than the other. You can use that 2×4 as a template to cut your next 2 – 2×4 frame supports.
- If you want a vertical kids climbing wall with this design instead, it’s easy. Skip the angles and just cut 3 – 2×4 boards to the correct height for your space.
Add the Climbing Ramp or Wall Boards
- Now that you have 3 – 2×4 frame supports cut, the next step to make a kids climbing ramp, or climbing wall, is to cut your climbing boards. Decide how wide your rock climbing ramp will be. Use those measurements to cut your boards. Every other board will go all the way across 3 supports, the boards between those will only stretch across 2 supports.
- I recommend using pressure treated 2×4’s for the boards, for the easiest build and strongest build. I used 3/4″ pressure treated lumber because I had a lot left over from another part of this DIY Kids Playhouse build. I had to reinforce the ladder side of this kids climbing ramp with another 3/4″ board to make it strong enough to support adults. 2×4’s would have been strong enough on their own.
- To make a kids climbing ramp or rock climbing wall last longer, I also recommend painting or staining the supports before assembly. That way you seal all sides of the lumber from sun and rain damage. Use self-tapping exterior deck screws to attach the boards to the supports. I’d use 3″ or longer screws on 2×4 boards. Or, 2 1/2″ or longer on 3/4″ thick boards.
- To make a kids climbing ramp or wall strong enough for years of use, attach each board to each support with 2 screws. Stay about 1 1/2″ away from the edges and ends of boards to avoid splitting the board. The boards that go all the way across the climbing ramp should have 6 screws total. The shorter boards should have 4.
- I spaced my boards about 1/2″ apart for a pretty look and to allow for easy rain drainage and drying. Don’t attach the top board until you attach the assembled rock climbing ramp to the play set, deck, fort, or whatever it is you’re attaching it too.
How to Attach the Kids Rock Climbing Wall
- Use 3″ to 4″ deck screws to attach 2- 2×4’s to the area you’ll attach the ramp to. Those 2×4’s should fit the spaces between the 3 supports. It’s easier to get a stronger connection with this trick. Those 2×4’s are screwed securely to the deck. Then 2 screws on each side can secure the frame supports to those 2×4’s. The middle support was also screwed into the deck I attached my ramp to.
Notes
You can build this as a climbing ramp with an easy to climb angle, like mine. Or skip the angles, to build a kids rock climbing wall for your backyard play set or playhouse. I love the ladder side of this climbing ramp. It makes getting to the top of this playhouse super easy for grown ups, like me.
Watch this short video for a quick walk through of how to make a kids climbing ramp for your backyard playhouse or even indoor playroom.
Thanks for checking out how to make a kids climbing ramp or wall. If you’re looking for more build projects for your DIY Playhouse or Playset, check out all of the DIY videos from my Kids Playhouse Build here.
More DIY Projects For You
Check out this DIY Small Step Ladder from 2×4’s.
You might also like this fun and easy DIY Nerf Gun Target build.

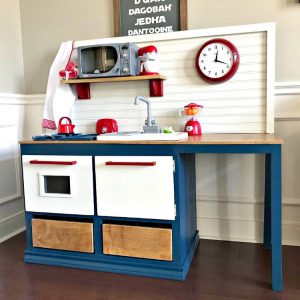
Or, this fun DIY Wooden Kids Play Kitchen will keep those kiddos busy and playing.
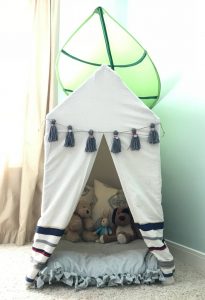
Or, this easy DIY Kids Play Tent from PVC Pipes.
Do you have more work to do outside this year? Check out How to Set Wooden Fence Posts in Concrete too.
That’s it for how to make a kids climbing ramp or wall. Let me know if you have questions. Don’t forget to sign up for the Abbotts At Home email newsletter to get DIY, Remodeling, and Crafty ideas in your inbox.

Stephanie Abbott has been remodeling homes, updating & building furniture, and working on DIY home maintenance and cleaning tips for over 20 years. Her remodeling has been featured in Better Homes and Gardens Magazine. And, her DIY YouTube channel has had more than 8 million views.
Most of the DIY tutorials and videos on this site focus on beginner to intermediate level DIY Projects that can be done in an affordable way without high-end, expensive tools. All of the cleaning tips on this website have been tested in her home.