
Do you want to reupholster a wingback chair? Here’s my best tips & easy steps from reupholstering a wingback chair. With costs & pros & cons.
How to Reupholster a Wingback Chair
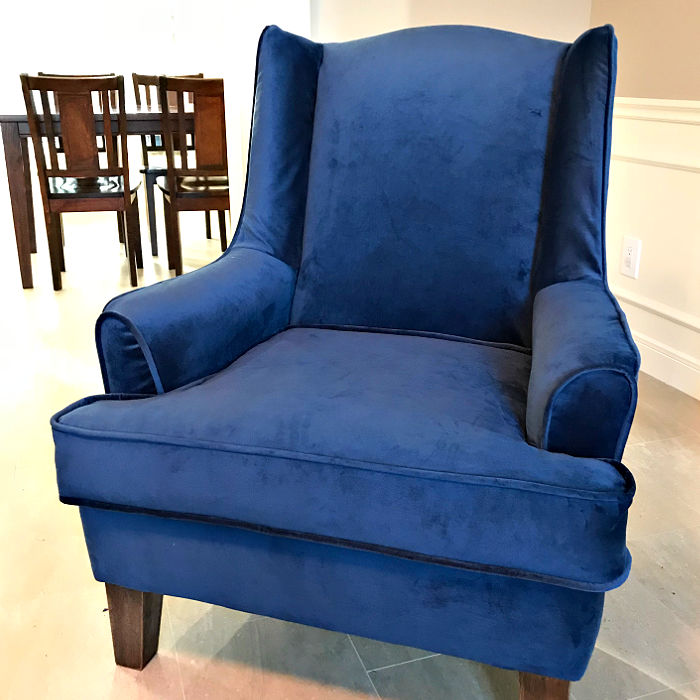
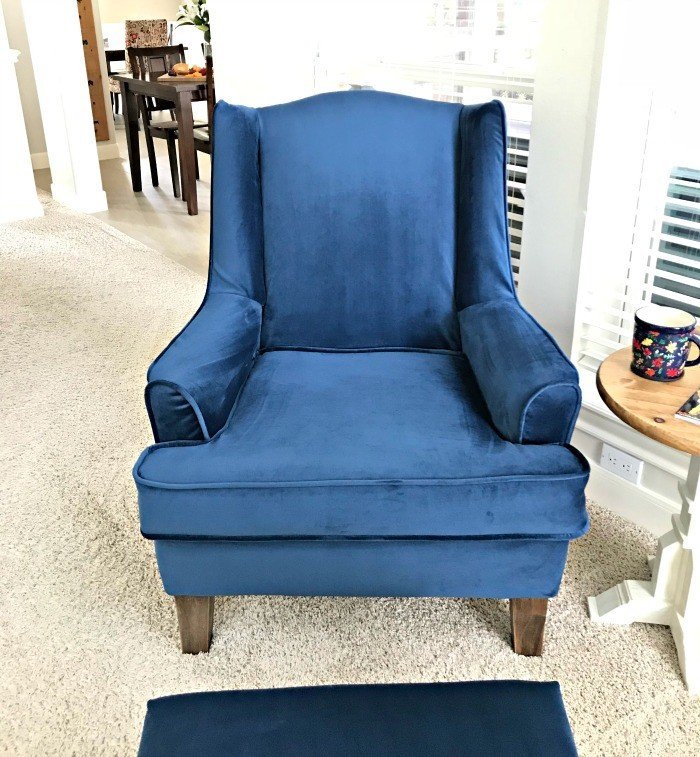
Do you have a tired looking upholstered wingback chair that needs a new look??? I did.
But, I finally decided to just go for it and reupholster my wingback chair with the most beautiful blue velvet fabric. And, it looks SO GOOD!
But, reupholstering a wingback chair is a lot of work. And, I learned a lot during this DIY upholstery project. Today, I’ve got my tips and tutorials to reupholster a wingback chair for you.

This isn’t a step by step guide from me. I don’t really feel like I’ve done enough chairs to give a full step by step tutorial.
BUT, I used a few great tutorials to help me do this and I really wanted to share those with you. I also have some pros and cons for reupholstering a wingback chair to help you decide whether or not to do it.
Plus, I have my favorite tips and process pictures from my DIY wingback chair upholstery makeover.
So, I hope that this post helps you decide whether or not you are ready to upholster a wingback chair too.
Table of contents
- Is it Hard to Reupholster a Wingback Chair?
- How Many Yards of Fabric Do You Need for a Wingback Chair?
- How Much Does it Cost to Upholster a Wing Chair?
- Is it Cheaper to Reupholster a Wingback Chair or Buy New?
- What You Need To Reupholster a Wingback Chair
- Reupholstering A Wingback Chair: Tips and Photos
- After Photos of my Reupholstered Wingback Chair
Is it Hard to Reupholster a Wingback Chair?
If you’ve never upholstered a wingback chair, this DIY project is definitely challenging. I’d say it’s an intermediate level project.
You need to have good attention to detail when you’re reupholstering a chair. It can be easy to mess up the alignment on the fabric.
And, you can accidentally pull the fabric tighter in some spots, making it look…sloppy, for lack of a better word.
I highly recommend taking your time, and stepping back, to check each area carefully as you work. You can always remove staples or undo stitches in spots that don’t look great.
And, this DIY upholstery project will take time. I spent about 24 hours working on this wingback chair makeover.
How Many Yards of Fabric Do You Need for a Wingback Chair?
You will typically need 5 to 7 yards of fabric to upholster a wing chair.
If you want to use a patterned fabric to reupholster your wing chair, you will likely use more fabric than you would with a solid fabric.
That’s because you need to keep the patterns moving in the same direction and right side up.
That means you will be limited in which sections of your fabric by the yard can be used to replace pieces of your wingback chair.
I have a post full of some of the Best Fabric by the Yard Online on Amazon in another post. I was surprised by all of the beautiful fabric that is actually easy to order and have delivered in a day or two online.
Check out this great yardage chart that shows average recommendations for yardage on all kinds of furniture upholstery projects.
How Much Does it Cost to Upholster a Wing Chair?
If you hire a professional to upholster your wing chair, it will cost between $600 and $1500.
If you reupholster your own wingback chair, you will probably spend between $300 and $450 on the fabric by the yard, batting, cording, thread, and other items you’ll need from a fabric store.
Is it Cheaper to Reupholster a Wingback Chair or Buy New?
Paying a professional to reupholster your wing chair will often cost more than or as much as buying a new wingback chair.
I ONLY recommend having your chair professionally reupholstered when that chair is an antique or has sentimental value.
You also might want to pay a professional to upholster your wing chair if it is a higher end chair with great framing.
Check out these highly rated wingback chairs on Amazon to see how much buying a new wing chair would be. Some of these chairs are absolutely beautiful at just $400.
OK, now that we’ve gone over answers to some common questions about reupholstering a wingback chair. Let’s get into some of the DIY details.
What You Need To Reupholster a Wingback Chair
Here’s a list of everything you’ll likely need to reupholster your chair.
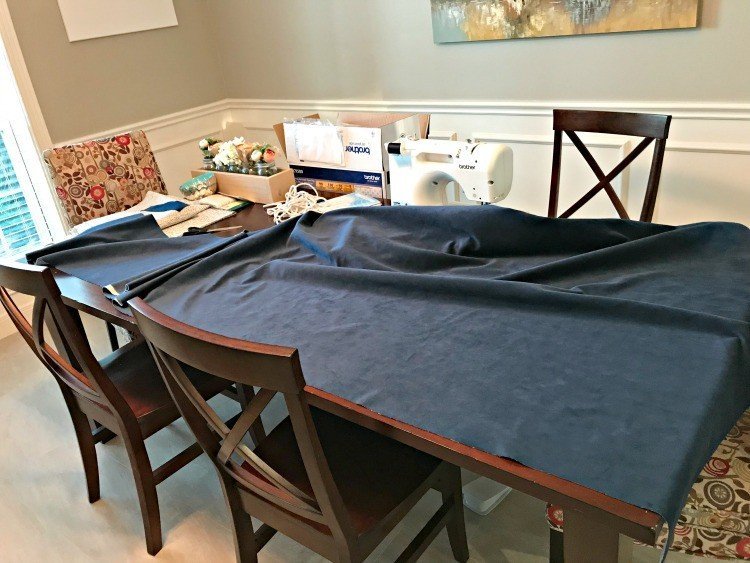
- A Sewing Machine, like my Brother Computerized & Easy to Use Machine
- Heavy Duty Stapler, I’ve used an Arrow Fastener T-50 for years and years and years now
- 5 to 7 yards of upholstery fabric
- Curved Upholstery Needles
- Small Cording for making piping
- Tack Strips
- Pins, Thread, scissors, needle nose pliers or staple remover
- And possibly, batting, foam, etc…each chair has different needs and materials. My chair is only 6 years old and I’m the only owner, so I didn’t need to replace anything but the fabric.
Reupholstering A Wingback Chair: Tips and Photos
You’ll Need a Sewing Machine
You’ll need a sewing machine for the seat and along the arms on your wingback chair.
And guys, I am not very skilled when it comes to sewing. I only know the basics. And, that was good enough to do the sewing to reupholster this wing chair.
If you have only used older sewing machines AND you thought sewing was hard, you should try one of the new computerized models.
This Brother sewing machine is so easy to use. It lowers the needle at the end of each stitch automatically, so you don’t need to remember.
And the instruction book includes very detailed pictures for setting up the thread and bobbin. I love it!
Plus, they’re only about $150. I’ll be using this sewing machine for decades, so it’s well worth it.
Make Sure You Have a Plan
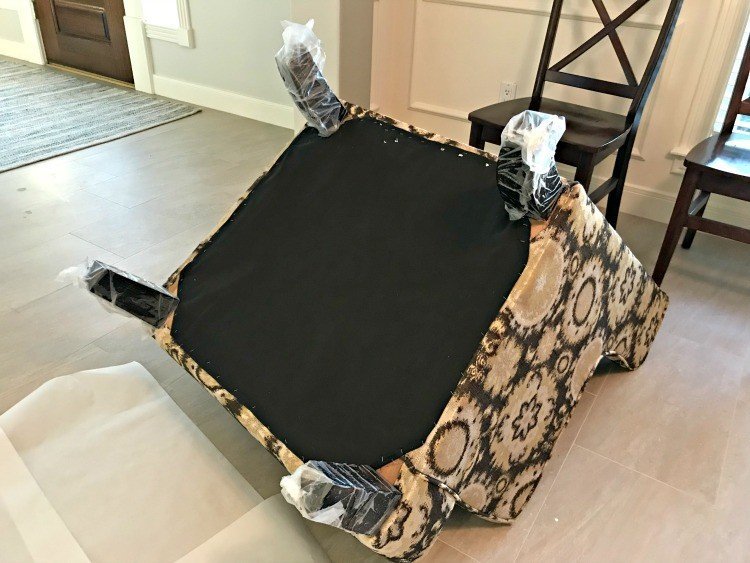
BEFORE YOU START, inspect your chair closely. You should be able to figure out which order the pieces of fabric were added to the chair.
You’ll remove the pieces in the exact OPPOSITE way that you add them back on.
It’s likely that the fabric pieces of most wing back chairs will be removed in the following order. BUT PLEASE VERIFY AS YOU GO.
- If your wing chair has a Skirt, it’s probably first.
- A Full Back Piece, no sewing required.
- The Front of the Seat Back, no sewing required.
- The Arms and Sides of the Chair, will be sewn together then stapled into place.
- And The Front Piece Under the Seat, sewn and stapled.
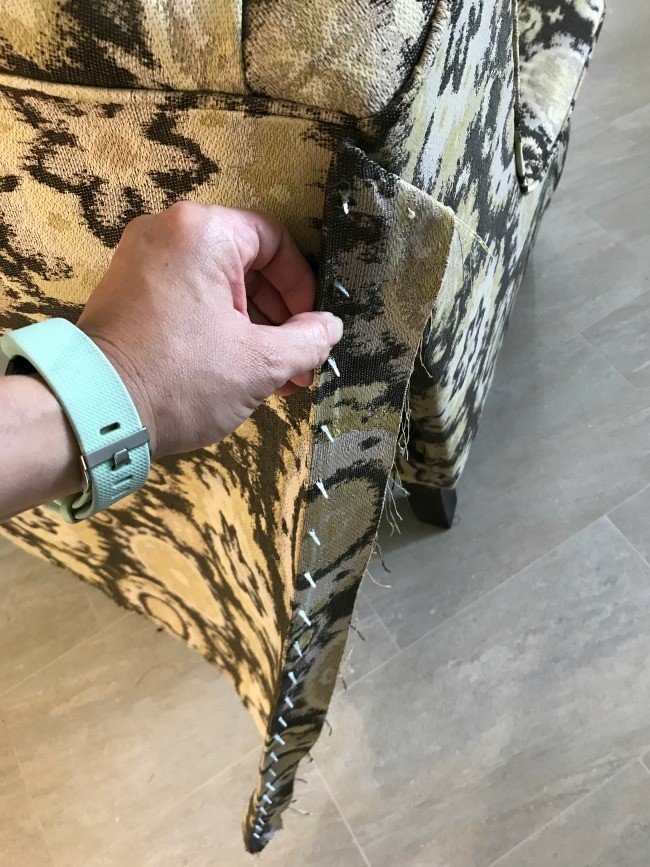
The First Pieces To Remove When You Reupholster A Wingback Chair
The skirt and back pieces will probably be the first pieces you need to remove.
The back of my wingback chair was attached at the sides with tack strips, at the top with a plastic tack strip inside, and under the bottom with staples.
No sewing was done on the back piece of the wingback chair. You just need to staple or hammer in the metal strips with a hammer or rubber mallet.
I reused the metal strips on the sides of the back piece. But, replaced the plastic tack strip at the top.
And, I used wire nails on the new strip, to make sure they went deep into the frame.
Be sure to get the nails or staples very flat here, or they will start to wear down the fabric. And, you’ll see a lump.
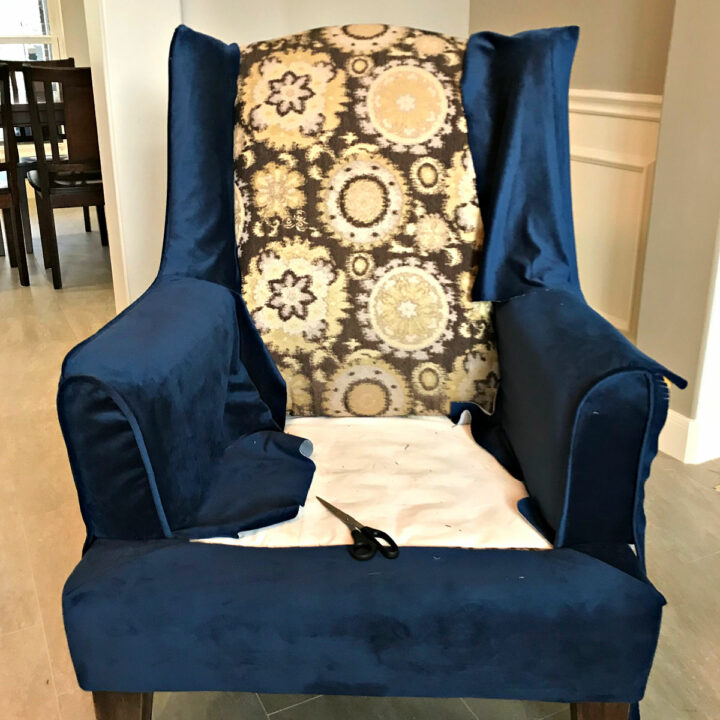
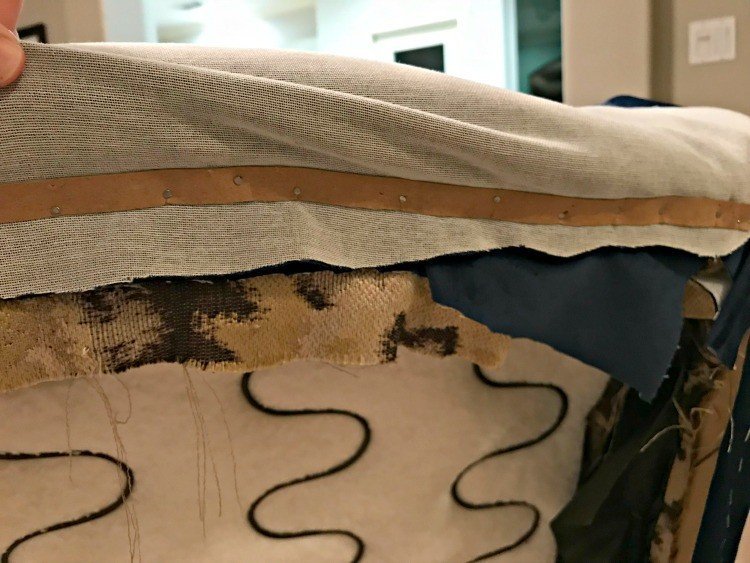
Use the Original Pieces as a Cutting Guide
When you reupholster a wingback chair, try to use the pieces you remove as a cutting guide whenever you can.
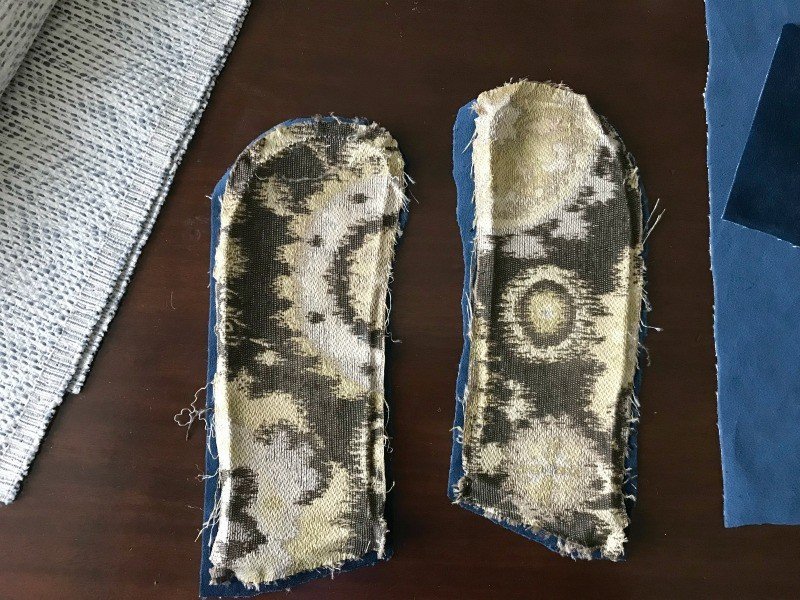
Pinning is the biggest part of reupholstering a wing chair. I pinned, tested, and re-pinned each new piece of fabric a few times before sewing.
You can see here that I pinned the fabric to the foam to hold it in the correct spot while I pinned on the cording.
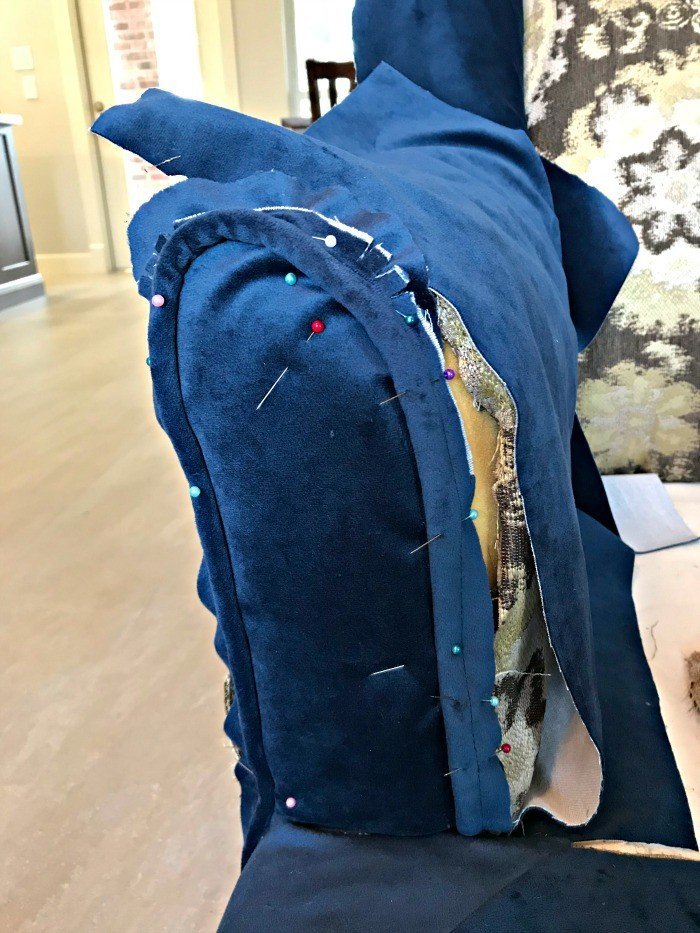
Two More Tips For Reupholstering a Wingback Chair
First, the seat is the hardest part for non-sewers, like me, just take your time and be sure to pin carefully. You can always remove stitches in sections that need a bit of adjustment.
Second, after the seat and each side is completely sewn and you’ve double-checked that it is completely perfect, trim away the excess fabric at the seams, to avoid getting weird lumps in the chair.
You can do this!
Now here are my favorite tutorials that helped me get the job done.
My Favorite Tutorials to Reupholster a Wingback Chair
- This series of 8 wingchair upholstery videos from Thrift Diving was a huge help. These are pretty thorough and gave me confidence to get started.
- Newton Custom Interiors has a really simple tutorial for making cording. It’s so easy, guys!!
- This professional upholstery class video for an arm chair.
After Photos of my Reupholstered Wingback Chair
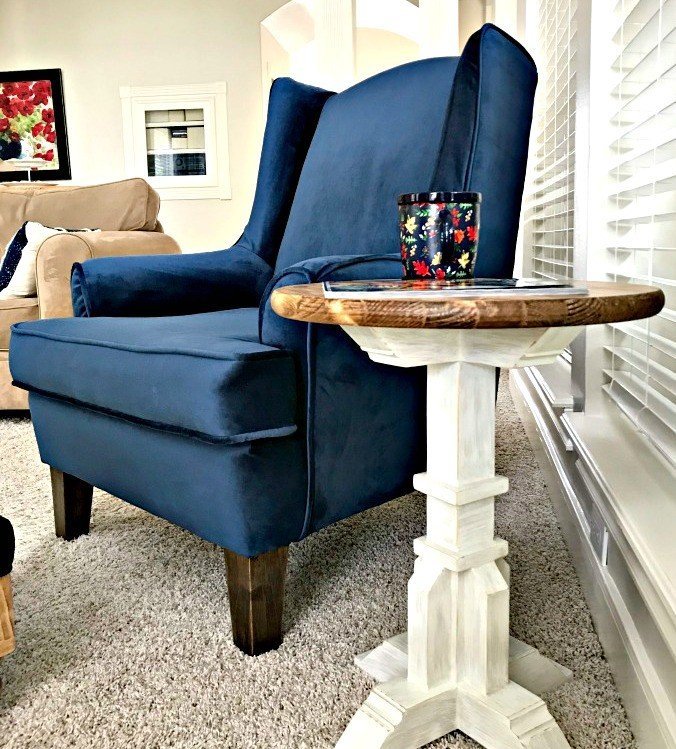

Last week, I shared the full reveal on our Modern Farmhouse Living Room Makeover with you guys. A big part of our living room makeover was all of the DIY furniture and upholstery projects.
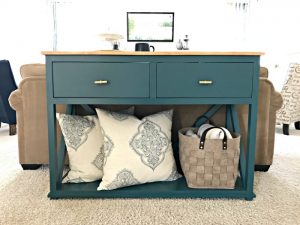
I’ve already shared the tutorials for the matching Blue Velvet DIY Upholstered Ottoman and Teal DIY Farmhouse Console Table.
You can also find tutorials for the DIY Side Table Woodworking Plan – $50 Build and the DIY Childrens Desk Plans with Storage on this blog.
More DIY Projects For You
Here’s 7 Helpful Tips for Decorating a Large Wall in a Living Room.

Give your furniture a new look with How to Paint Furniture for Beginners or the tutorials in the 20 Best DIY Projects Using Chalkboard Paint.
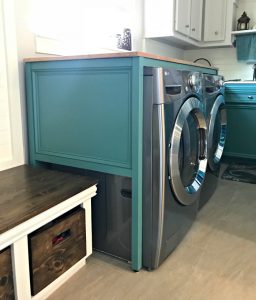
Looking for more DIY Furniture Ideas? Check out this DIY Over Washer and Dryer Laundry Table.
Or my DIY Farmhouse Console or Entry Table woodworking plans.
You might also like the 30 Best Amazon Bed Frames for Kids, Teens, & Adults. It’s one of my popular Best of Lists full of recommendations for everything.

Feeling inspired? Now that you’ve seen these tips and tutorials to reupholster a wingback chair. Have fun and let me know if you have questions.
Don’t forget to sign up for the Abbotts At Home email newsletter to get DIY, Remodeling, and Crafty ideas in your inbox.

Stephanie Abbott has been remodeling homes, updating & building furniture, and working on DIY home maintenance and cleaning tips for over 20 years. Her remodeling has been featured in Better Homes and Gardens Magazine. And, her DIY YouTube channel has had more than 8 million views.
Most of the DIY tutorials and videos on this site focus on beginner to intermediate level DIY Projects that can be done in an affordable way without high-end, expensive tools. All of the cleaning tips on this website have been tested in her home.