
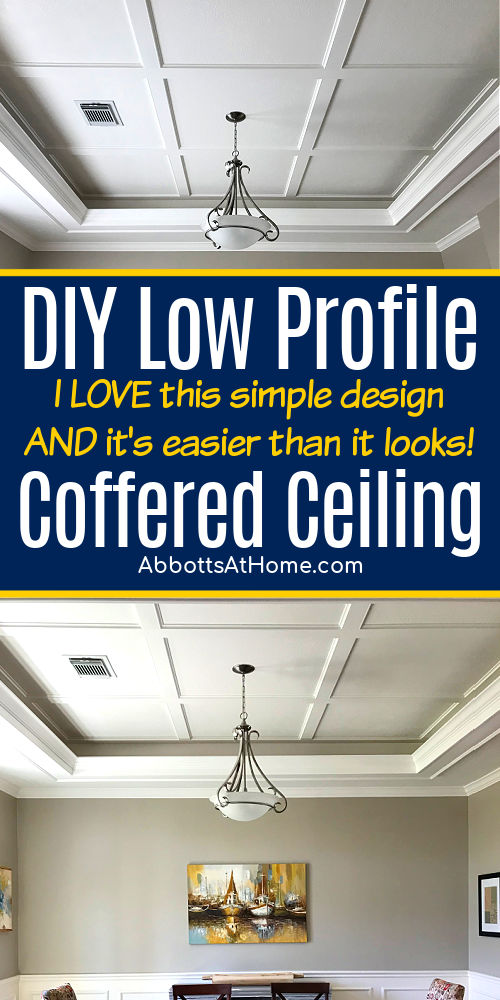
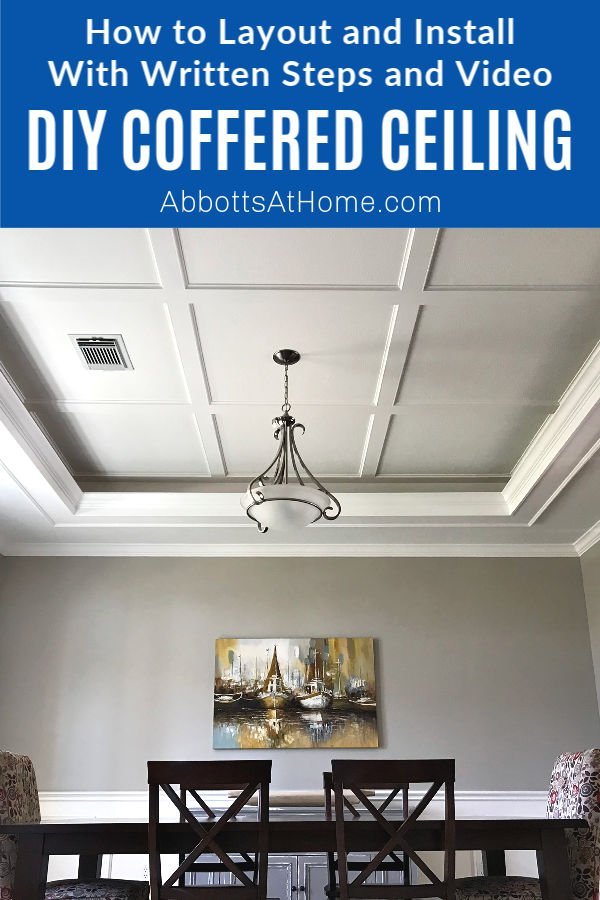
I LOVE this beautiful DIY coffered ceiling design. Steps, photos, and how-to video for this EASY flat coffered design using 1×4’s & cove.
Simple DIY Coffered Ceiling Design with Low Profile Trim
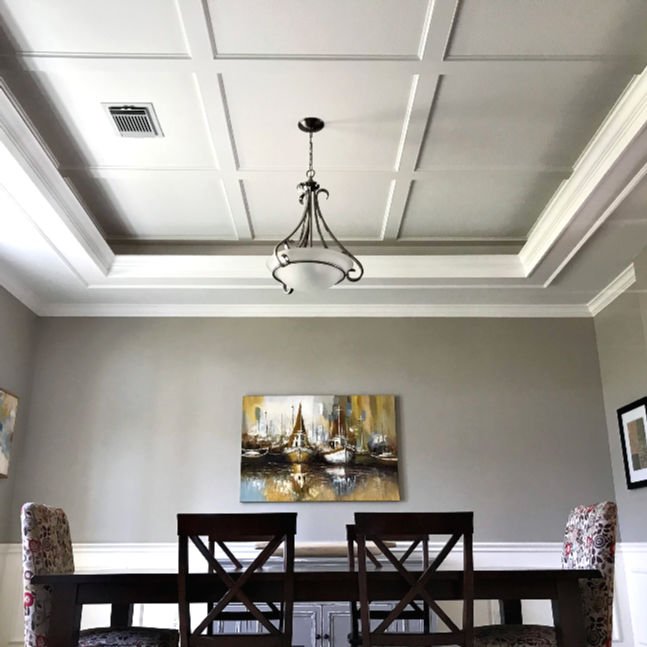
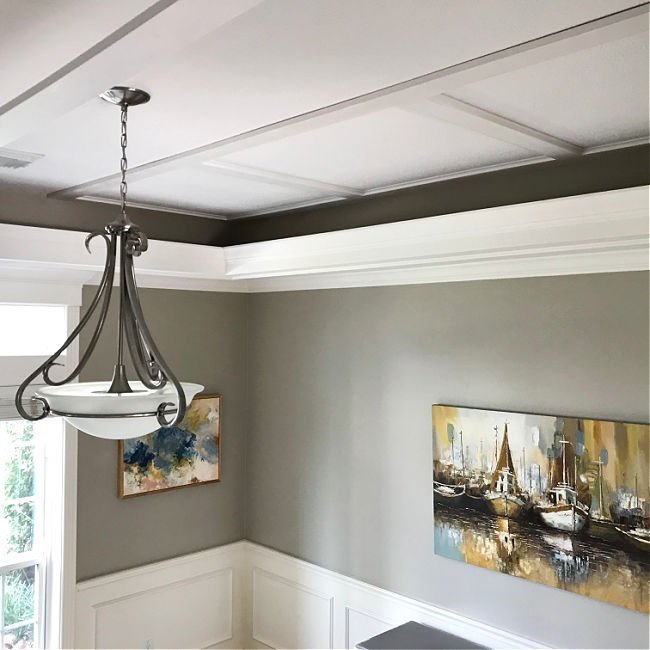
Hi guys! I am happy dancing all over my Dining Room this week. The ceiling in there already had some nice trim.
But, I thought that a little more could make the room instantly eye-catching. And, I think installing this flat coffered ceiling absolutely did that by adding so much style and charm to that room!
Definitely give this a try if you’re looking for coffered ceiling ideas for a room with lower ceilings.
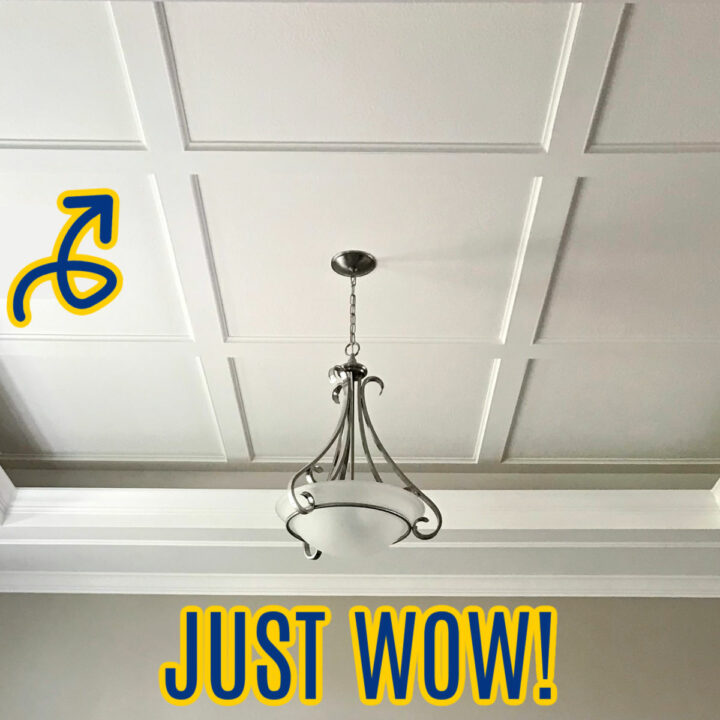
Not only will I love looking at this room for years to come, it will give buyers a great first impression whenever we decide to sell. This room is the first room you see off of our entry.
That extra molding on the ceiling is a wow-factor that happens right when people walk in our home. I think that low profile coffered ceiling can absolutely help sell our house one day.
Now, let’s get to the how to install this simple coffered ceiling design.
Table of contents
How Much Does it Cost to Build A Coffered Ceiling?
I spent less than $200 on this low profile coffered ceiling design. The area I was working with is about 10′ by 11′.
My design uses polystyrene cove molding which is about 40% cheaper than the primed wood cove molding. Since I had to buy 18 – 8′ long cove molding boards, this cheaper molding saved me about $40.
I’ve used polystyrene molding as crown molding in my home too. It looks and installs just like wood molding, but is lighter and easier to work with. And, cheaper!
Lowes and Home Depot always have it in my area, so you can check it out for yourself in the molding aisle.
One last note on the cost of this simple faux coffered ceiling design, the more squares you add to your grid, the more you’ll spend on wood trim and molding.
I designed my ceiling with a 3×3 – 9 square grid to avoid having to work around my light and vent. But, a 4×3 or 4×4 grid would have worked on that ceiling too.
I highly recommend carefully measuring your walls and drawing a diagram to plan your design.
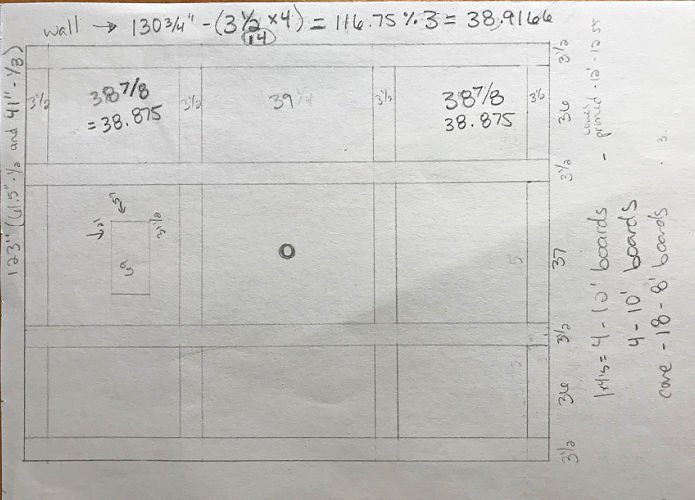
Add the exact location of any vents, speakers, and lights on the ceiling to the drawing so you can see where all of the trim and molding will sit beforehand.
RECOMMENDED: 25 Best Tray Ceiling Ideas & Vaulted Tray Ceiling Ideas (Molding, Trim, & Paint)
Are Coffered Ceilings Worth It?
I think Coffered Ceiling are absolutely worth the work and expense to install! Actually, I think any beautiful trim work and millwork in a home can help sell your home faster.
If you’ve ever been on any Model Home tours, they always have lots of beautiful molding, crown molding, wainscoting, and wood panels in those homes.
People love all those extra details. Installing this simple Coffered Ceiling in your home will also make it more memorable for house hunters touring lots of homes.
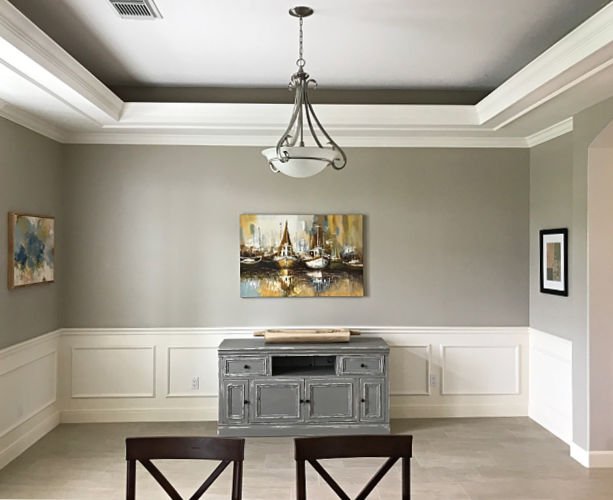
The Dining Room trim work was already nice. But, I thought this easy Coffered Ceiling design would add even more style.
What do you think? Did this cheap coffered ceiling makeover add charm, style, and value this room?
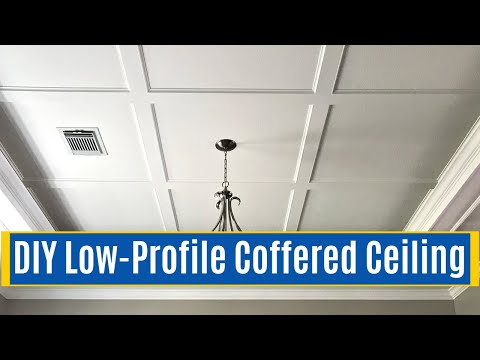
DIY Flat Coffered Ceiling Trim – Install Video
Watch this 10-minute video to get a step by step look at this coffered ceiling installation, how I drew the layout for my boards and molding, and how I prepped and painted the trim.
Easy Flat Coffered Ceiling Installation
Materials Needed
- Dewalt Compound Miter Saw
- Ryobi 18V Brad Nailer
- Stud Finder
- Square
- Paintable Wood Filler
- Dap Spackling Compound
- Gator Micro Zip Sander
- Sanding Sponges
- Dap Painter’s Acrylic Latex Caulk
This is an overview of the steps for this DIY project. If you want more details on planning and installing this flat coffered ceiling, be sure to watch the video above.
It’s easier to explain this bigger projects in a video.
Measure and Mark The Ceiling
Start by measuring and marking with pencil where you want to install the 1×4’s.
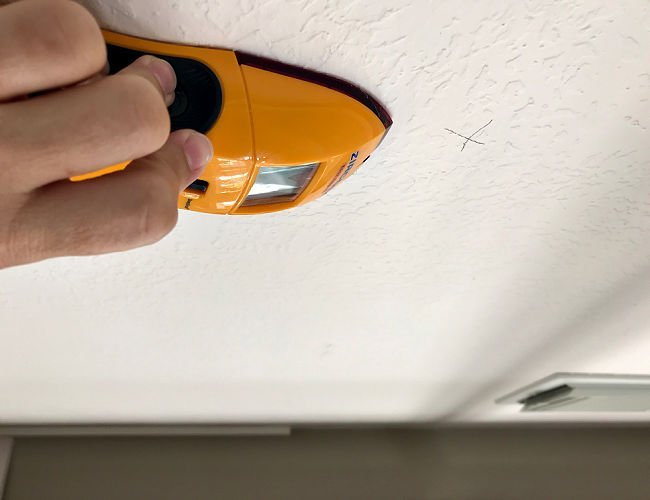
Mark the joists on the ceiling with a pencil and stud finder.
You want to brad nail the longest, heaviest boards in your design to the joists so that the nails help to support the boards weight while the construction adhesive sets.
Install The 1×4’s
Then carefully measure and cut each board. I used a Miter Saw for quick, straight cuts. But you can use a Circular Saw.
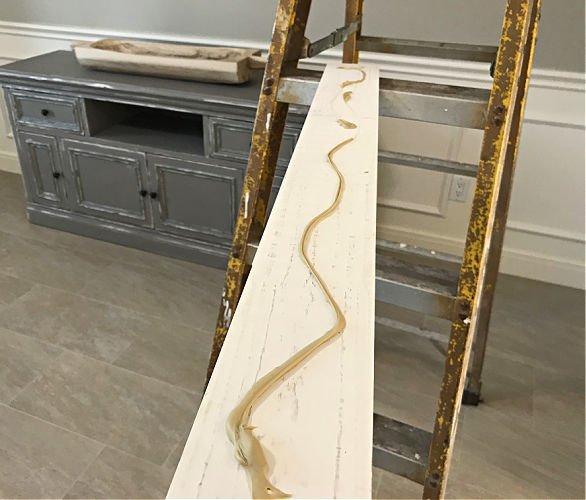
Make sure you use enough construction adhesive on your 1×4 boards. My ceiling has a slight texture, so I had to use enough for it to grab onto that texture.
Install all of the full, ceiling-length 1×4’s before installing the shorter pieces that complete your squares.
You’ll also want to install all of the 1×4 boards before adding in the cove molding.
Also, I highly recommend buying the primed 1×4 boards for this project because it saves so much time.
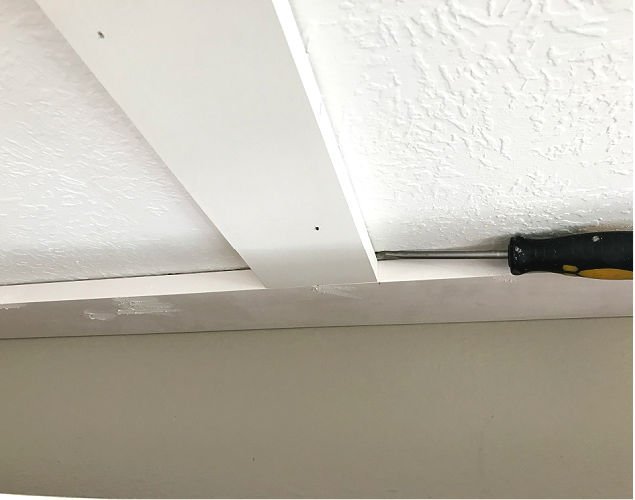
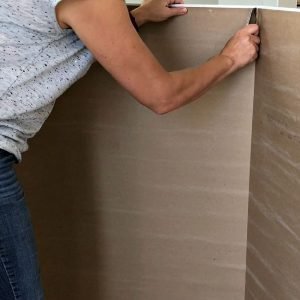
I’m using the screwdriver in the photo above to hold that board flush with the board perpendicular too it while the construction adhesive sets.
I used blocks to push boards up whenever they were sitting too low. You want all of your boards to be level with each other. You can see how I do that in the video above.
Install Cove Molding
After all of the 1×4’s are up; measure, cut, and install the cove molding. I kept the cove flush with the 1×4’s by nailing it into the 1×4’s before nailing it into the ceiling.
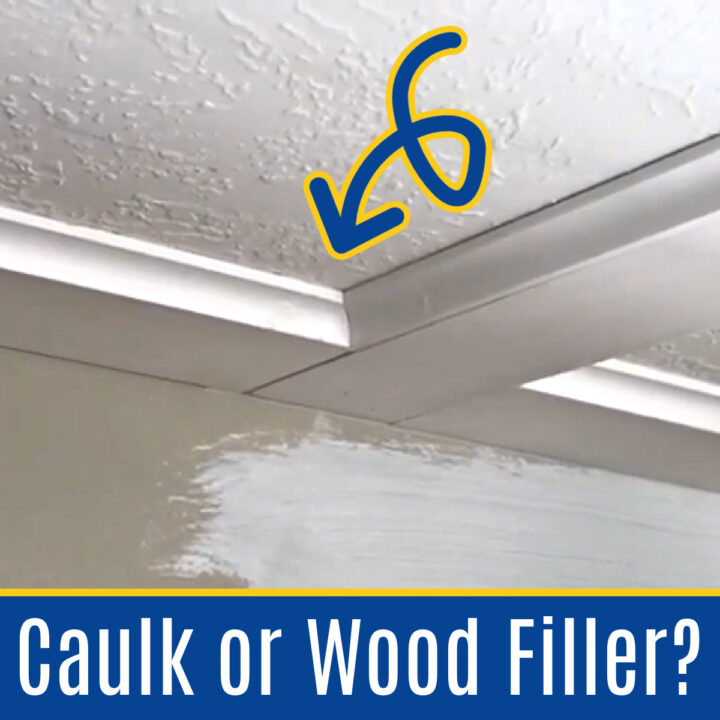
Use Wood Filler, Caulk, and Paint
Now, it’s time to use wood filler and caulk on your simple coffered ceiling DIY.
Be sure to get the caulk and wood filler, or spackling, perfect before painting any wood paneling, wood trim, baseboards, and crown molding in your home.

Here’s a close look at that DIY flat coffered ceiling. A paint sprayer (like the one I used in my How to Paint Built In Bookshelves post) would give you the best paint finish.

But, I didn’t have one at the time and still got a pretty paint finish. Just be sure to use a high quality nylon brush to apply your paint in the direction of the length of boards and molding.
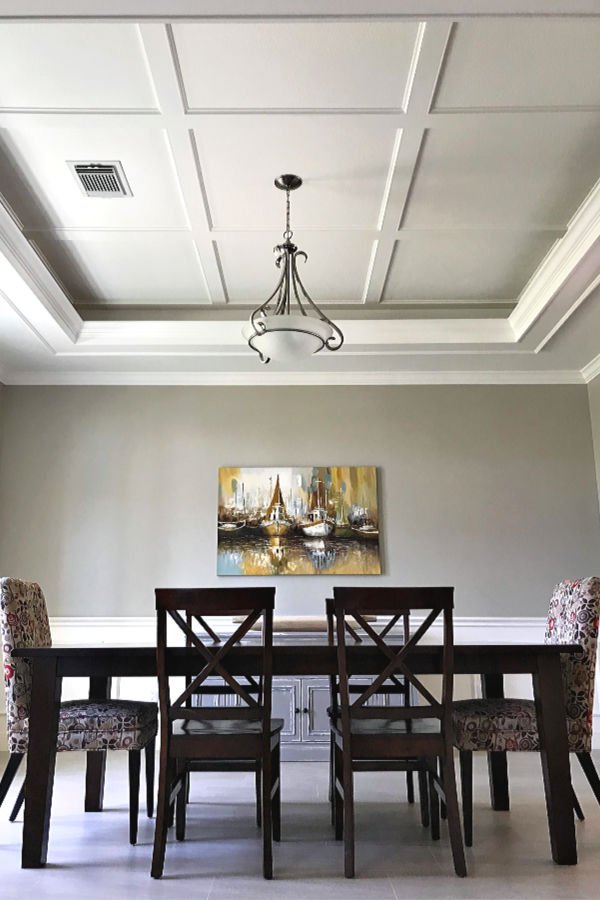
And, be sure to avoid brushing over paint that has already started drying so that you don’t dull the sheen in those spots. I used Behr’s Vermont Cream in Eggshell sheen on this ceiling.
Additional Design Note
You can also modify the design on this low profile coffered ceiling to get a custom look you love. I have seen this coffered look done with 1×6 boards too. So, if you like that wider board look, go for it.
You can also use a different molding inside the squares. I used cove molding for my Simple DIY Coffered Ceiling design because it matched the design of my crown molding.
But, if you watch the video above, you can see another style of molding that would look beautiful too. 🙂
Well, that’s it for this Low Profile Coffered Ceiling tutorial. Good luck with your project! Here’s a few more ceiling posts from my home, if you still need ideas:
- 15 Best Ways To Make An Old Ceiling Look Better
- DIY Tongue and Groove Porch Ceiling: Cheap, Beautiful and Easy
- DIY Plywood Plank Ceiling – Faux Shiplap Install
- Beautiful DIY Vaulted Ceiling Makeover
- Best Ceiling Paint Finish: Flat vs Eggshell Sheen Results
- Installing Beautiful Three Piece Crown Molding: DIY Steps and Video
More DIY Projects For You
You might also like this tutorial to whiten your grout.

Check out 15 tips for how to cut drywall and hang drywall here.
And, I love this post on How to Clean Car Seats At Home too!
That’s it for this easy Coffered Ceiling DIY. Let me know if you have questions. Don’t forget to sign up for the Abbotts At Home email newsletter to get DIY, Remodeling, and Crafty ideas in your inbox.
Simple DIY Coffered Ceiling

Tools
- Miter Saw
- Brad Nailer
- Stud Finder
- Square
Instructions
Steps to Install a Simple DIY Coffered Ceiling
- Measure your ceiling carefully. Then draw a diagram of your ceiling marking the exact layout of anything on the ceiling, like lights, vents, or fans.
- Using that diagram, decide where you want the 1x4 grid on your ceiling to be and how many squares you want.
- Pick the type of moulding you want inside the squares. I used cove moulding for this ceiling.
- You can use your diagram to figure out how many feet of moulding and 1x4 you'll need before you go shopping.
- Mark the studs in the ceiling with a studfinder and pencil. Also, measure and mark for the 1x4's. You can see how I did this for my Simple DIY Coffered Ceiling in the video.
- Use a Miter Saw to cut the 1x4's to size.
- Use plenty of construction adhesive to attach the 1x4's and enough brad nails to hold the 1x4's tightly against the ceiling while the construction adhesive dries.
- After all of the 1x4's are installed, cut and brad nail the moulding onto the 1x4's.
- Use wood filler and caulk to get a professional looking finish.
- Follow up with paint and your done.
Watch the video for more detailed tips and explanations for each step.
Notes
How Much Does it Cost to Build A Coffered Ceiling?
I spent less than $200 on this low profile coffered ceiling design. The area I was working with is about 10′ by 11′. My design uses polystyrene cove moulding which is about 40% cheaper than the primed wood cove moulding. Since I had to buy 18 – 8′ long cove moulding boards, this cheaper moulding saved me about $40.
I’ve used polystyrene moulding as crown moulding in my home too. It looks and installs just like wood moulding, but is lighter and easier to work with. And, cheaper! Lowes and Home Depot always have it in my area, so you can check it out for yourself in the moulding aisle.
One last note on the cost of this simple DIY coffered ceiling design, the more squares you add to your grid, the more you’ll spend on wood trim and moulding. I designed my ceiling with a 3×3 – 9 square grid to avoid having to adjust my light and vent. But, a 4×3 or 4×4 grid would have worked on that ceiling too.
I highly recommend carefully measuring your walls and drawing a diagram to plan your design. Add the exact location of any vents, speakers, and lights on the ceiling to the drawing so you can see where all of the trim and moulding will sit beforehand.
Are Coffered Ceilings Worth It?
I think so! I think any beautiful trimwork and millwork in a home can help sell your home faster. If you’ve ever been on any Model Home tours, they always have lots of beautiful moulding, crown moulding, wainscoting, and wood panels in those homes. People love all those extra details. Adding this Simple DIY Coffered Ceiling Design in your home will also make it more memorable for house hunters touring lots of homes.

Stephanie Abbott has been remodeling homes, updating & building furniture, and working on DIY home maintenance and cleaning tips for over 20 years. Her remodeling has been featured in Better Homes and Gardens Magazine. And, her DIY YouTube channel has had more than 8 million views.
Most of the DIY tutorials and videos on this site focus on beginner to intermediate level DIY Projects that can be done in an affordable way without high-end, expensive tools. All of the cleaning tips on this website have been tested in her home.