
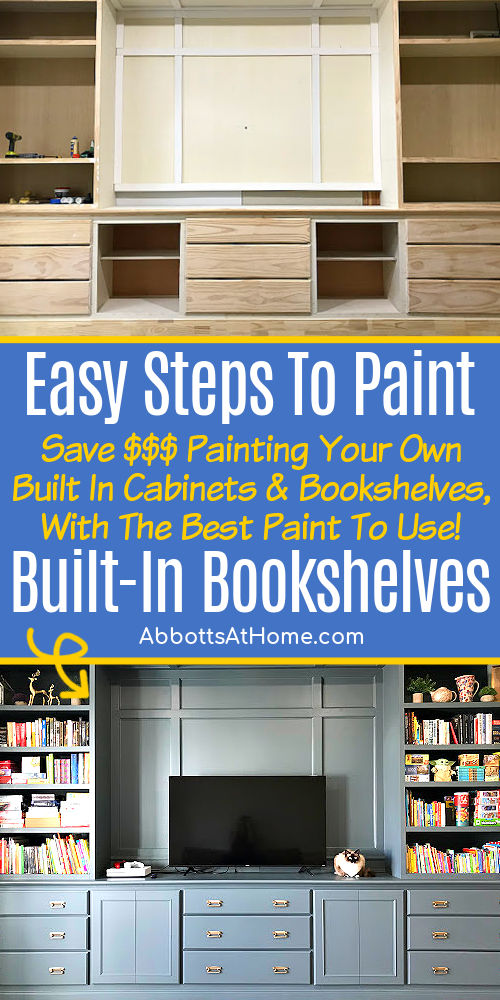
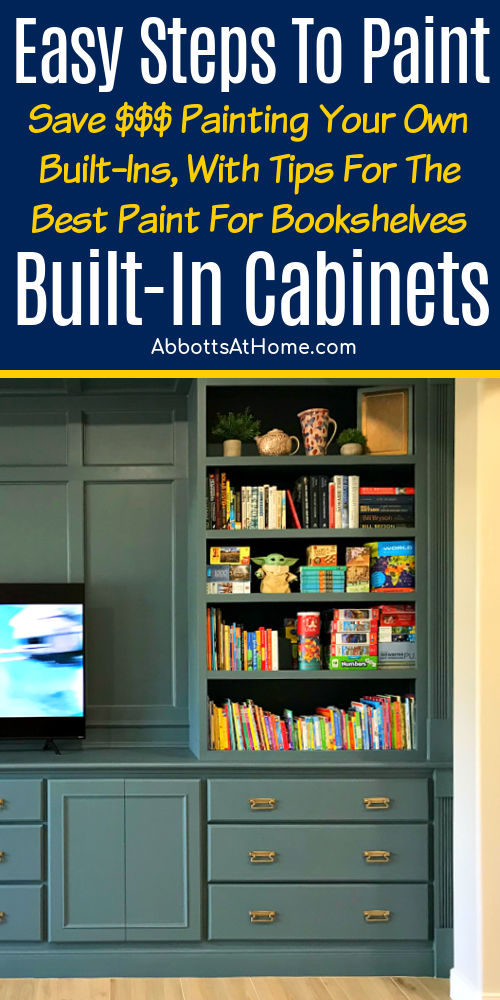
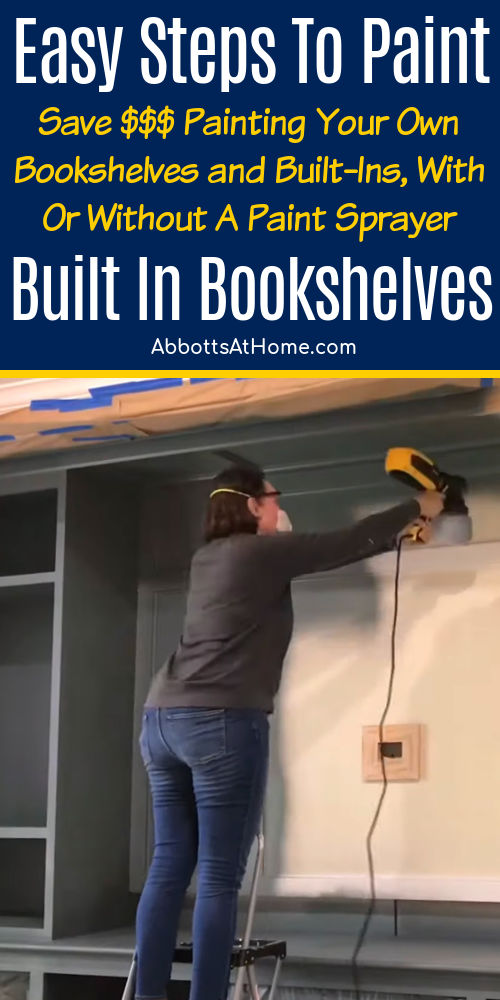
Easy DIY Steps & Video for How to Paint Built In Bookshelves and Cabinets. With Answers to Tons of Common Questions & a Printable Guide.
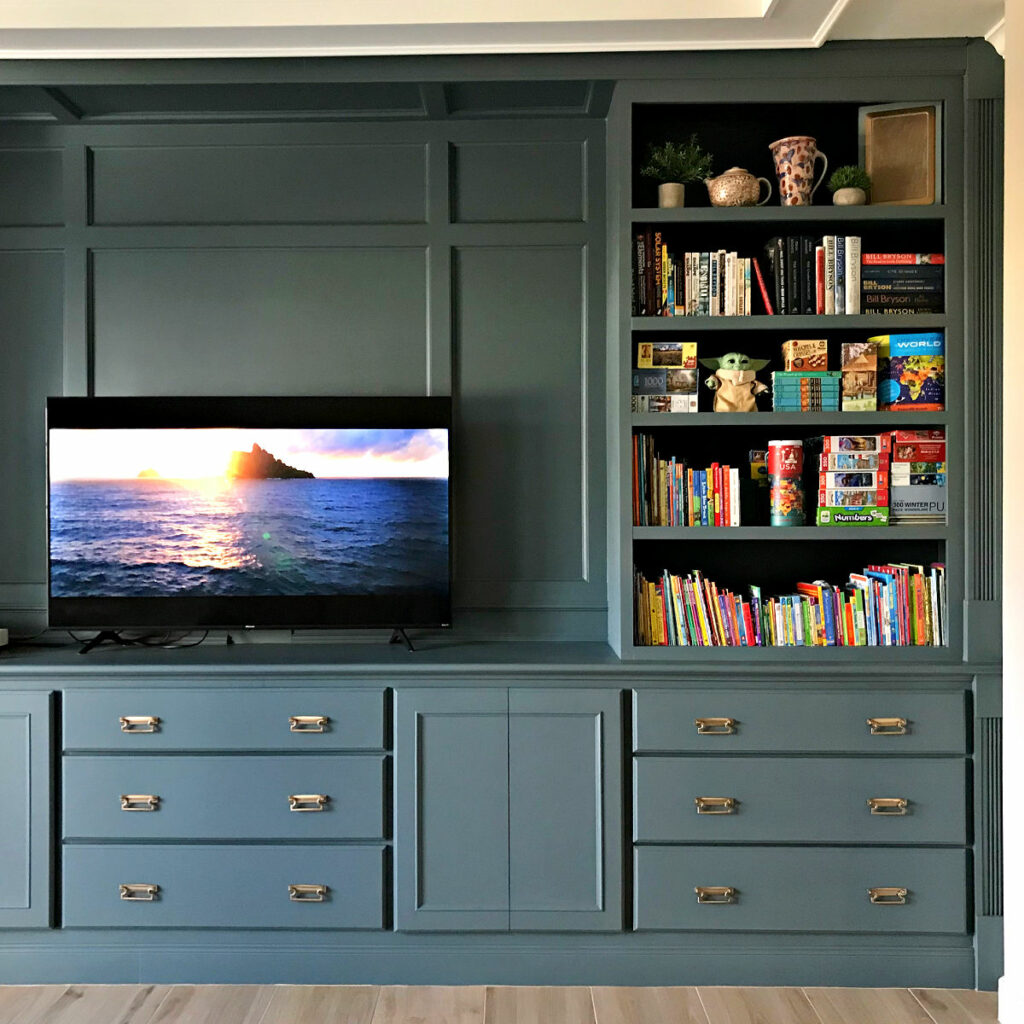
How to Paint Built In Bookshelves and Cabinets
Painting built in bookshelves and cabinets can seem overwhelming for beginners or like a lot more work than you can handle.
And, there are so many types of primers, paints, and rules for painting built in cabinets and bookshelves. The truth is, there are a lot of right ways to do this correctly.
What you really need to do is just do your research, pick the primer, and paints you want to use, then follow the steps to use those primers and paints correctly.
This post is exactly how I paint new and previously painted built in bookshelves and cabinets.
You can find a link to the free printable guide below. But first, let’s go over the important steps and my recommended products.
If you’re also looking for tips and tutorials about How to Paint Furniture for beginners, More DIY Tips for How to Paint Furniture and 20+ Step by Step Furniture Painting Tutorials, check out those posts.
Table of contents
- How to Paint Built In Bookshelves and Cabinets
- What Kind of Primer Do You Use on Built In Bookshelves
- What Is The Best Paint For Built-in Bookshelves?
- Best Paint Finish For Bookshelves
- Can You Paint Built Ins and Cabinets Without Sanding
- Painting Built In Bookshelves – Quick Overview
- DIY Steps to Paint Built In Bookshelves and Cabinets
- Where to Start Painting Built In Cabinets and Bookshelves?
- Should I Use a Paint Sprayer on Bookshelves and Cabinets?
Now, let’s get to those steps for how to paint built in cabinets and bookshelves.
What Kind of Primer Do You Use on Built In Bookshelves
If you are painting built ins that already have a paint or stain finish, it’s always a good idea to use a primer.
You need to use a primer that can block and seal any type of old finish, or wood knothole, underneath it. AND, that can also stick to any surface, even high gloss finishes.
It’s also very important to follow the products recommendations for application and dry time. Paint feels dry before the products dry time ends. But, it’s still curing (hardening and drying).
So, let it dry completely or you’ll end up with tacky paint for weeks or months after. No one wants that. Here are three great primers to use to paint built in bookshelves and cabinets.
- Sherwin Williams Pro Block Latex
- Benjamin Moore Advance Primer
- Zinsser 123 Plus Water-Based All Projects Primer

What Is The Best Paint For Built-in Bookshelves?
Just like primer, picking a long lasting, durable paint is important when it comes to high use furniture like built ins and cabinets.
I prefer safe to use, low VOC, low odor, water-based acrylic or latex paints that dry fast and cure hard and fast.
I never use oil-based paints in my home, even though they are durable. They are hard to apply, hard to clean up, have VOC’s and fumes that are dangerous, have a long dry and cure time, and they yellow over time.
And, there isn’t really 1 best paint for built ins, there are actually quite a few that do a great job.
Here are 3 of my favorite paints that work great on built ins and bathroom and kitchen cabinets. Again, follow the product guidelines for application, dry time, and paint sprayer settings (if using one).
- Magnolia Homes by Kilz Acrylic Interior Paint or Chalk Style Paint
- Sherwin Williams ProClassic Acrylic
- Benjamin Moore Advance
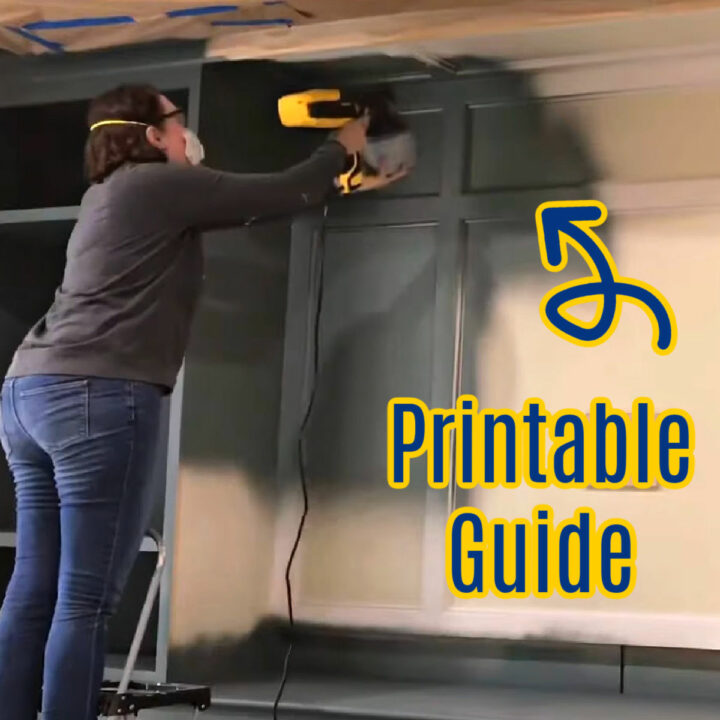
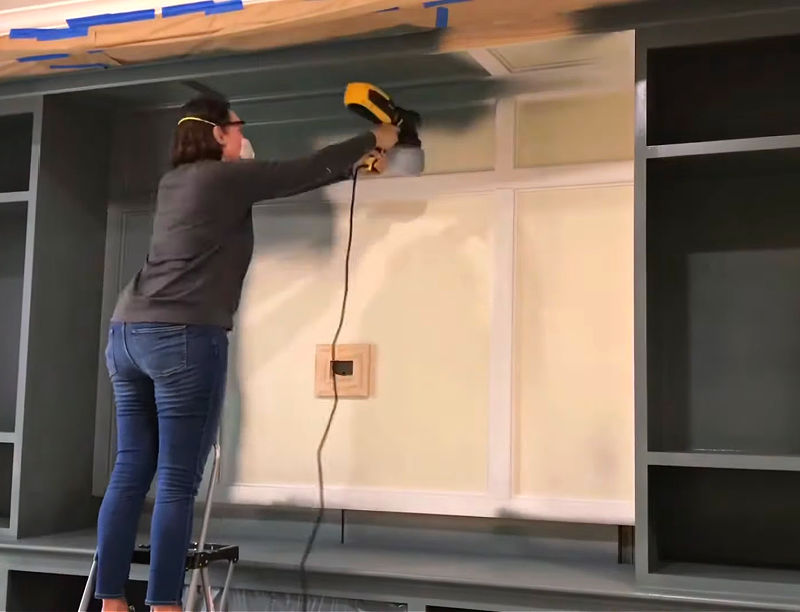
Use a nice synthetic brush or foam roller to avoid brush marks. I used a handheld paint sprayer for the first coat of paint on my built ins. They’re not necessary but they can save hours of work.
Best Paint Finish For Bookshelves
The old rule for picking the best paint finish for bookshelves and cabinets was to use Semi-Gloss or Gloss on trim, cabinets, doors, and built-ins. But now, any sheen from Eggshell to Gloss might work.
Pick a sheen that works with the style of the room. Semi-gloss and Gloss work well when you’re going for an overall glamorous or high-end look.
Eggshell and Satin work well with more relaxed, cozy, or casual styles. I use Eggshell sheen on all of the trim, doors, wainscoting, and cabinets in my home. I even use Eggshell sheen on ceilings.
Eggshell and Satin sheens have a great, subtle sheen that reflects light around a room without accentuating imperfections in the paint. Semi-gloss and gloss are so shiny that the reflected light highlights dents and dings.
Eggshell and Satin sheens also have enough sheen to make wiping off dirt and grime easy. Flat finishes aren’t smooth enough to make clean up easy.
Can You Paint Built Ins and Cabinets Without Sanding
You can sometimes paint built ins and cabinets without sanding. If the built ins have an old finish that looks perfectly smooth and ready for paint, then you can sometimes skip the sanding.
BUT, you have to be sure you’ll still have good adhesion between the old finish and the new paint. There are a few ways to do this without sanding.
First, you need to clean the old finish with a cleaning degreaser like TSP. With some old, low gloss finishes, you might be ready to apply a high quality primer now, like the three primers I suggest above.
Certain high gloss paints or varnishes will need a deglosser or liquid sandpaper applied across the entire surface.
That deglosser will get the old finish ready to bond with the new primer, similar to what sandpaper does. Follow the directions on the product you use for the best result.
I personally think just doing a scuff sanding across the surface is easier than using a deglosser or liquid sandpaper.
A scuff sanding with 120 grit sandpaper is just the same amount of pressure you would use cleaning a kitchen counter. Also, don’t forget to use wood filler and caulk anywhere you need it.
But, both work well. So, go with either the scuff sanding or the deglosser, then apply a quality primer.
Painting Built In Bookshelves – Quick Overview
Here’s a quick look at the general steps for how to paint built in bookshelves and cabinets. You can find a detailed explanation of each step below.
- Clean and Repair
- Sand & Dust Off
- Tape Off, Seal, and Drop Cloth Prep Work
- Apply Primer
- Apply 2 Coats of Paint
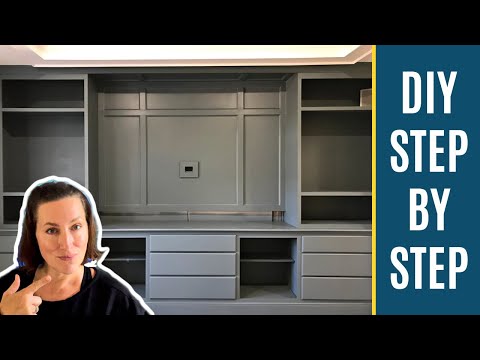
How to Paint Bookshelves and Cabinets: Video
Watch this walkthrough video to see exactly how I painted the built in bookshelves and cabinets I’ve been building in my house. Scroll down for written steps.
DIY Steps to Paint Built In Bookshelves and Cabinets
Here are the steps I always use for how to paint built in bookshelves and cabinets. Like I mentioned at the beginning of this post, there are a lot of ‘right ways’ to paint built ins and cabinets.
So, I know that can make it confusing for anyone that hasn’t done it yet.
Just be sure to follow the product recommendations on your primer and paint. And, always use quality primers and paints that people recommend for cabinets and built ins.
The only real variations when it comes to painting built in cabinets comes in prepping for paint, how to apply paint, and whether or not to use a top coat. I’ll cover all of that below. Let’s get to my recommendations. 🙂
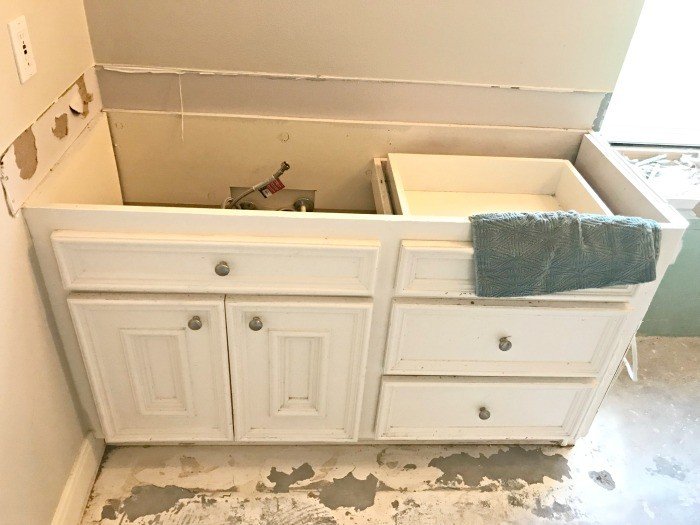
Step One – Clean and Repair
If you are painting built in bookshelves or cabinets that already have an old paint or stain finish, prep your built ins for painting by cleaning off built up dirt and oils with a degreaser safe for wood, like TSP, or a vinegar and water mix.
Once it’s clean, look it over for any spots that might need repairs. Use wood filler or spackling on small dents, dings, and cracks.
Use paintable caulk on any joints in the wood or where the built ins or cabinets meet the floor, walls or ceilings. You can find a full written tutorial for where to use wood filler and caulk here.
Larger repairs in wood furniture should be made with Bondo All Purpose Wood Putty. Bondo is structurally stronger for large patches in wood furniture and trim. Here’s a written tutorial about how to use Bondo to repair furniture.
Step Two – Sand And Dust Off
Sand unfinished or newly made built in bookshelves and cabinets to 120 grit. 120 grit will leave the wood with a smooth look and feel that is a good starting place for painting.
Most old paint and stain finishes will need either a scuff sanding with 120 grit or a good wipe down with a deglosser or liquid sandpaper.
If you use a deglosser, then be sure to follow the directions on the product before moving on to applying the primer.
If you are doing a scuff sanding instead, sand any of the old finish that will get new paint with 120 grit sandpaper. That will give the new paint a better grip onto the old finish.
If the old finish is chippy and rough, you’ll have to sand it smooth before painting.
Always wear a mask when sanding. And, follow safety guidelines about possible lead paint if the built ins could have possibly been painted before 1978.
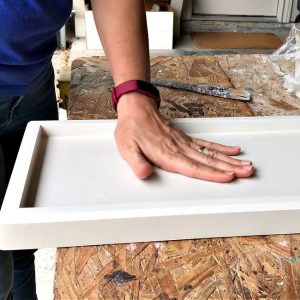
Make sure that everywhere feels smooth to the touch before painting. If it doesn’t feel smooth, that area might look rough when painted.
You can see in the video above how I constantly run my hand over areas I’m sanding to see if it actually feels smooth. Wipe off all dust with a Tack Cloth or clean damp rag.
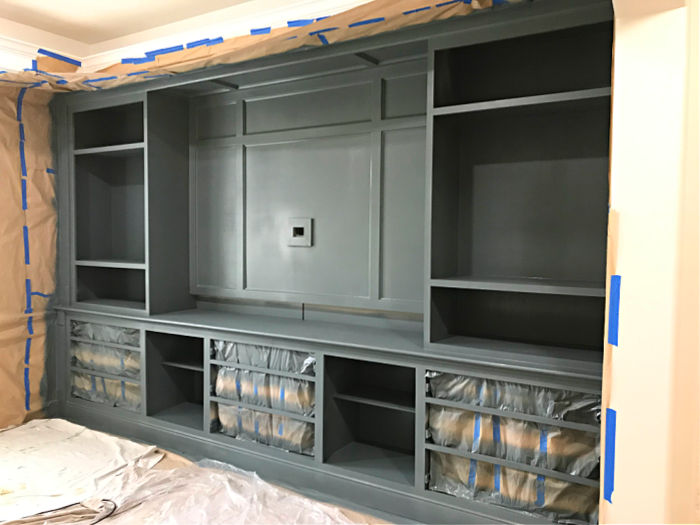
Step Three – Tape Off, Seal, and Drop Cloth Prep Work
Now that you have the built ins cleaned and ready for paint, it’s time to prep and protect the area around them.
Use painters tape around your built-ins, cabinets, or bookshelves. Make sure you get that tape in a perfectly straight line across the walls and ceiling.
It takes a little patience lining up a bunch of shorter pieces perfectly to make one long line, but it’s worth it.
If you’re using a paint sprayer, you’ll also need masking paper to protect the walls, floor and ceiling. Follow the paint sprayer’s instructions for how far back masking paper needs to cover.
I think my paint sprayer recommended masking paper 2 feet around the outside of the built in bookshelves or cabinets. But some recommend 4 or more feet of masking paper.
Use a drop cloth and painter’s tape to protect the floor too.
Seal the painters tape along the walls and ceiling with 1 coat of matching wall and ceiling paint to prevent feathering of the built in’s paint under the tape. You can see how I painted over my painter’s tape in the video.
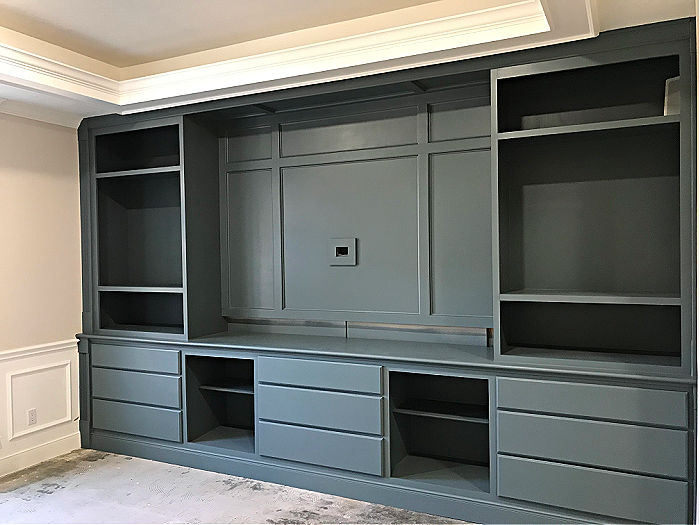
Step Four – Apply A Quality Primer
Apply a good water-based primer. There are cases where you might not need a primer, but it’s always safer to use one.
It helps your paint stick to almost any old finish and it provides a beautiful, smooth starting point for the paint.
You can find my 3 recommendations for good primers to use when painting built in bookshelves and cabinets above, or in the free printable guide near the end of this post.
Follow the directions on the primer for the best results. Use a quality nylon brush, foam roller, or foam brush to avoid brush marks. Allow it to fully dry according to the directions before step six.
Step Five – Apply The Paint
Apply 2 coats of a latex or acrylic paint that is known to be durable and dry hard enough to work well on cabinets and built ins.
There are 3 recommendations for paints I like to use on built in bookshelves and cabinets above.
You might need a light sanding with a 120 grit sanding block after the primer or after the 1st coat of paint, if the paint feels rough. This is pretty common when painting cabinet-grade plywood.
Lightly sand that paint or primer smooth, then dust off with a tack cloth again.
Follow the directions on the paint container for the best results. You usually only need 2 coats. But some red paint colors need 3 coats to get full coverage.
I also really like to do 3 or 4 total coats of paint on flat surfaces that get used a lot, like counter tops and shelves. Be sure to let them properly dry between coats so that they don’t stay tacky.
You should always wait 3 to 4 days after the last coat is applied before putting anything on the painted surface.
Use a fingernail in a hidden area to check that the paint has fully hardened. If your fingernail doesn’t make a mark, the paint should be ready for use.
That’s it, guys! Now, here’s answers to a couple common questions you might have.
Where to Start Painting Built In Cabinets and Bookshelves?
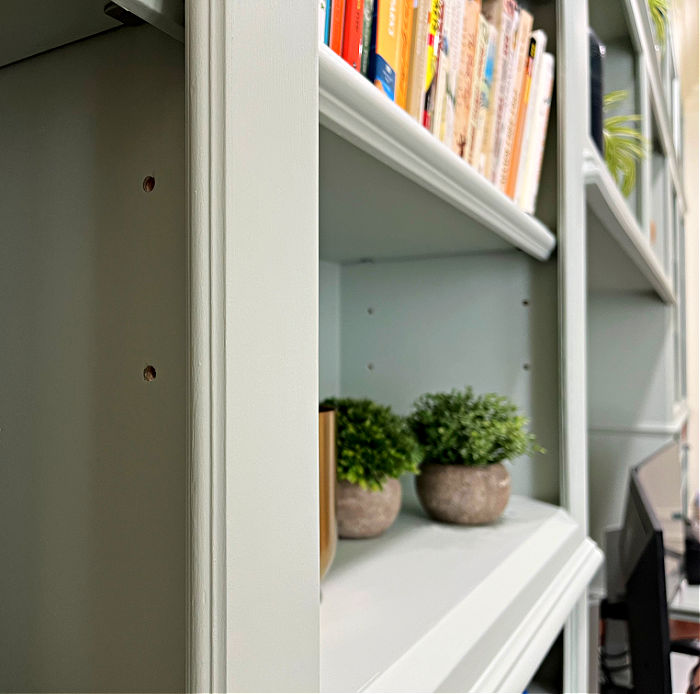
I think it’s easiest to paint inside cabinets and open bookshelves, working your way out to the front or face of the frame.
And, I generally work from the top to the bottom. Doing this helps me avoid touching wet paint as I work.
Should I Use a Paint Sprayer on Bookshelves and Cabinets?
A paint sprayer can absolutely save time when it comes to painting cabinets and built ins. And, by time, I mean hours. I used a paint sprayer on my built ins to apply the first coat of paint and I loved it.
You can see in the video how quickly that went. That Wagner Paint Sprayer made clean up easy too!
I also like to use a paint sprayer on walls to knock those out quickly.
The coat of paint that a paint sprayer applies is nice and thick (when you use quality paints). So, the second coat is more about painting any areas you can’t get with the sprayer and finishing everything off with a nice final layer.
But, paint sprayers cost money and have a slight learning curve of their own. So, only buy one if you think you’ll keep using it.
If you use a paint sprayer be sure to follow the instructions and guidelines for your sprayer and the type of paint you use. You’ll also need to follow the directions on the paint for how to thin that paint, if necessary.
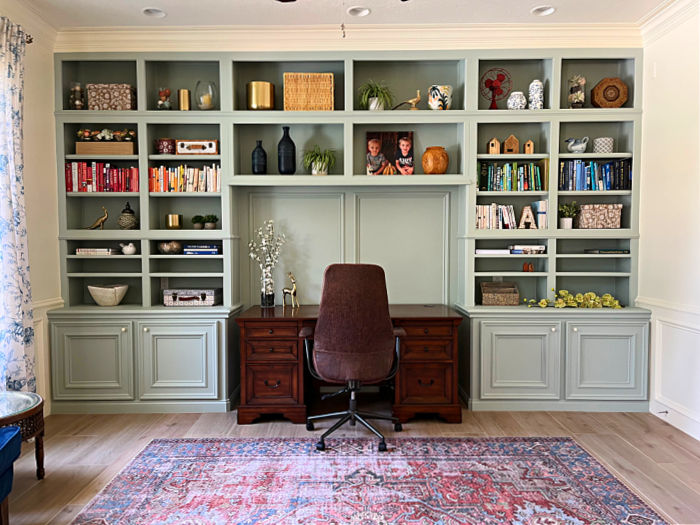
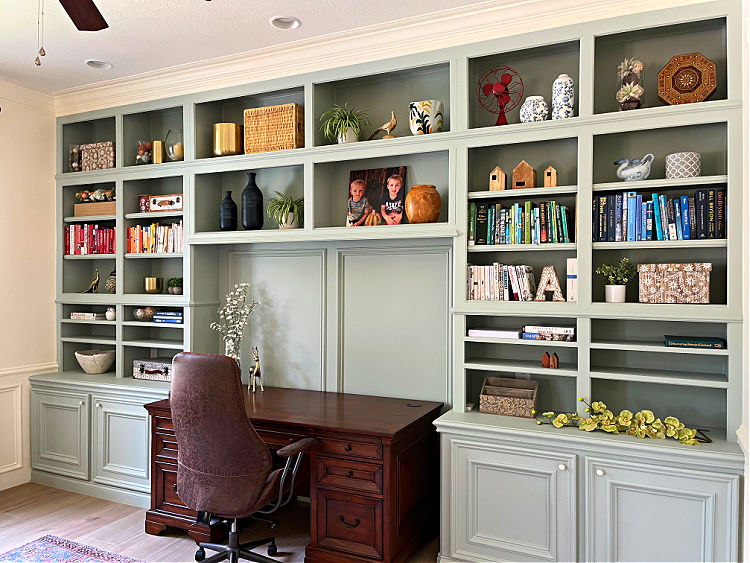
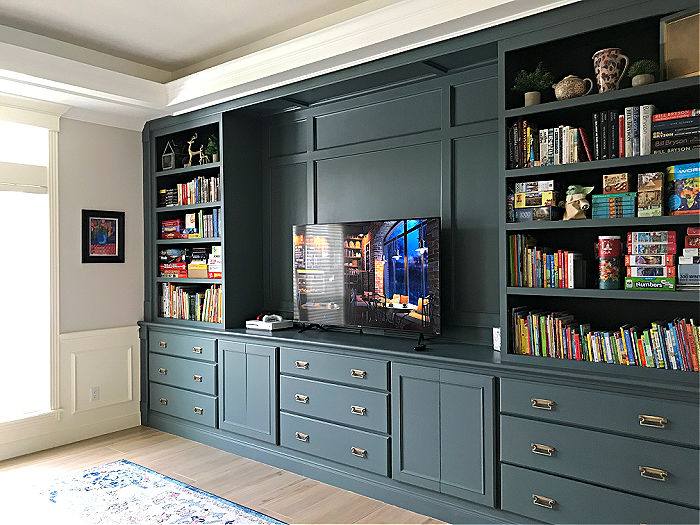
You can see all of the Before and After Family Room Makeover pictures from this room now. You won’t believe how huge the difference is!
Hi guys! You can find a few more tips for painting built ins in my free printable guide. Including these:
- Why I don’t use a top coat
- Which paint sheen I like to use on built ins and cabinets
- How I easily touch up small spots of peeled off paint after removing the painters tape
Grab the free printable guide for how to paint built in cabinets and bookshelves here.

Thanks for checking out this post full of tips for how to paint furniture for beginners. If you’re looking for more of my Furniture Painting Videos, check out this Beginner Furniture Painting playlist on YouTube.
More DIY Projects For You
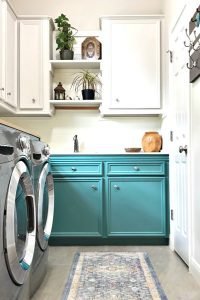
You might also like this Colorful Laundry Room Makeover.
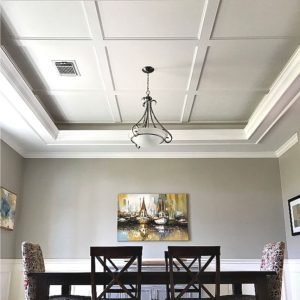
Or this Simple DIY Coffered Ceiling Makeover.
Here’s How to Get a Super Smooth Finish with Chalk Paint. It’s a-mazingly easy!
You might also like this DIY for How to Whiten Tile Grout. It’s a Game Changer!

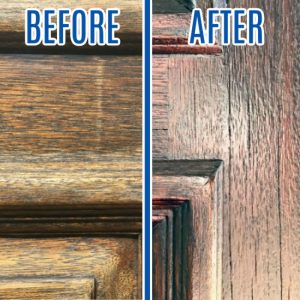
And, if it is time to Stain your Front Door, check out these steps for how I restain a front door without stripping it or removing it. 🙂
Feeling inspired? Now that you’ve read these tips for How to Paint Built In Cabinets and Bookshelves, you can do it too. Let me know if you have questions.
Don’t forget to sign up for the Abbotts At Home email newsletter to get DIY, Remodeling, and Crafty ideas in your inbox.
How to Paint Built In Bookshelves and Cabinets

If you are ready to give your built ins a makeover, but don’t know where to start, this post is for you! It’s everything you need to know about how to paint built in bookshelves and cabinets.
Tools
- Quality Primer and Paint
- Synthetic Paint Brush
- Foam Roller
Instructions
Quick Look At The Steps
Here’s a quick look at the general steps for how to paint built in bookshelves and cabinets. You can find a detailed explanation of each step below.
- Clean and Repair
- Sand & Dust Off
- Tape Off, Seal, and Drop Cloth Prep Work
- Apply Primer
- Apply 2 Coats of Paint
DIY Steps to Paint Built In Bookshelves and Cabinets
Here are the steps I always use for how to paint built in bookshelves and cabinets. Like I mentioned at the beginning of this post, there are a lot of ‘right ways’ to paint built ins and cabinets. So, I know that can make it confusing for anyone that hasn’t done it yet.
Just be sure to follow the product recommendations on your primer and paint. And, always use quality primers and paints that people recommend for cabinets and built ins.
The only real variations when it comes to painting built ins comes in prepping for paint, how to apply paint, and whether or not to use a top coat. I’ll cover all of that below. Let’s get to my recommendations.
Step One – Clean and Repair
If you are painting built in bookshelves or cabinets that already have an old paint or stain finish, prep your built ins for painting by cleaning off built up dirt and oils with a degreaser safe for wood, like TSP, or a vinegar and water mix.
Once it’s clean, look it over for any spots that might need repairs. Use wood filler or spackling on small dents, dings, and cracks. Use paintable caulk on any joints in the wood or where the built ins or cabinets meet the floor, walls or ceilings. You can find a full written tutorial for where to use wood filler and caulk here.
Larger repairs in wood furniture should be made with Bondo All Purpose Wood Putty. Bondo is structurally stronger for large patches in wood furniture and trim. Here’s a written tutorial about how to use Bondo to repair furniture.
Step Two – Sand And Dust Off
Sand unfinished or newly made built in bookshelves and cabinets to 120 grit. 120 grit will leave the wood with a smooth look and feel that is a good starting place for painting.
Most old paint and stain finishes will need either a scuff sanding with 120 grit or a good wipe down with a deglosser or liquid sandpaper. If you use a deglosser, then be sure to follow the directions on the product before moving on to applying the primer.
If you are doing a scuff sanding instead, sand any of the old finish that will get new paint with 120 grit sandpaper. That will give the new paint a better grip onto the old finish. If the old finish is chippy and rough, you’ll have to sand it smooth before painting.
Always wear a mask when sanding. And, follow safety guidelines about possible lead paint if the built ins could have possibly been painted before 1978.
Make sure that everywhere feels smooth to the touch before painting. If it doesn’t feel smooth, that area might look rough when painted.
You can see in the video above how I constantly run my hand over areas I’m sanding to see if it actually feels smooth. Wipe off all dust with a Tack Cloth or clean damp rag.
Step Three – Tape Off, Seal, and Drop Cloth Prep Work
Now that you have the built ins cleaned and ready for paint, it’s time to prep and protect the area around them.
Use painters tape around your built-ins, cabinets, or bookshelves. Make sure you get that tape in a perfectly straight line across the walls and ceiling. It takes a little patience lining up a bunch of shorter pieces perfectly to make one long line, but it’s worth it.
If you’re using a paint sprayer, you’ll also need masking paper to protect the walls, floor and ceiling. Follow the paint sprayer’s instructions for how far back masking paper needs to cover.
I think my paint sprayer recommended masking paper 2 feet around the outside of the built in bookshelves or cabinets. But some recommend 4 or more feet of masking paper. Use a drop cloth and painter’s tape to protect the floor too.
Seal the painters tape along the walls and ceiling with 1 coat of matching wall and ceiling paint to prevent feathering of the built in’s paint under the tape. You can see how I painted over my painter’s tape in the video.
Step Four – Apply A Quality Primer
Apply a good water-based primer. There are cases where you might not need a primer, but it’s always safer to use one. It helps your paint stick to almost any old finish and it provides a beautiful, smooth starting point for the paint.
You can find my 3 recommendations for good primers to use when painting built in bookshelves and cabinets above, or in the free printable guide near the end of this post.
Follow the directions on the primer for the best results. Use a quality nylon brush, foam roller, or foam brush to avoid brush marks. Allow it to fully dry according to the directions before step six.
Step Five – Apply The Paint
Apply 2 coats of a latex or acrylic paint that is known to be durable and dry hard enough to work well on cabinets and built ins. There are 3 recommendations for paints I like to use on built in bookshelves and cabinets above.
You might need a light sanding with a 120 grit sanding block after the primer or after the 1st coat of paint, if the paint feels rough. This is pretty common when painting cabinet-grade plywood. Lightly sand that paint or primer smooth, then dust off with a tack cloth again.
Follow the directions on the paint container for the best results. You usually only need 2 coats. But some red paint colors need 3 coats to get full coverage.
I also really like to do 3 or 4 total coats of paint on flat surfaces that get used a lot, like counter tops and shelves. Be sure to let them properly dry between coats so that they don’t stay tacky.
You should always wait 3 to 4 days after the last coat is applied before putting anything on the painted surface. Use a fingernail in a hidden area to check that the paint has fully hardened. If your fingernail doesn’t make a mark, the paint should be ready for use.
Notes
If you have more questions, be sure to download the Free Guide to Painting Built Ins and Cabinets. It's full of answers to common questions with recommendations on which paints to use. And, watch the video to see me painting my built ins.

Stephanie Abbott has been remodeling homes, updating & building furniture, and working on DIY home maintenance and cleaning tips for over 20 years. Her remodeling has been featured in Better Homes and Gardens Magazine. And, her DIY YouTube channel has had more than 8 million views.
Most of the DIY tutorials and videos on this site focus on beginner to intermediate level DIY Projects that can be done in an affordable way without high-end, expensive tools. All of the cleaning tips on this website have been tested in her home.