
Turn that BORING ceiling into the BEAUTIFUL feature it should be! This DIY Vaulted Tray Ceiling idea gave our Master Bedroom instant style.
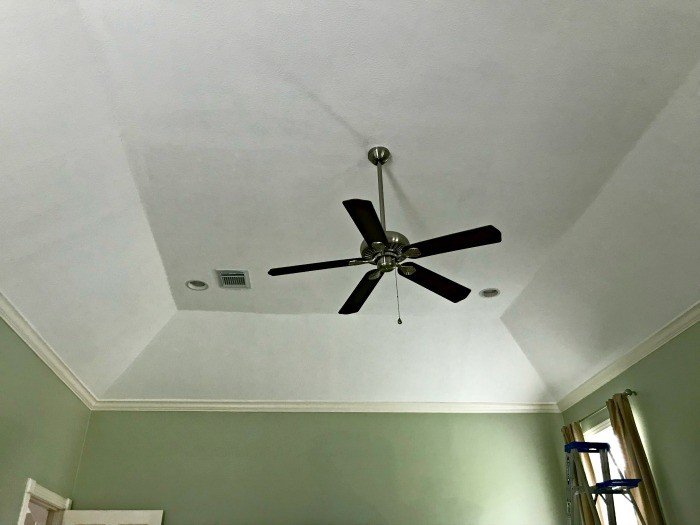
This Vaulted Tray Ceiling Was Damaged & Boring
You know you’ve hit a home run with a DIY when it becomes the instant star of a room. This DIY Vaulted Tray Ceiling is definitely the star of or Master Bedroom now!
In fact, when my Mom first saw the update, she said she didn’t even notice we had a vaulted ceiling before. What?! Something like a vaulted ceiling should always be the eye-catcher in a room.
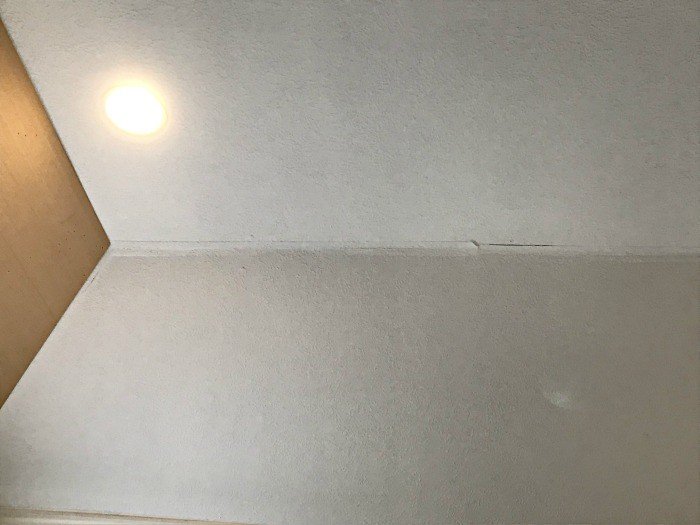
But ours had some problems. The drywall tape job had bubbled and cracked in quite a few spots. So, that needed to be fixed.
And we made the mistake of painting the ceiling with the untinted paint sold in the stores. It was a stark white, cold paint color that looked terrible. Definitely pick a shade of white instead of buying the default.
Is This Angled Tray Ceiling Makeover Hard?
The install work for this vaulted tray ceiling design idea was relatively straight-forward. I install trim and molding around here all the time. So, I had a pretty good idea what I was getting into.
The most challenging part of this angled tray ceiling makeover is just the fact that you have to go up and down ladders over and over and over. And you are working over your head the whole time. Which can be pretty tough on your arms and neck!
But just keep reminding yourself that it’ll look awesome when you’re done. And you’re getting a decent workout in too. Win win! So, let’s get this vaulted ceiling makeover started. 🙂
RECOMMENDED: 25 Best Tray Ceiling Ideas & Vaulted Tray Ceiling Ideas (Molding, Trim, & Paint)
How To Install This Vaulted Tray Ceiling Trim
Supplies Needed
- Construction Adhesive (like this one) that works for drywall and wood projects
- Zinsser 123 Water-based Primer & latex paint of choice, I used Behr’s Polished Pearl
- DAP White Latex Caulk, the Paintable Type
- DAP Plastic Wood w/ Drydex
- Cabinet-Grade 4×8 Plywood Sheets, about .20 inches thick or 5mm
- Pine Lattice Moulding
- 3″ Base Board Molding, I used this one
Tools Needed
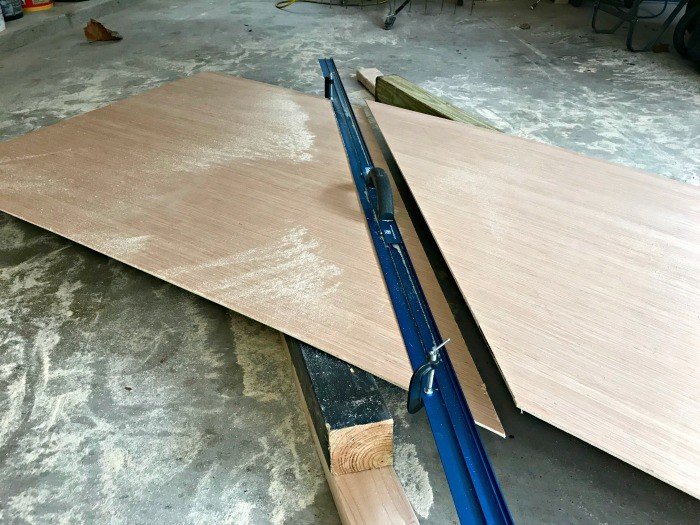
- Circular Saw and a Cutting Guide (see photo below for example)
- Miter Saw for the 45-degree cuts on the base board molding and lattice
- Brad Nailer & Brad Nails
- I used 2 1/4″ Brad Nails to attach the plywood and base board to the studs in the ceiling, then 3/4″ for the lattice
- Caulking Gun
- Additional: 2 ladders, pencil, tape measure, spirit level, stud finder
PLEASE NOTE: I only used the plywood panels because I wanted to cover the textured ceiling for a finished look. If your ceiling is already smooth, skip the plywood steps. You won’t need to do them to get the same look. Lucky you!
Step One
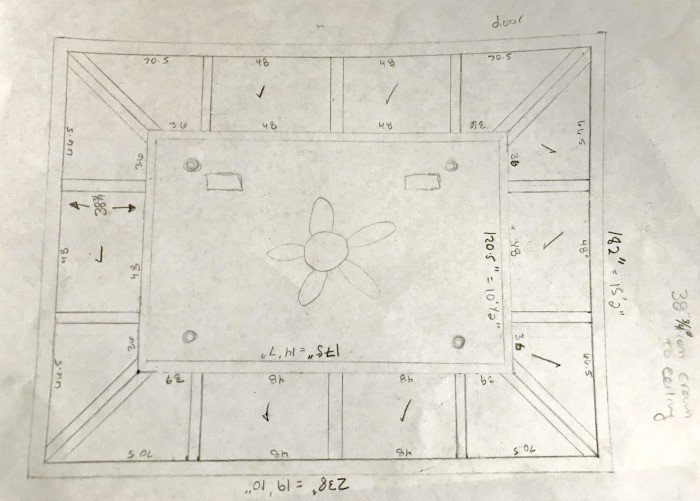
Start by carefully measuring the length of each wall where the wall and ceiling meet and the length of the wall where the angled tray ceiling and the flat center meet. Then draw up a quick sketch with these.
Making a diagram of the ceiling will help you plan how many sections you’ll need, visually check that the layout will look balanced, and easily track the measurements of each section for your cuts.
Based on the length of my walls, I went with 4 sections on the long walls and 3 on the short walls. I was able to reduce cuts by sticking with the default 48″ width panels on the 6 center sections.
Step Two
Now, that you’ve double-checked your measurements and made a diagram, you can cut your panels. I used my Circular Saw and a cutting guide to cut each panel. I find it easier to cut all of the panels at once, so that I save time and only get covered in sawdust once. 🙂
Make sure the primed or smoother side of the panels will face out when you’re marking and making your cuts. Brush all of the sawdust off of the panels before carrying them inside.
Step Three
Use your stud finder to mark the location of the studs in the wall where you are attaching the panels. I marked those studs on the crown molding and the ceiling so that I could see the marks after the panel was in place.
Step Four
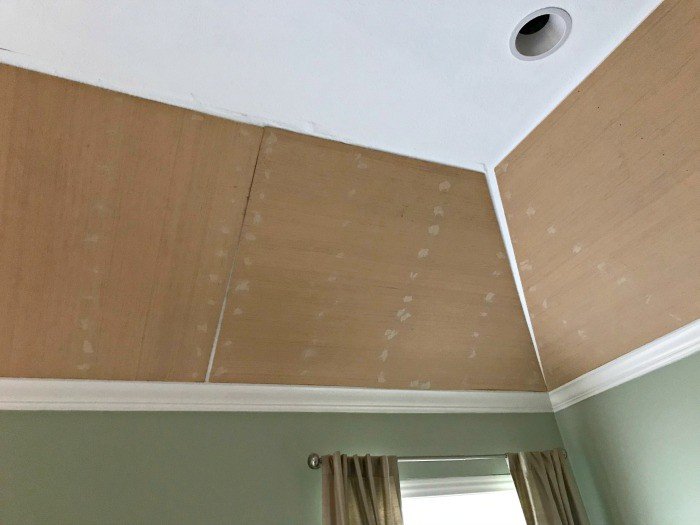
Now you can install those wood panels in the vaulted ceiling. Since I knew my crown molding was level, I used that as the base for each panel.
As long as I had it perfectly pressed against that crown, it would be square. If you don’t have crown molding already, you’ll need to install that before the panels to get the same vaulted ceiling trim makeover look.

Step Five
I used quite a bit of adhesive on each panel, as you can see above. And also tons of brad nails. Those panels will never budge!
When you’re gluing them up, don’t worry about up to a 1/2″ gap between panels, the molding will cover that. Just make sure that the panels don’t overlap!!
Step Six
Once all of the panels are glued and nailed into place, use that wood filler on the nail holes. Caulk will shrink and isn’t sandable, so wood filler or spackling is best for this job.
After all holes are filled and sanded smooth, I primed the panels. I primed my old crown molding too. It was due for a new coat of paint too.
Step Seven
Next up for this DIY Vaulted Tray Ceiling Makeover, I marked the studs in the ceiling so that I could attach the base board to the ceiling. Be sure to put those marks where you can still see them once the molding is up.
Then I marked a straight line, with my spirit level, across the top of the paneling. This was my guide for the edge of the base molding along the panels.
I used the already level crown molding as my reference point here. For my ceiling, I marked 38″ from the crown molding to the top of the panels across the boards, then connected those marks with my 4′ long spirit level.
Sorry I didn’t get a picture of this, but this line was very close to the top end of the panels. I wanted the base board to sit on top of the edge of the panels to hide any uneven lines along the panels.
Each panel was slightly longer or shorter at the top, due to natural cutting and measuring differences. BUT the bottoms were perfect since I pressed them up to the edge of the crown.
Step Eight
Attach the baseboard to the ceiling with nails at the studs. It’s so lightweight, I skipped the glue. Just be sure to nail it in at every stud. You’ll need to make angled cuts here.
Make sure everything lines up perfectly before nailing. You want those corners to look as perfect as possible. If you have to move off of that straight line you just marked (a little bit) to make that corner perfect, then do it.
Your eye will always notice a bad corner before a 1/4″ difference in height. Also, I bought 20′ long pieces of base board for this ceiling. That way I could use 1 single board for each of the 4 sides.
If you can avoid using 2 pieces, it gives a nicer look and you don’t have to go through all of the work hiding the seam with caulk or wood filler.

Step Nine
Now that all of the baseboard is attached, you can add the lattice trim between the plywood panels.
The measurements for each should be very close to the others, but I checked the measurement at each spot to get the best fit possible. I brad nailed the lattice into place.
You can use 1/2″ nails here, if you used plywood panels. If you already had a smooth drywall ceiling, then use 1 1/2″ long brad nails at a slight angle to hold that trim tightly against the ceiling.
For the 4 corners, I used 2 pieces of lattice butted up against each other. No need to calculate angles. I started by cutting the lattice piece about 4″ longer than I needed. Since, lattice is flexible I could hold up the lattice in the corner to mark the cut points.
Just remember that you want the inside edges where the two lattices meet to make a line from exactly the corner of the new base molding on the ceiling and the corner of the crown molding at the bottom. I used my Circular saw for this cut.

Step Ten
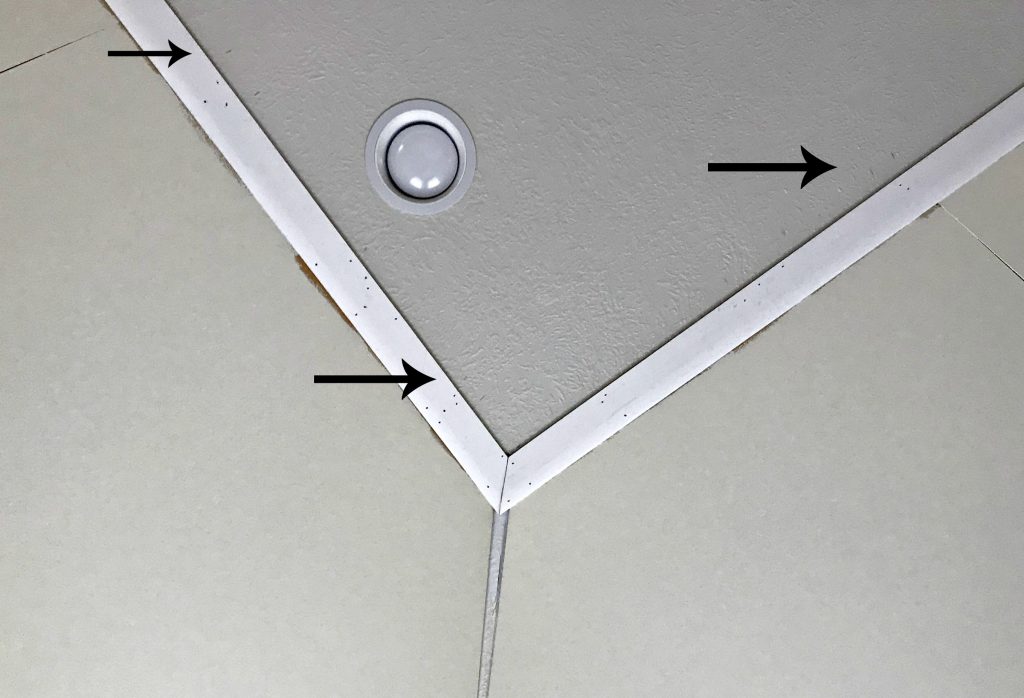
Now, on to the boring but kind of the most important part…caulking. Caulk along the top and bottom of the panel where it meets the molding. Caulk either side of each piece of lattice too. And fill the holes in the base board on the ceiling with wood filler.
When those dry, sand them smooth. Getting the caulk and wood filler looking great is the key to a professional looking job. Remember, caulk can’t be sanded. So, you need to have it looking great before it dries.
If you’re new to DIY trim projects check out this post for tips on where to use caulk or wood filler on wood trim. Once dry, paint with 2 or 3 coats of your latex and you’re ready to show off your hard work!
RECOMMENDED: 36 Great DIY Ceiling Makeover Ideas: Designs From Easy To Just WOW!
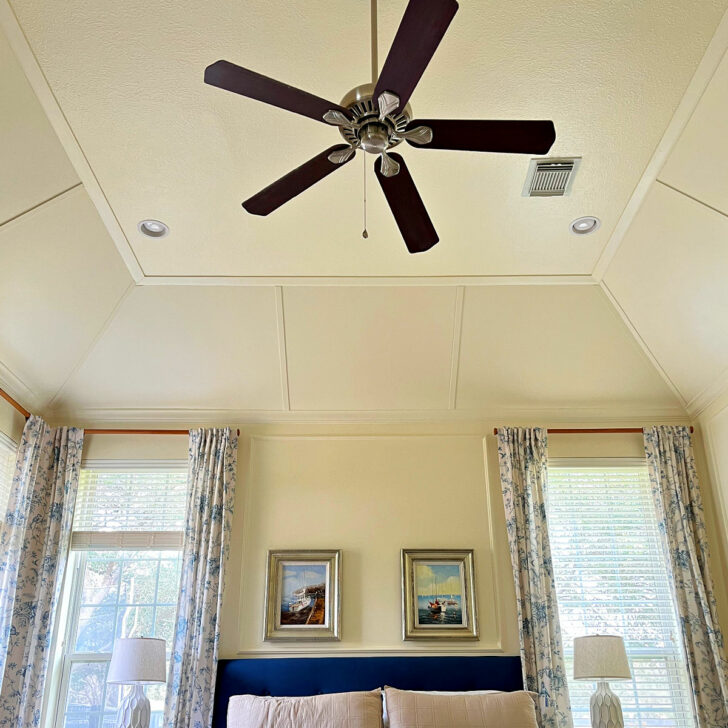
The Finished Vaulted Tray Ceiling Trim
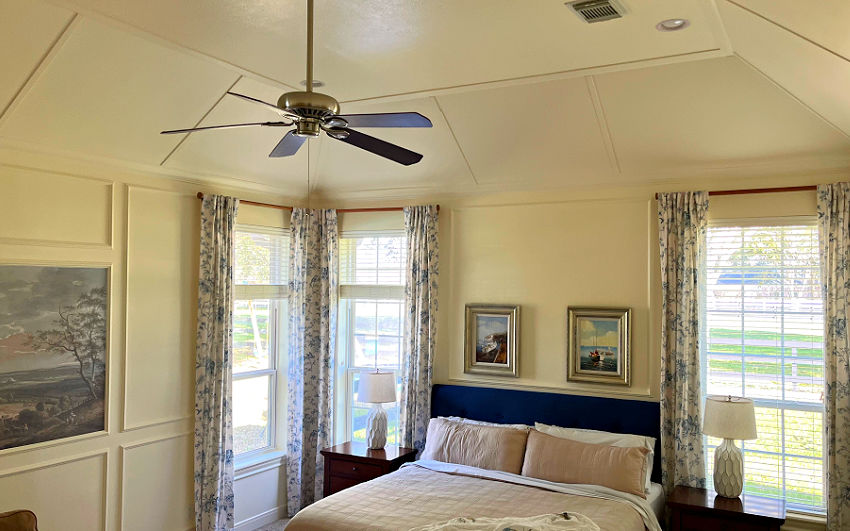
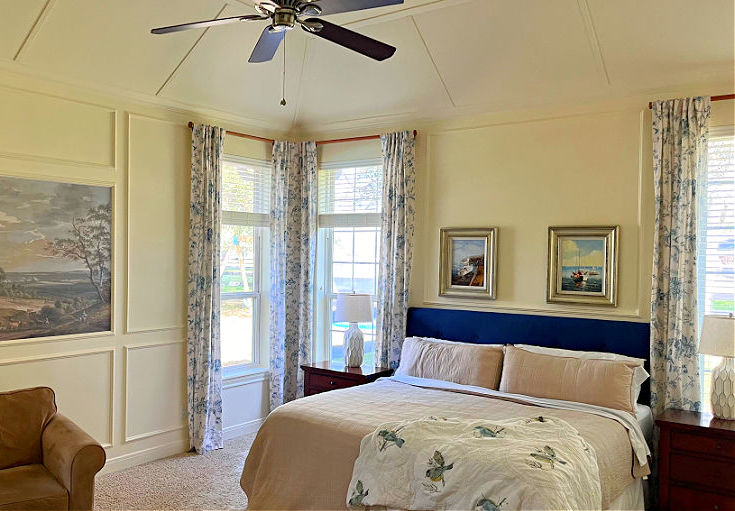
And, here’s the big reveal, guys! I love how this paneling and extra trim transformed our Vaulted Ceiling into a feature. It draws the eyes up and makes the whole room feel bigger with higher ceilings.
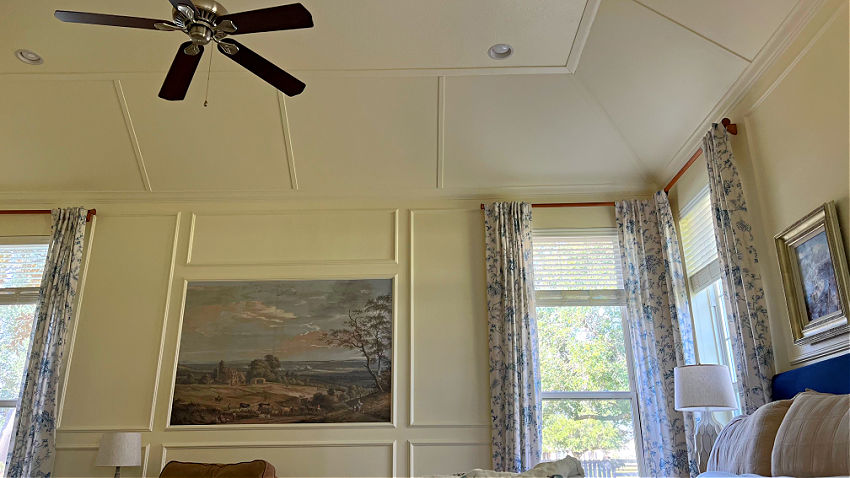
Painting the walls and ceiling recently made this room look even better. I love the fresh, bright, clean look of white paint these days.
That’s it for this vaulted tray ceiling molding idea. I hope that helped to inspire your design. Good luck!
More DIY Ceiling Ideas For You
- 15 Best Ways To Make An Old Ceiling Look Better: Easy, Cheap And Pretty Ideas
- Super Easy Way To Remove Water Stains From Ceilings Without Paint (1 Step)
- 20 Cheap Ceiling Ideas That Look Beautiful – From Amazon
- How To Cover A Textured Ceiling With Beautiful Shiplap (With Easy Steps & Video)
- What Is The Best Ceiling Paint Finish, Flat Or Eggshell? (With Photos Of 7 Rooms)
Looking for more DIY Ceiling inspiration? Check out this DIY Simple Coffered Ceiling Makeover.

Or, get the DIY Steps to add Board & Batten Molding to your walls. You can see more of my DIY Home Remodeling tutorials here.
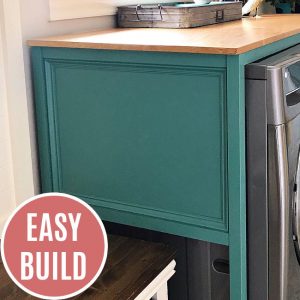
I love, love, love this DIY Over Washer and Dryer Laundry Table. It’s a Laundry Room game changer!
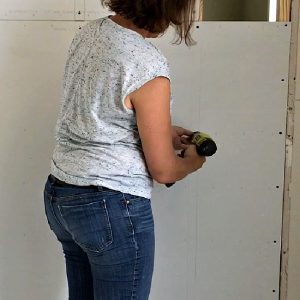
This tutorial for how to cut and hang drywall is great for beginners.
That’s it for this DIY Vaulted Ceiling Makeover. Follow the links above to get the things you’ll need. Have fun and let me know if you have questions.

Stephanie Abbott has been remodeling homes, updating & building furniture, and working on DIY home maintenance and cleaning tips for over 20 years. Her remodeling has been featured in Better Homes and Gardens Magazine. And, her DIY YouTube channel has had more than 8 million views.
Most of the DIY tutorials and videos on this site focus on beginner to intermediate level DIY Projects that can be done in an affordable way without high-end, expensive tools. All of the cleaning tips on this website have been tested in her home.