Skip to Content

Cheap And Easy DIY Canvas Frame (4-Step Wooden Frame And Video)

QUICK & EASY steps to build a DIY canvas frame, using 1×2’s. This beautiful wood frame is my favorite way to frame canvases. Finish in 1-day!

How To Build A DIY Canvas Frame

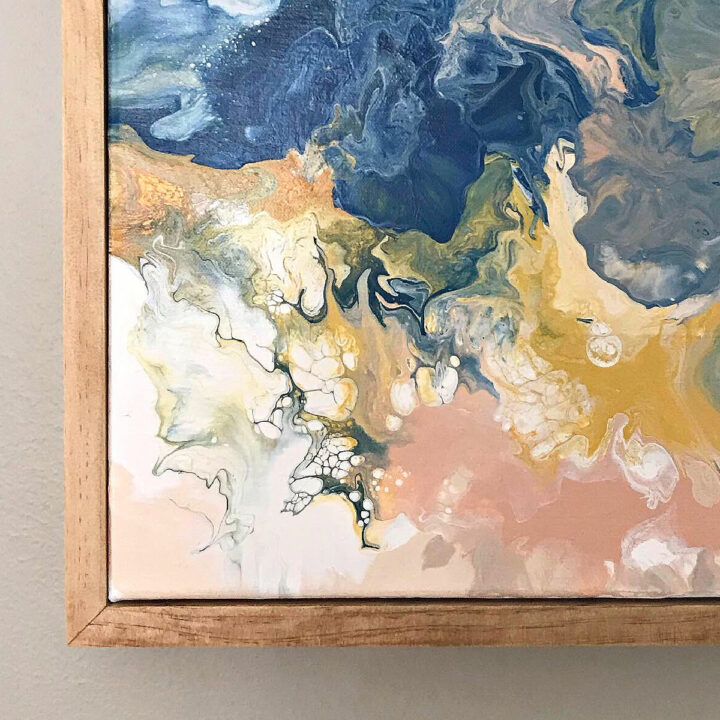
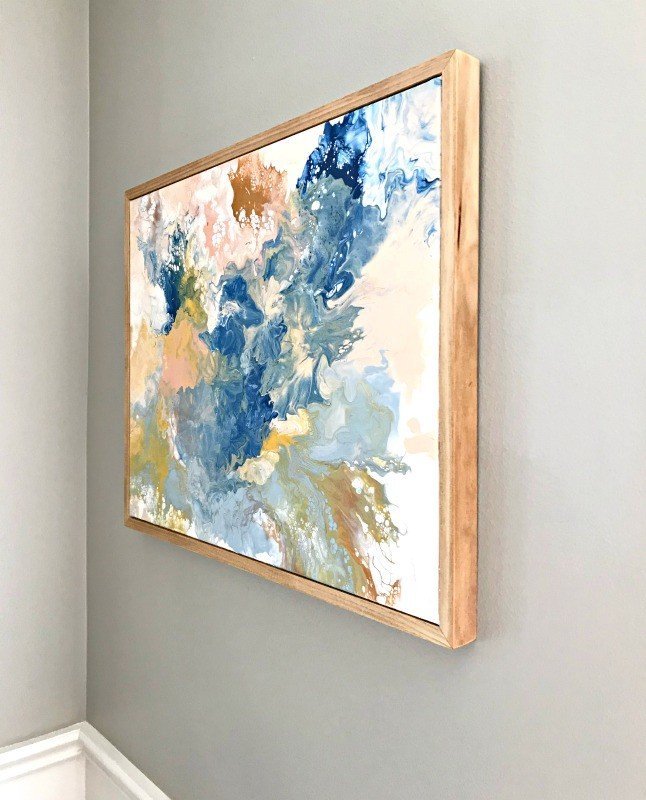
Hi guys. Today, I’ve got a quick and easy project for you all. This is how I build a pretty and simple Wood Frame for Canvas Art out of 1×2 dimensional lumber.

The clean lines of this wood canvas frame means this frame looks beautiful in any home. And, it’s such an easy frame to build, that you can easily have it done in a day. Yay!

Image of a wooden DIY canvas frame made with 1x2 lumber, on canvas wall art.
This easy DIY Canvas Frame looks beautiful with this DIY Acrylic Paint Pouring Wall Art.

Some links on this post are affiliate links. As an Amazon Associate I earn from qualifying purchases at no additional cost to you. 

I used Select Pine for this frame, but you can use the Oak, Poplar, Cedar or even Common Pine 1×2’s from your local Lowe’s or Home Depot.

Changing up the type of lumber and stain color you use can give you a unique, custom look for your canvas art.

If you are looking for a chunkier wood frame for canvas art, check out this Easy DIY Chunky Wooden Frame. Or, for a more detailed canvas frame, check out this DIY Wood Picture Frame With Trim Molding.

OK, let’s get to this DIY Wooden Frame for Canvas Art build.

Make your own stunning art for less than $20 with this pretty DIY Paint Pouring Wall Art Idea & Tutorial. I love this DIY Art Project, guys! Anyone can do this. #AbbottsAtHome #WallArt #PaintPouring #PouringPaint #AcrylicPaint #DIYDecor
Building this wood canvas frame slightly bigger than the frame means the canvas fits snuggly inside the frame without having to be permanently attached to it.

What Wood Is Used for Framing Canvas Art?

What is the best wood for canvas frame building?? Most dimensional lumber can be used for framing canvas art, as long as you follow general woodworking guidelines for picking boards.

So, pick straight, knot-free boards when you’re making a wood frame for canvas art.

For this DIY wood frame for canvases, I like to use the Select Pine, Cedar, or Poplar Dimensional Lumber available at most big box hardware stores, like Lowe’s and Home Depot.

The Oak 1×2’s would look beautiful as a frame too.

Just be sure to finish the frame with at least a Top Coat to seal the wood. That will protect the wood from the art medium on the canvas AND it will protect the canvas from the wood oils.

Image of a 1x2 wood frame for canvas art with text that says "Quick and Easy DIY Canvas Frame".

How To Make A Wooden Frame For Canvas Art

Luckily, it’s pretty easy to make a DIY frame for canvases, especially if you’re already comfortable with power tools or know someone who is.

And, this DIY Wood Frame for Canvas art is actually a pretty quick and low cost build. Here’s what you’ll need, followed by the steps.

Materials Used

  • Sander & Sandpaper – I used 80 and 150-grit on Select Pine
    • Other types of wood may require other grits for the best result
  • 1×2 Dimensional Lumber, I used Select Pine from Lowe’s or Home Depot
  • Wood Glue
  • Miter Saw
  • Angle Strap Clamp (I use this one)
  • Wood Filler
  • Finish – I used Watco Danish Oil in Medium Walnut

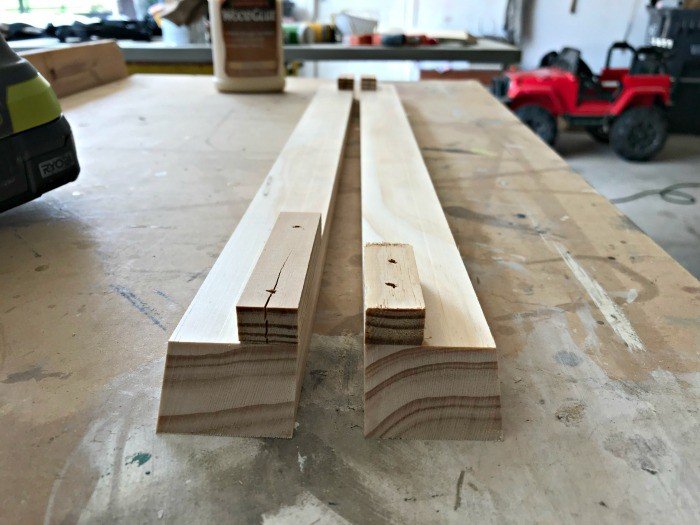
Step One – Measure And Cut Lumber

Using a Miter Saw, cut the inside of your frame to be 1/8″ to 3/16″ larger than the canvas size. Use 45-degree cuts on the corners.

I like to use the 1st cut piece for one side to mark the cuts for the opposite side. Getting clean 45-degree corners is really easy if the opposite sides are exactly the same size.

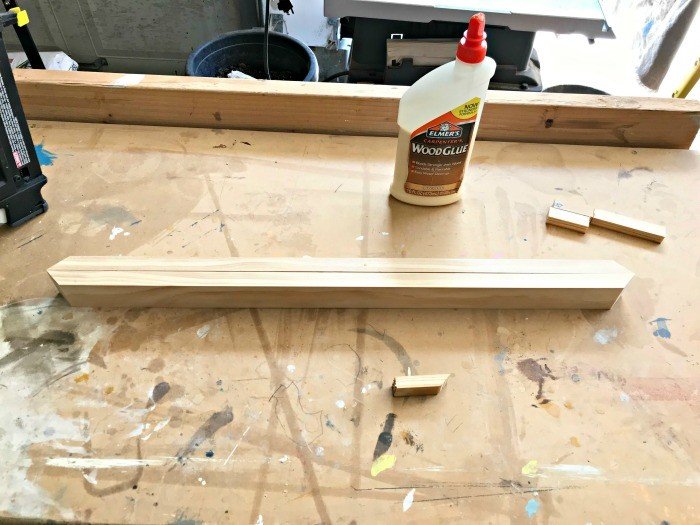
Step Two – Attach Back Stops

Next, attach scrap wood or trim molding to the 4 corners (on just the top and bottom boards) with brad nails and wood glue to act as a stop for the back of the canvas.

I used scrap 3/4″x 1/2″ molding pieces to stop my 3/4″ depth canvas flush with the wood. You can also use 1″ or 1/2″ or 1/4″ trim pieces to change the look or to work with a canvas with more depth.

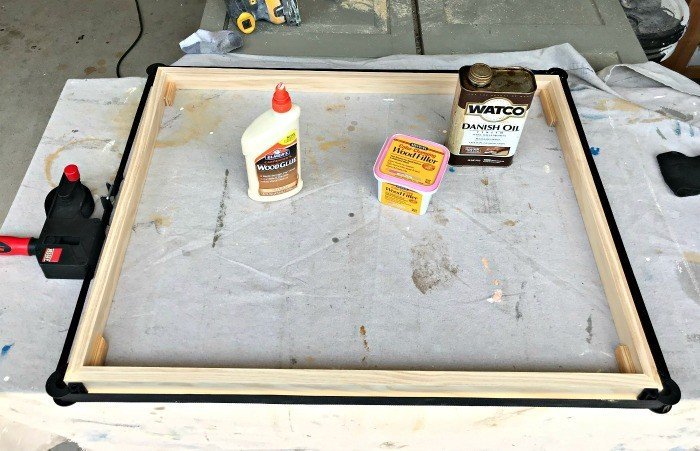
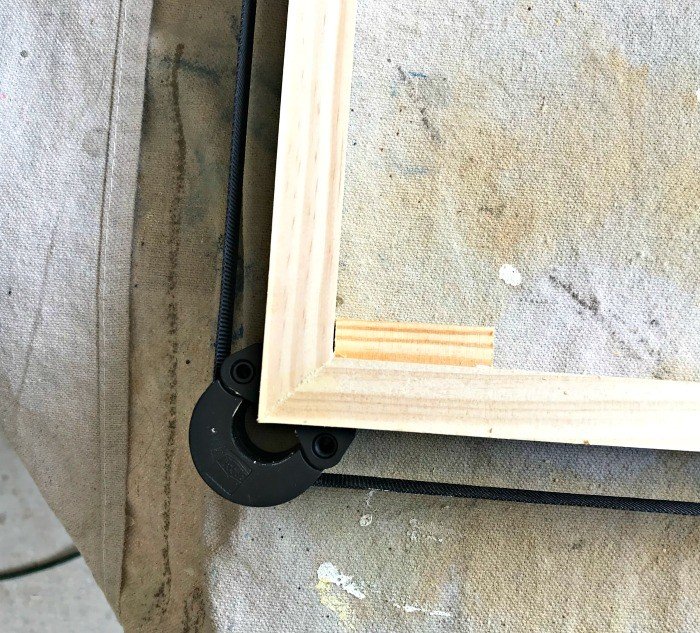
Step Three – Glue And Nail Frame

Layout the 4 sides of your DIY Wood Frame for Canvas on a flat surface. Use Wood Glue and clamps to hold the corners tight and straight while the glue dries.

I love using my Bessey Strap Angle Clamp for frames. It makes building wood frames so much easier. You can see it in the video above. 🙂

Bessey Angle Clamp Strap on a pine picture frame.

If you don’t have corner clamps of some sort, use brad nails with the glue to assemble the DIY wooden canvas frame. If possible, use nails only on the top and bottom sides of the frame, so they’ll be less visible.

Step Four – Sand And Apply Finish

Let the glue dry for a few hours before removing the clamps. The joints should be pretty tight, but a little bit of wood filler along the front and corners of the canvas frame will make them look even neater.

If you used a brad nailer on the exterior of the frame, use wood filler on those holes too.

Let the wood filler dry, then sand the frame to prep for stain. I used Danish Oil, so I only needed to prep with 1 sanding of 150-grit sandpaper.

Other types of stain may require higher levels of sanding. Be sure to follow the directions on the stain to get the best results.

That’s it for the build steps. Keep scrolling to see the full steps for how I finished my canvas frames.

DIY Wood Frame for Canvas Build Video

Seeing someone do something always helps me understand the steps better. Watch this video to get a better look at each build step.

I LOVE how this EASY DIY Wood Canvas Frame using 1x2 Pine LOOKS on Canvas Art

Finishing My DIY Frame For Canvas Art

Step One – Prep For Finish

Once the wood filler dries, sand the extra wood filler off and smooth the whole frame with 100-grit sandpaper. Then switch to 150-grit to get Select Pine ready for finish.

For different types of wood or finishes, you may need to use different grits to get the best finish.

How to Make an Easy Wooden Frame for Wall Art or Canvases. Full tutorial and video. You can build these in an afternoon. #AbbottsAtHome #DIYwoodworking #Frames #woodworking #woodworkingforbeginners #DIYDecor #HomeDecor

Step Two – Apply Danish Oil

Next, dust off the DIY Wood Frame for Canvas with a clean rag. Then apply your finish. I used Danish Oil in Medium Walnut.

It’s one of my go to finishes, lately. It wipes on easily and dries pretty fast. Plus, it hardens the wood a bit and doesn’t require a top coat. So, it’s super easy.

Step Three – Attach A Sawtooth Hanger

After the finish dries, you can nail a small sawtooth hanger to the back of the frame. Then flip the frame over and gently push the canvas into place.

Building the frame just an 1/8″ or 3/16″ larger than the canvas should give you a tight enough fit to hold the canvas in without extra help.

If not, painters tape, sticky putty, or a few drops of hot glue on the back can hold the canvas where you want it.

How to Make an Easy Wooden Frame for Wall Art or Canvases. Full tutorial and video. You can build these in an afternoon. #AbbottsAtHome #DIYwoodworking #Frames #woodworking #woodworkingforbeginners #DIYDecor #HomeDecor

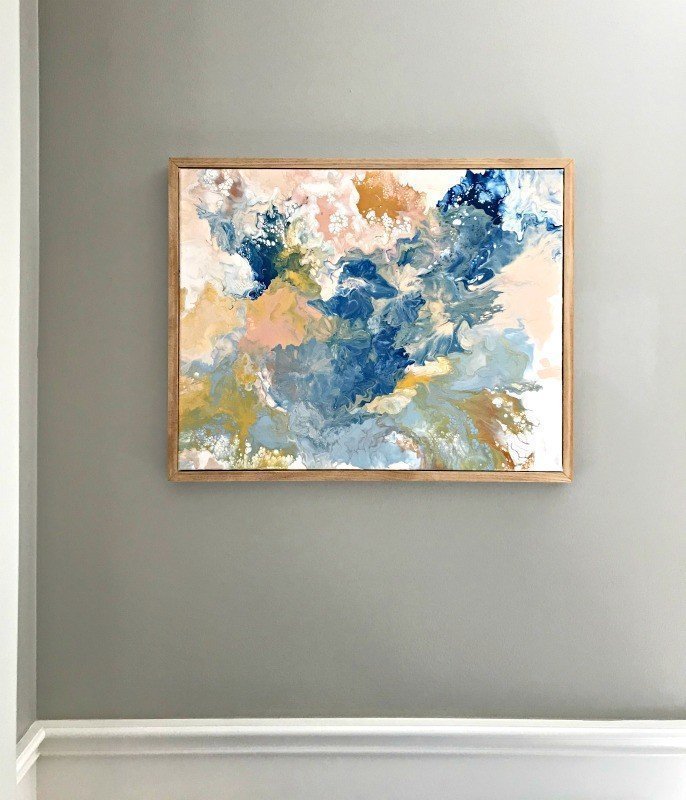
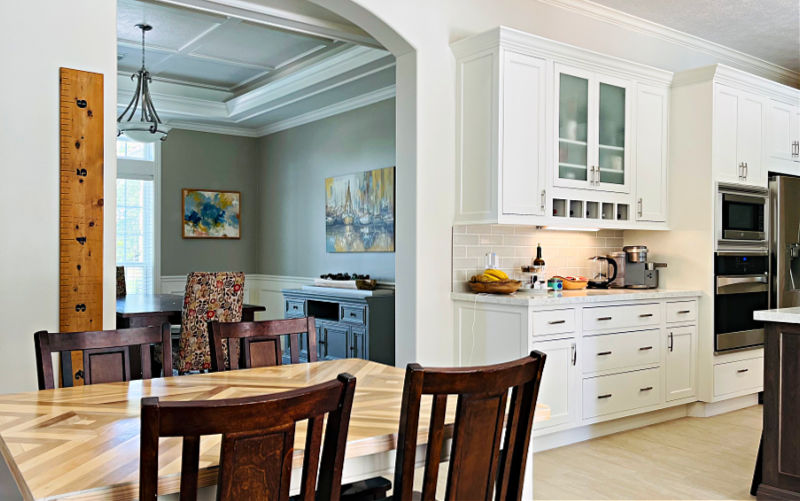
And now you’re ready to hang your beautiful new wall art. Check out this post about my Easy DIY Coffered Ceiling to see more of my Dining Room.

Image of a Dining Room seen through a large white kitchen.
You can see that frame in the background in this photo from my kitchen. See more of my freshly remodeled kitchen in 7 DIY Kitchen Makeover Ideas That ABSOLUTELY Made My Boring Kitchen BEAUTIFUL.

That’s it for this DIY Wood Frame for Canvas tutorial. Here’s a few more tutorials you might like. Thanks for stopping by!


You might also like these 2 DIY frame options. First, How to Make a Wood Picture Frame has great curves and detail, but it’s an easy build.

How to Make a Wood Picture Frame - The EASY Way! With just 2 pieces of molding and a Miter Saw. With Easy to Follow Steps and Video Guide.

And, second, this easy DIY chunky wooden frame for Wall Art.

Easy to Follow Steps for How to Patina Paint Metal Finishes with 20 different DIY faux metal looks for Copper, Bronze, and Iron Rust Patina. Just paint on the metal paints and spray with the oxidizing patina spray to get a faux metal look you'll love.

Want to see more DIY wall art ideas? Check out how I make scrap wood wall art here.

Build your own custom DIY Scrap Wood Wall Art. Works for Barn Quilt, Tribal Art, Boho, Mosaic, geometric wood designs and more. Includes DIY Wood Wall Art Tutorial steps and how-to video!

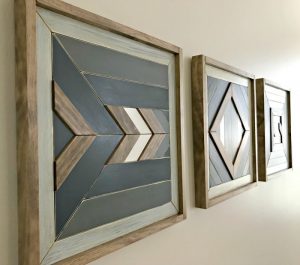
Or, this pretty DIY Chevron Wood Art.

Here's a cool tutorial for DIY Chevron Wood Wall Art that I love! She used Cedar with accents of blue and white paint to add a chippy, distressed look. #AbbottsAtHome #WoodArt #WoodworkingIdea #DIYIdeas #Cedar #WallArt

How about this DIY Barn Star Wall Art I made for just $20. Pottery Barn sells this for $400!

How to build this Wooden DIY Barn Star Art (Wood Barn Quilt) for less than $20 in lumber. Pottery Barn sells it for $400. Winning! DIY Wood Sign - Barn Quilt - Pottery Barn Knock Off #ChristmasProjects #ChristmasDecor #ChristmasSign #PotteryBarn #BarnQuilt #AbbottsAtHome

For a bigger build, this DIY Table Over Washer and Dryer – Laundry Table build is always popular and I have printable build plans with the steps. 🙂

Hide those ugly machines with this DIY Table Over Washer and Dryer or DIY Folding Table. Full tutorial and free printable build plans.

I love this easy DIY Wood Drawer Front. The beautiful routed edge gives it so much style.

How to build a Quick & Easy DIY Wood Drawer Front with a pretty routed edge, slab overlay design. I love how adding a simple routed edge to this DIY Wood Drawer Front gave it a beautiful, classic, high end look. That was so, so easy!

DIY Wood Frame for Canvas

Build this quick and easy DIY wood frame for canvas or wood wall art. Includes steps and video tutorial. This DIY wooden frame has a clean and simple design using 1x2 lumber. #AbbottsAtHome #woodworkingideas #frame #diyprojects #woodworkingprojects #diydecor
How to make a pretty and simple DIY Wood Frame for Canvas or Wood Wall Art.

Instructions

Building the 1×2 DIY Wood Frame

Step One

  1. Cut the inside of your frame to be 1/8″ to 3/16″ larger than the canvas size. Use 45-degree cuts on the corners. I like to use the 1st cut piece for one side to mark the cuts for the opposite side. Getting clean 45-degree corners is really easy if the opposite sides are exactly the same size.

Step Two

  1. Optional: Attach moulding to the 4 corners with brad nails and wood glue to act as a stop for the back of the canvas. I used 3/4″ pieces to stop my 3/4″ depth canvas flush with the wood. You can also use 1″ or 1/2″ or 1/4″ pieces to change the look or to work with a canvas with more depth.

Step Three

  1. Layout the 4 sides of your DIY Wood Frame for Canvas on a flat surface. Use Wood Glue and clamps to hold the corners tight and straight while the glue dries. I love using my Bessey Strap Angle Clamp for frames. It makes building wood frames so much easier. You can see it in the video above.

Step Four

  1. Let the glue dry for a few hours before removing the clamps. The joints should be pretty tight, but a little bit of wood filler along the front and sides will make them look even neater.

Finishing your Wooden Frame for Canvases

Step One

Once the wood filler dries, sand the extra wood filler off and smooth the whole frame with 80-grit sandpaper. Then switch to 150-grit to get Select Pine ready for finish. For different types of wood or finishes, you may need to use different grits to get the best finish.

Step Two

Dust off the DIY Wood Frame for Canvas or Wood Wall Art with a clean rag. Then apply your finish. I used Dutch Oil in Medium Walnut. It’s one of my go to finishes, lately. It wipes on easily and dries pretty fast. Plus, it hardens the wood a bit and doesn’t require a top coat. So, so easy.

Step Three

After the finish dries, you can nail a small sawtooth hanger to the back of the frame. Then flip the frame over and gently push the canvas into place. Building the frame just an 1/8″ or 3/16″ larger than the canvas should give you a tight enough fit to hold the canvas in without extra help. If not, painters tape, sticky putty, or a few drops of hot glue on the back can hold the canvas where you want it.

Notes

This is how I build a pretty and simple DIY Wood Frame for Canvas or Wood Wall Art out of 1×2’s. The clean lines make this design work in most homes, from Modern to more Traditional styles. Yay!

Feeling inspired? Now that you’ve seen how to build a frame for a canvas you can too.

Let me know if you have questions. Don’t forget to sign up for the Abbotts At Home email newsletter to get DIY, Remodeling, and Crafty ideas in your inbox.

Rebecca

Monday 22nd of July 2019

Great frame tutorial Stephanie! I can't wait to see how you made the paint pour artwork. Thank you for sharing at Celebrate Your Story!

Stephanie

Thursday 8th of August 2019

Thanks so much, Rebecca. It's such an easy project. It's just about the only way I can make art. :)

Michelle | Thistle Key Lane

Sunday 21st of July 2019

Hi Stephanie, thanks for sharing this beautiful framing project with us. I can't wait to feature it this week on Tuesday Turn About!

Stephanie

Thursday 8th of August 2019

Thanks so much, Michelle. That's so exciting. :)

Carol

Thursday 18th of July 2019

Perfect! I have done several acrylic paint pour canvases and want to be able to frame them reasonably. I like them fine un-framed but framing just finishes them off so beautifully. Featuring when my party opens up tonight!

Stephanie

Thursday 18th of July 2019

Yay! Thanks so much, Carol. :)

Candace

Thursday 18th of July 2019

I can't tell you how perfect the timing of this post is for me! I was just wondering about how to make something like this the other day. Thanks for such a great post, Stephanie!

Stephanie

Thursday 18th of July 2019

Yay! So glad I could help Candace. Good luck with your build!

Michelle

Tuesday 16th of July 2019

A handy frame tutorial for visual artists! And I love paint pour art! Beautiful!

Stephanie

Tuesday 16th of July 2019

Thanks, Michelle!

Comments are closed.
Skip to Instructions