
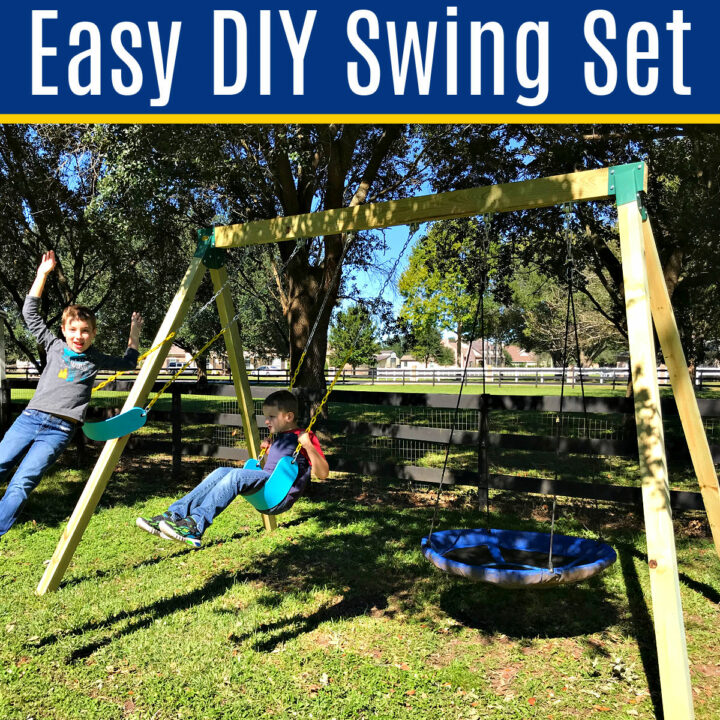
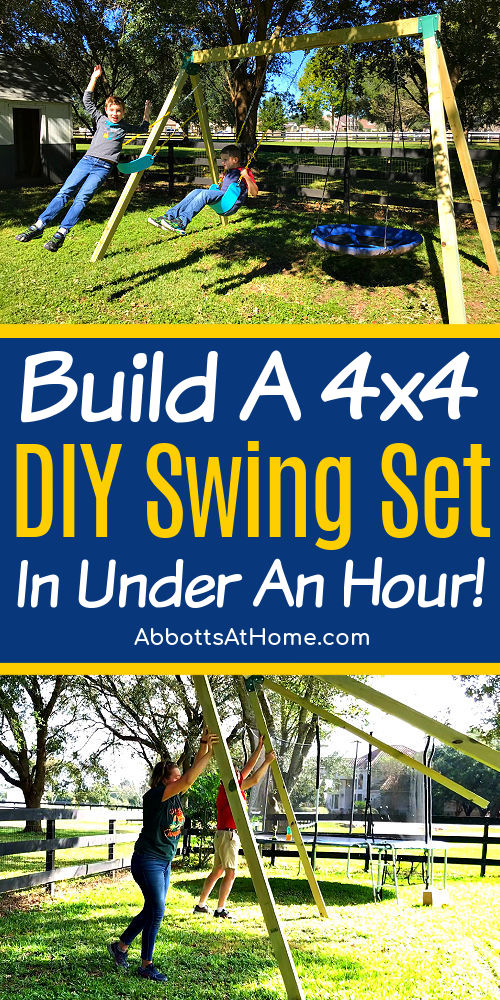
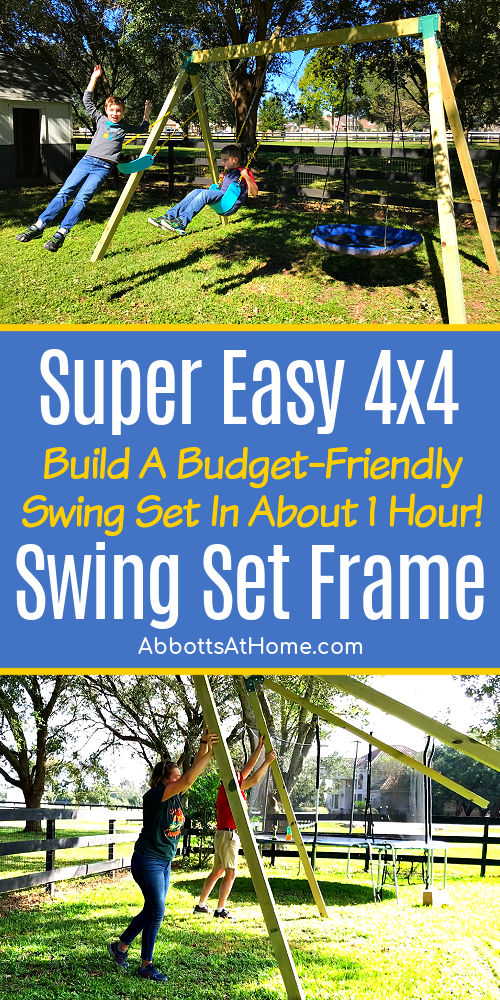
Hello, hello, hello! I have a super quick and easy backyard project for you all today. This weekend I finally built my kids the DIY Swing Set they’ve been asking for lately.
And, it was amazingly easy, guys. In fact, I was able to finish this swing set build in about an hour, by myself.
This swing set is extra sturdy too. It’s heavy enough and strong enough for adults to safely swing on. Just be sure to buy swings that are strong enough to carry the weight of an adult.
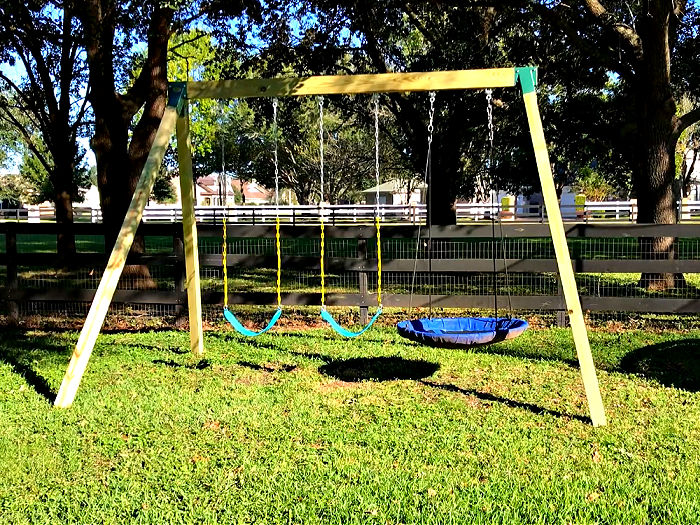
This wooden swing set frame is built with metal A-Frame Brackets I ordered off Amazon and Pressure Treated wood from my local hardware store.
It was a pretty budget-friendly project too. I spent about $275 on everything I used on this Swing Set, including the 3 swings and swing set hangers.
In this easy DIY Swing Set Frame tutorial I have the full build steps, materials list, how to video, AND answers to tons of common questions to help you get this build done!
Table of contents
Can You Build Your Own Swing Set?
Yes, you can build your own swing set. In fact, even the expensive swing set kits will have to be at least partially constructed by the buyer, unless you hire someone to do it for you instead.
There are so many ways to build your own swing set. You can design and build your own swing set from scratch. There are always tons of plans available online.
You can buy kits online that include wood. Order huge over-the-top swing set and playhouse combos. Or, do what I did and just buy A-Frame Swing Set Brackets that make building your own swing set easy.
I built this swing set in less than an hour, by myself, with minimal tools. You can too! Keep scrolling to see how to build a swing set frame.

Is it Hard to Build your own Swing Set?
It is not hard to build your own swing set when you use A-Frame Swing Brackets. These metal brackets are an easy way to build a sturdy swing set without having to cut angled legs.
And, you won’t have to do any complicated joinery or cuts either. All you have to do is slot the wood into the metal brackets, then install the Lag Bolts.
I was able to build this heavy-duty swing set in just an hour, working alone. The swing set brackets I used come with the hardware needed to build the DIY swing frame.
I bought the lumber at my local hardware store. Lowe’s and Home Depot also sell the pressure-treated lumber I used for this project.
Anyone comfortable with using a power drill and a saw can build a swing set. I only needed help when it was time to lift the Swing Set Frame into place.
Even then, it only took 2 adults to lift the wooden swing set. You can see how we did that in the video below.
RECOMMENDED: Is It Cheaper To Build Your Own Swing Set? (Cost of DIY vs Kits)
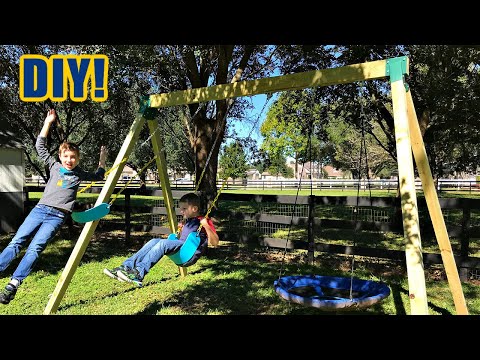
Easy DIY Swing Set Frame – Build Video
If any of the written steps below are confusing, watch this short video to see how to build a swing frame from 4×4’s and swing set brackets.
How To Build A Swing Frame From 4×4’s
Materials Needed
- Heavy Duty Swing Hangers (I bought 3 Pair)
- 2 Heavy Duty Swings
- A-Frame Swing Set Brackets with Hardware
- 40″ Swing Saucer
- 1 – 10′ Long 4×6 Pressure Treated Post
- 4 – 9′ Long 4×4 Pressure Treated Posts
Tools Needed
- Power Drill with Drill Bits (various sizes)
- Socket Wrench Set (various sizes)
- Socket Wrench Drill Bit OR Ratcheting Socket Wrench OR Adjustable Wrench
- Circular Saw, Jigsaw, OR Miter Saw
Steps to Build a 4×4 Swing Set
Here’s a quick step overview. The detailed steps are below.
- Cut the swing set posts to size.
- Attach the Swing Hangers to the 4×6.
- Install the A-Frame Swing Set Brackets to the 4×6.
- Attach the 4×4 posts to the A-Frame Swing Set Brackets.
- Lift the Swing Set Frame into place.
- Hang the swings and ENJOY!
Cut the Posts to Size
Start by cutting your 5 Swing Set posts to size, if needed. Cut your 4×4 pressure treated posts to 9′ long. Make sure to make nice straight cuts on the ends of your posts.
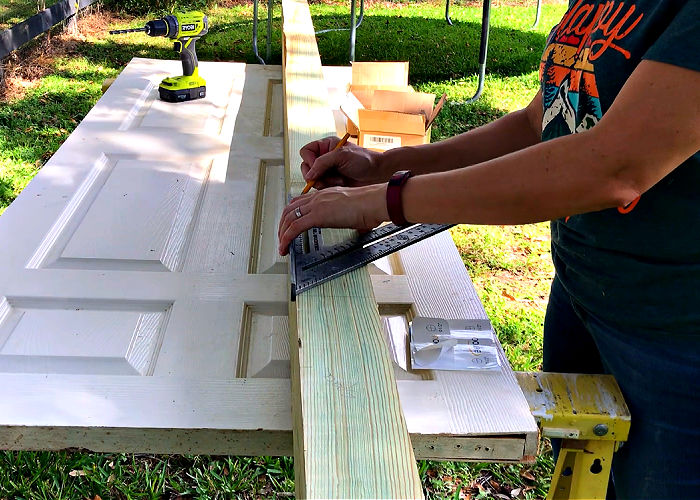
Attach the Swing Hangers
Then mark the spacing for the swing hangers. I used a pencil and a speed square to mark the spacing on my 4×6 post.
Be sure to make the marks and install the hangers on one of the 4″ wide sides of your 4×6, if you are using the same Swing Set Brackets as I used.
Swings should be 18″ away from each end of the 4×6 post. AND, I spaced each set of Swing Hangers 18″ apart. I used 3 sets of Swing Hangers on my post.
On my 10′ long post, that left me with the 3 swings spaced 15″ apart.
Now, most swing sets recommend spacing swings 12″ to 16″ apart, at a minimum. But, you can always increase the spacing to ensure children won’t bump each other if they start to swing side to side.
Install the Swing Hangers using the Lag Bolts that come with the Swing Hangers.
Predrill the holes with a drill bit slightly smaller than the Lag Bolt. Don’t forget to use the washers with the Lag Bolts. You can see how I installed the Lag Bolts in the video above.

Attach the A-Frame Swing Set Brackets
Once the Swing Hangers are installed and the Lag Bolts, also called Lag Screws, are tight you can install the A-Frame Swing Set Brackets.
Attach the brackets to each end of the 4×6. Make sure that the brackets are installed with the leg posts facing out.
The Swing Set Bracket uses Lag Bolts too. The holes for the Lag Bolts need to be predrilled with a slightly smaller drill bit.
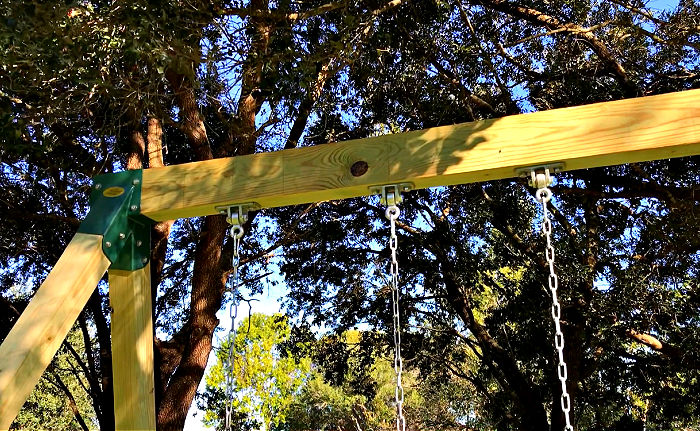
If you aren’t sure which size drill bit to use, google the size of your Lag Bolt to see recommendations. Make sure that you install the Lag Bolts on each side of the brackets on both ends.

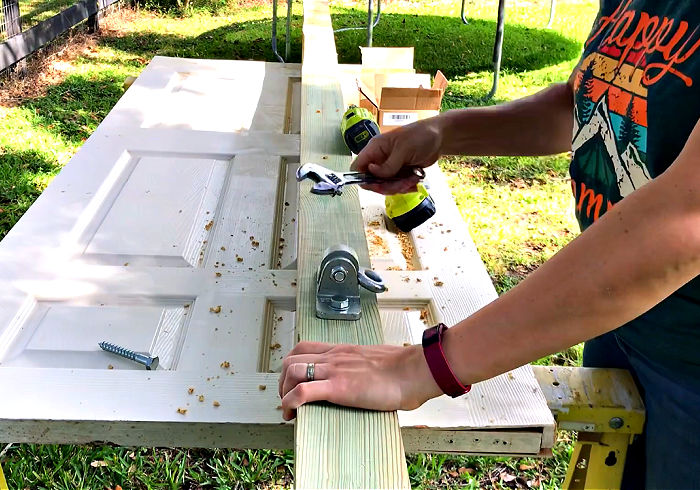
Attach the 4×4 Posts to the Brackets
Then, install the 4×4 legs, one at a time. Be sure that the top of the post is touching the metal framing inside the A-Frame Swing Set Bracket.
When that post is touching the metal, that means that the 4×4 is helping to carry the weight of the 4×6.
If the 4×4 isn’t making contact with the metal, then only the Lag Bolt on that leg is carrying the weight of that heavy 4×6.
Again, predrill for those Lag Bolts and don’t forget the washers.
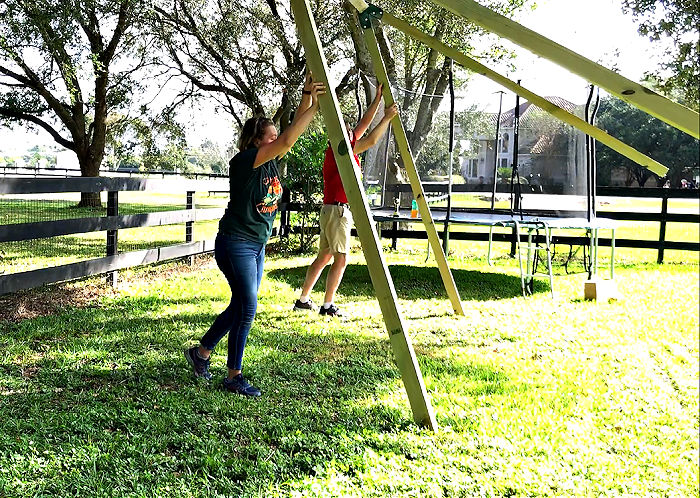
Lift the DIY Swing Frame into Place
Once all 4 of the 4×4’s are installed, you can lift the swing set frame into place.
It is heavy and awkward, but my husband and I were able to do this together without too much trouble.
You can slowly shimmy the swing set backward and forward by inching one post along at a time. You can see what I mean in that video too.
Make sure to get the swing set where you want it that day. It will start to settle into the ground as it is used and with exposure to rain.
Once those posts settle in an inch or two, they’ll be harder to move.
Is a 4×4 Strong Enough for a Swing Set?
A 4×4 is strong enough to use as leg supports for the frame of most swing sets.
You can also use a Pine 4×4 as the top beam. But, if you use that 4×4 as the top beam, add a middle bracket and post support if the top beam exceeds 10′.
I recommend using a 4×6 along the top of the swing set frame, when possible, and 4×4 posts as the legs.
A 4×6 top beam would provide extra strength. You can use a 12′ top beam to support swings without a middle bracket and post support. This set of swing set brackets is made for a 4×6 header and 4×4 legs.
Scroll up to see how to build a swing set frame with easy steps and a helpful build video.
Is Pressure Treated Wood Safe for Swing Sets?
Pressure Treated wood is safe to use for swing sets and outdoor play structures. Manufacturers stopped using dangerous chemicals, like arsenic, in pressure treated wood in 2004.
Pressure Treated wood is also a lot more budget-friendly than the redwood or Cedar that is also available in most stores for exterior DIY projects.
Can I Paint Pressure Treated Wood?
Yes, you can paint pressure treated wood. But, most pressure treated lumber available in hardware stores if freshly treated. That means it’s still pretty wet.
Sometimes you can even tell how damp it is just be touching it. You should wait a few months after buying it to paint it. Three months should be long enough for pressure treated wood to dry out.
After that, you can paint the wood with exterior grade paint. Preferably one that is made for decking, so that it is also non-slip.
The same is true for Exterior Stains. Wait 3 months before staining. If you can find Kiln Dried Pressure Treated wood, you are probably safe to paint it right away.
That’s it for my Easy DIY 4×4 Swing Set Plans. Good luck with yours!
More DIY Projects For You
- 13 Best AC Filters For Cleaner Air In Your Home
- What Happens If Your AC Filter Is Dirty? Cooling Might Stop Working
- How to Reupholster a Wingback Chair: Best Tips & Easy Steps
- 18 BIG Pros & Cons: Should You Paint a Brick House White
- 12 Best Benefits of Pressure Washing Your Driveway And Walkways
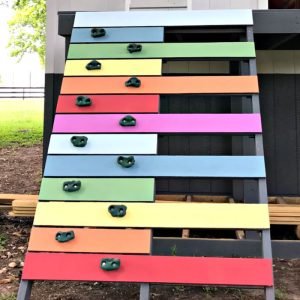
Add some more fun to your backyard with How to Make a Kids Climbing Ramp or Rock Wall.
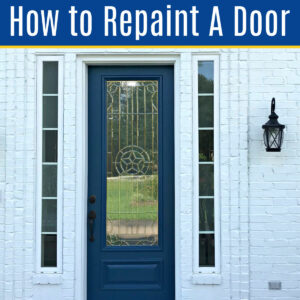
You might also like How to Repaint a Door without Removing It or this post on Why Is My Front Door Paint Bubbling & Blistering.
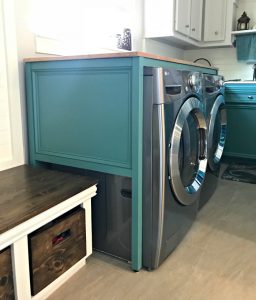
Looking for more DIY Furniture Ideas? Check out this DIY Over Washer and Dryer Laundry Table.
Feeling inspired? That’s it for this Easy DIY Swing Frame on a budget! Let me know if you have questions.
Don’t forget to sign up for the Abbotts At Home email newsletter to get DIY, Remodeling, and Crafty ideas in your inbox.

Stephanie Abbott has been remodeling homes, updating & building furniture, and working on DIY home maintenance and cleaning tips for over 20 years. Her remodeling has been featured in Better Homes and Gardens Magazine. And, her DIY YouTube channel has had more than 8 million views.
Most of the DIY tutorials and videos on this site focus on beginner to intermediate level DIY Projects that can be done in an affordable way without high-end, expensive tools. All of the cleaning tips on this website have been tested in her home.