
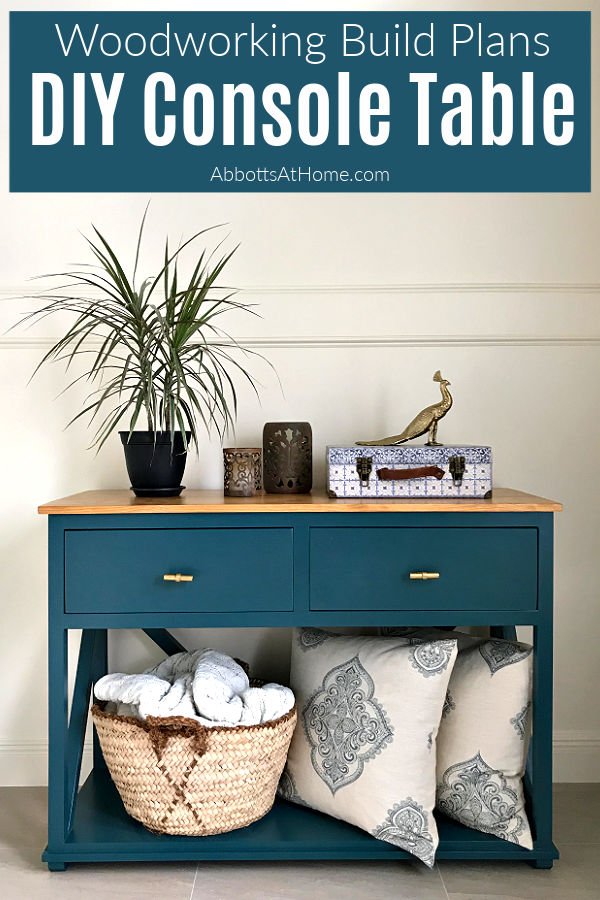
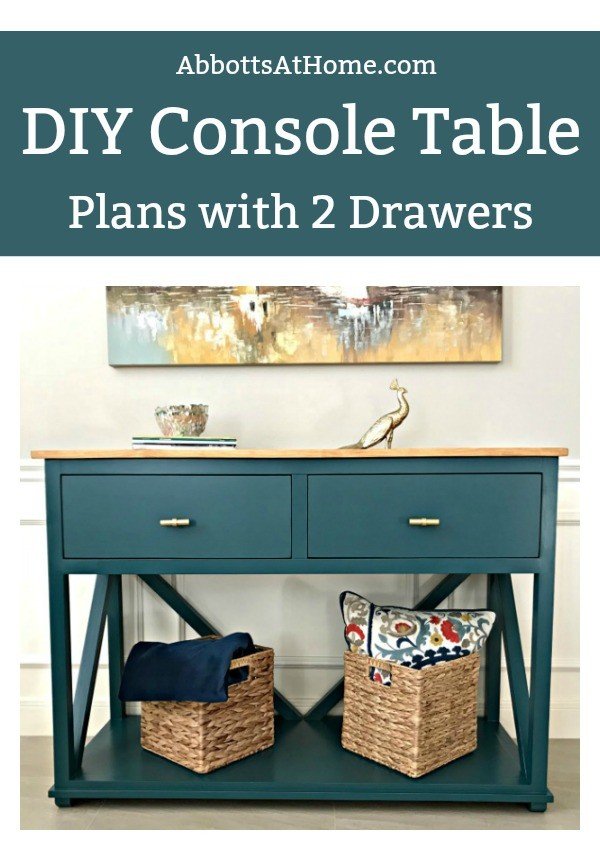
I LOVE this beautiful DIY Console Table Plan with Drawers for an Entry, Dining Room, or Living Room! Printable woodworking plans available.
DIY Console Table Plan with Drawers
Yay! It’s week 2 of our Living Room makeover and things are moving along nicely. You can see the living room before photos and makeover plan here.
This week, I’m sharing the DIY Console Table Plan with drawers, I’ll be using behind our couch.
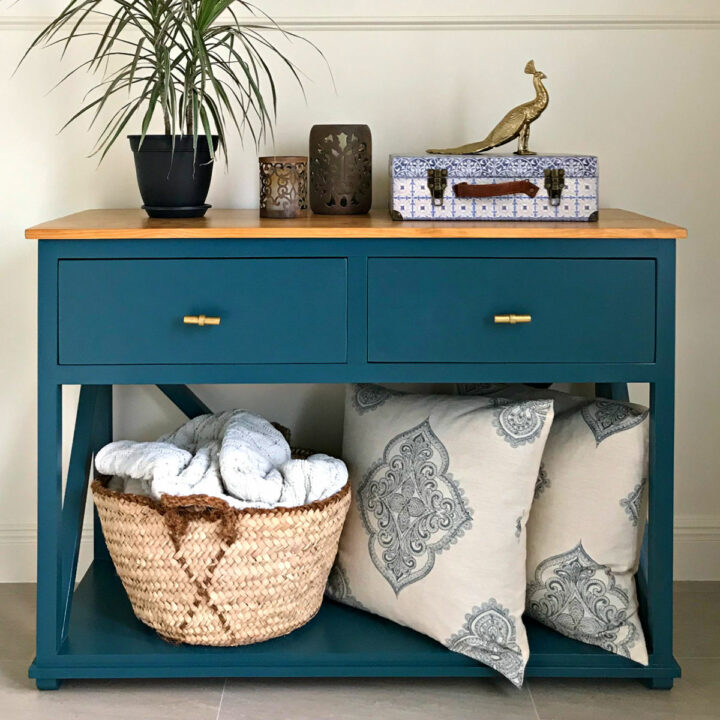
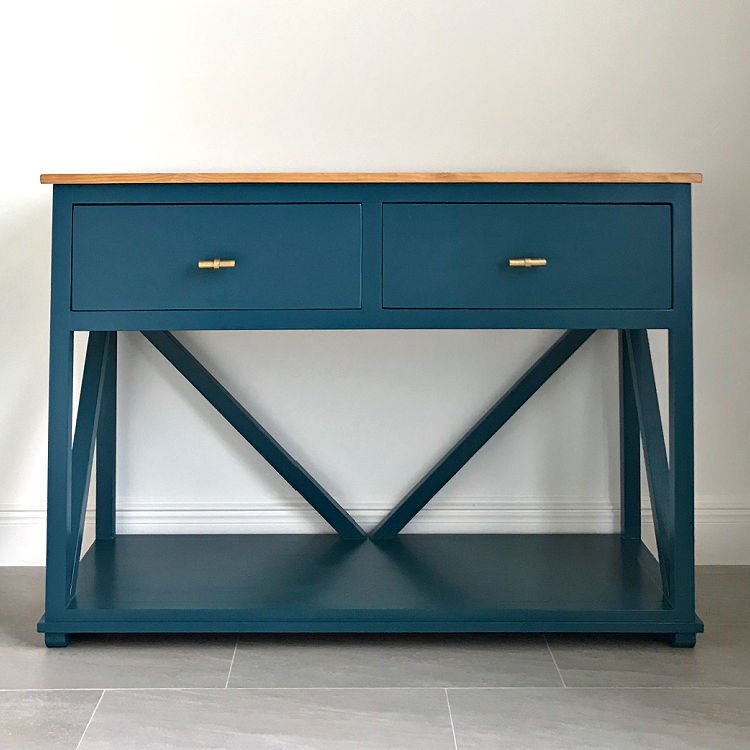
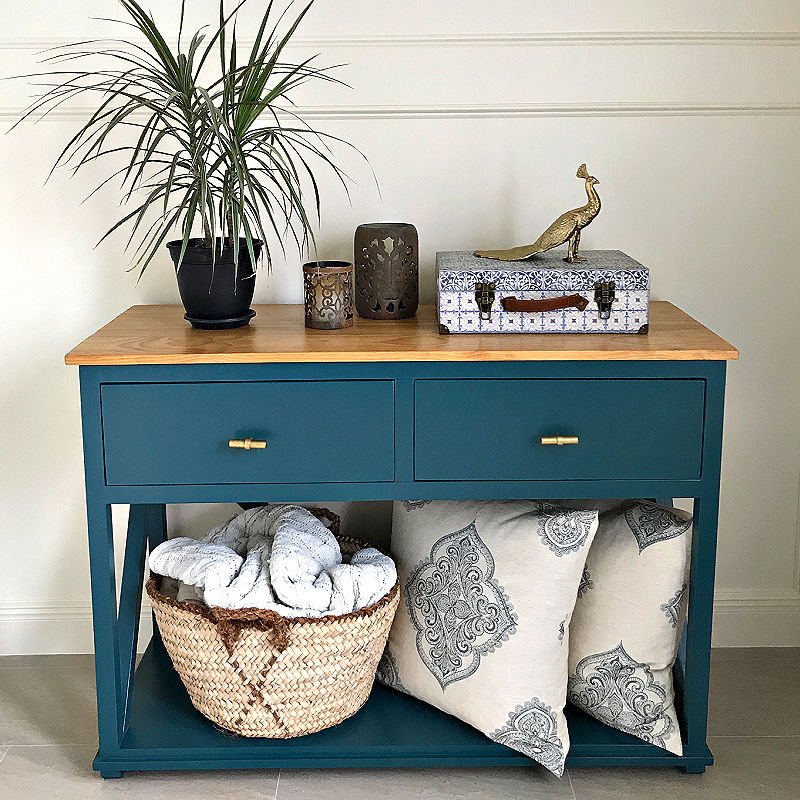
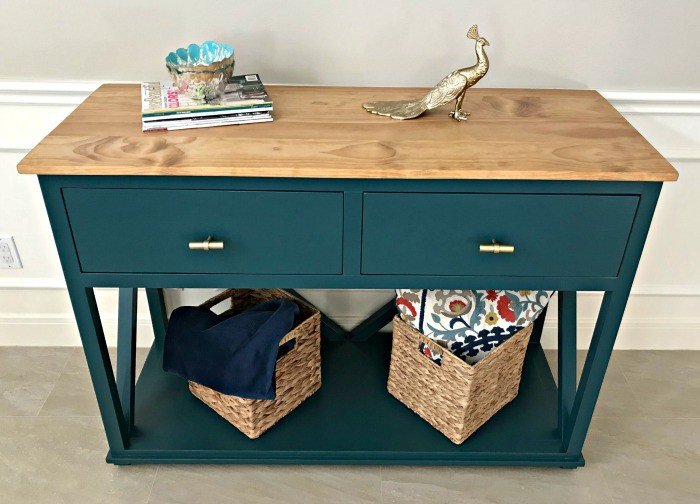
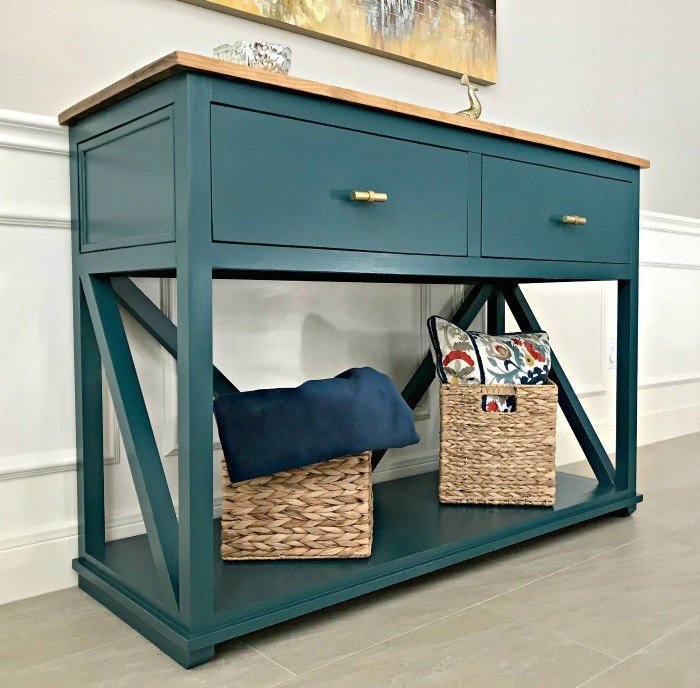
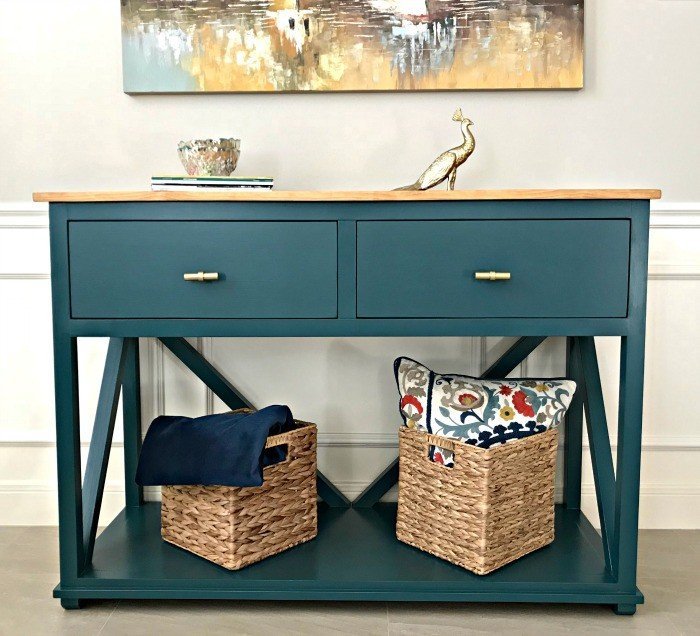
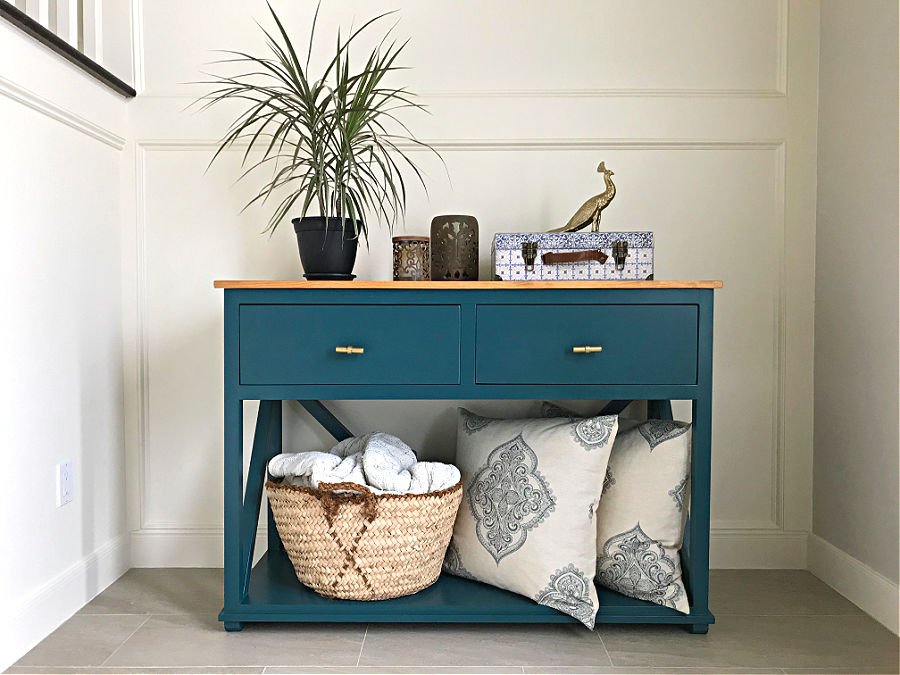
This is absolutely one of my favorite builds, guys! And how beautiful is that paint color?!
You can see more of my DIY furniture plans here. My DIY Outdoor Sofa from 2×4’s, DIY Round Kitchen Table, and DIY Modern Farmhouse Bench are a few more favorites around my house.
Strangely enough, I actually designed and built this DIY Console Table Plan this past May. But I have been totally procrastinating about sharing the tutorial.
Writing these things up takes quite a bit of time. Time that I generally want to spend building the next thing. 😉
But, now that just means I get to share the build steps this week, with you. Serendipity! Keep up with my latest builds, home remodeling, and DIY tips on my Facebook page.
Let’s get this DIY Console Table Plan with Drawers build started!
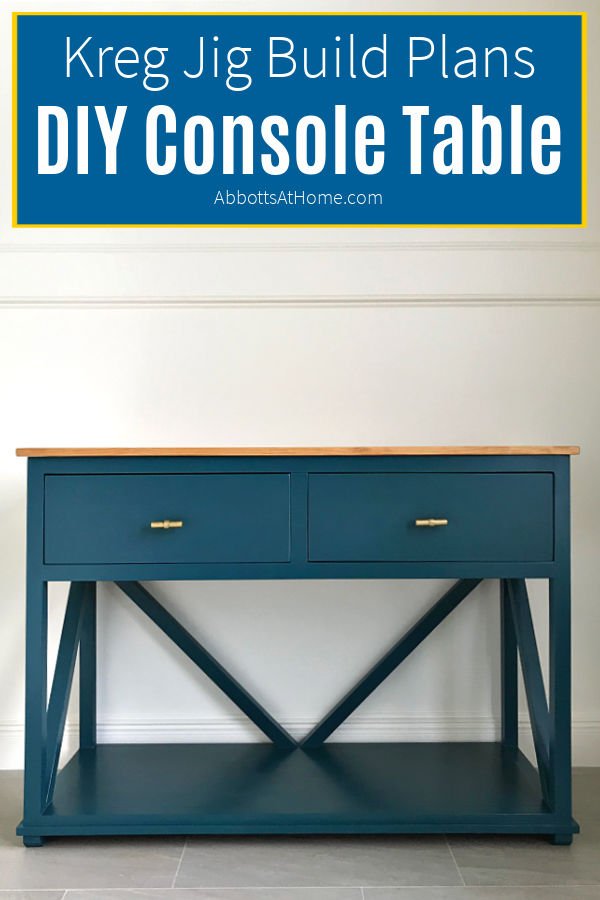
Printable Build Plans for this DIY Console Table Plan with Drawers are available for purchase on Gumroad. If you find any of these steps confusing, the 24-page printable will help explain things better, with plan images of each step and measurements 🙂

Tools Needed for this Build
- Saw, I used a Miter Saw for the straightest possible cuts
- Circular Saw, with a cutting guide for perfectly straight cuts, if available
- 2 Sets of 16″ Drawer Slides
- Power Drill
- Clamps
- Kreg Jig, I use the Kreg Jig R3, and screws
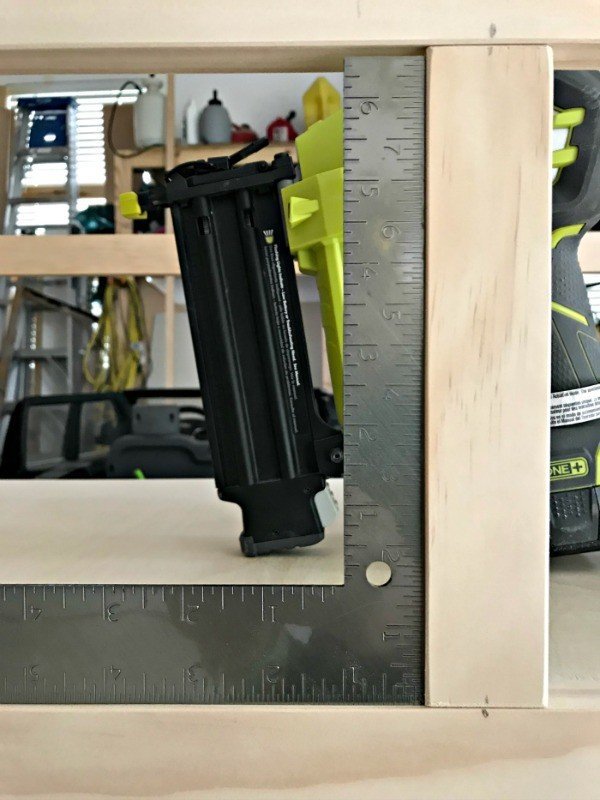
- Brad Nails and Nail Gun (I’ve used this one for years)
- Wood Glue
- Sandpaper
- Wood Filler
Shopping List for the DIY Console Table Plan
I used Select Pine Dimensional Lumber, Cabinet-Grade Plywood, and Pine Molding for this build.
And, a quick note about the drawers, I used 1×6 Select Pine simply because I had it and it made the build quick and easy. 3/4” plywood is generally a better choice for drawers because of it’s stability.
So, these plans are for building plywood drawer boxes. And, again, be sure to double-check the measurements for your drawers with the exact dimensions of your opening and the recommended requirements of your drawer slides.
- 2 Sets of 16″ Drawer Slides
- 7 – 8’ boards of 2×2 Dimensional Lumber
- 1 – 4’x8’ sheet of 3/4” Cabinet Grade Plywood
- 1 – 2’x4’ sheet of 1/4” Luan or Cabinet Grade Plywood
- 1 – 8’ board Pine Screen Molding – for trim inside the side panels
- 1 – 8’ board 1/2″ x 3/4″ Pine Molding – for front and side bottom edges of the Console Table
- 3 – 6’ long – 1×6” Dimensional Lumber (Optional Top – If you decide to use plywood, don’t buy this)
- 1 – 6’ long – 1×3” Dimensional Lumber (Optional Top – If you decide to use plywood, don’t buy this)
Buy or Use Scrap Lumber
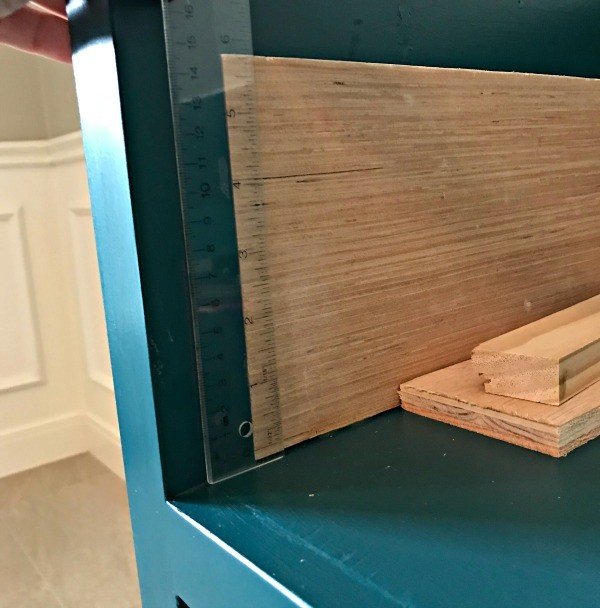
2 – 15 1/2″ x 3″ – 1/2″ plywood or lumber – to build a flat surface for the drawer slides
Build Plan Cutting Guide
You can find a detailed cutting guide with diagrams to help you make the cuts with the least amount of materials in the 24-page printable build plans.
I recommend making the cuts for this DIY Console Table Plan, as you need them. Things don’t always line up as planned during a build.
ALWAYS DOUBLE-CHECK measurements for each piece before cutting, so that they work perfectly with your build.
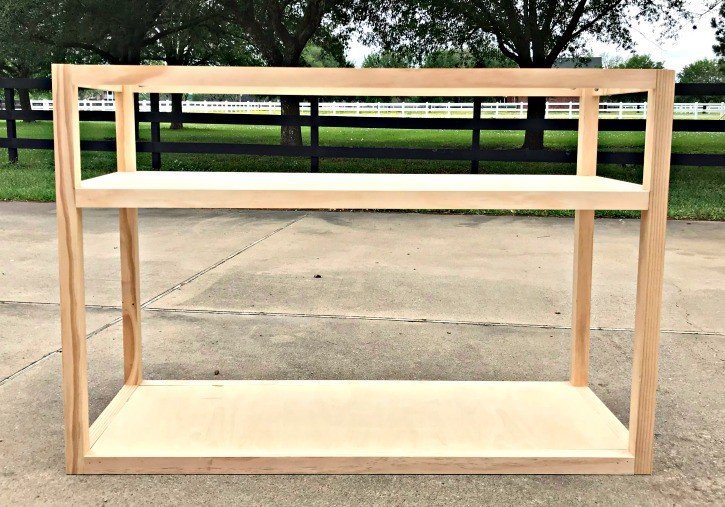
DIY Console Table Plan with Drawers – Build Steps
Please Note: You’ll notice 1×2’s in some of the photos where I say to use a 2×2. I realized 2×2’s would have been better for the entire frame, halfway through my build. Sorry for any confusion.
Step 1
Begin by assembling the frames for the sides. Each of the 3 rails will have 1 pocket hole on each side. Follow the Kreg Jig guidelines for the pocket holes for the thickness of each board.
Each side will be 2 – 2×2 legs with 3 – 2×2 rails at the top, bottom and middle. The middle rail should start 9 1/2″ down from the top of the frame. The opening for the drawers should be 8”. Use appropriate pocket hole screws and wood glue to connect each spot.
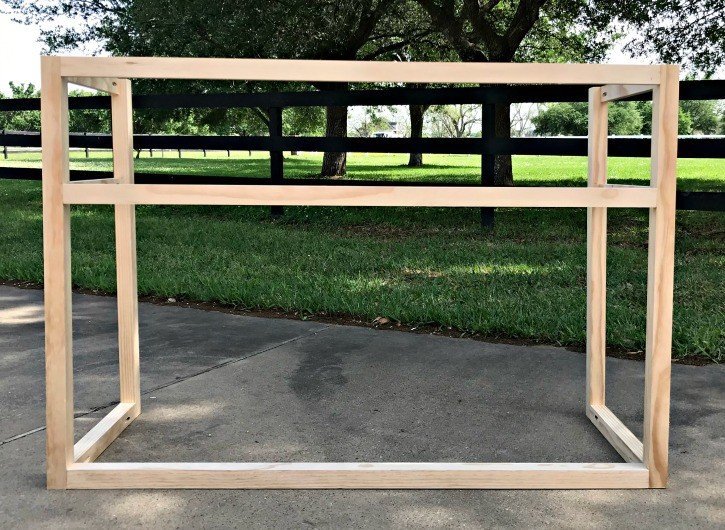
Step 2
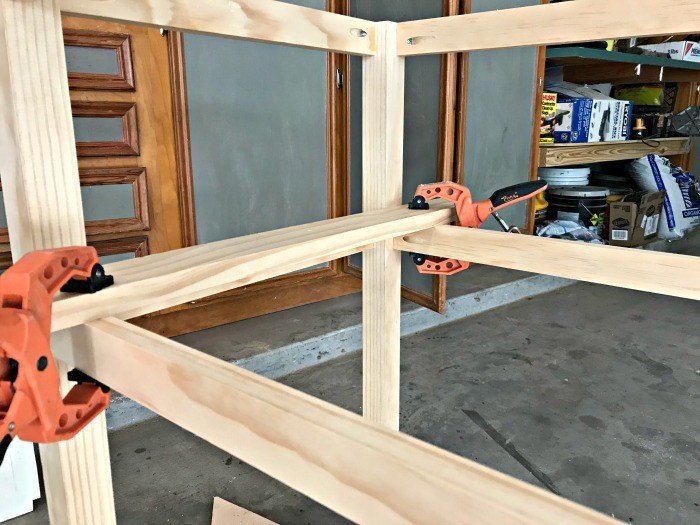
Follow the exact same process to connect the side frames at the front and back. 3 – rails at front and back, in the same places, with 1 pocket hole at the end of each. Use appropriate pocket hole screws and wood glue to connect each spot.
Step 3
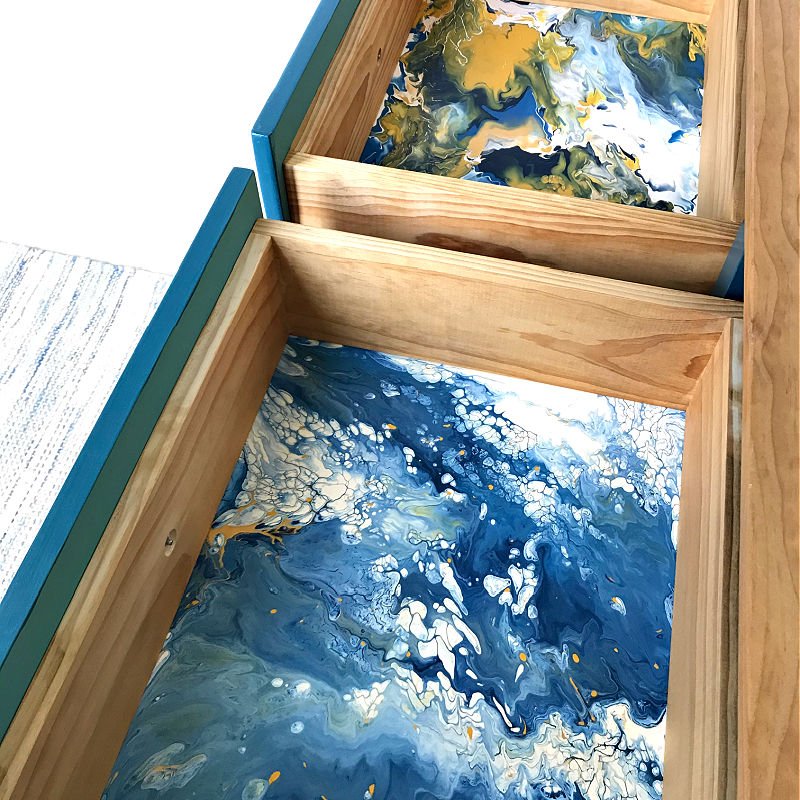
Once all 4 sides of the frame are complete, you can add the plywood bottom and middle. You can see in the photo that I used 2 pocket holes on the short sides and 4 pocket holes on the long sides.
To easily make sure the plywood is level with the top of the frame, clamp scrap boards along the top of the rails before flipping the frame over. Then you can set the plywood on those clamped boards and it should be flush with the rails. You can see how I did that in the picture above.

Step 4
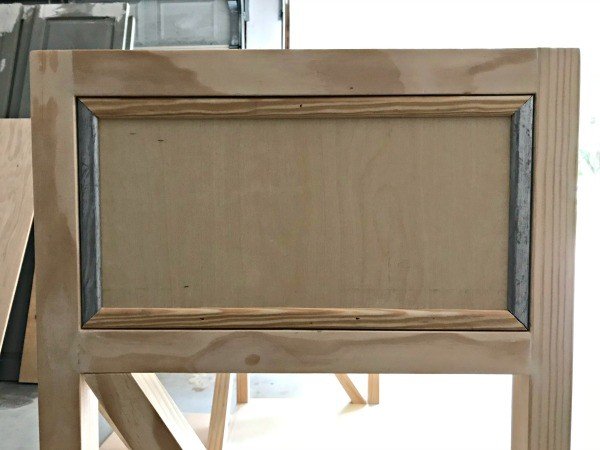
Add the 2 – plywood sides, next. 2 pocket holes on the long sides and 1 on the short sides will be enough. I only set these back 1/4″ from the front of the rails. Then used 1/4″ thick Pine Screen Moulding and my brad nailer to frame out the plywood.
BUT, you could set the 3/4″ plywood flush with the inside edge of the 2×2 frame and have 3/4″ of setback in the front for 3/4″ deep moulding, like a nice 3/4″ deep Cove or Panel Molding. Use 45-degree corners on whichever moulding you pick. Glue and brad nail it into place.

Then add the 3/4″ plywood to the back of the drawer box. This side generally won’t be visible. So, you can skip the trim and just set it flush with the outside of the frame. Use 4 pocket holes on each long side and 1 on each short side.
Step 5
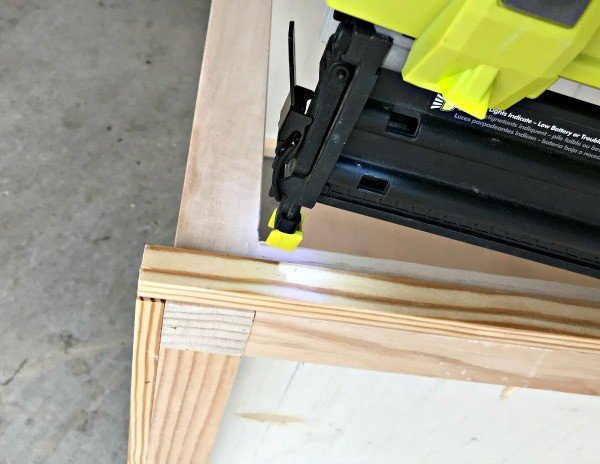
Add 1/2″ x 3/4″ molding along the bottom front and side edges to add more detail to the design. The molding should stick out 1/2″ from the table, so the 3/4″ thick side is glued and brad nailed to the frame.
This type of molding along the bottom edge of furniture is pretty common in traditional furniture. For this molding, I added molding to each side, then along the length of the front, including the length of molding on each side.
Step 6
Find the middle of the top and middle front rails and mark them with pencil. Then mark the middle of the 8″ long divider to go between the boxes. Line up those marks and you should have that 8″ long divider directly in the middle of the drawer opening.
Of course, before gluing and nailing that divider in place, double-check the distance from each side at top and bottom.
Step 7
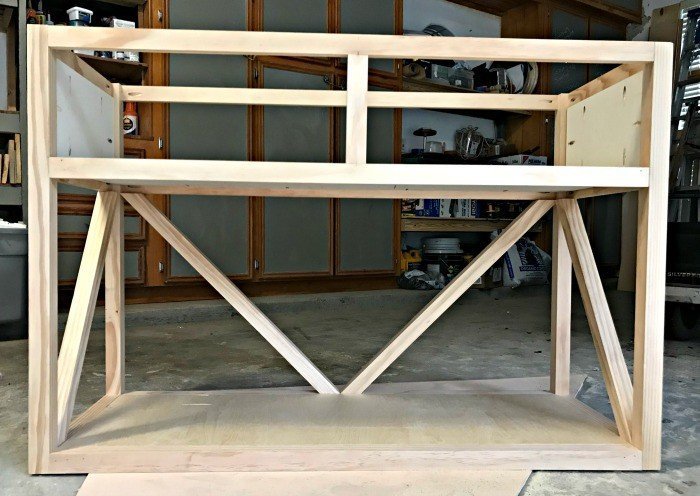
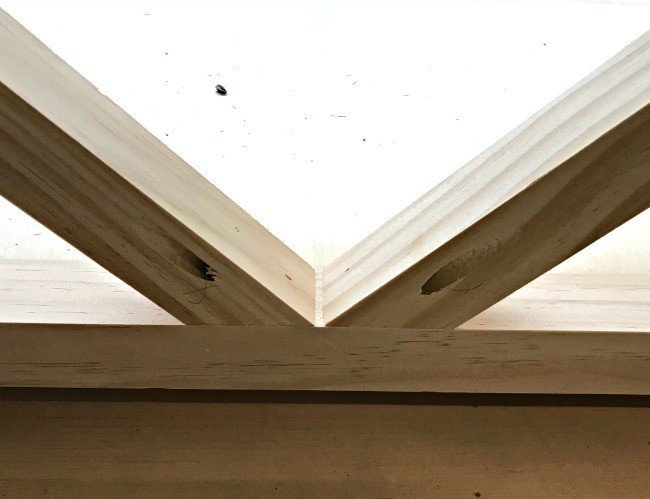
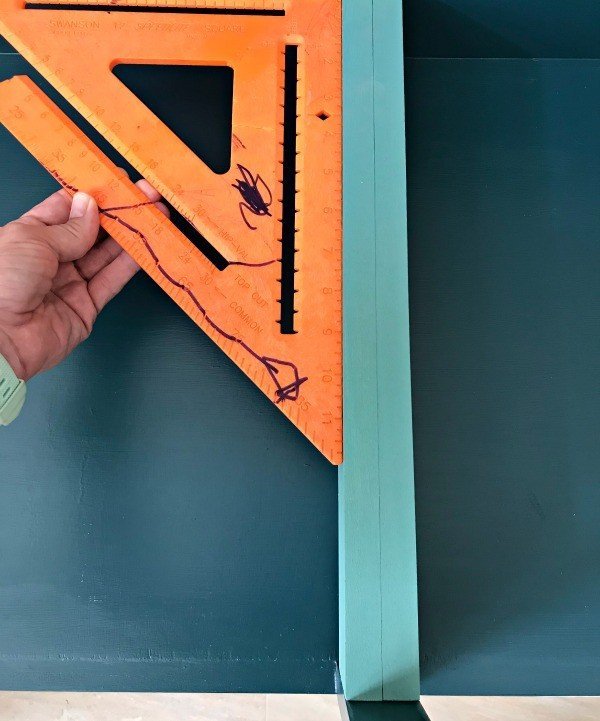
Lets add the 4 angled frame pieces. Be careful cutting the angles and getting the length right for your build. Double-check all of the measurements, as you work.
The 2 angles on the back are around 31” before cutting angles with 45-degree angles on either end. Put 1 pocket hole on each end of the backside of the pieces.
The other 2 sides are around 26” before cutting angles. The angle on the top is 34-degrees, on mine. And 56-degrees on the bottom. Go slow and double-check. Angles can be pretty confusing, at least for me.
I like to hold a board up to the spot and carefully sketch the angle on the board before cutting. Then I go to my Miter Saw to line the angle up on the saw. It makes it less confusing and foolproof (for me, at least) when I take it to the saw with the angle marked.
Use 1 pocket hole on each end again. Go for the inside of the pieces on the sides. Glue and screw all 4 in place on the DIY Console Table Plan.
Step 8
Next, I attached feet to the table. The feet for this Console Table are 2×2’s with a 1/2″ high 45-degree notch cut out of the front end of each foot.
I attached the feet with 2 kreg screws drilled through the bottom of each foot. Attach them a few inches from each end of the 2×2. You can countersink the screw heads with the kreg jig pocket hole drill bit. Just drill the holes deep enough to hide the screw heads.
Step 9
If you set your 3/4″ side plywood panel 1/4″ back from the outside of the frame, you’ll need to use a 1/2″ plywood strip to make the inside flat and ready for the drawer slide hardware. Technically, you only need that 1/2″ strip directly behind the glide. You also need a stretcher from the back to the front of the Console Table between the 2 drawers to attach the drawer slides too.
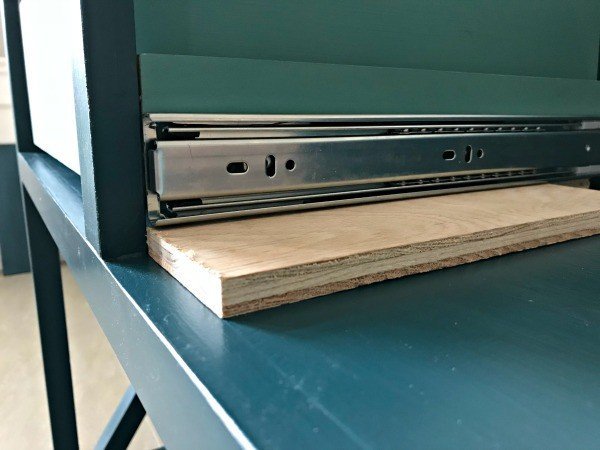
Wood glue and nail 2 pieces of 3/4” plywood. You could use Kreg Jig pocket holes, but you need these pieces perfectly square and flush with the 8” high 2×2 drawer divider so that the drawer slides operate properly. Wood glue and brad nails are just easier to get square. Since 3/4” plywood isn’t actually that thick, there will probably be a small gap between these 2 pieces. Use a square to help you line everything up.
Install the drawer slides based on the instructions that came with your slides. For my slides, I used a scrap piece of 1/2″ plywood as a spacer for my drawer slides. Lay the spacer along the bottom of the opening for the drawers where each of the 4 drawer slides need to be mounted, to quickly get them installed evenly 1/2” up each side.
I set the slide on the spacer to attach it 1/2″ from the bottom of the drawer opening. Then I attached the drawer slide to the bottom edge of drawers I built. That should leave a 1/2” gap under the drawer and 1” above.
Typically, you can leave as little as a 1/4” gap under a drawer and 1/2” above. I leave more so new builders have more wiggle room when learning new skills. But, if you are comfortable building drawers and furniture, you can adjust the size of the drawers and install on the slides for deeper drawers.
I’ll explain how to build the drawers in the next step.
Step 10
Double-check the measurements for your drawers with the exact dimensions of your opening and the recommended requirements of your drawer slides. If you have accidentally built an opening even 1/16” off, you should adjust your drawers to fit the opening. Your drawer boxes should be about 21″ wide x 16″ deep x 6 1/2” high, depending on how perfectly to plan every cut was made. Be sure to use the actual thickness of your plywood sides when building the drawer box.
Just because plywood is called 3/4” thick, doesn’t mean it is. Most is actually .709” thick. Even that small difference can cause the drawer slides to not operate properly. The best trick is to hold 2 scrap pieces of your plywood together, measure them, then subtract that number from the overall width of the drawer box (21” in this case).
Ex. 21”- .709 – .709 = 19.582” wide front and back sides.
I know, drawers are hard, y’all. But if I can do it, so can you. You can use wood glue and brad nails or Kreg pocket holes to build the drawers.
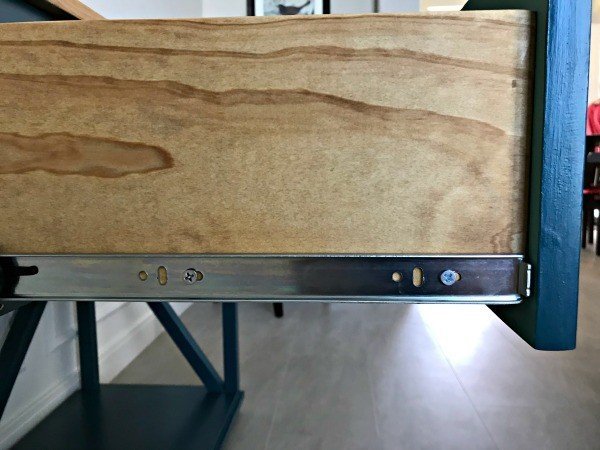
The pocket holes for drawers should be on the outside of the front and back pieces. This means you won’t see them on the inside of the box. And the drawer front you’ll add, will be hiding the pocket holes on the front piece.
Again, drawer bottoms can be done multiple ways. For this build, I just used wood glue and brad nails to attach the bottom piece of 1/4” plywood onto the box. But you could also inset ½” thick plywood with wood glue and brad nails. Or use a traditional rabbet or groove to hold 1/4” plywood in place.
Make sure that the drawer boxes and glides work before attaching the fronts. Once you have them working, attach the 3/4″ thick inset fronts. You want to measure the opening for each drawer to get an exact size for the drawer front. Typically you can subtract 1/8” inch from the overall length of the opening for inset drawer fronts.
If you’re drawer front is too big, you can use a power sander to slowly remove some length. If the drawer front is a little smaller than you’d like, you can iron on extra edge-banding to make it longer. Use playing cards to hold the drawer front off the bottom of the drawer opening and painters tape to hold the fronts in place while you screw them onto the boxes from the back.
And finally, some people use wood filler and paint on unfinished plywood edges. You can also iron edge-banding onto the drawer front edges to get a pretty edge. Just be sure to account for that when cutting your drawer fronts.
Step Eleven – Optional 1×6 Top Design
Build your top with 3 – 1″ x 6″ boards and 1 – 1” x 3” board, using wood glue and 6 pocket holes along 3 of the boards to join them together.
When joining 1x lumber for a table top, it’s best to try to pick center grain boards, when possible. So, the end of those boards would have pretty straight grain lines. If you cannot find those, alternate the cup on the grain so that they work against each other to hold the boards flat.
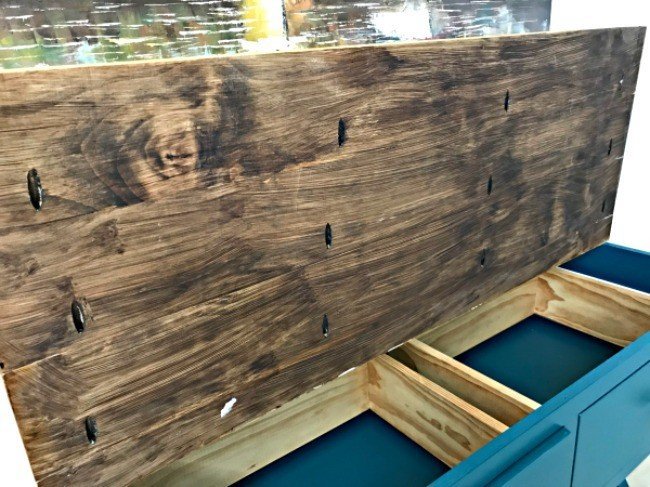
Attach the top to the frame of the DIY Console Table with angle brackets and 1/4″ screws. You might want to finish the top and table separately, before attaching, if you’re going with a mix of paint and stain, like mine.
Step Eleven – Optional Plywood Top Design
If you’re planning to paint your top, plywood with edge-banding is probably the best choice. It can look pretty stained too.
Follow the layout guide for cutting the plywood pieces and you’ll be able to get a top and all of the other plywood pieces for this build from 1 – 4×8 sheet of plywood.
I prefer Maple, if staining. Or the cheaper primed cabinet-grade plywood, if painting. Use iron on edge-banding to get the best looking edges on plywood that will be painted or stained. Attach this type of top with corner brackets or pocket holes.
Now that your DIY Console Table Plan is built, you’re ready to finish it off. 🙂
How I Painted and Stained my DIY Console Table Plan with Drawers
Remove the drawers. Fill all pocket holes with a good wood filler. If you plan to stain the table, be sure to use a wood filler that stains well. Sand all holes flush, once filler dries. I also sand all hard edges on each rail, leg, corners, etc. I think it gives furniture a more ‘finished’ look.
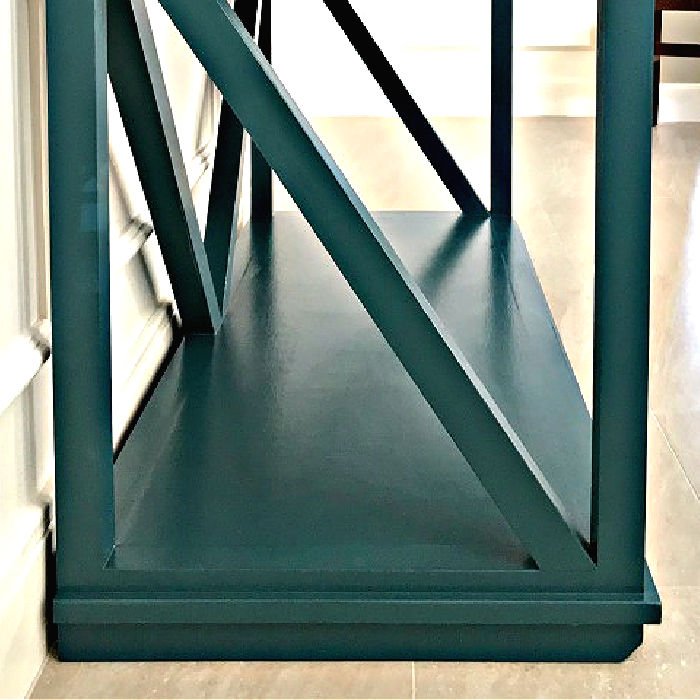
If painting, I sand to 120 or 150 grit on Pine. If staining, I’ll go to 220. Wipe away all dust with a good tack cloth or very slightly damp scrap cloth. I painted this table with Magnolia Homes by Kilz in the color Weekend.
It’s a great dark Teal. JoAnna Gaines actually designed this color line with Kilz. You can buy this color, in a chalk paint, at Target or at most Ace Hardware stores. I also like to just make my own chalk paint using latex paint.
You can find my DIY Chalk Paint Recipe here. Making your own chalk paint saves money and let’s you easily get a color you love! And, whether you use store-bought chalk paint or homemade chalk paint, here’s my tips for how to get a smooth finish with chalk paint, at home.
The top is stained with Medium Walnut, Danish Oil by Watco. I love using this product. You can literally pour it on and wipe it around. It’s not sticky at all and dries quicker than normal stain. I used 2 coats of this, lightly sanding with 220-grit between coats. Then I sealed with 2 coats of Minwax’s Polycrylic in Clear Matte.
Printable Build Plans for this DIY Console Table Plan with Drawers are available for purchase on Gumroad. If you find any of these steps confusing, the 24-page printable will help explain things better, with plan images of each step and measurements 🙂
Other DIY Projects from this Living Room Makeover
- Layout a plan and decide on some of the main choices…fabric, curtains, paint, etc
- Paint the Walls, Ceiling, and Crown Molding
- Remodel the Fireplace Wall with a Modern, Traditional Millwork Design
- Build and Upholster a new Ottoman
- Reupholster 2 Wing Chairs…in the worlds most amazing fabric 😉
- Build 2 new DIY Pedestal Accent Tables
- Move the TV above the Fireplace
- Rearrange the Layout around our Great Views
- Add new lighting, wall art, decor, throws, pillows…basically, add the icing!
That’s it, guys. Thanks for checking out the tutorial for this beautiful DIY Console Table Plan with Drawers. Looking for more DIY Beginner Woodworking Projects? Check out this DIY Beginner Woodworking Video playlist on YouTube or check my DIY Furniture Build Plans post for a look at all of my builds.
Check out this tutorial for a pretty DIY Play Kitchen for Kids.
I also love this DIY Upholstered Twin Headboard tutorial.
Check out this DIY Over Washer and Dryer Laundry Table with free printable build plans.
You might also like this DIY for How to Whiten Tile Grout. It’s a Game Changer!

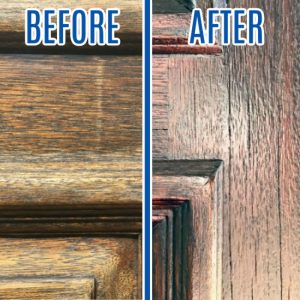
And, if it is time to Stain your Front Door, check out these steps for how I restain a front door without stripping it or removing it. 🙂
Feeling inspired? Now that you’ve read how to make this DIY Console Table Plan with drawers, you can do it too. Let me know if you have questions.
Don’t forget to sign up for the Abbotts At Home email newsletter to get DIY, Remodeling, and Crafty ideas in your inbox.

Stephanie Abbott has been remodeling homes, updating & building furniture, and working on DIY home maintenance and cleaning tips for over 20 years. Her remodeling has been featured in Better Homes and Gardens Magazine. And, her DIY YouTube channel has had more than 8 million views.
Most of the DIY tutorials and videos on this site focus on beginner to intermediate level DIY Projects that can be done in an affordable way without high-end, expensive tools. All of the cleaning tips on this website have been tested in her home.