
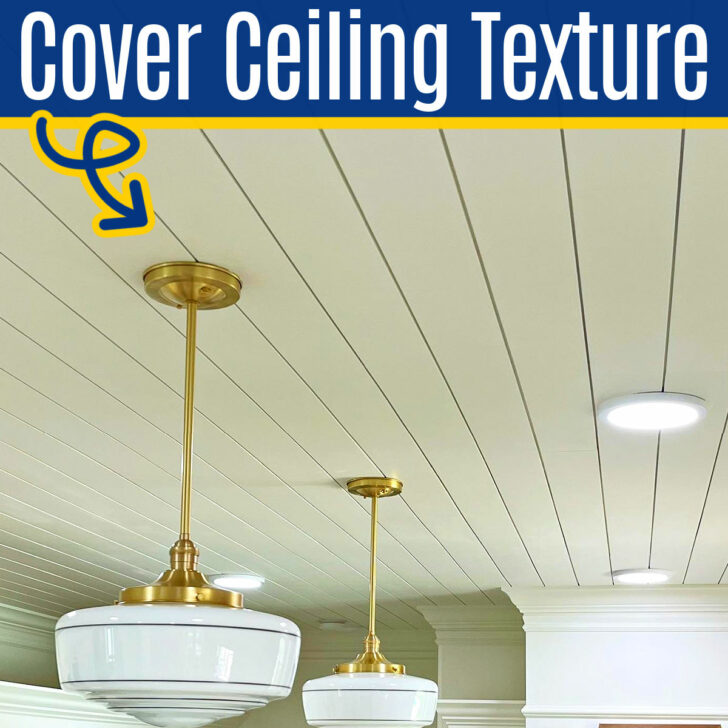
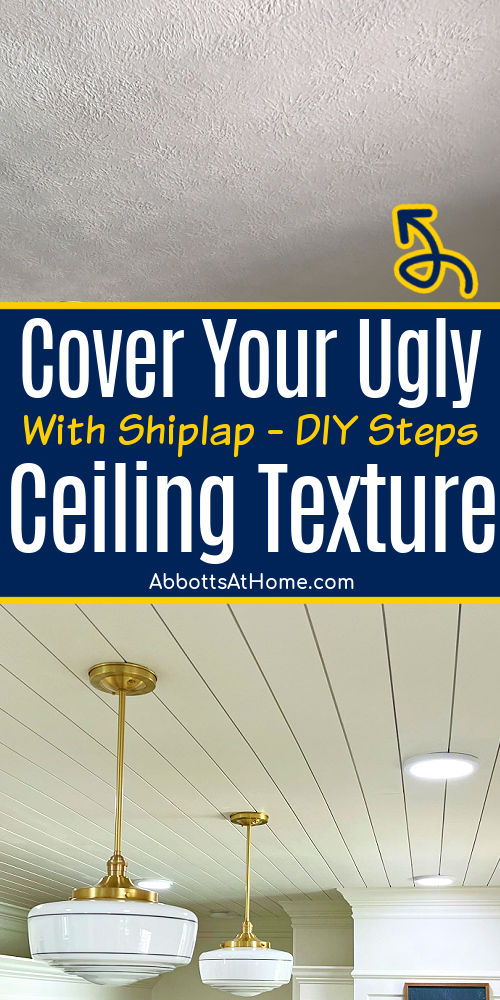
Looking for a BEAUTIFUL way to cover a textured ceiling? Here’s how to install shiplap on a ceiling to get a custom look you’ll LOVE!
How To Cover A Textured Ceiling With Shiplap
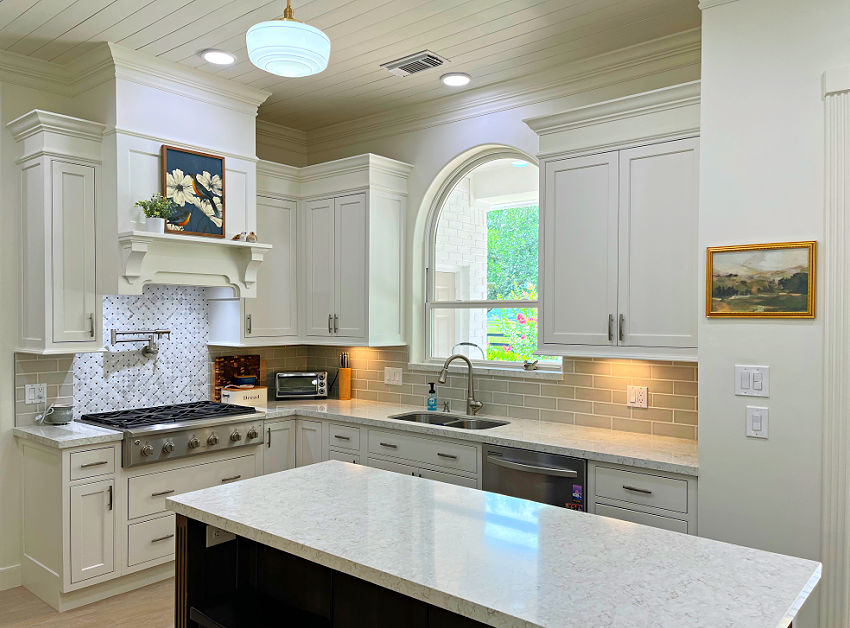
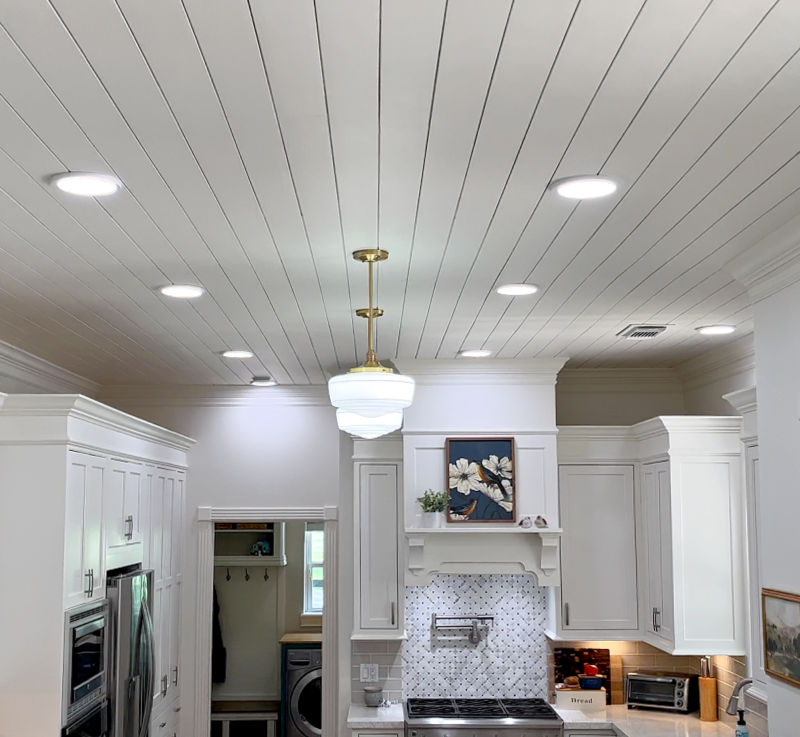
Hi guys! I finally did it! I covered that ugly ceiling texture on my kitchen ceiling. And, I’m SO GLAD I did. That texture had driven me crazy for 7 years.
I’d literally spend family dinners looking up at that ceiling trying to figure out how I was going to get rid of that texture.
After years of procrastinating and planning, I decided to install shiplap on the kitchen ceiling. That change was just 1 part of 7 changes I made in my kitchen to give it a custom, high end look.
You can see all of the changes in this 7 DIY Kitchen Makeover Ideas That ABSOLUTELY Made My Boring Kitchen BEAUTIFUL post.
There are many ways to hide ugly ceiling texture, this is just the one that I thought fit my style and the style of the room best. If you like this shiplap ceiling look too, keep reading to see the steps.
Let’s get to it!
Table of contents
Easy Steps To Cover A Textured Ceiling With Shiplap
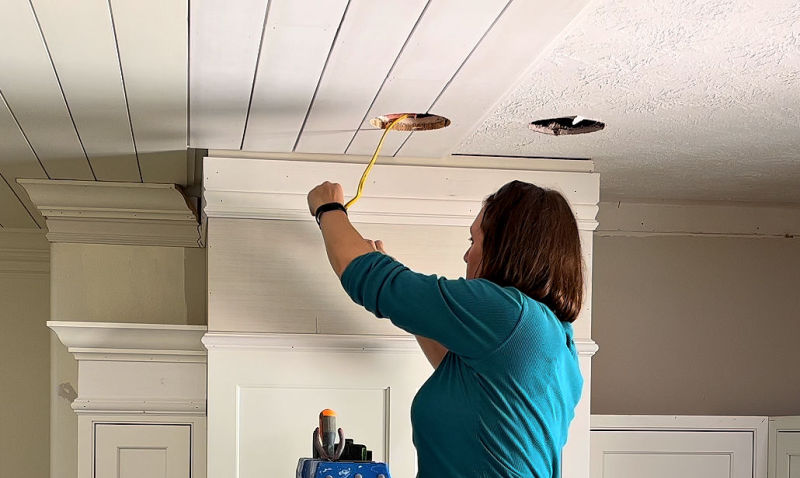
1. Find And Mark Your Joists
Use a stud finder and a straight edge to mark every joist on your ceiling. If you don’t have one, here’s some highly-rated stud finders.
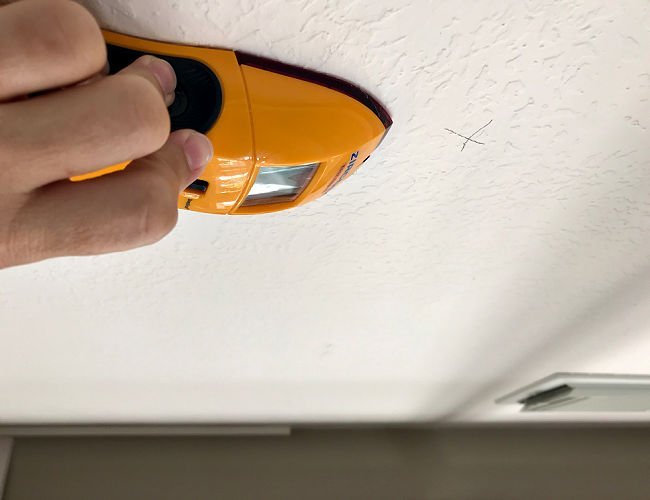
I usually find the stud, mark it with a pencil, then mark every 12″ along that stud, checking with the stud finder to be sure I’m still in the right spot. Then I connect those marks with a straight line.
Studs should generally be spaced about 18″ apart. You might find extras depending on structural needs for the walls above and below the ceiling.
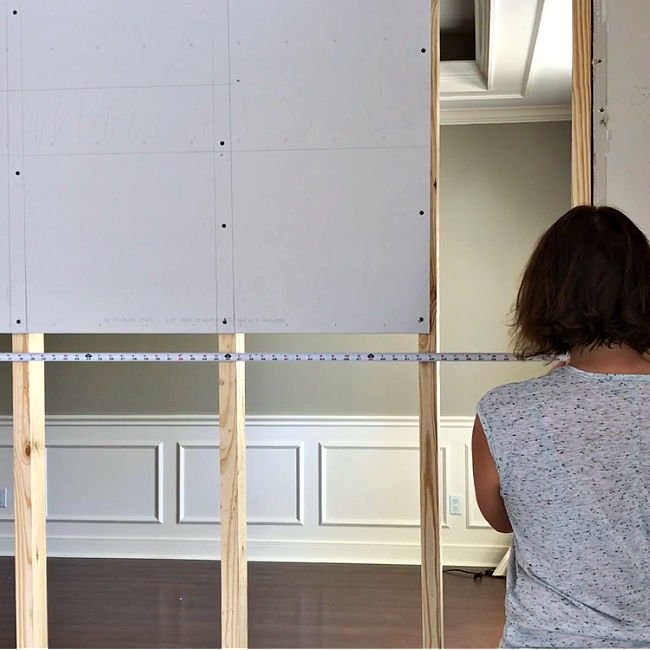
2. Cut Your Shiplap To Size
One of the most important things to remember is to STAGGER the ends of the shiplap. That means you don’t want a row of shiplap to end at the same spot or within 12″ of a board on the row next to it.
Staggering the ends will help to hide where one board ends and another begins, giving the the row the look of 1 long board.
It’s also better to stagger the boards so that 2 ends next to each other don’t start to warp together. Keeping the ends separated helps to strengthen the shiplap as one whole unit.
So, when you cut your shiplap, make sure that you pick a length that won’t end next to a board in a previous row. You also MIGHT want to have each board end on the joists.
Starting and stopping each board at a joist makes getting a flush look between boards easier. I didn’t install my shiplap this way.
So, I had to do a lot of angled nailing at the ends to pin the shiplap tightly against the ceiling. It was a bit of a pain. But, getting accurate measurements to hit a joist is nearly impossible when I work alone.
But, no worries, you can get a great look either way.
3. Brad Nail Shiplap Over Ceiling Texture
Butt your shiplap nice and tight against the end of the last board AND along the edge of the shiplap board next to it.
Then brad nail your shiplap on each side of the board at EACH joist it covers. That’s right, I said at EACH joist. Use the marks you made on the ceiling as a guide for where to put your brad nails.
Use 2″ long brad nails to get a good grab into the studs. Your shiplap is probably 1/2″ thick, the drywall is about 3/4″ thick. So, 1 1/4″ of the nail isn’t even in the stud.
You’ll need that extra 3/4″ of brad nail to get a good grab into the stud.
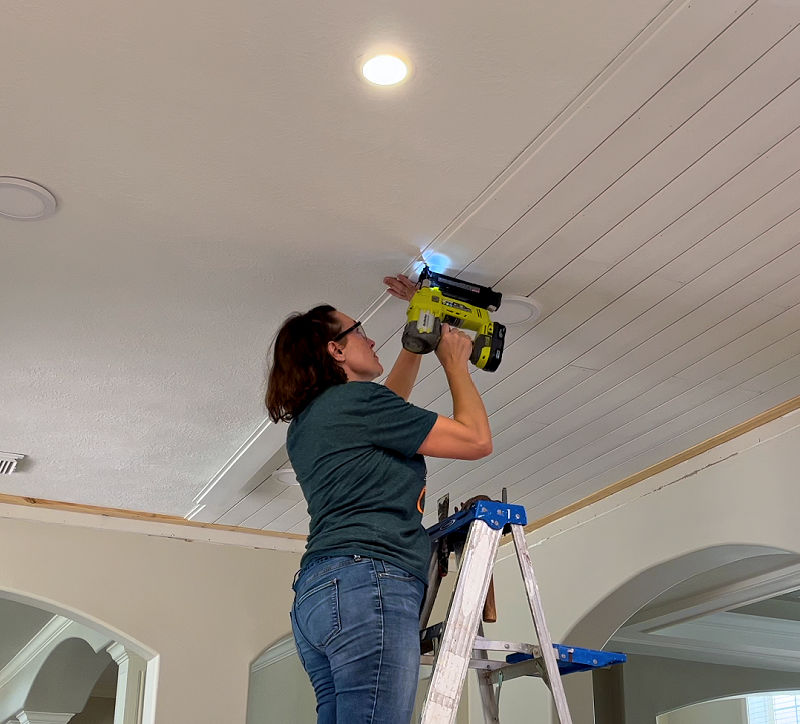
And, slightly angle that nail gun when you shoot in the nails so that the angle is another extra guard against the shiplap pulling away from the ceiling. Angled nails pin the shiplap more tightly.
Whenever I install trim, crown molding, or boards on walls and ceilings I use the “V” method with my brad nails. That means I slightly angle the nails in alternating directions to get a tight fit against the drywall.
The “V” method is why I don’t need to use adhesive with trim, even on ceilings. If any of the nails stick out, use a hammer and a nail set to sink them below the face of the shiplap.
See more of my trim projects in 18 Beautiful DIY Trim And Molding Ideas For Your Home (With Steps).
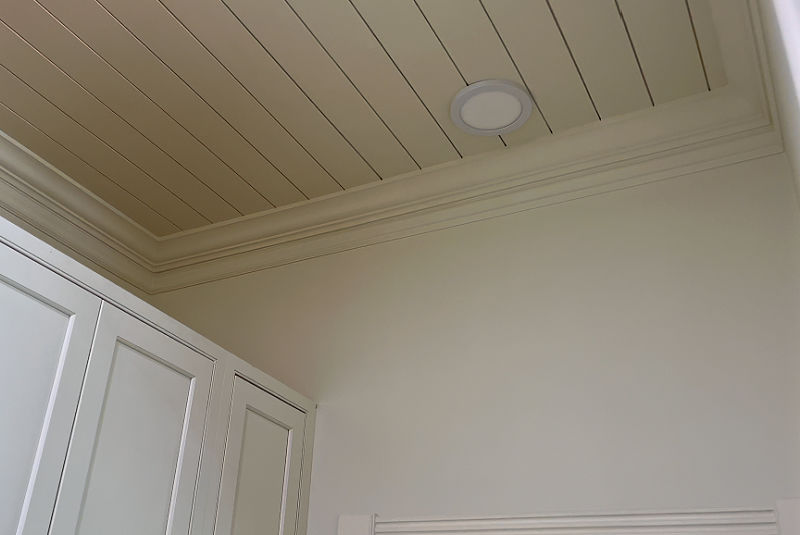
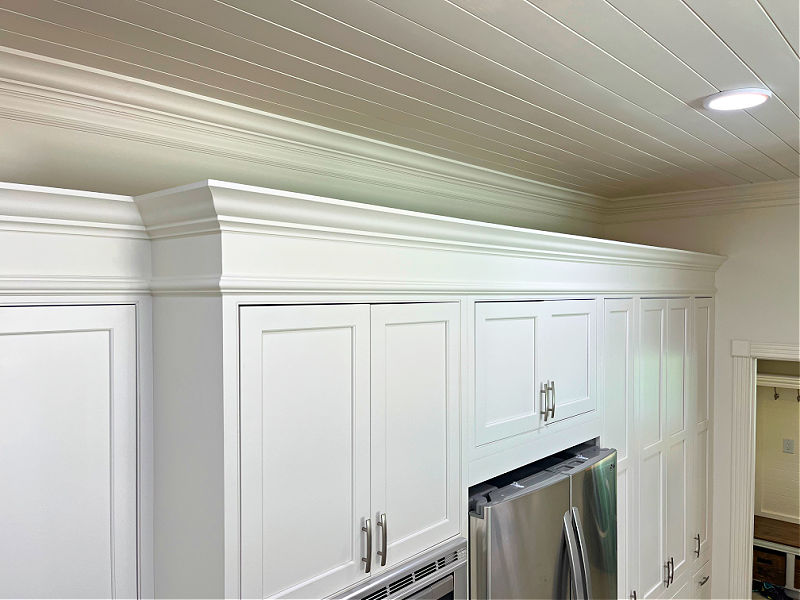
4. Install Optional Crown Molding
I framed the shiplap on my kitchen ceiling with this Beautiful Two Piece Crown Molding. You can also you crown molding alone or even this Three Piece Crown Molding to get a look you love!
But, you don’t have to use crown molding at all, it’s optional. You can install the shiplap up to the walls or go with a smaller trim, like 1×2’s, to frame the ceiling and hide the gap.
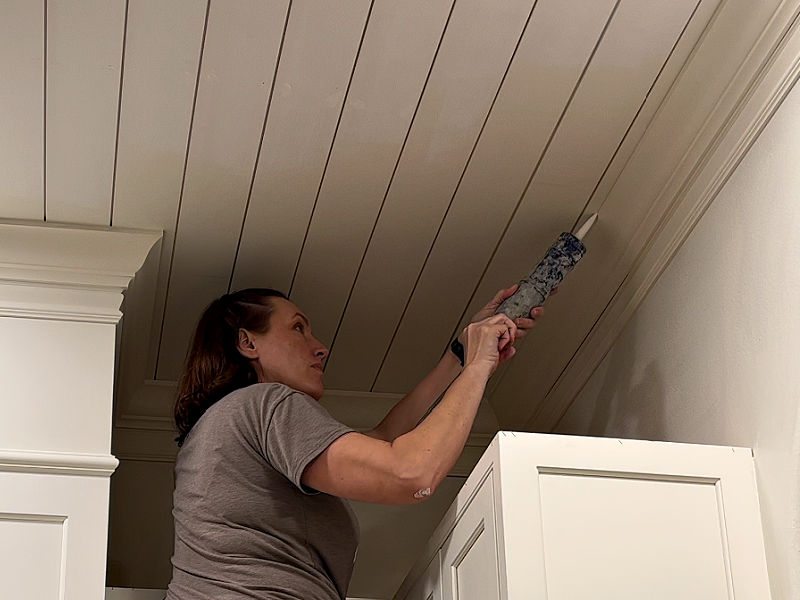
5. Use Wood Filler And Caulk
Now that you have all of your shiplap installed, it’s time to make it look professional! Start by using wood filler or spackle on all of the nail holes.
Overfill the nail holes a little so that , as the filler dries and shrinks, it won’t create a divot where the nail hole was. Once it dries, sand it flush with the boards using 120 to 180 grit sandpaper.
I like to use this little Gator Micro Zip Sander for getting into tight spots and sanding spots smooth. After sanding, remove all of the dust with a tack cloth.
Then caulk where the shiplap meets the wall or the crown molding. Be sure to wipe away the excess caulk before it dries. Check out When to Use Caulk or Wood Filler on Trim for a complete guide.
6. Paint Your New Shiplap
Using a paint sprayer would be the easiest and fastest way to paint shiplap. A paint sprayer is just better at getting into the recessed area between the boards.
See the best paint sprayers on Amazon here.
If you don’t have a paint sprayer, you can absolutely paint your shiplap ceiling by hand. I used a small nylon paint brush to paint inside the gaps and a large paint brush to paint the boards.
Just be sure to take your time and use a quality nylon brush to get a nice smooth finish. Avoid painting over drying paint to eliminate uneven sheen.
You could also paint the boards with at least 1 coat of paint before using them to cover a textured ceiling. Painting before install will reduce the amount of time that you spend painting your ceiling.
I used Eggshell Sheen Sherwin Williams paint in the color Dover White on my ceiling, walls, and trim. I’m a big fan of using Eggshell Sheen on Ceilings. That subtle sheen brightens the whole room.
See Some Of The Shiplap Work In This Video
Want to see me installing shiplap over a textured ceiling? Watch this video.

That’s it for how to install shiplap over a textured ceiling. I hope this helped! Now, here’s a few more posts you might like.
- How to Wash Pillows In A Washing Machine (Easy Steps & Video Guide)
- 8 Easy Ways To Dry Paint Cans For Disposal
- 3 Easy Steps To Change Grout Color From Dark To Light
- How To Clean Area Rugs At Home
- Steps For Using Easy Off Oven Cleaner on a Gross Oven
- Testing 7 Easy Ways To Get A Heat Stain Out Of Wood
Some DIYs You Might Like
Here’s how to Restain a Door without Removing It: Easy One Day DIY!
This post about How to Remove Water Stain from Ceiling Without Paint – 1 Easy Step is always popular!
Check out the 50 Best Outdoor Door Mats For A Beautiful Front Door.

Feeling inspired? Now that you’ve seen how to cover a textured ceiling with shiplap, get to it. It’s easy!

Stephanie Abbott has been remodeling homes, updating & building furniture, and working on DIY home maintenance and cleaning tips for over 20 years. Her remodeling has been featured in Better Homes and Gardens Magazine. And, her DIY YouTube channel has had more than 8 million views.
Most of the DIY tutorials and videos on this site focus on beginner to intermediate level DIY Projects that can be done in an affordable way without high-end, expensive tools. All of the cleaning tips on this website have been tested in her home.