
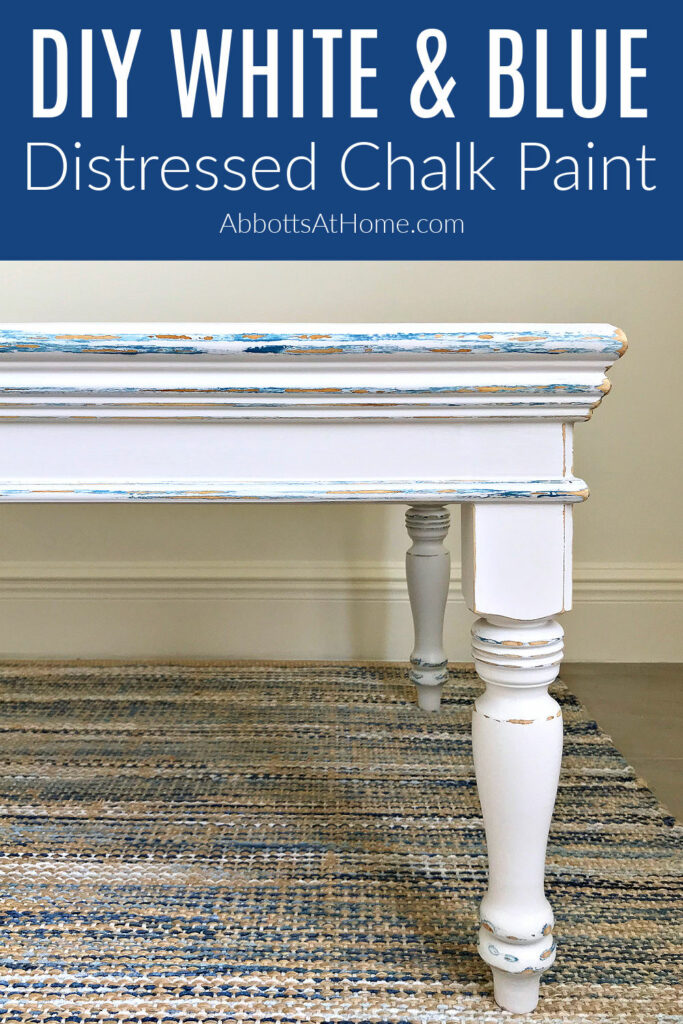
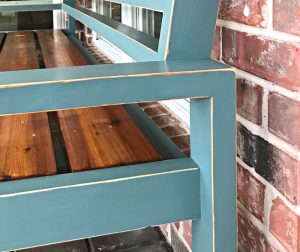
I LOVE this easy DIY White and Blue Distressed Chalk Paint Look! Layering white over other colors with just a little bit of distressing on the furniture curves & corners adds so much character and a vintage feel to furniture.
DIY White and Blue Distressed Chalk Paint Look
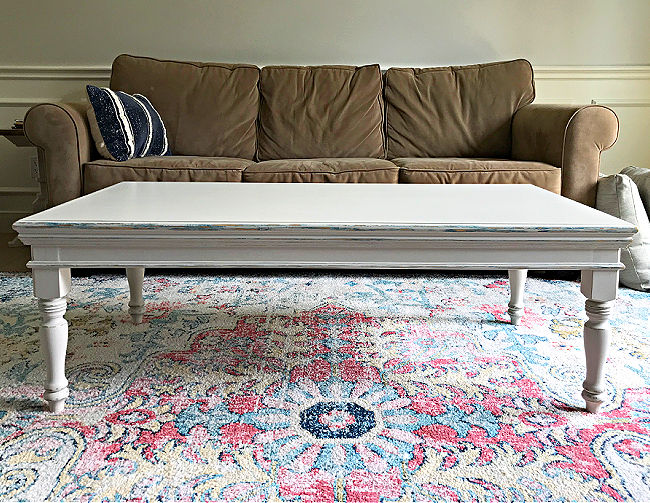
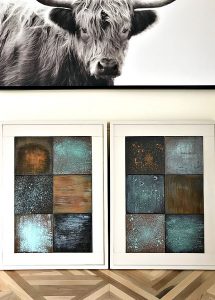
Oh guys, this DIY White and Blue Distressed Chalk Paint turned out even better than I expected. It’s absolutely perfect with the colorful area rug and the grey-blue built ins in this room.
I couldn’t be happier with this easy furniture paint look.
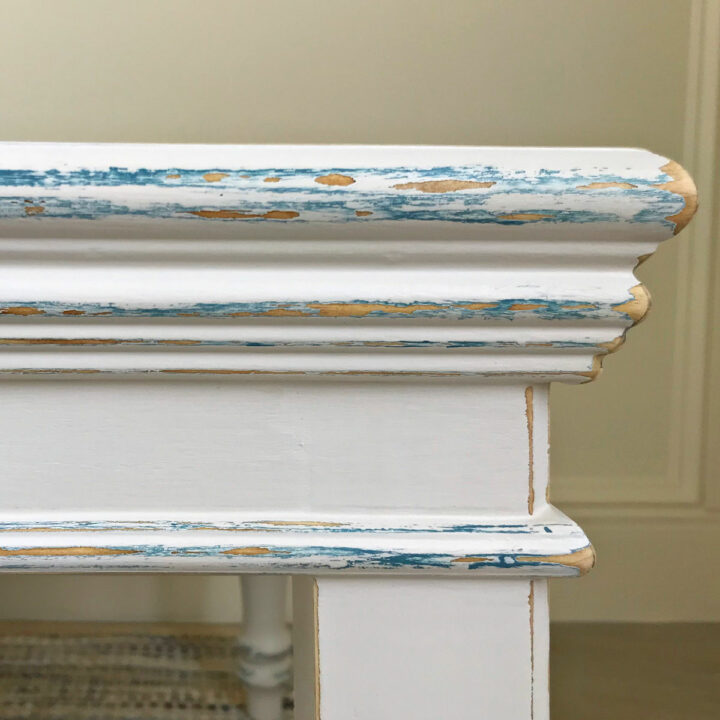
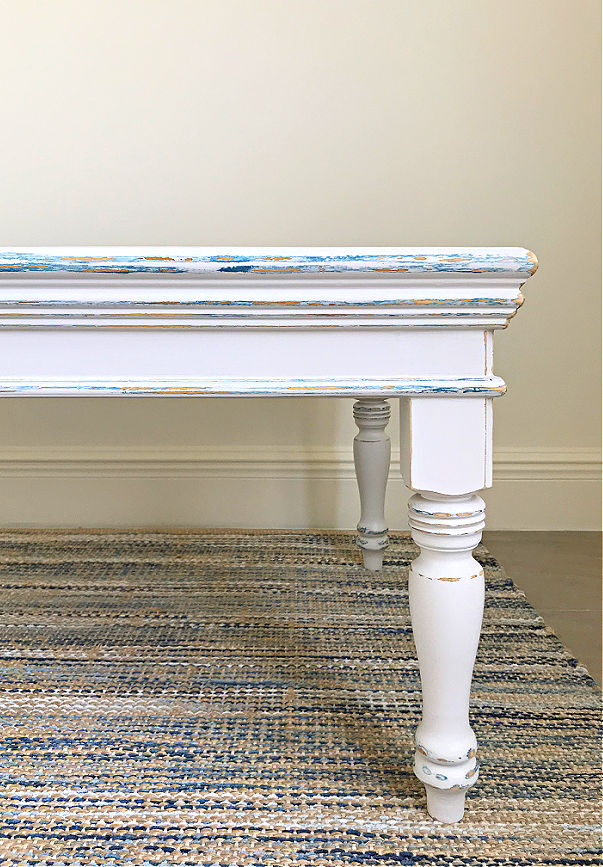
The hints of blue and wood showing under that white paint is just beautiful. I kept the distressing light so that the table still looks mostly white against that big colorful area rug.
I just wanted touches of color to highlight the molding and corners of the legs.
The matte water-based top coat adds a subtle sheen that always makes furniture look like it’s been professionally finished.
Matte top coats are my secret to getting a high-end furniture store look on my furniture.

Why I Like Distressed Paint Looks
Layering and distressing chalk paint is one of my favorite ways to give furniture a beautiful new look.
I know it’s probably hard for some people, but I always think layering and distressing chalk paint and stain is an easy way to get a beautiful artsy painted furniture look without actually needing many artistic skills.
At least, that’s what I think. Distressing chalk paint does take practice, though. Figuring out how much paint to sand off and where you want to sand off paint if the real skill with distressing chalk paint.
It’s all about figuring out what you like too. Some people like a little bit of distressing. Other people like a lot. There’s no right or wrong. Go for the look you like.
And, if you decide you’re not happy with the distressing, you can always paint over it.

Let’s get to what you need to know to do this beautiful DIY White and Blue Distressed Chalk Paint look at home.
What is the Best Paint for Distressing Furniture
Chalk Paint or acrylic paints are absolutely the best paints I’ve used for distressing furniture. They dry and cure harder and faster than latex paint. That means you can add a second coat sooner than you can with most other paints.
Chalk and acrylic paints also sand nicely. Because these paints dry so hard, instead of plastic-y like Latex Paints, you can sand them without worrying about the paint peeling, separating from the furniture, or pilling up.
Chalk paint is known for being able to stick to most old finishes, without stripping or sanding it off. Chalk paint is great at being able to grab on to most surfaces.
Just be sure to clean off old finishes with a mild dish soap or degreaser like TSP before painting. And, if the old finish is glossy, I’d give it a light overall sanding just in case.
That’ll give the new chalk paint a firm hold onto the old finish.
Latex or spray paints can sort of peel off or resist sanding. They’re just not designed for sanding. Latex wall paint is designed to work best on walls.
To make it chip resistant the paint companies design it to form a plastic-y layer over walls. Latex Paint bonds to itself well. So, when you try to sand it, it can peel off in strips or even separate from the furniture under it.
Where to Buy Cheap Chalk Paints
You can find lots of great chalk paint colors on Amazon or at stores like Michael’s and Hobby Lobby. Or, you can make your own chalk paint from latex interior paint using this chalk paint recipe.
Homemade chalk paint works just like the store bought stuff. But, it’s cheaper and you can make it from any color at the paint store.
I used homemade white and store-bought blue chalk paint for this DIY White and Blue Distressed Chalk Paint Furniture Look.
How do you Paint Furniture to Look Distressed
Well, that depends on what you mean when you say distressed. Distressed furniture paint describes so many different paint styles. Generally though, to distress furniture you’ll need to do some paint sanding to expose the wood in spots.
You might also use Vaseline to distress furniture paint. Vaseline lets you mark exactly where you want to distress. It makes it easier to sand that paint off those spots. That can be a huge help sometimes.
When some people say they want to do a distressed paint look, they’re actually picturing an aged, distressed paint look.
That paint look usually starts with sanding chalk paint. Then follows that up with a glaze or wax over the paint that makes it look old.
There are so many ways to give painted furniture a distressed look.
Check out my list of 20+ beginner furniture painting tutorials for more ideas about how you want your painted furniture to look.
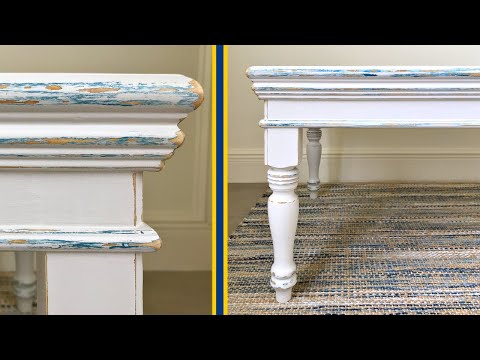
Watch this video to see a quick look at the steps for this DIY White and Blue Distressed Chalk Paint Makeover.
What You Need for this Furniture Makeover
- Medium Walnut Danish Oil – for unfinished wood only
- White Chalk Paint, I made my own with this DIY chalk paint recipe but this white chalk paint would be beautiful
- Medium Blue Chalk Paint
- Rust-oleum Matte Varathane
- Quality Synthetic Paint Brush
- 120-grit sandpaper or sanding block
- Gator MicroZip Detail Sander

How to Clean Furniture Before Painting
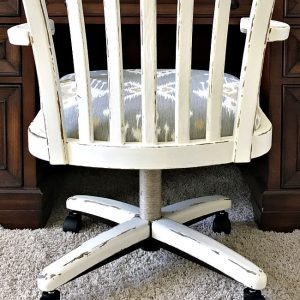
I like to use this easy homemade wood cleaner on dirty furniture. This cleaner worked amazingly well on the super dirty office chair I rescued from the trash. This homemade wood cleaner moisturizes the wood while it cleans too.
Warm water with Dawn dish soap can work well on mildly dirty furniture that still has a good finish on it. I wouldn’t use soapy water to clean dry wood, unfinished wood, or wood with exposed wood under the finish. The water can soak into the wood, drying it out more, staining it, and/or raise the grain.
You can also use store bought cleaners that are safe for finished wood, even if they have chipped bare wood spots. Liquid TSP is great, easy to use cleaner that can be used on furniture before painting.
DIY Quick Step Paint Guide
Here’s a quick overview of the steps I used for this DIY White and Blue Distressed Chalk Paint Furniture Makeover. Detailed explanations of each step are below.
- Clean the existing finish. Or apply Danish Oil to unfinished wood.
- Apply 2 coats of a white or off white chalk paint.
- Light sanding and dust off.
- Apply 2 coats of a medium blue chalk paint on areas you will distress.
- Apply 2 more coats of the white chalk paint over the blue areas.
- Distress with a Sanding Block or detail Sander.
- Protect with 2-3 coats of a water-based poly.
Sign up for the Abbotts At Home newsletter to get a FREE 19-page guide with steps and tips for How to Paint Furniture for Beginners. Including answers for the most common questions I get about painting furniture. You’ll also get the FREE guide for How to Paint Built In Bookshelves and Cabinets.
How to Distress Painted Furniture
Be sure to always follow the recommended dry times or application instructions on each product you use for this distressed White and Blue chalk paint look.
Step One
If your furniture already has a stain finish, that you want to paint over, then it just needs a quick cleaning before starting. Use TSP or read the section above about ways to safely clean furniture.
If your furniture is unfinished, I recommend applying Danish Oil to bare wood. It makes a great primer under paints. Danish oil soaks into wood and hardens, making the wood stronger. It also provides a smoother surface that chalk paint can still grab onto.
You can also paint straight onto bare wood with chalk paint. Chalk paint works beautifully in most circumstances.
Step Two
Apply 2 coats of your white or off white chalk paint all of your furniture. Use a quality synthetic brush to avoid brush strokes. 2 coats of white chalk paint should provide full coverage. But, if not, you can apply a third all over coat after the blue paint has been applied in step 4.
Step Three
After the second coat of chalk paint has dried, lightly sand the entire piece of furniture. This will give the chalk paint a smooth finish or feel, while also removing any dust nibs that may have dried in the paint.
I like to use a sanding block with a grit between 120 and 180 to do this step. A light swipe across every painted surface will do. Watch the video above to see how quick and easy this step is.
Once you’ve finished, clean off all the dust with a slightly damp cloth.
Step Four
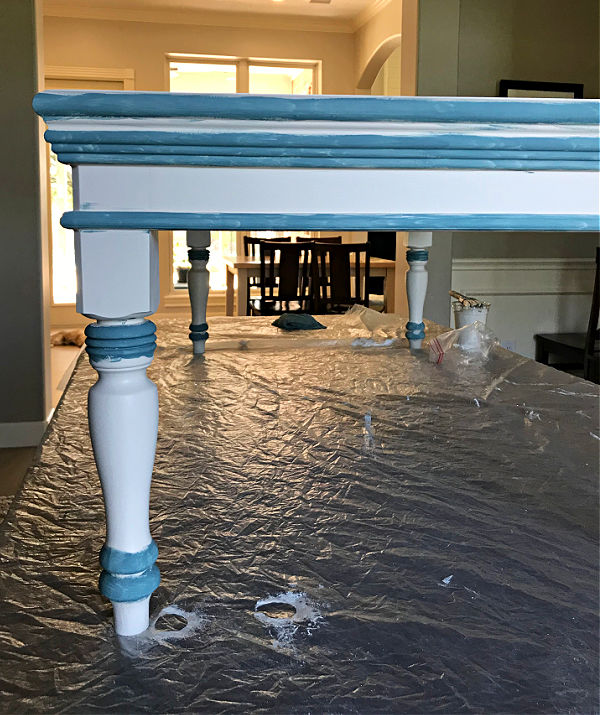
Now, apply 2 coats of blue chalk paint to only the parts you want to highlight. I applied blue to the molding on my DIY coffee table and on a few curvy parts on the legs.
If you want more or less blue to show up, go for it. I always recommend going with your gut to get a look you’ll like.
I used a small kid’s paintbrush to apply the blue. I worked quickly and wasn’t worried about keeping the lines straight. This will be painted over anyway.
Step Five
Once the blue has dried, apply 2 coats of white chalk paint over the blue paint. That should completely cover the blue chalk paint. If your first 2 coats of white paint (step 2) didn’t provide full coverage, paint the whole piece of furniture again too.
Once the blue chalk paint is covered and it looks like a solid white piece of furniture again, rub your hands across the paint. If it feels slightly ruff, lightly sand it again. Then clean off the dust.
Step Six
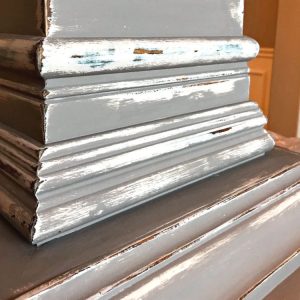
Now, it’s time to start distressing the chalk paint layers. I like to use a small detail sander for distressing. They’re great for targeting small areas for sanding.
You can see this in the video, I sand small lines at a time on the curves of the molding on my table. This exposed the blue paint in those area. Sometimes I sanded a spot more to bring out the wood underneath too.
I keep saying it, but it’s worth saying again. This DIY White and Blue Distressed Chalk Paint look is all about getting the amount of distressing you like. I wanted random lines on the curves for this table. You might decide you like bigger chunks of distressing.
I also used my detail sanded to sand down the corners and hard edges on the legs. I didn’t paint those spots blue. So, it just reveals the wood underneath in those spots.
Once you’ve finished distressing everywhere you want to distress, clean off the dust again.
Step Seven
Finally, it’s time to apply a top coat. I love the Matte finish in this water-based poly AND the Flat Sheen in this top coat. Both of them give furniture a beautiful store-bought furniture look.
Follow the directions on whichever top coat you use to get the best result.
Scroll down for a printable version of this tutorial.
That’s it for this DIY White and Blue Distressed Furniture Paint Makeover. Good luck with your project!
You might like this Shabby Chic Style DIY White Distressed Chalk Paint look too.
I love this DIY White and Grey Distressed Chalk Paint Furniture Makeover.
This How to Patina Paint Faux Metal Finishes Tutorial is a fun way to make or update decor and furniture.
Try this easy DIY Blue Distressed Chalk Paint look too.
Get this Easy DIY Rust Paint Effect with this tutorial.
Feeling inspired? Get out there and do your own DIY White and Blue Distressed Chalk Paint Makeover. Have fun and let me know if you have questions. Or post pictures of your work and tag Abbotts At Home on FB, I’d love to see it!

Stephanie Abbott has been remodeling homes, updating & building furniture, and working on DIY home maintenance and cleaning tips for over 20 years. Her remodeling has been featured in Better Homes and Gardens Magazine. And, her DIY YouTube channel has had more than 8 million views.
Most of the DIY tutorials and videos on this site focus on beginner to intermediate level DIY Projects that can be done in an affordable way without high-end, expensive tools. All of the cleaning tips on this website have been tested in her home.