
How I Added a Mudroom in a Small Laundry Room with cheap DIY projects and ideas that turned cabinets into a bench, shoe and coat storage.
DIY Mudroom in A Small Laundry Room
This house was built in the late 90’s. So a bit before mudrooms became a standard in new construction homes. Today, we all know that mudrooms make life so much easier. And we really needed one!
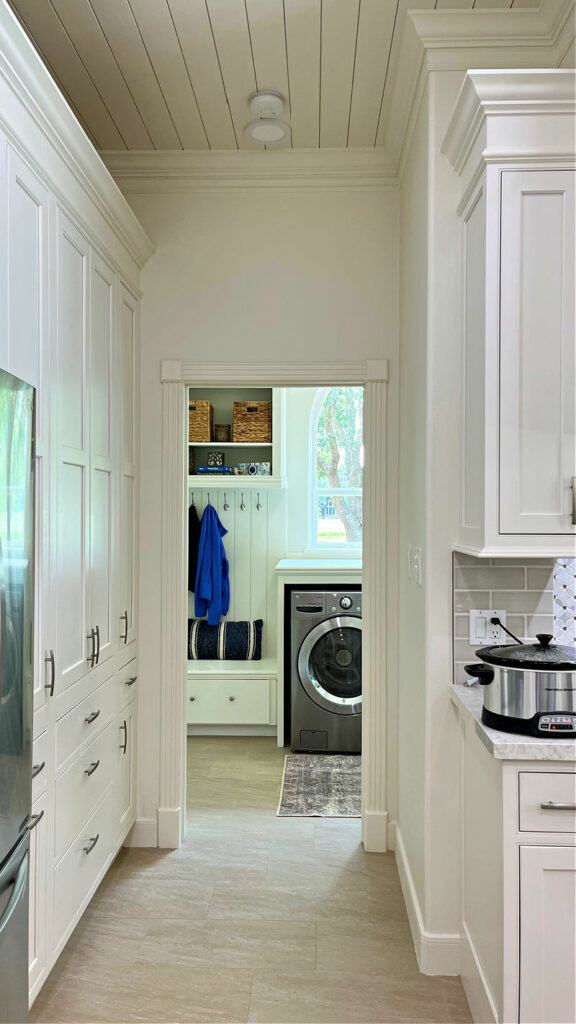
Since we used the door in our Laundry Room as our main entry, it made since to try to turn our laundry room into a laundry room mudroom combo space.
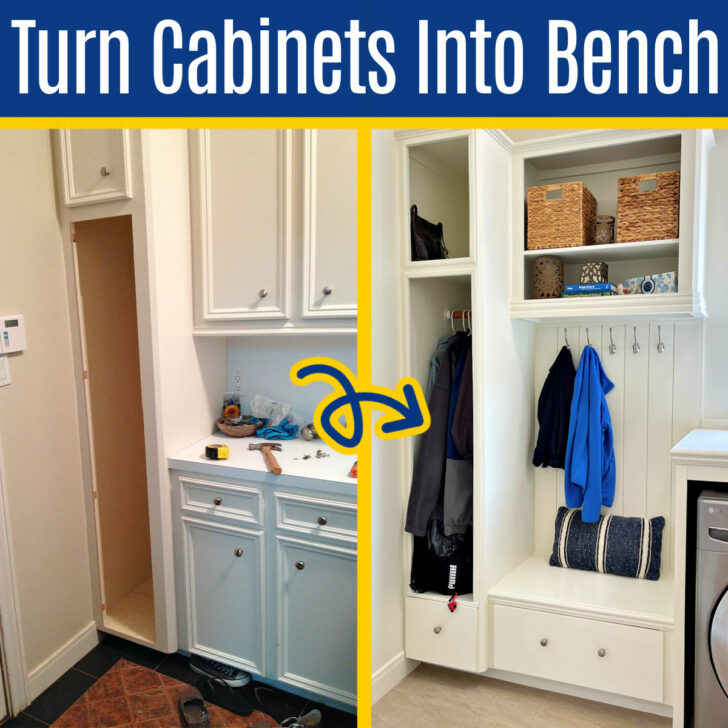
Luckily for me, this set of cabinets next to that door were pretty much unused. And, they’re made of 3/4″ thick plywood. So, I knew I could convert a cabinet into a bench and shoe storage pretty easily.
In this post, I’m sharing how I convert cabinets into a bench, shoe storage, and coat storage. And, the different looks this laundry room mudroom combo has had over the years.
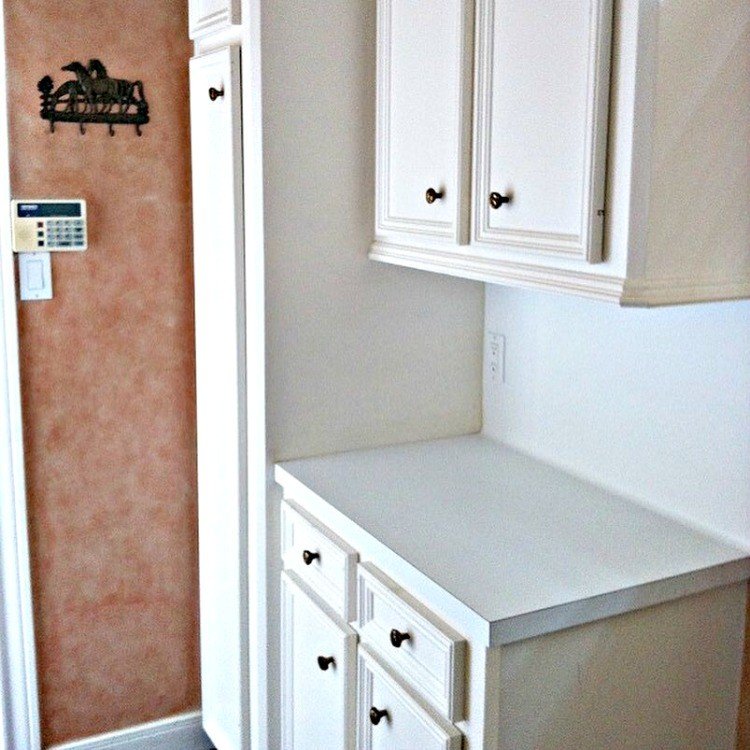
Table of contents

3 Looks For This Small Laundry Room Mudroom Combo
It’s been almost 10 years since I turned cabinets into a bench, shoe storage, and coat storage. It’s had a few looks in that time. Here’s a look at how the style of this small laundry room mudroom combo has changed.
My first version of this new mudroom laundry room combo seemed darker and more rustic. And, I still hadn’t finished adding all of the DIY wooden storage bins.
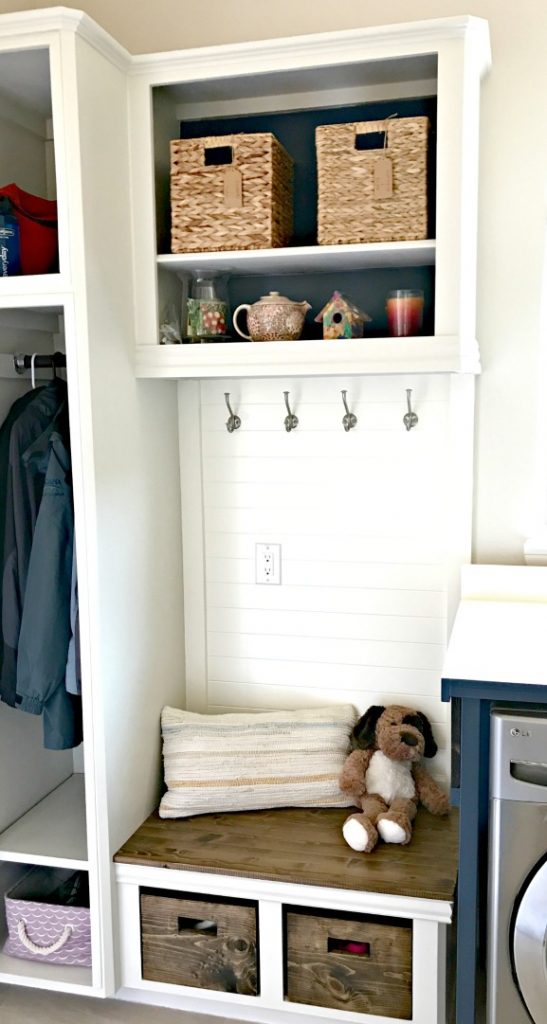
After a couple years, I finished building 2 more bins and added thin plywood liners to the coat storage. I also built a nicer DIY Over Washer and Dryer Laundry Table.
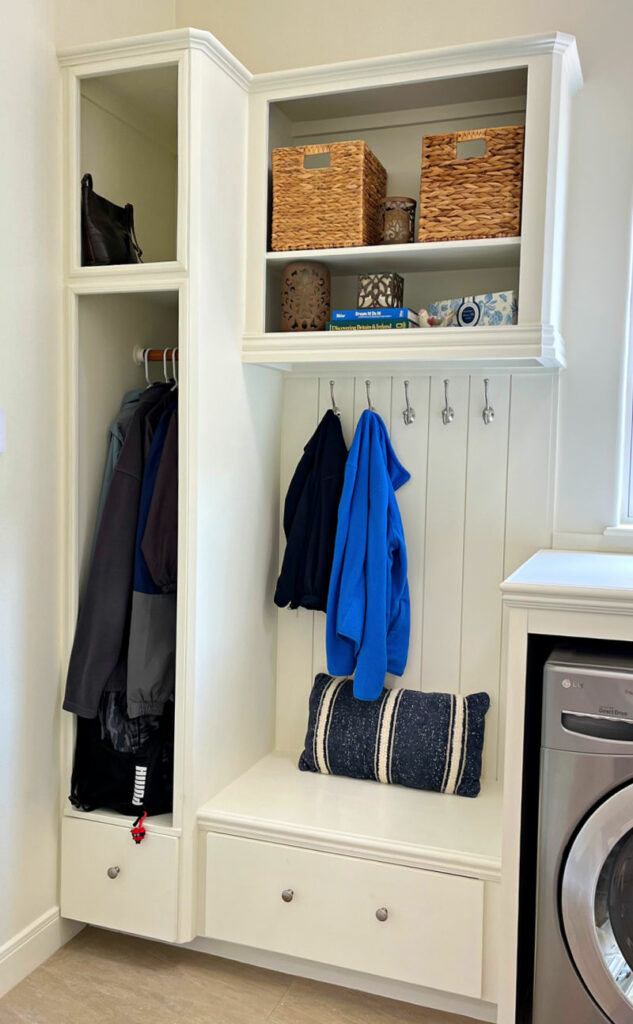
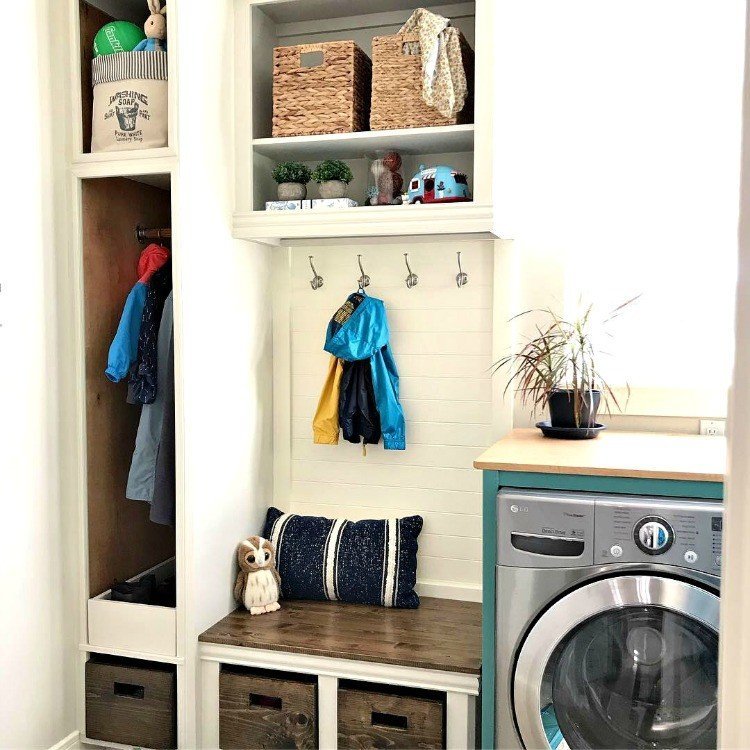
Recently, I painted this small laundry room mudroom combo all white. I also built a new laundry table and storage drawers, and installed a shiplap backsplash. That all white look matches the kitchen A LOT better.
Turning Cabinets Into A Bench With Shoe Storage
That bench started out as a 3/4″ thick plywood built-in base cabinet. Some cabinets are too flimsy to be cut down into a bench. But if your cabinets are sturdy and thick, this is a great low cost DIY.
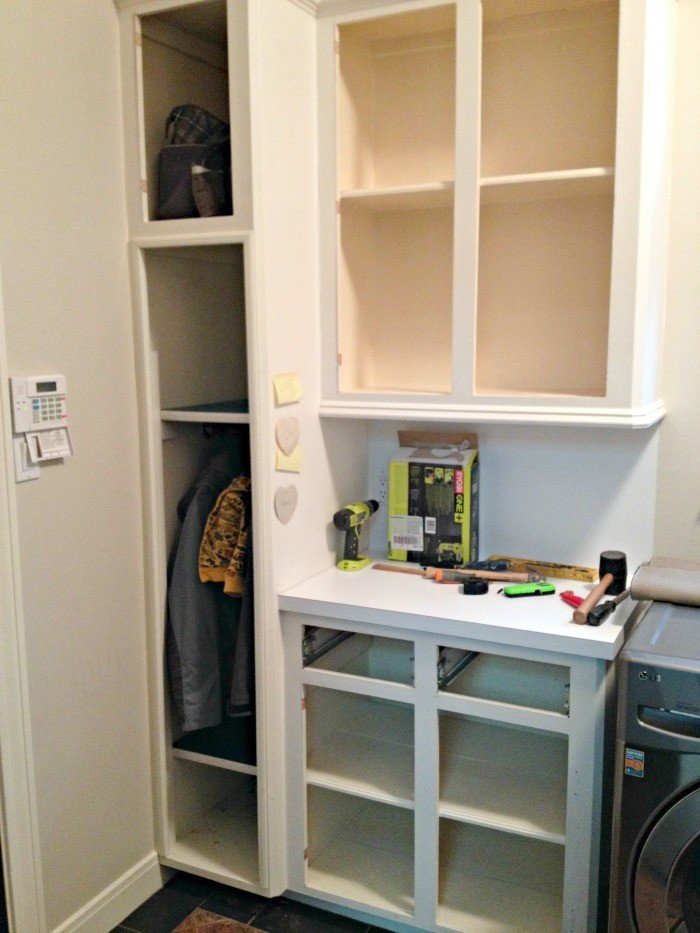
I removed the doors and drawers. Then marked a straight line with a pencil across the lower cabinet and upper cabinet where I wanted to cut them.
I used a circular saw to cut everywhere I could. But near the walls and the longer cabinet I had to use a jigsaw and a handsaw to finish the cuts. A reciprocating saw would have worked even better.
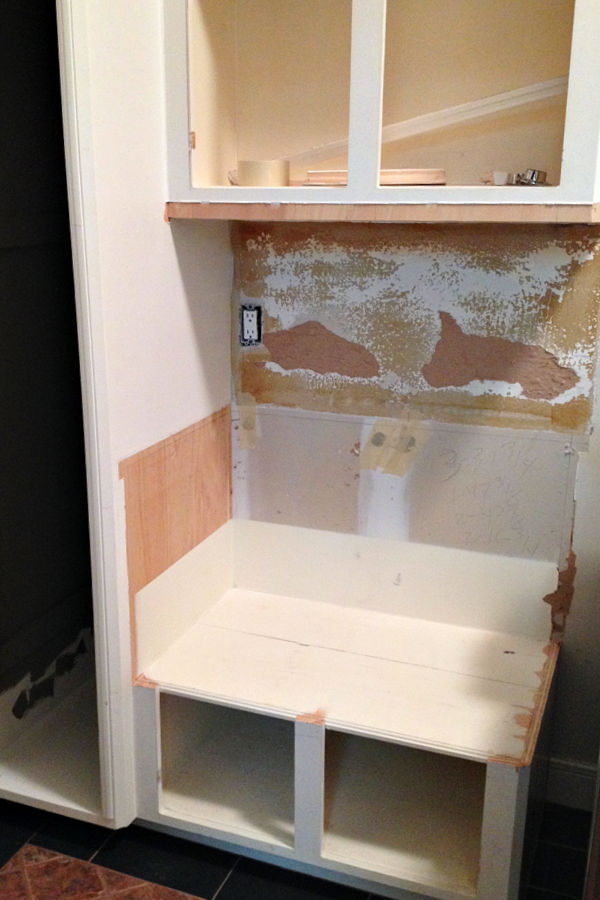
After cutting the upper and lower cabinets, the next step to covert cabinets to a bench and storage was to add a new top and bottom to those cut off spots.
I used lumber, plywood, and trim molding to finish off the cut down cabinets. Since the lower cabinet would be a mudroom bench, I added extra supports, screwed into the surrounding 3/4″ plywood.
I added v-groove paneling along the back wall with coat hooks. Baskets on the upper shelf hold hats, scarves, and gloves.
Making all of this look nice means lots of sanding and knowing where to use caulk and wood filler on wood trim. But, it’s not to complicated.
I built the Shoe Storage Crates with my Kreg Jig. I love custom crates because you can make them the perfect size for your space. Here are some great shoe storage options, if you don’t want to build.
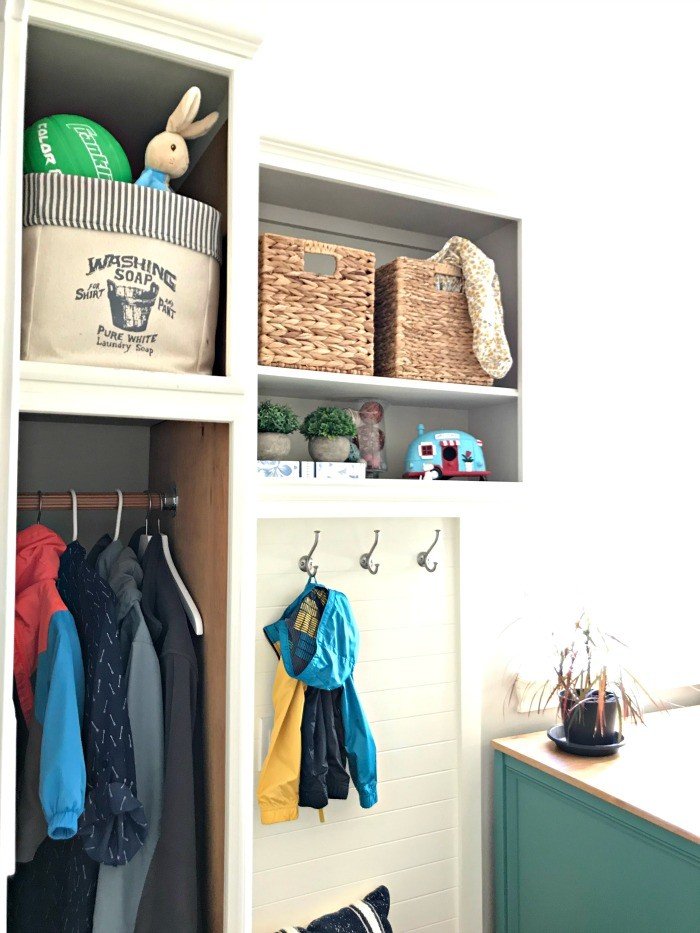
How I Added Coat Storage In A Tall Cabinet
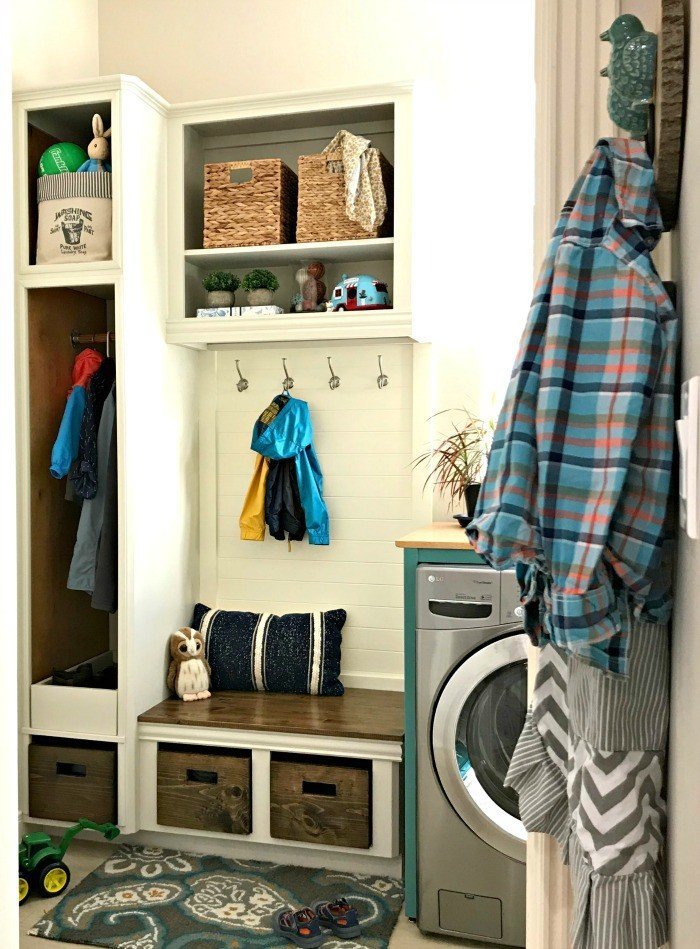
That tall cabinet on the left used to be one of those long cabinets that people like to store brooms and cleaning supplies in. I converted the bottom half to more shoe storage (you can never have enough.
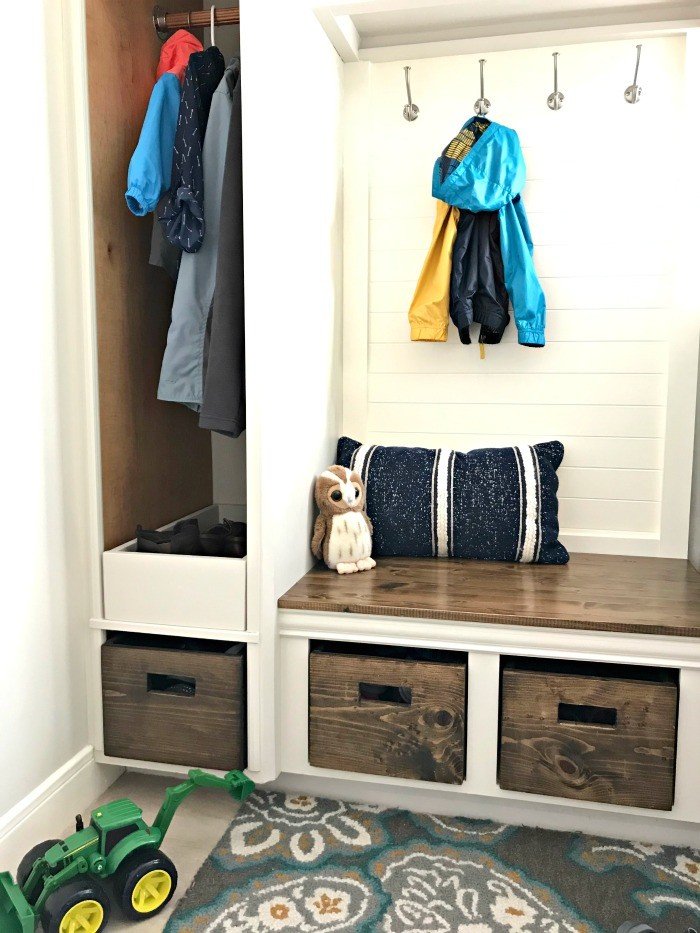
Then, I lined the inside of that open cabinet with stained plywood for a pretty, finished look. I love how much more functional this space is after converting the cabinets into a bench, coat, and shoe storage.
The white shelf dividing the 2 different boxes lets me add a 3rd wood bin to that area. Having 3 matching boxes ties both areas together. The white wood box on the top looks nice against the wood stain.
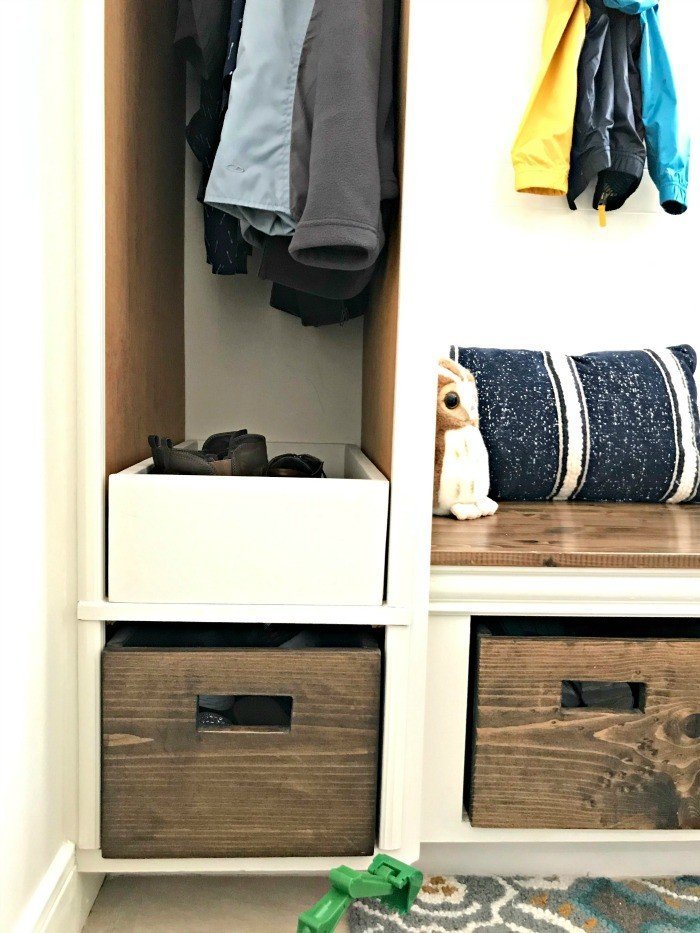
It was designed to be a shorter, open box and easy to use. I kind of have one of those husbands that thinks pulling a drawer out is too much effort. So, this was designed to be super easy for him to drop things in. 😉
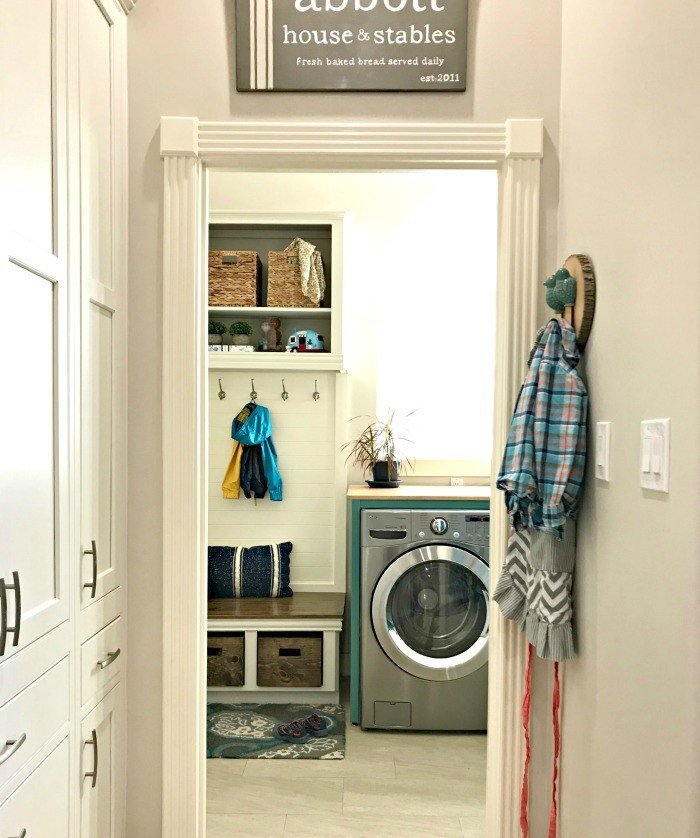
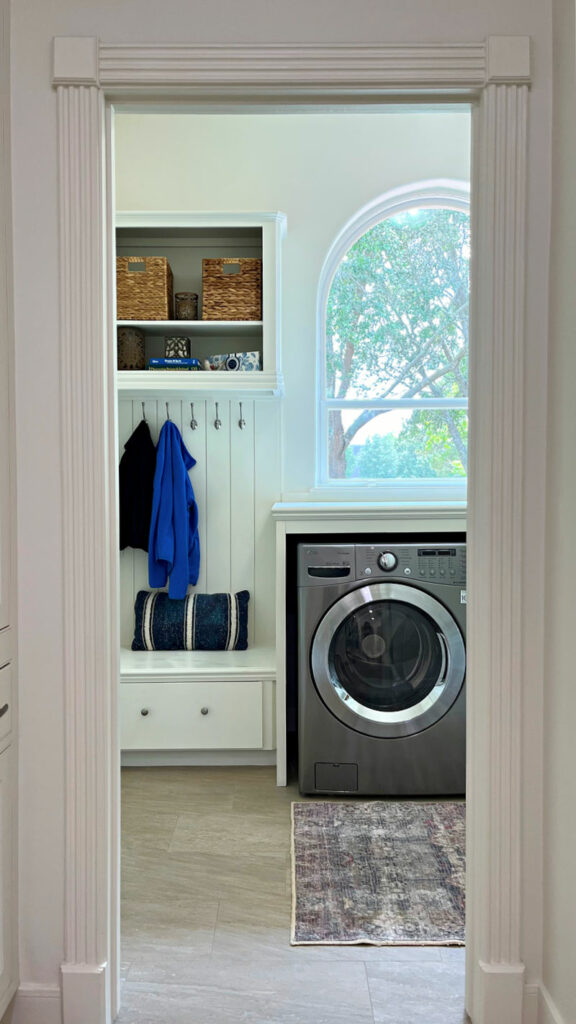
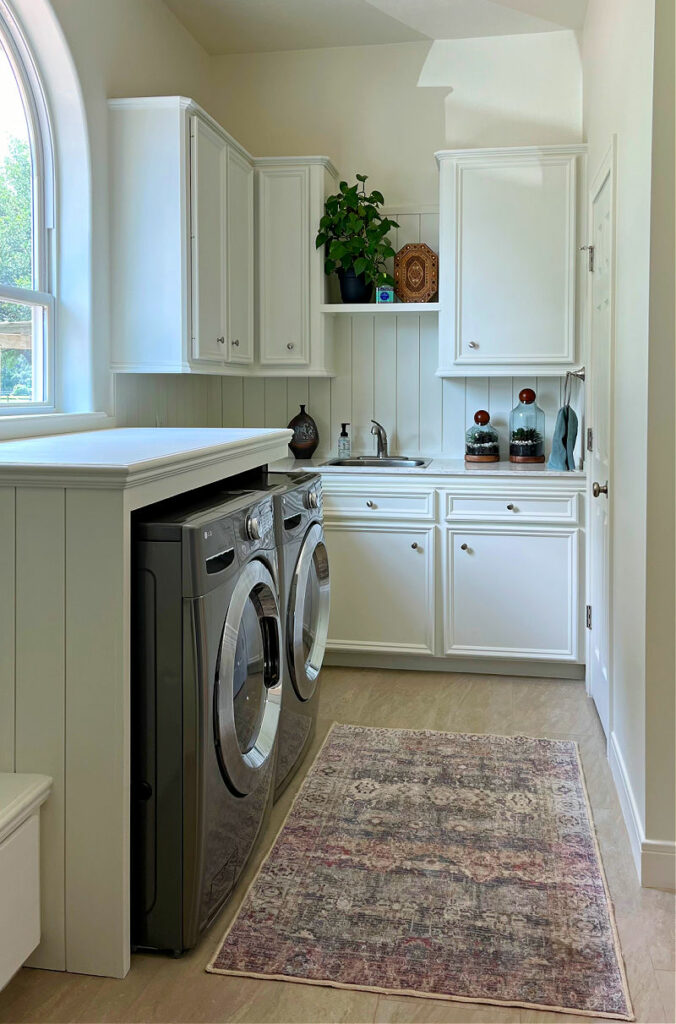
I love the view of this little Mudroom from our kitchen now. It just seems so cozy and homey. The DIY Over Washer and Dryer Laundry Table I built to fit over the washer and dryer plays a huge part in giving the room some style.
More Laundry Room Mudroom Details
Plus, it’s just a great place to drop the purse and keys, fold laundry, and it hides those big machines. You can find the DIY for that wood slice wall hook here too. I love having a place to hang cute aprons in a kitchen. Cute aprons add so much charm and color.
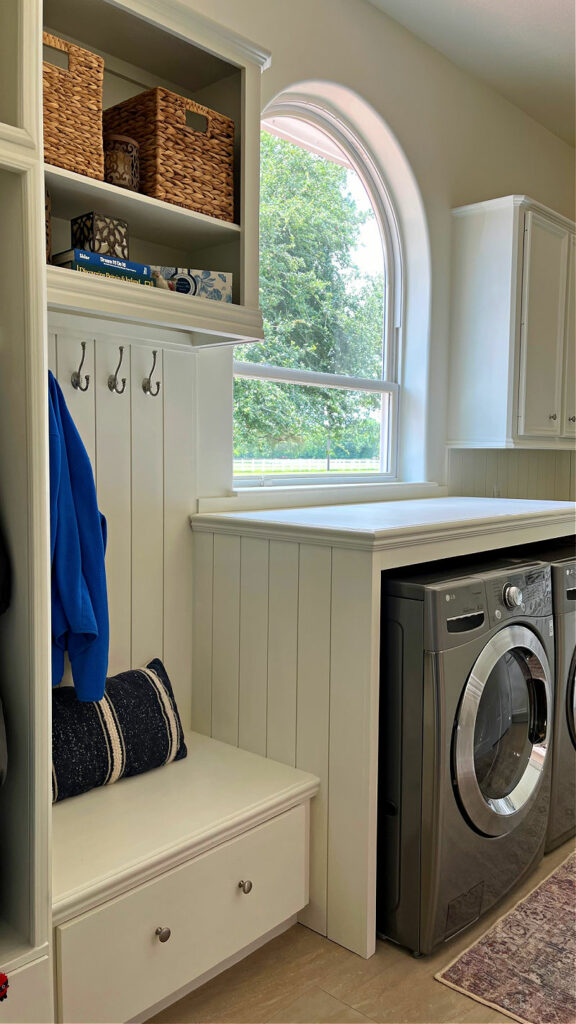
The woven baskets over the bench have been a great place to store gloves, scarves, and hats. The 4 hooks typically hold the coats we’re grabbing the most for that season and the kids book bags.
I used a v-groove MDF panel to connect the bench to the upper cabinet, like a hall tree. I framed that in with 1×3 pine dimensional lumber. You can see more small laundry room ideas here.
Adding a Closet Rod and Brackets to that open tall, open cabinet gives us lots of extra coat storage. That storage area above the coats typically stores my purse and my husbands laptop bag.
I have to say, this new Mudroom in our small laundry room is well loved and used all day long. I’m so happy that I went for it with this project. Sometimes a big change is the best way to add function to a home. 🙂
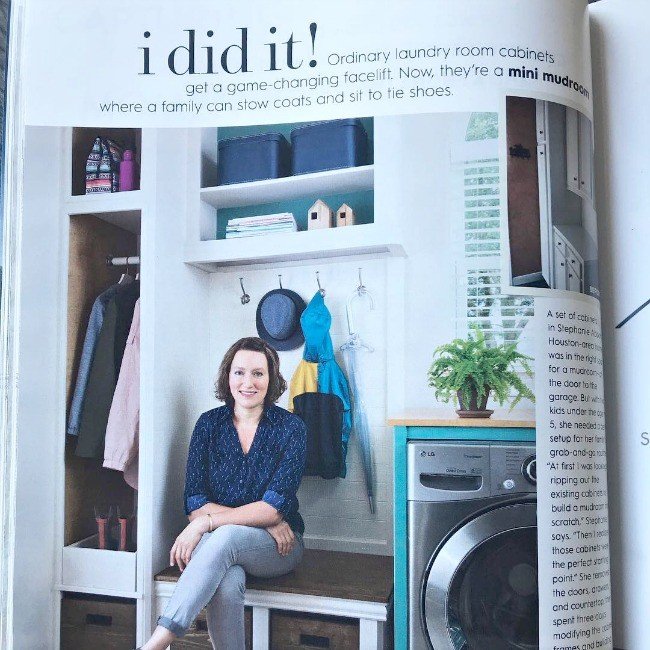
This Mudroom was Featured in Better Homes and Garden Magazine!
One last thing! Crazily enough, this little Mudroom Bench and Coat Storage was actually featured in an issue of Better Homes and Gardens. It was a really incredible experience. I’m still pinching myself.
You can read all about the BHG photo shoot and how it happened here.
More DIY Projects For You
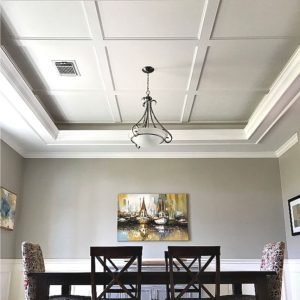
Looking for more home design ideas and inspiration? I love this DIY Simple Coffered Ceiling Makeover.
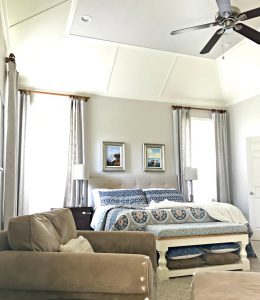
And this DIY Vaulted Ceiling Makeover.
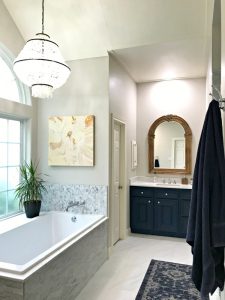
This Master Bathroom Before and After Makeover is full of DIY tips and tutorials.
Make beautiful DIY Wood Overlay Drawer Fronts with this simple tutorial.
Have a look at this Before and After Colorful Living Room Makeover for more home ideas.
Thanks for checking out how I Added a Mudroom in a Laundry Room. Please let me know if you have questions. Don’t forget to sign up for the Abbotts At Home email newsletter to get DIY, Remodeling, and Crafty ideas in your inbox.

Stephanie Abbott has been remodeling homes, updating & building furniture, and working on DIY home maintenance and cleaning tips for over 20 years. Her remodeling has been featured in Better Homes and Gardens Magazine. And, her DIY YouTube channel has had more than 8 million views.
Most of the DIY tutorials and videos on this site focus on beginner to intermediate level DIY Projects that can be done in an affordable way without high-end, expensive tools. All of the cleaning tips on this website have been tested in her home.