
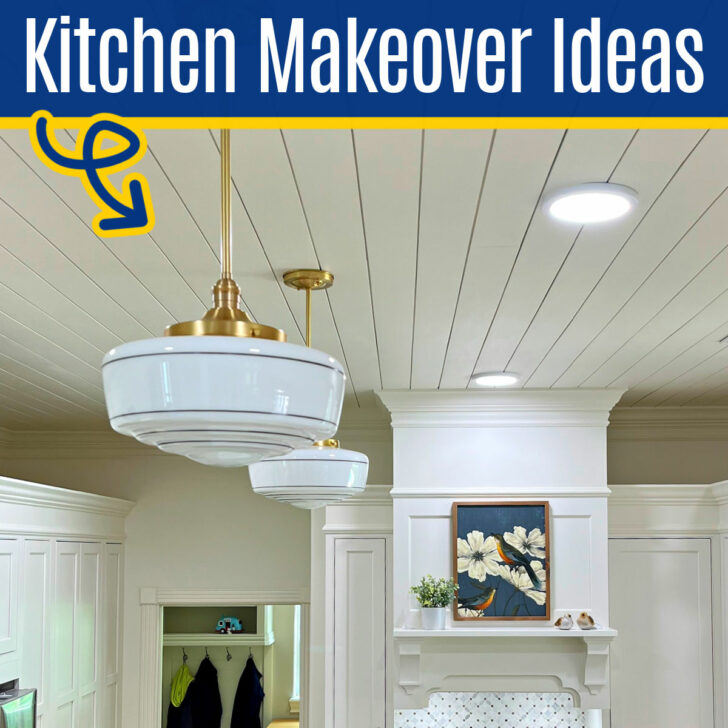
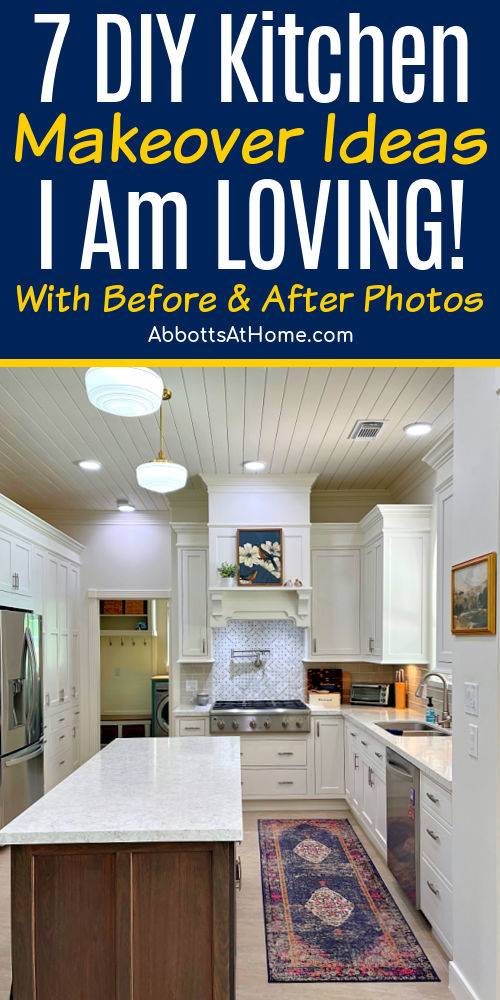
I spent the last 2 months on 7 DIY Kitchen Makeover Ideas that turned my boring kitchen into a BEAUTIFUL kitchen with tons of unique style.
These Beautiful Kitchen Makeover Ideas 100% Improved My Kitchen!
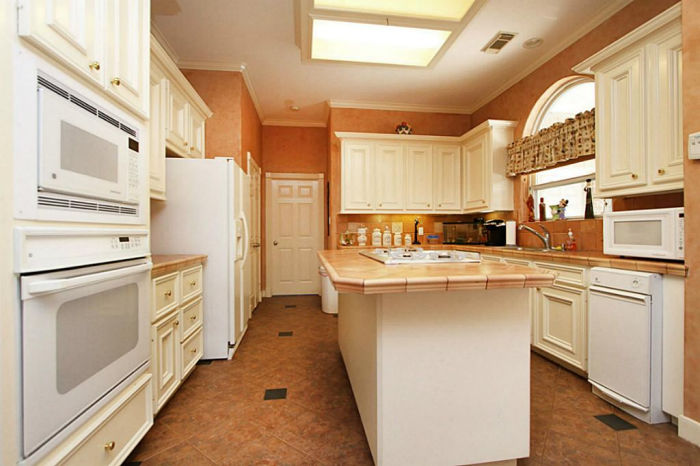
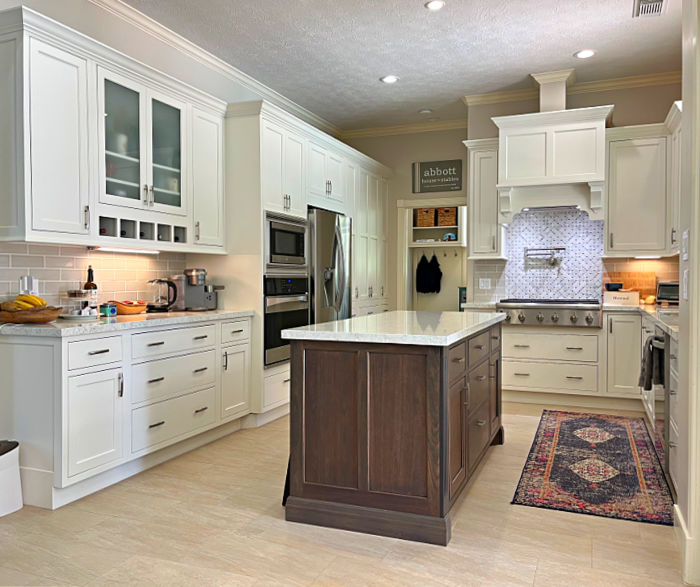
Fun Fact: This kitchen was orange when we moved in 12 years ago. It had orange walls, orange counters, and orange floors. Here’s a look at it before we had it remodeled.
Then, once we had it remodeled the kitchen was pretty good. BUT, there were a few BIG things that always bothered me about the new kitchen.
The texture on the ceiling was a lot thicker and uglier than the texture in the rest of the house. So, I really wanted to hide that texture.
And, the oil-based trim paint that they used on the crown molding has yellowed. That’s why I never use oil-based paint. I decided to install my two piece crown molding and paint it white.
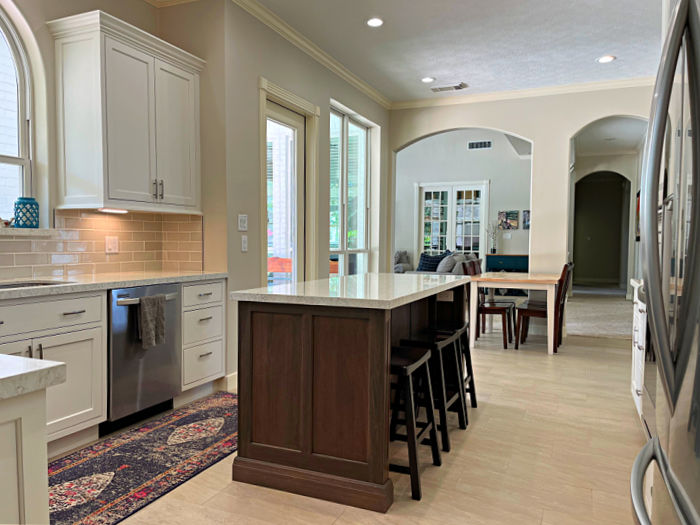
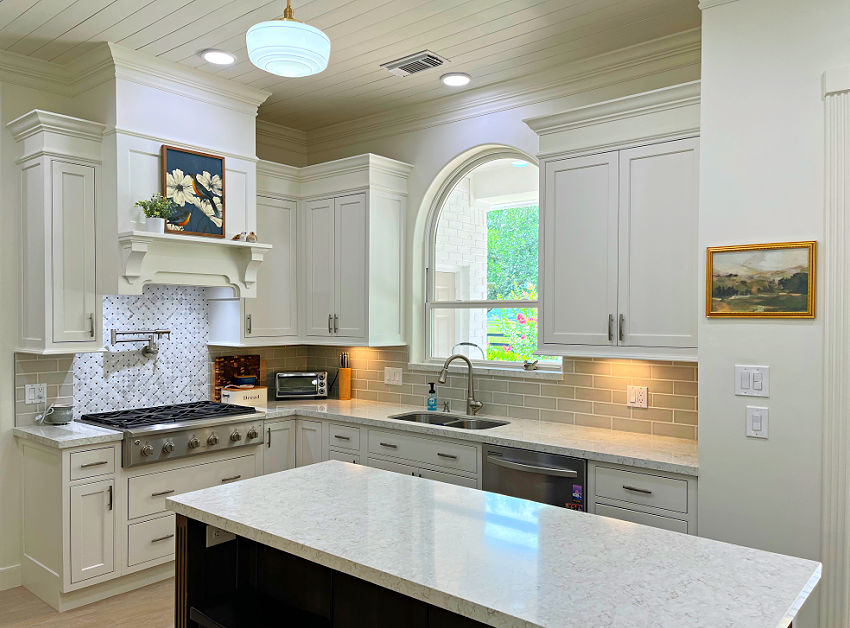
I actually decided that the beige walls were giving the room a boring feel too. They needed to be white to match the cabinets to brighten the room and make it feel as big as it actually is!
The can lights that the contractor installed were in 2 groups of 4 that were not lined up with each other. That always looked weird. So, I wanted to move 4 of them and line up the can lights in 2 rows.
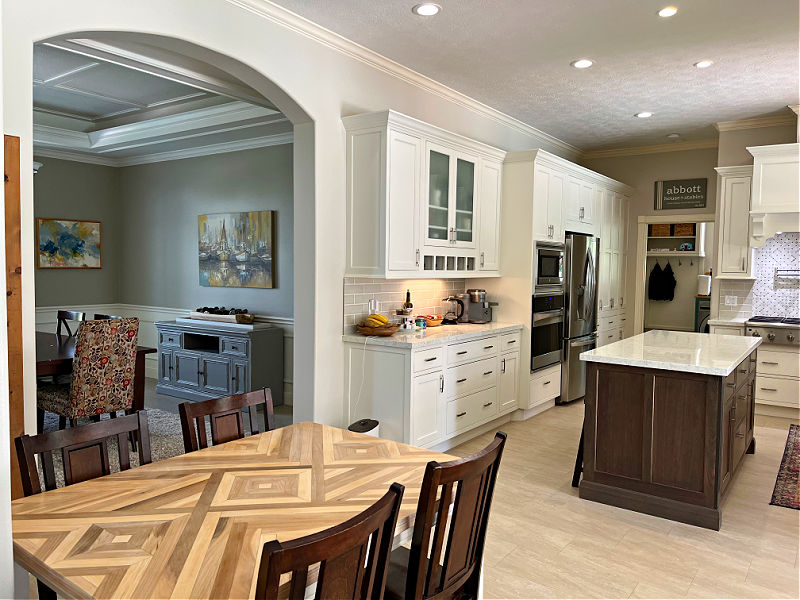
The next HUGE problem was the way the contractor hid the vent over the range. The tiny box looked too small and boring over my range cabinets. So, I decided to take that cabinet to the ceiling instead.
Next up, the space above the cabinets is too big. That makes it look dark, shady, and WRONG. But, instead of taking the cabinets all the way up with these 10′ high ceilings, I’ll extend the existing cabinets.
Let’s get started!
7 DIY Kitchen Makeover Ideas That Look Great
I spent 2 months making these changes alone. If I can do this alone, almost anyone can do this as a couple. So, don’t be afraid to try! Watch YouTube videos and talk to people to learn how to do it right!
1. Painting My Walls The Same White As The Cabinets
The easiest change I made was painting the walls, trim and ceiling in the exact same color as the cabinets. In this case it was Sherwin Williams Dover White with an Eggshell sheen.
I’ve been painting the ceilings in my house with an Eggshell sheen for a few years now. It always brightens a room and draws the eye up, making the ceilings feel even higher!
Switching to white walls in this house has also been a game-changer. It’s giving each room instant style and impact. White walls are a great background for all of the color I add to a room.
Check out my recent Master Bedroom makeover, this two story foyer makeover, or my boy’s Outer Space Bedroom Makeover to see more white walls in my house.
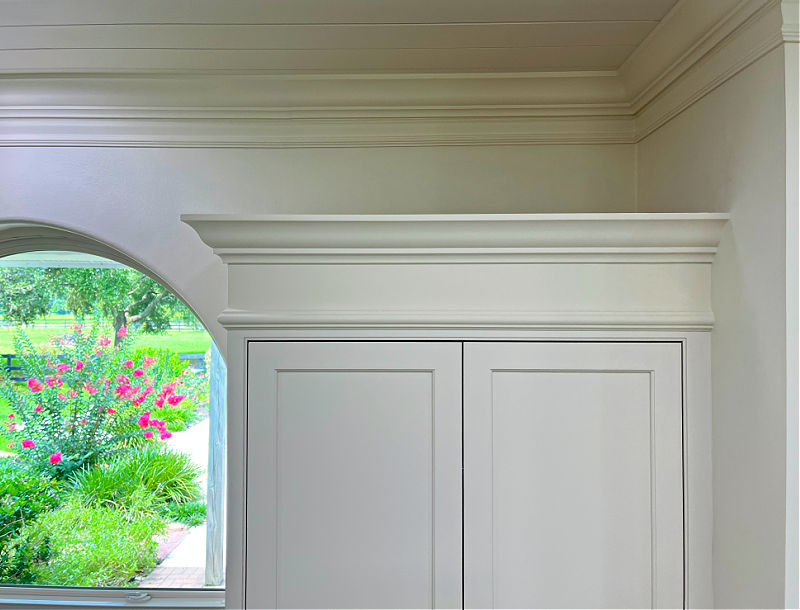
2. Extending My Cabinets With Trim
To extend my cabinets about 6″ higher, I popped off the existing cabinet crown and set it aside to reuse it.
I used primed 1×6 lumber and a 1 1/4″ chair rail, that you can find at Lowe’s and Home Depot, on top of each cabinet. The chair rail hides the connection between the 1×6 and the cabinets.
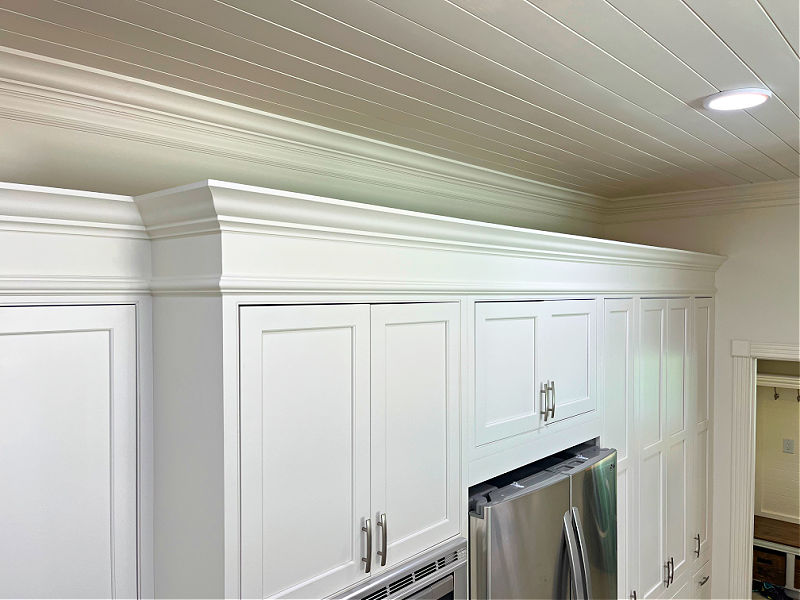
Then I reinstalled the crown molding onto the 1×6. To do all of this, I used my Brad Nailer. Then I finished it off with caulk and filler on the trim.
I LOVE extending painted cabinets up with this easy but BIG impact DIY. It’s one of my favorite kitchen makeover ideas. See 10 ways to Add Height To Kitchen Cabinets in a previous post.
I’m a tall girl and I already can’t reach the top shelf in my cabinets. So, I didn’t want to take them all the way to the ceiling.
Extending the upper cabinets with trim added just enough height to get rid of the overly big gap over the cabinets.
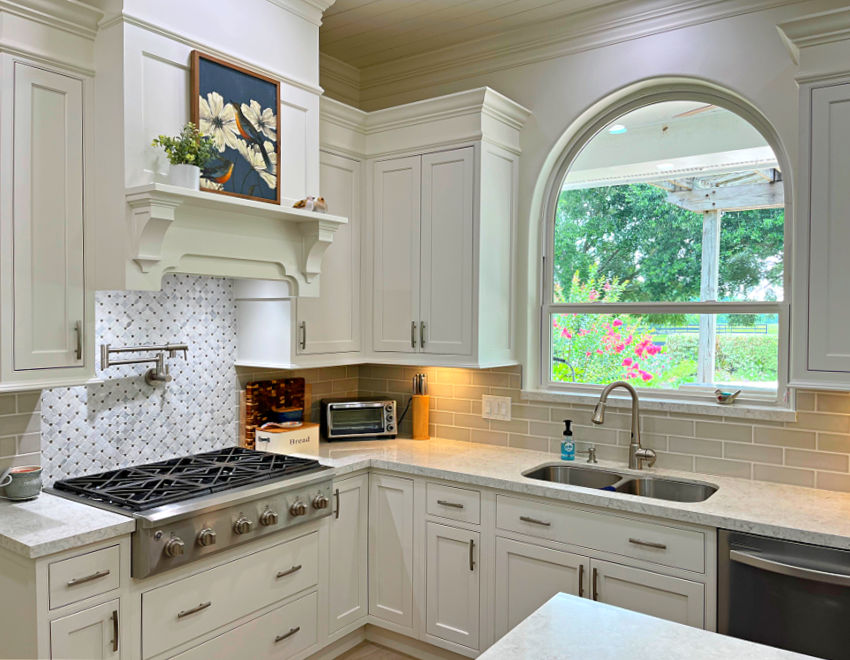
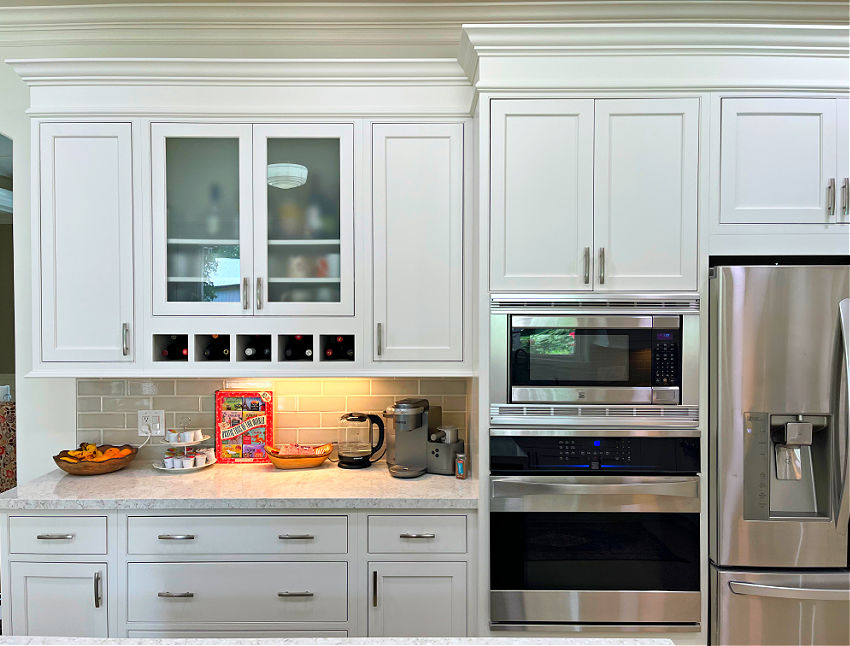
3. Installing Two Layer Crown Molding
The crown molding in this room was pretty good. BUT, I LOVE lots of beautiful trim and molding in my traditional home. I install extra trim in every room.
So, I installed the same two piece crown molding in this kitchen that I installed for my boys bedroom makeover. Luckily, I was able to save and reuse the existing crown. So, it was a big money saver.
I almost installed my three piece crown molding in the kitchen. But, I decided that might be too many layers with the shiplap ceiling. In the end, I think the 2 layer crown looks perfect!
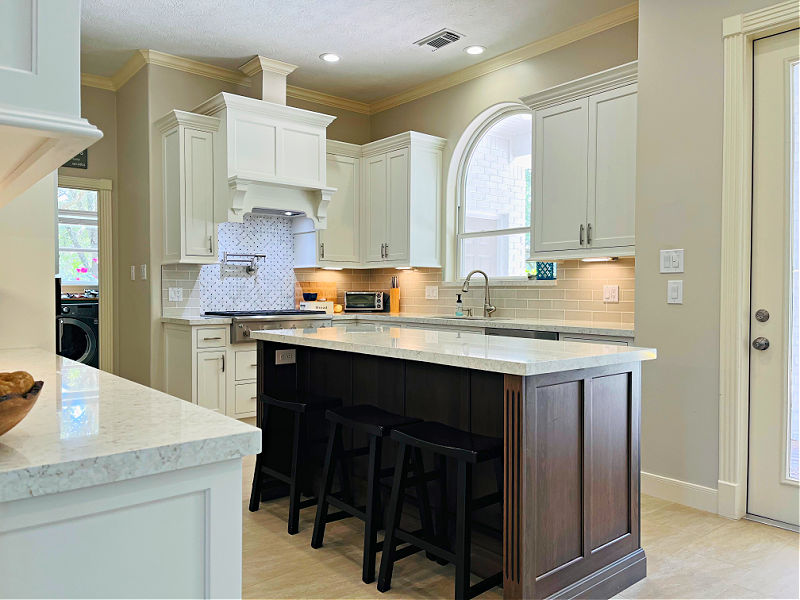
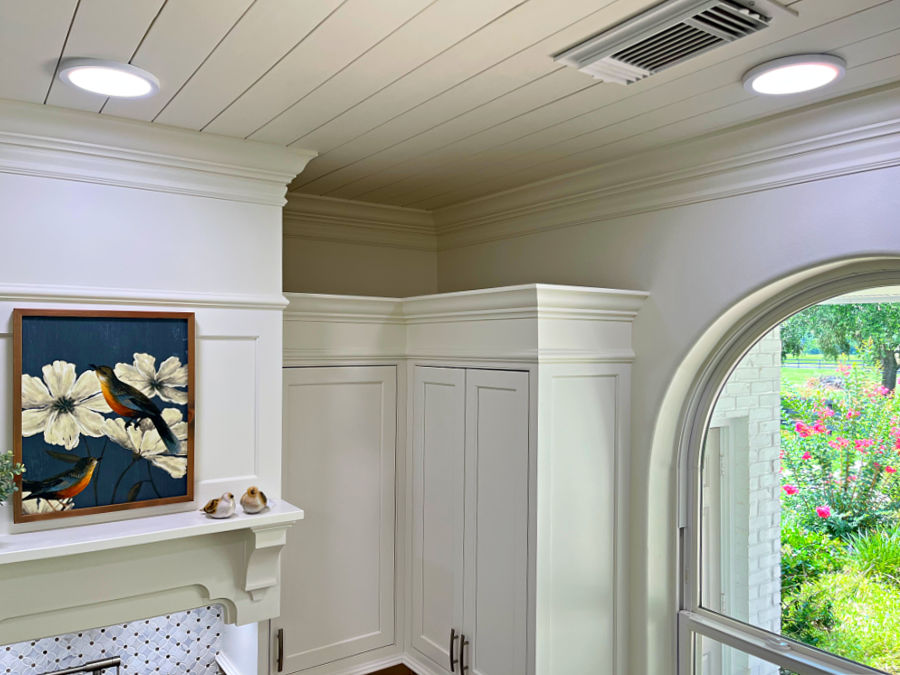
4. Fixing The Layout Of My Can Lights
While I was installing the shiplap, I was able to easily line up all 8 can lines on the ceiling into 2 rows of 4. It looks SO MUCH better, guys! I’m so glad that hot mess of mismatched can lights is fixed.
I was also able to install brighter LED white lights on the ceiling. Which was a big help in getting rid of the “dark” feeling my kitchen used to have.
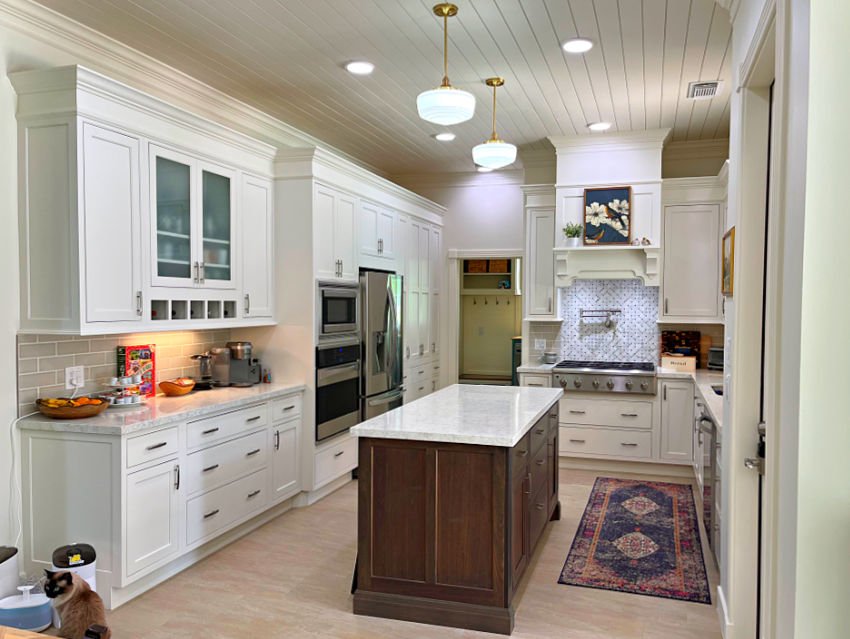
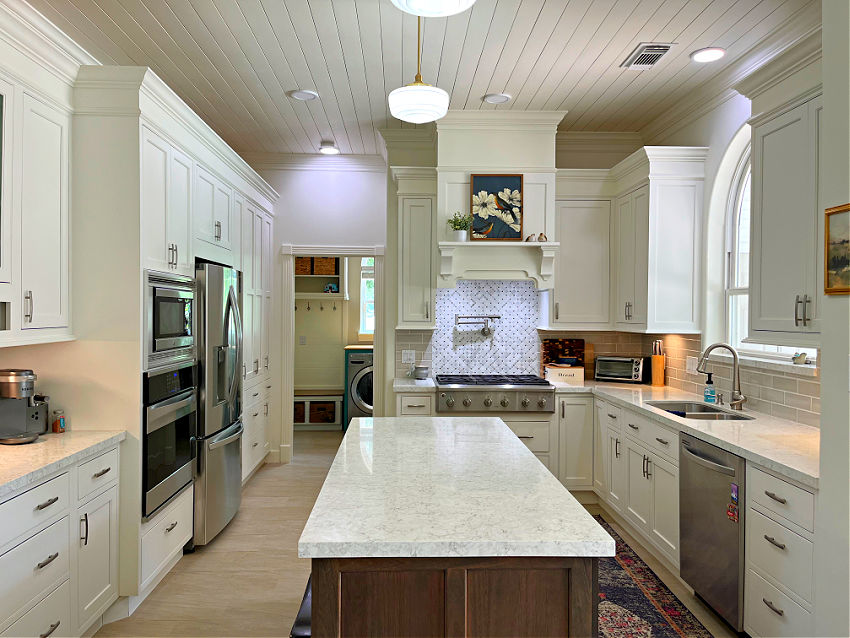
5. Installing Pendants Over The Island
Another one of my favorite kitchen makeover ideas ended up being the switch from can lights to pendants over the island.
The new pendants have a great vintage milk glass style that I LOVE. They’re made by an American company, called Olde Brick Lighting, that hand makes beautiful light fixtures.
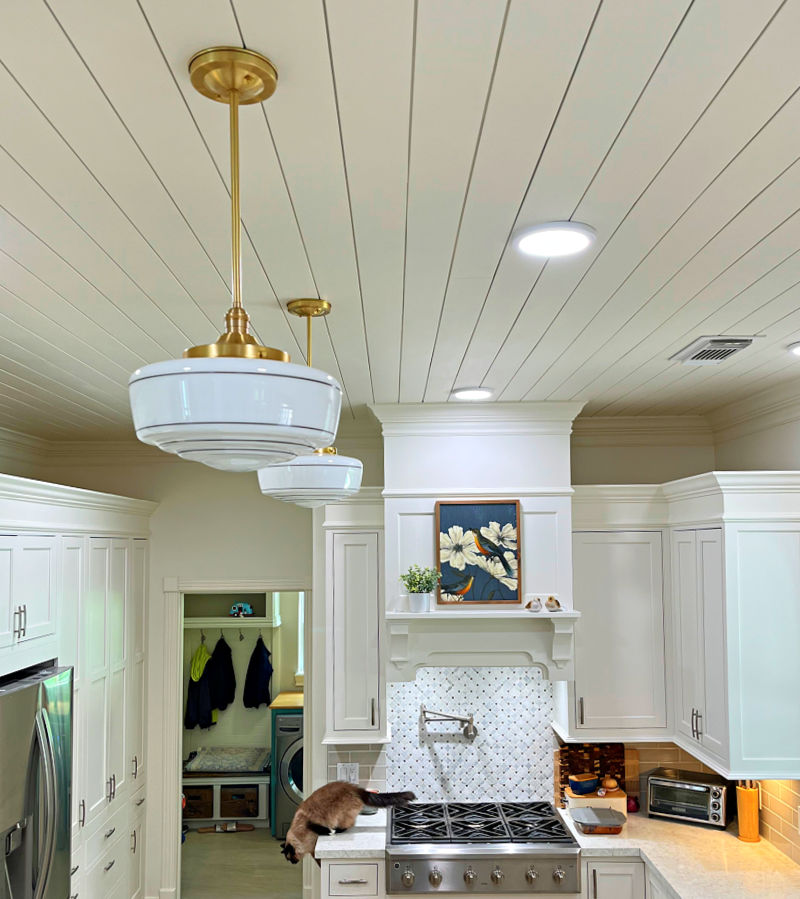
I also LOVE that the matte brass on the pendants adds a nice contrast to my stainless steel appliances. Mixed metals are so trendy these days. But, they actually do look great together.
Check out these lights on ETSY or check out their whole shop here. Or, see more of my favorite milk glass and schoolhouse style lights in a previous post.
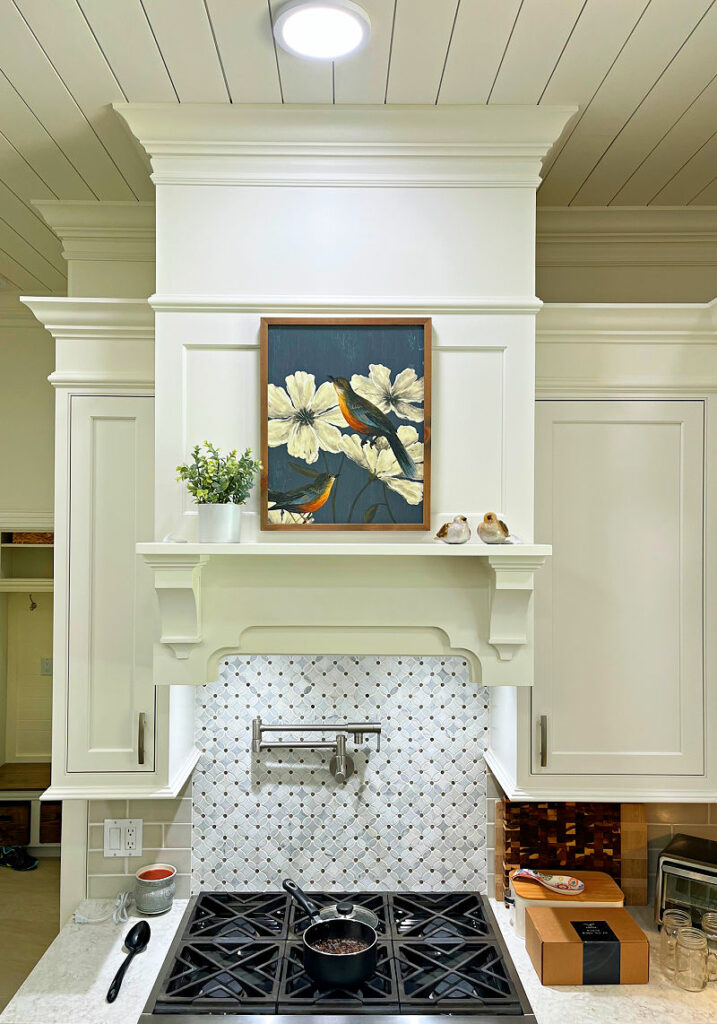
6. Extending The Hood To The Ceiling
The second biggest change, for me, is the HUGE improvement that extending the hood to the ceiling made. It just gives the whole room a more professionally finished look.
The hood extension is similar to the cabinet extension. But, for the hood, I took it all the way to the ceiling with plywood and connected the plywood to the cabinets with the same 1 1/4″ chair rail.
The range hood is topped off with the same 2 layer crown molding as the rest of the kitchen. So, that it looks continuous with the crown on the walls.
Check out my posts for how to cut safely small pieces of wood trim or how to cut dead ends on trim, if you want to learn some beautiful DIY finish carpentry tips and tricks.
7. Installing Shiplap On The Ceiling
Last but not least, I installed shiplap on the ceiling for 2 BIG reasons. First, I wanted to hide the ugly texture. Second, I LOVE ceiling features. You can see all of my DIY feature ceiling tutorials here.
This shiplap makes the ceiling feel BIGGER. And, the eggshell white paint reflects light and helps to brighten the room.
See How To Cover A Textured Ceiling With Beautiful Shiplap for steps to get this look!
Before And After Kitchen Makeover Video
Want to get a better look at these DIY kitchen remodeling ideas? Watch this video to see more.
Now, here’s a few more posts that will help you DECORATE your home.
- 23 Beautiful & Shocking Before And After Room Makeover Photos
- 16 Great Ways to Repurpose an Unused Formal Living Room
- 15 Best Ways To Make An Old Ceiling Look Better: Easy, Cheap And Pretty Ideas
- How To Put A Rug On Stairs LIKE A PRO: 10 Must-See Tips!
Some DIYs You Might Like
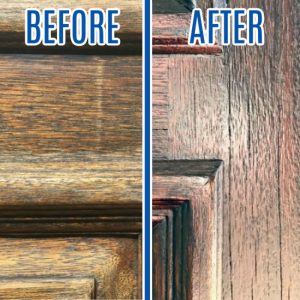
Here’s how to Restain a Door without Removing It: Easy One Day DIY!.
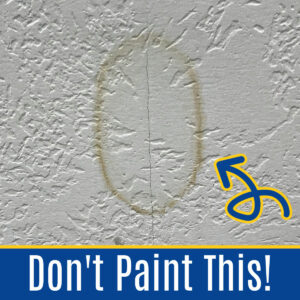
This post about How to Remove Water Stain from Ceiling Without Paint – 1 Easy Step is always popular!
Check out the 11 Best Reasons To Cut The Cord With Cable: 4 Were SO Unexpected!

Feeling inspired? Now you’ve seen this list of ways to make a dark basement feel brighter, get to work. And, good luck!

Stephanie Abbott has been remodeling homes, updating & building furniture, and working on DIY home maintenance and cleaning tips for over 20 years. Her remodeling has been featured in Better Homes and Gardens Magazine. And, her DIY YouTube channel has had more than 8 million views.
Most of the DIY tutorials and videos on this site focus on beginner to intermediate level DIY Projects that can be done in an affordable way without high-end, expensive tools. All of the cleaning tips on this website have been tested in her home.