Easy DIY Wooden Curtain Rod Bracket Holder: Steps & Video
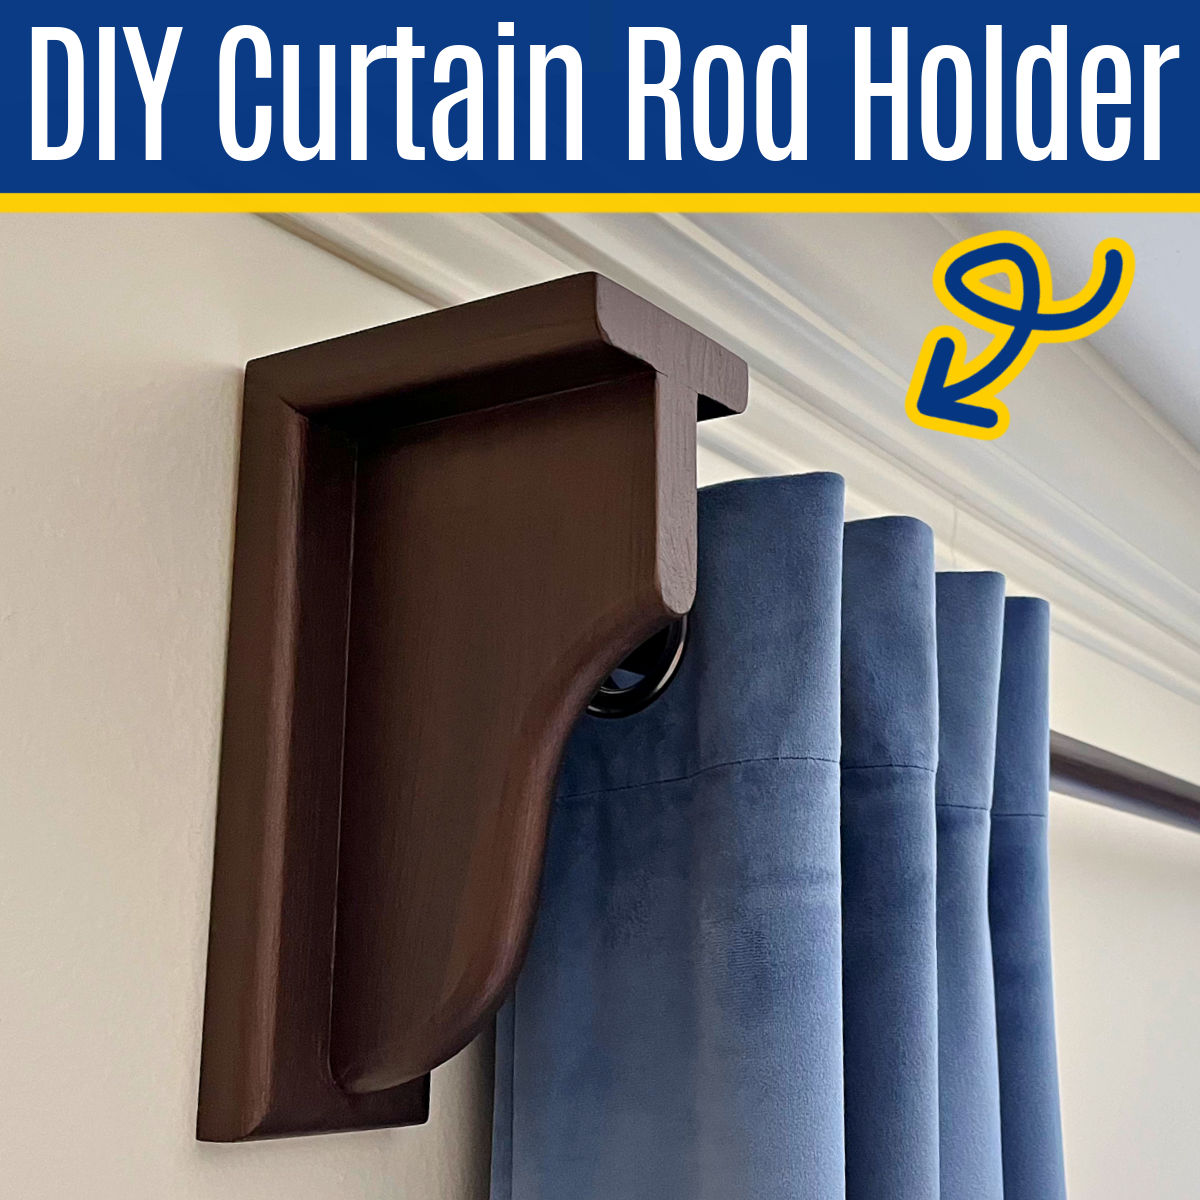
Make a QUICK & EASY DIY Wooden Curtain Rod Brackets in less than a day. This wood bracket & rod can be stained or painted to match any room.

DIY Home Decor, DIY Crafts, and DIY Wall Art tutorials using wood, paper, paint, crafts, fabric, and more!
Make a QUICK & EASY DIY Wooden Curtain Rod Brackets in less than a day. This wood bracket & rod can be stained or painted to match any room.
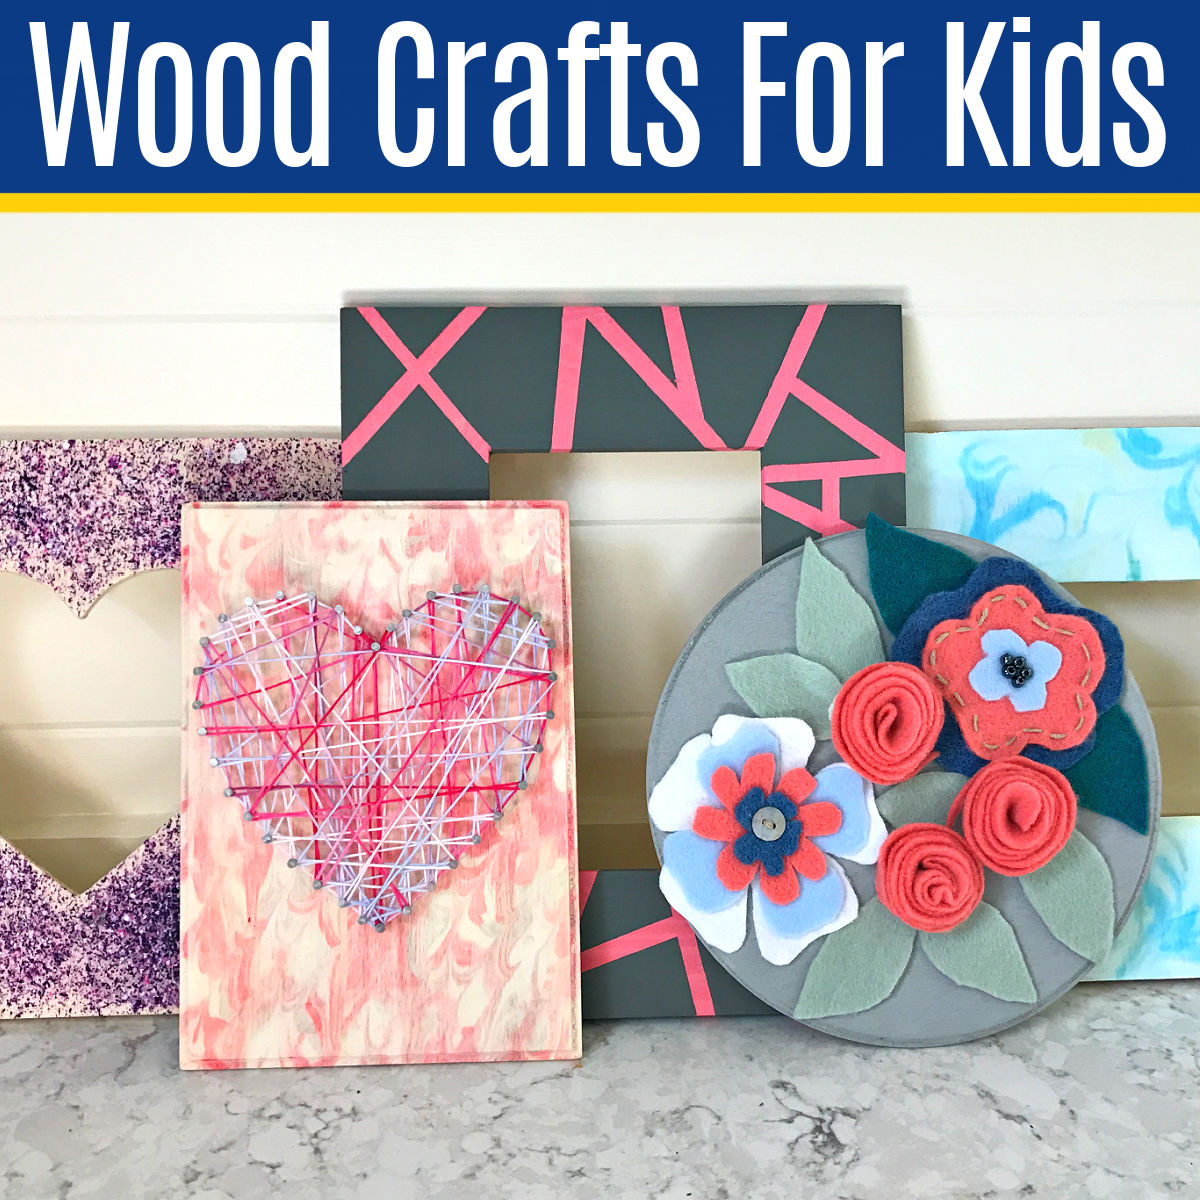
Looking for a fun, cheap and easy wood crafts for kids? Here’s 6 cute wood craft ideas using things like wood frames and wood plaques.
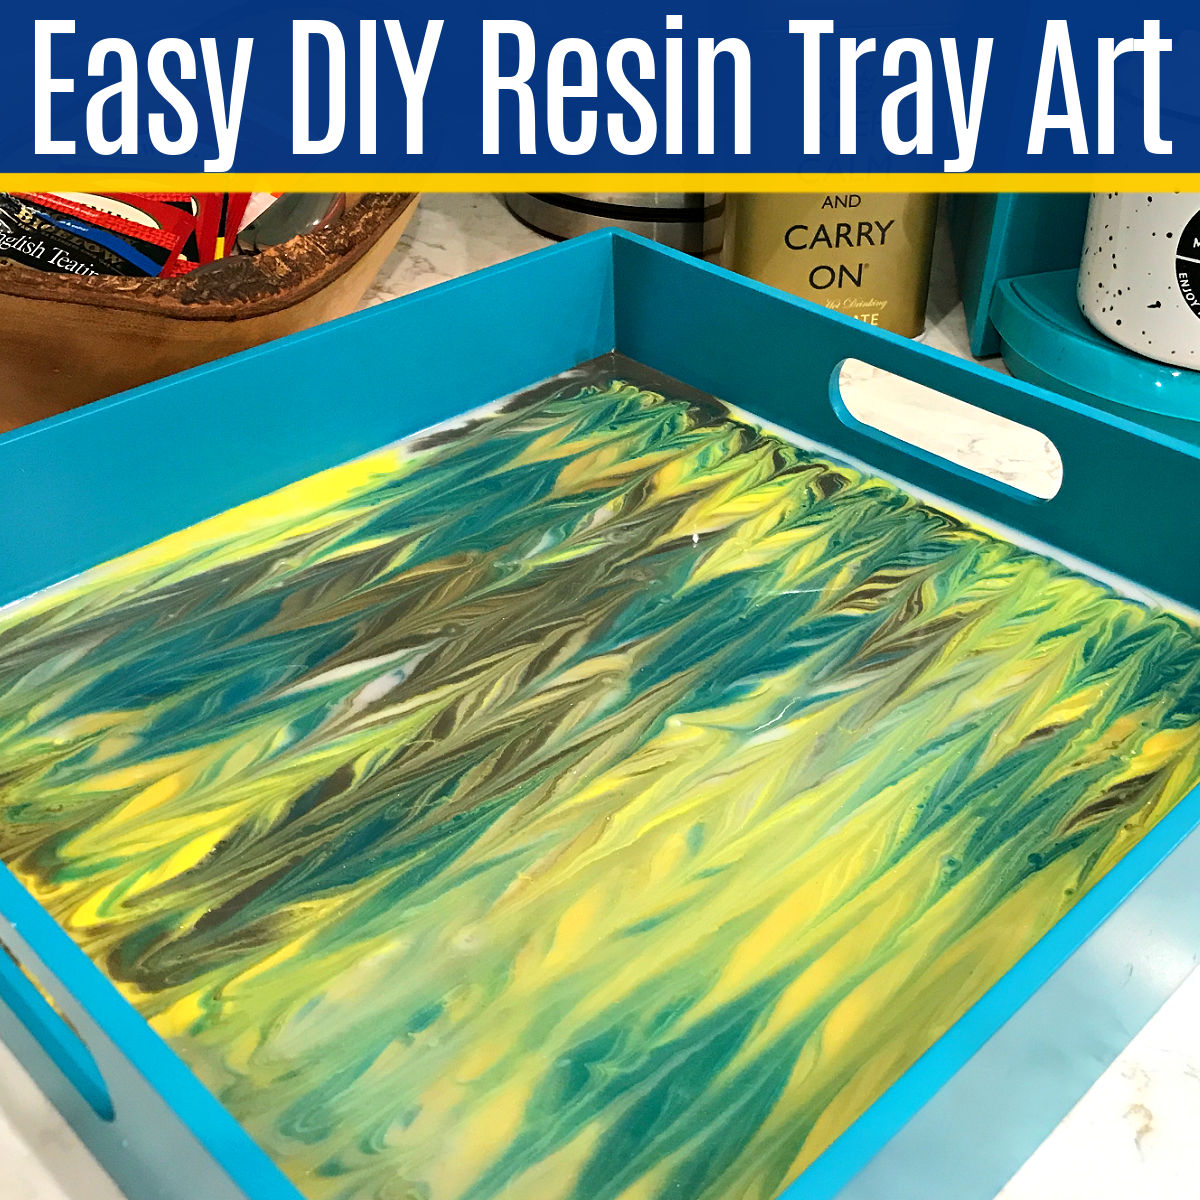
I LOVE this QUICK and EASY DIY Resin Tray Art Idea using EnviroTex Lite resin and acrylic craft paints. With written instructions and video.
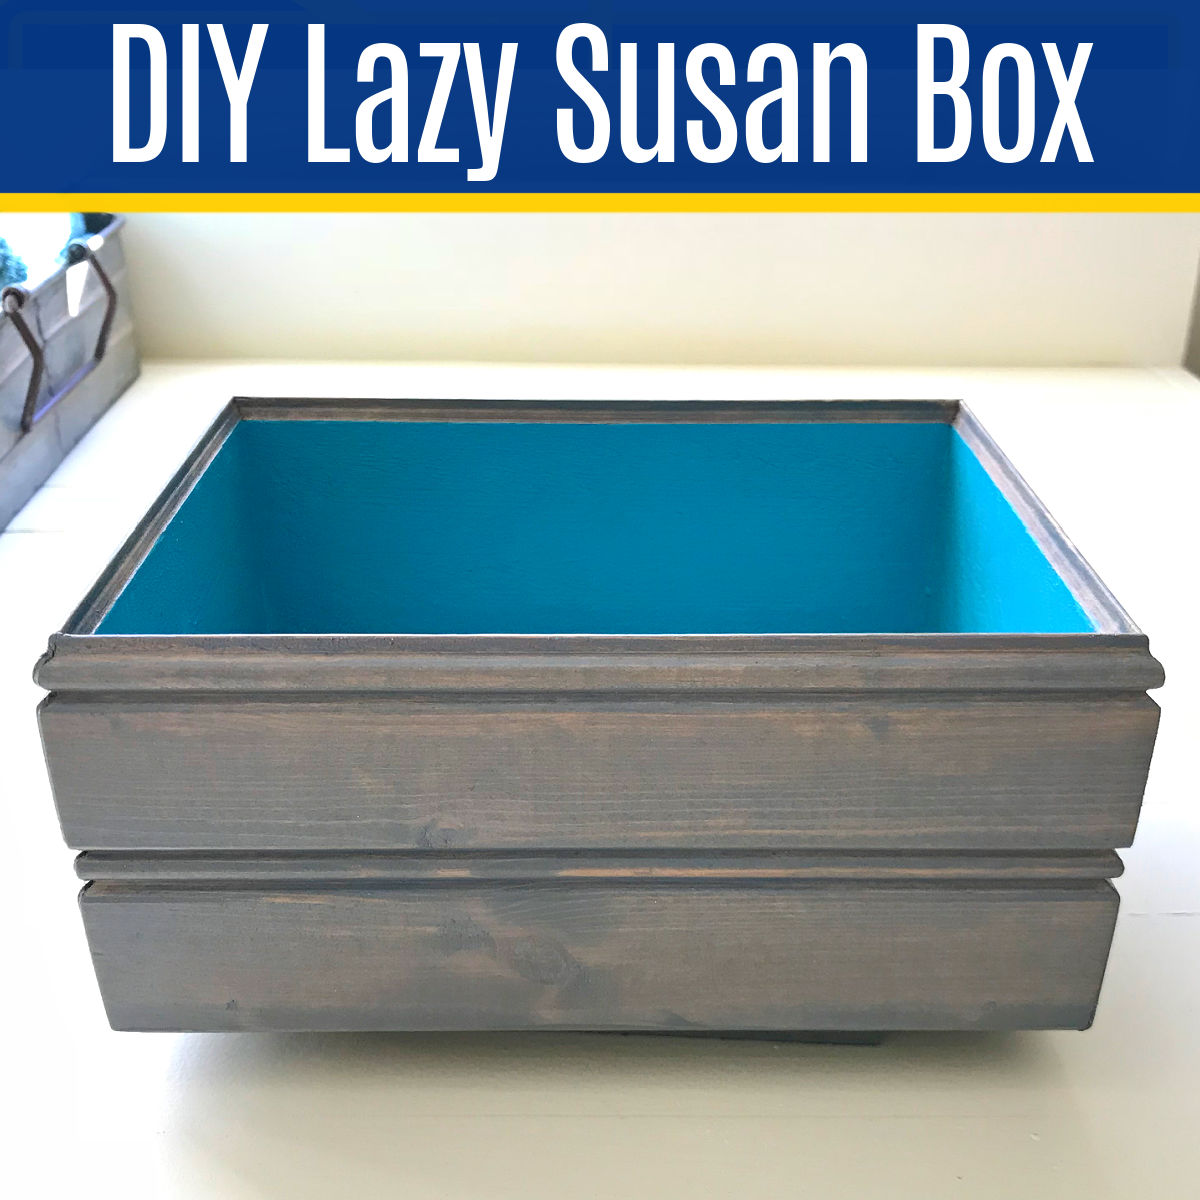
Make a small DIY Lazy Susan Organizer for spices, sprinkles, your most used items & more. Easy steps for a small lazy Susan cabinet organizer.
QUICK & EASY steps to build a DIY canvas frame, using 1×2’s. This beautiful wood frame is my favorite way to frame canvases. Finish in 1-day!
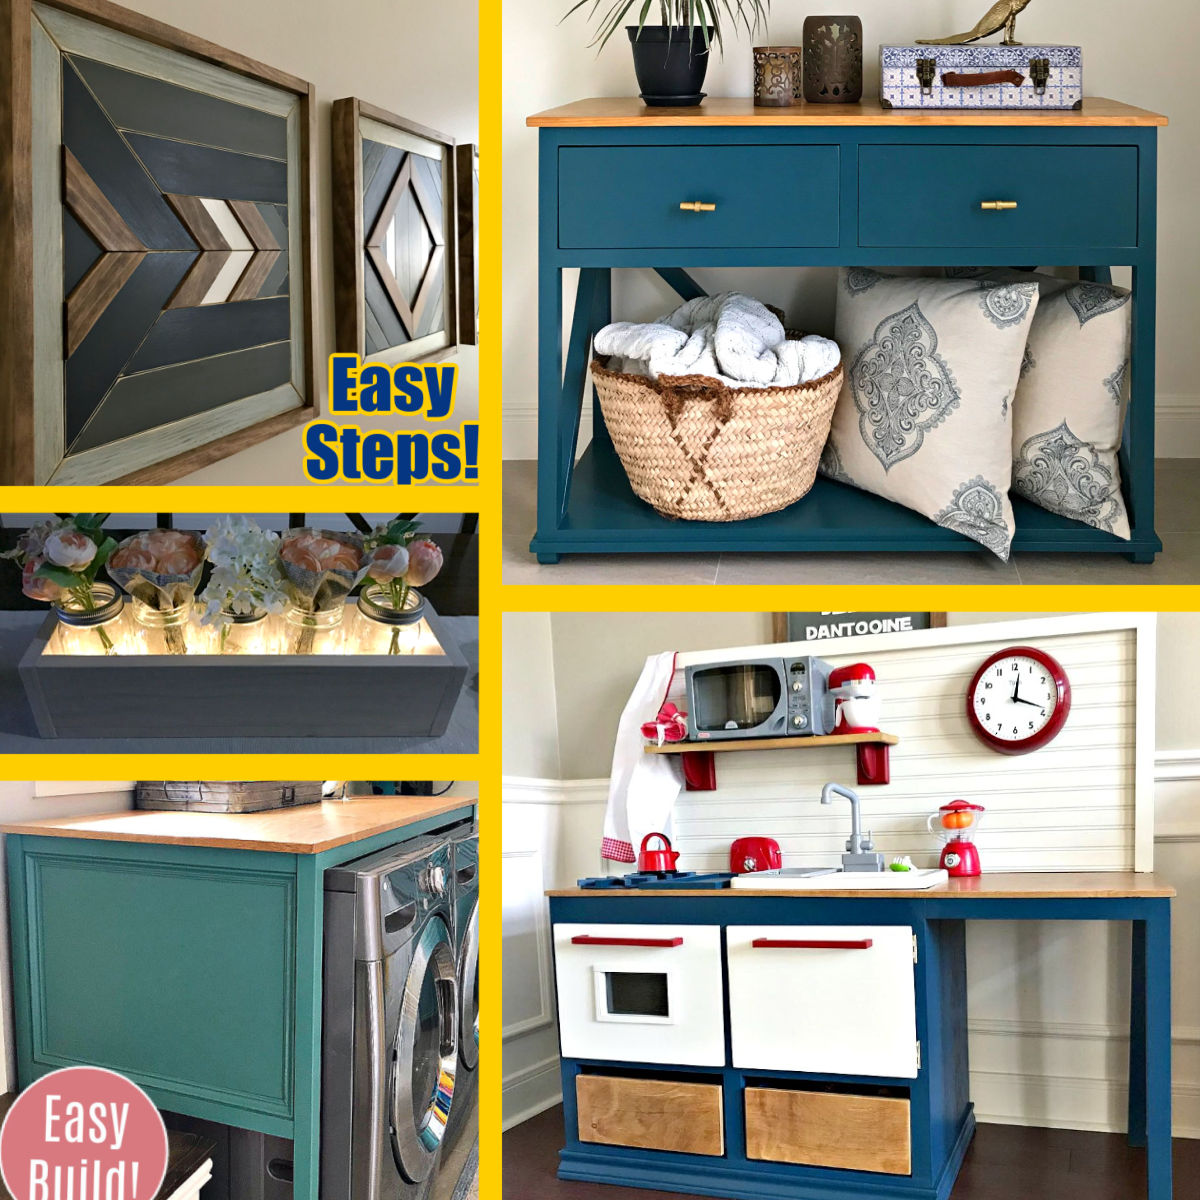
Wondering how to make wood wall art? Here’s a simple DIY scrap wood wall art tutorial for beginners that looks good enough to give as a gift!
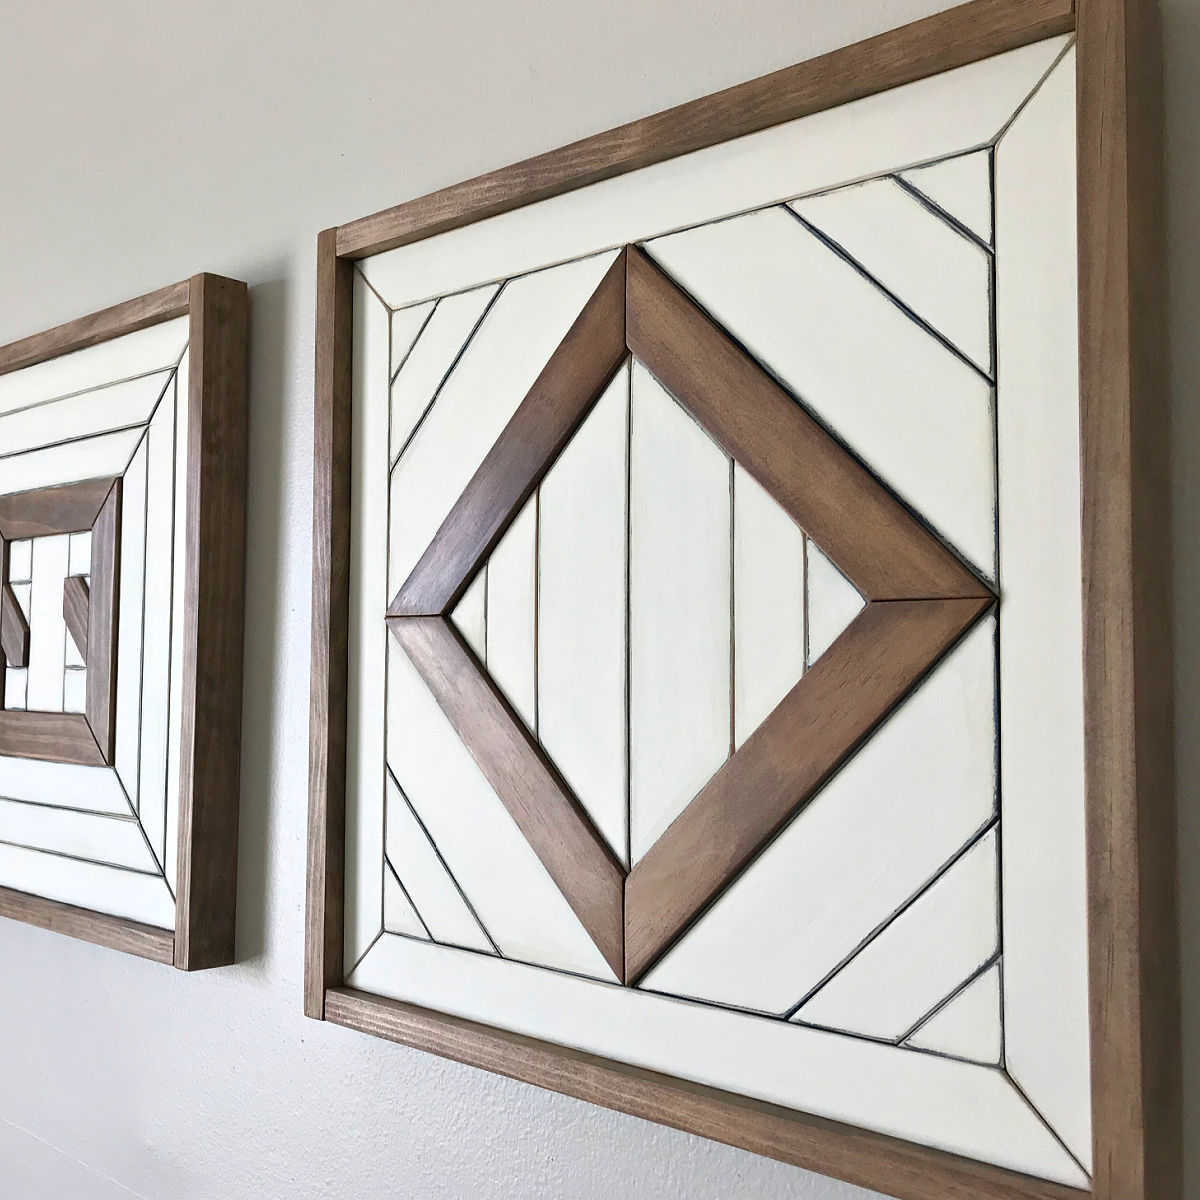
Make this beautiful and simple scrap wood wall art with these easy to follow DIY steps and a short video to help you get started.
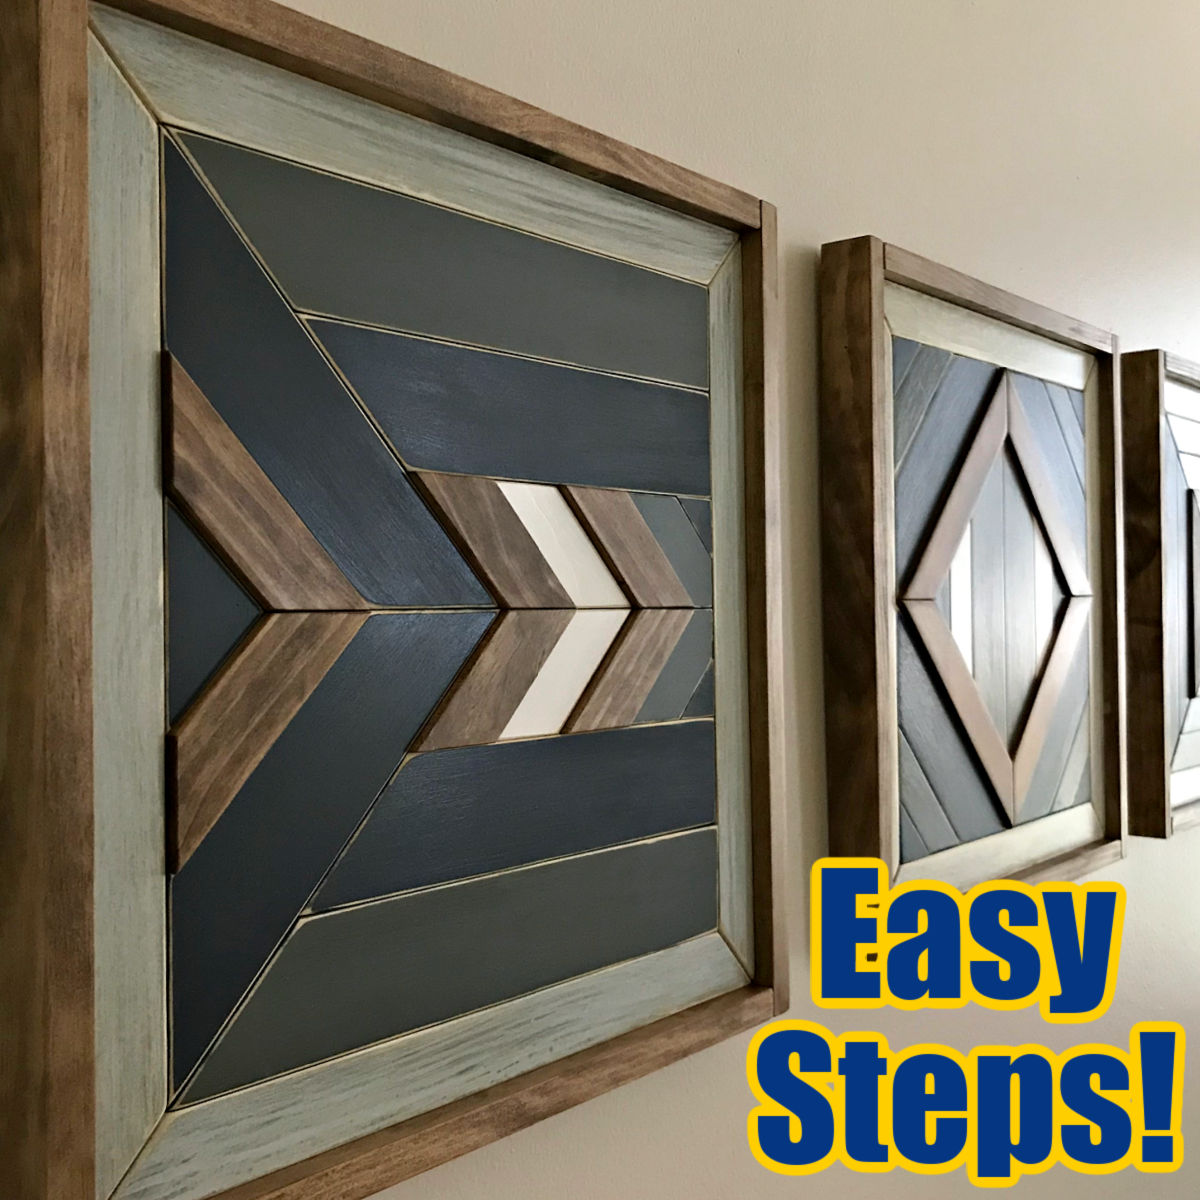
I am LOVING this beautiful DIY Chevron Wood Wall Art. I made mine with Cedar for less than $20. Easy enough project for beginner woodworkers!
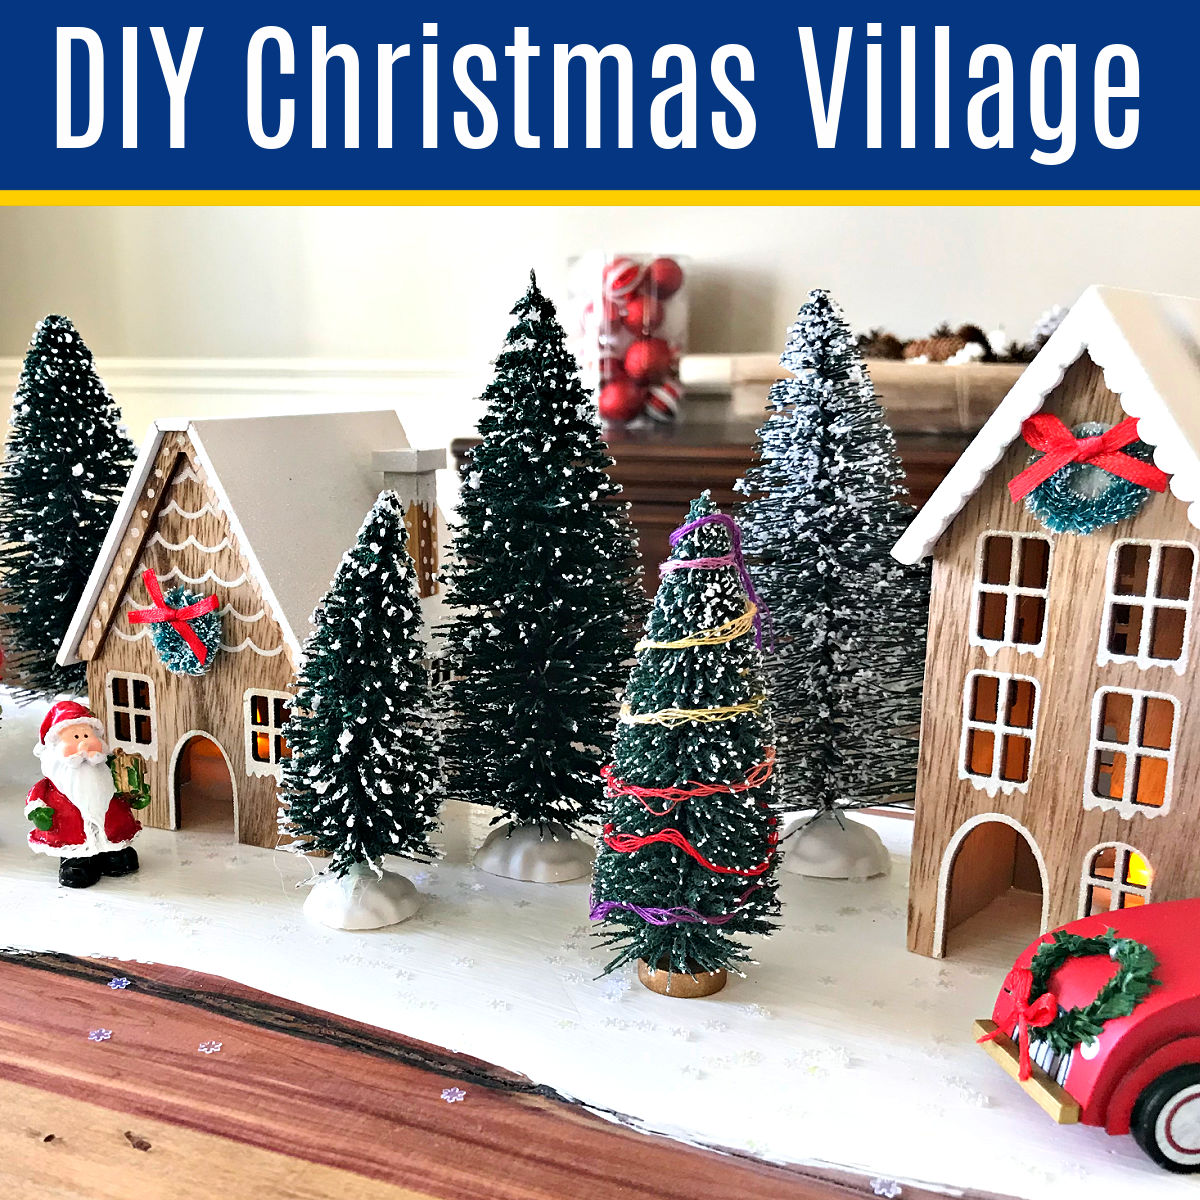
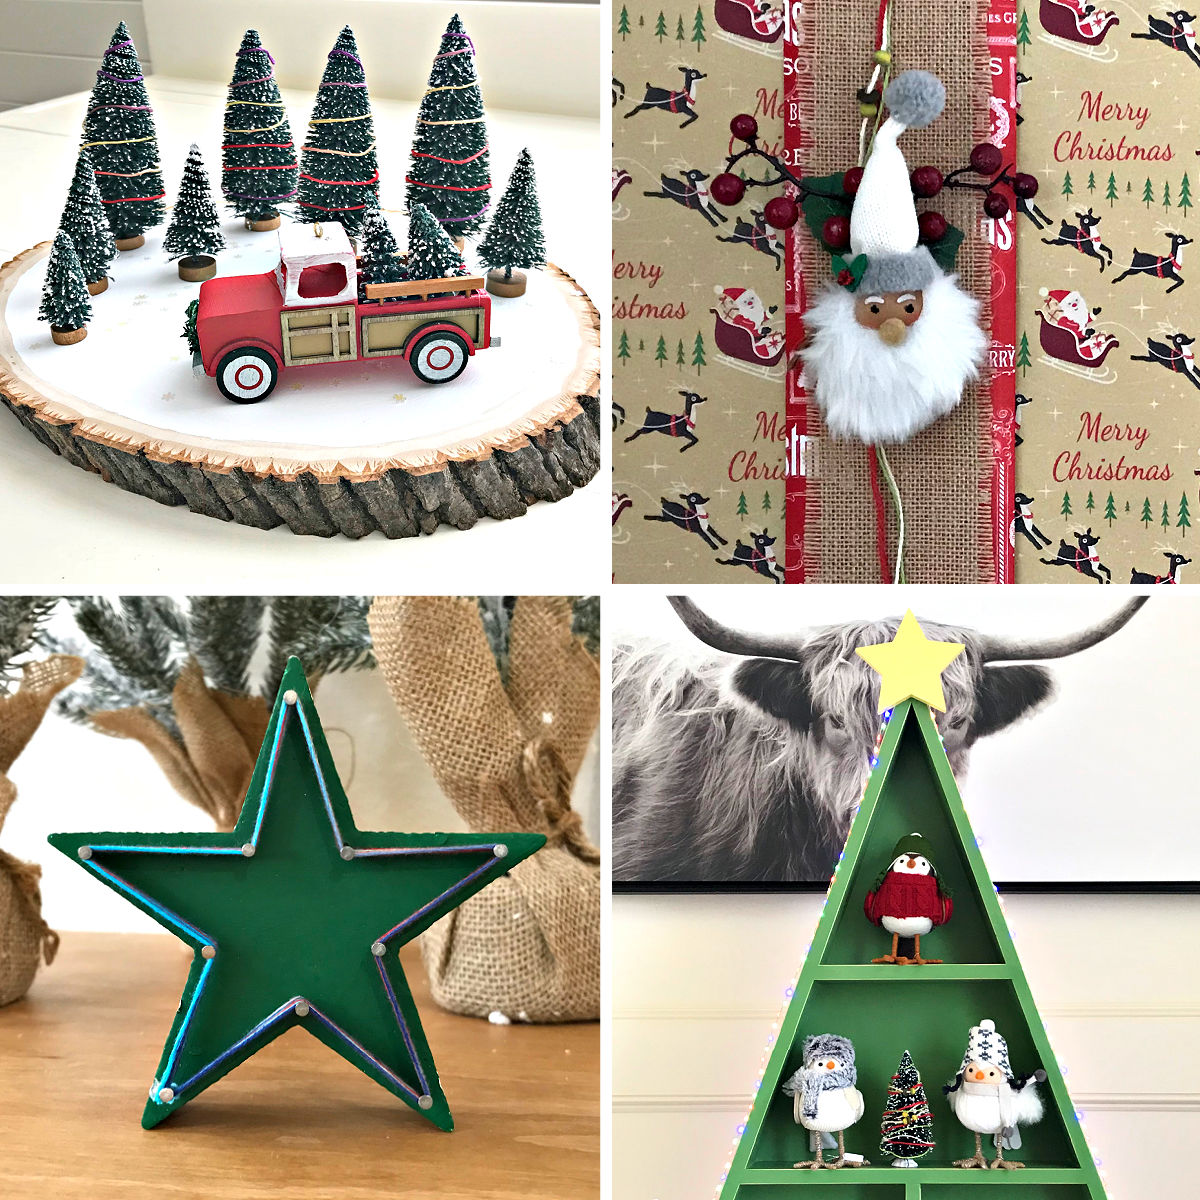
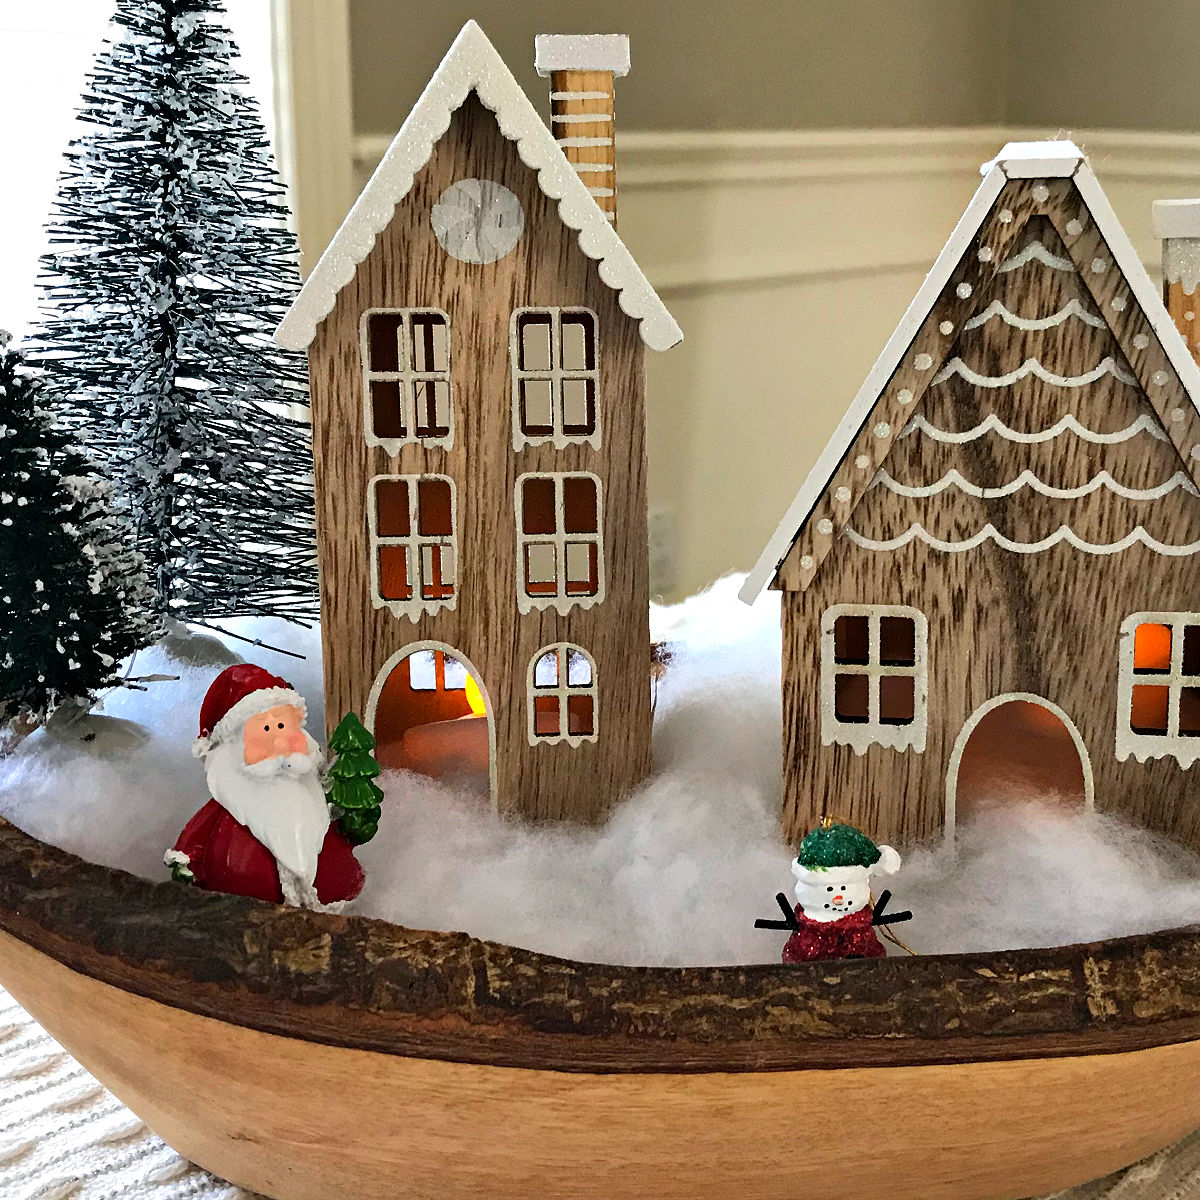
I LOVE this EASY DIY Christmas Table Centerpiece Idea. Make a FUN Red Truck Christmas Village everyone will enjoy, with steps & how-to video.

Looking for cute & clever handmade gift ideas?? Here’s 50 AWESOME & CHEAP DIY gift ideas for friends and family, under $25. I LOVE this list!
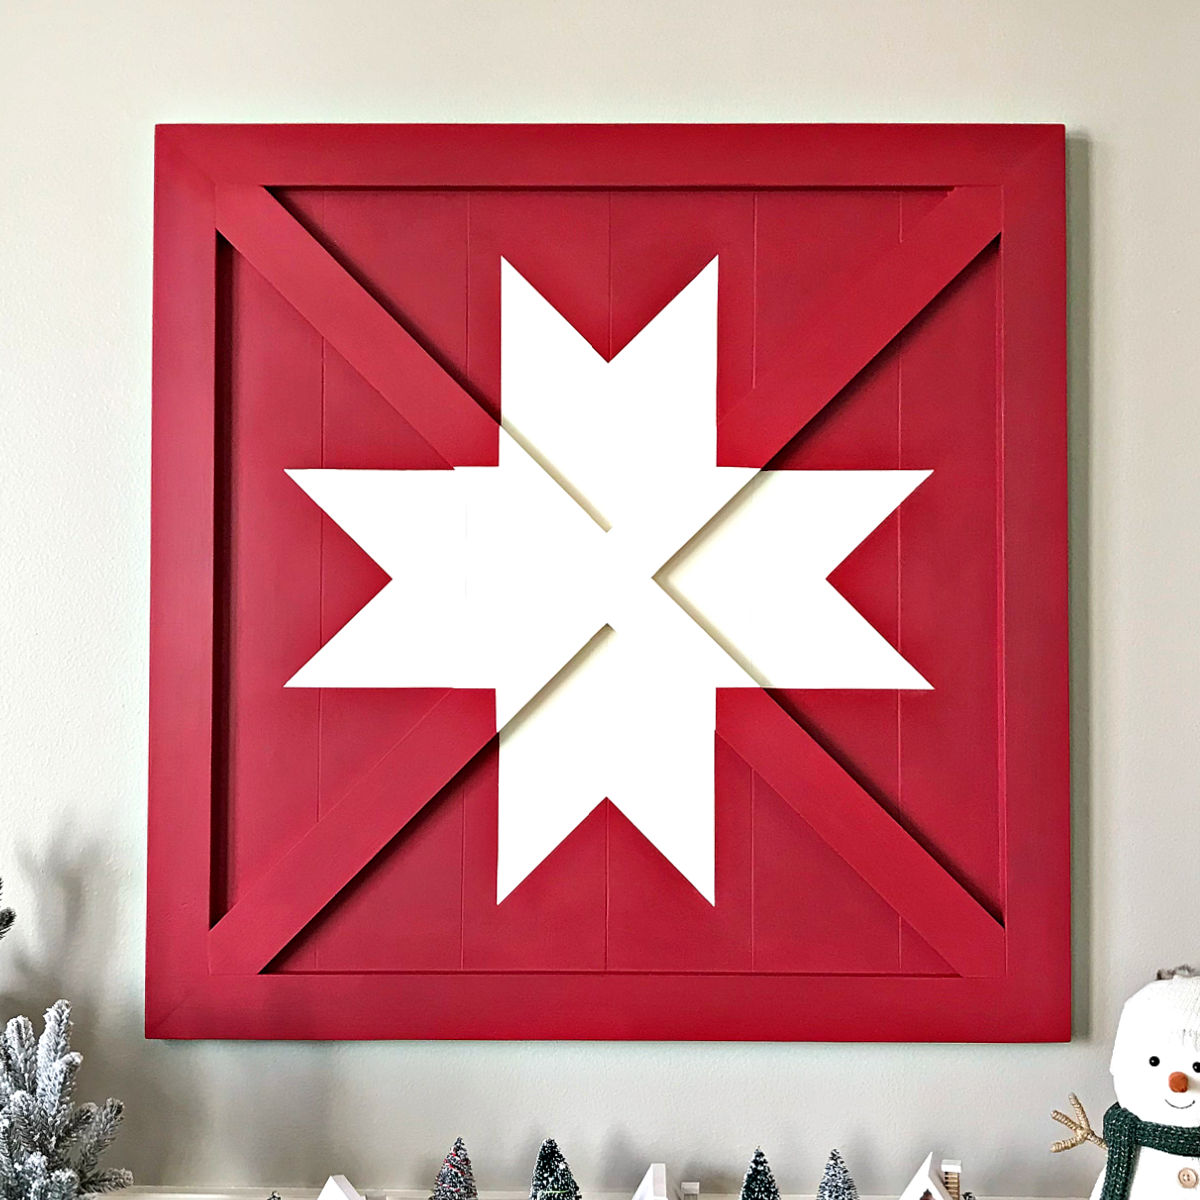
I LOVE this BEAUTIFUL DIY Wooden Barn Star Quilt Art. It’s an easy woodworking project you can build for less than $20 in lumber. Yay!
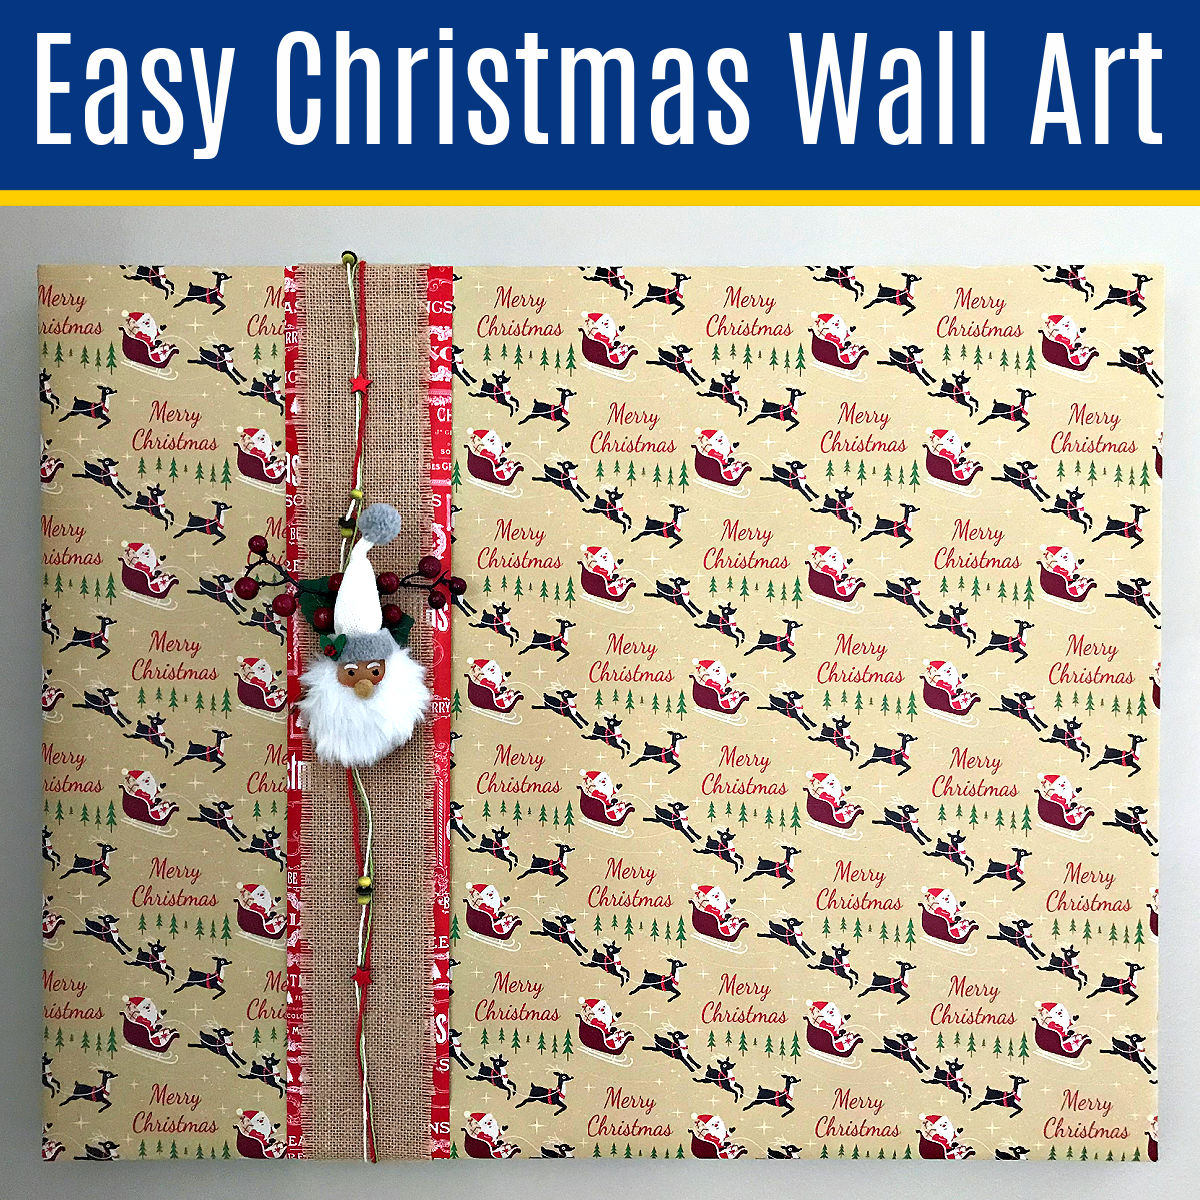
I LOVE this quick & easy Christmas Décor idea! Here’s my easy steps and How-To video showing How to Wrap A Picture Frame with Gift Wrap.
Need some new ideas for this years Christmas craft? Here’s 12 fun and easy handmade Christmas Ornament Ideas for kids and adults.
Check out this BIG list of DIY Christmas Projects & Homemade Christmas Gifts: easy crafts, ornaments, décor, and Christmas woodworking ideas.
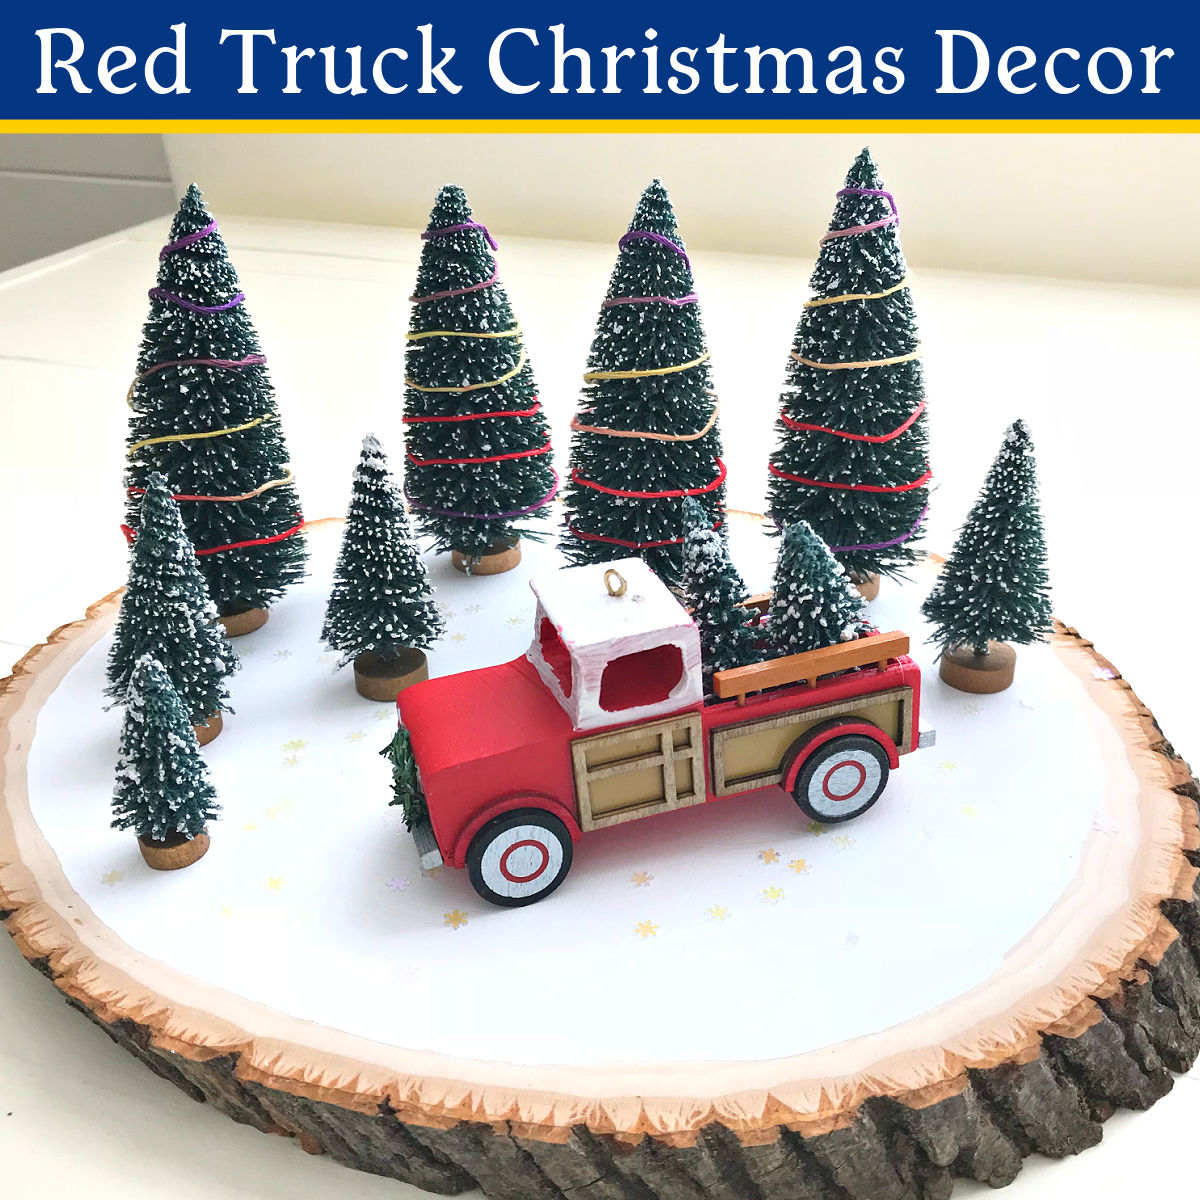
This EASY DIY Red Truck Christmas décor idea is my favorite table top Christmas decoration! The red truck & bottle brush trees are so cute!
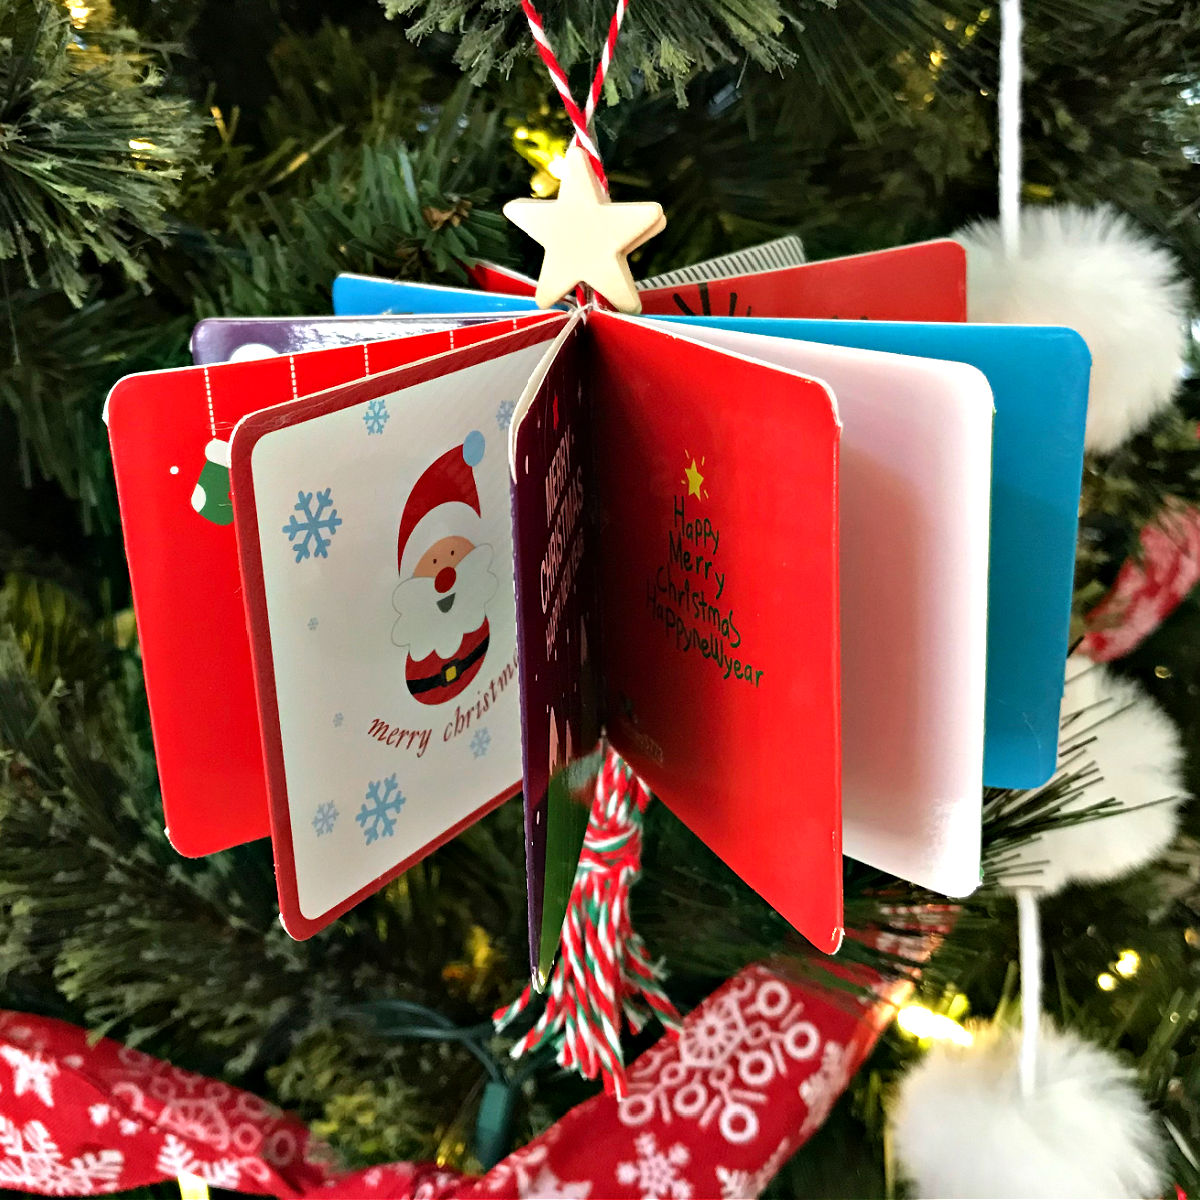
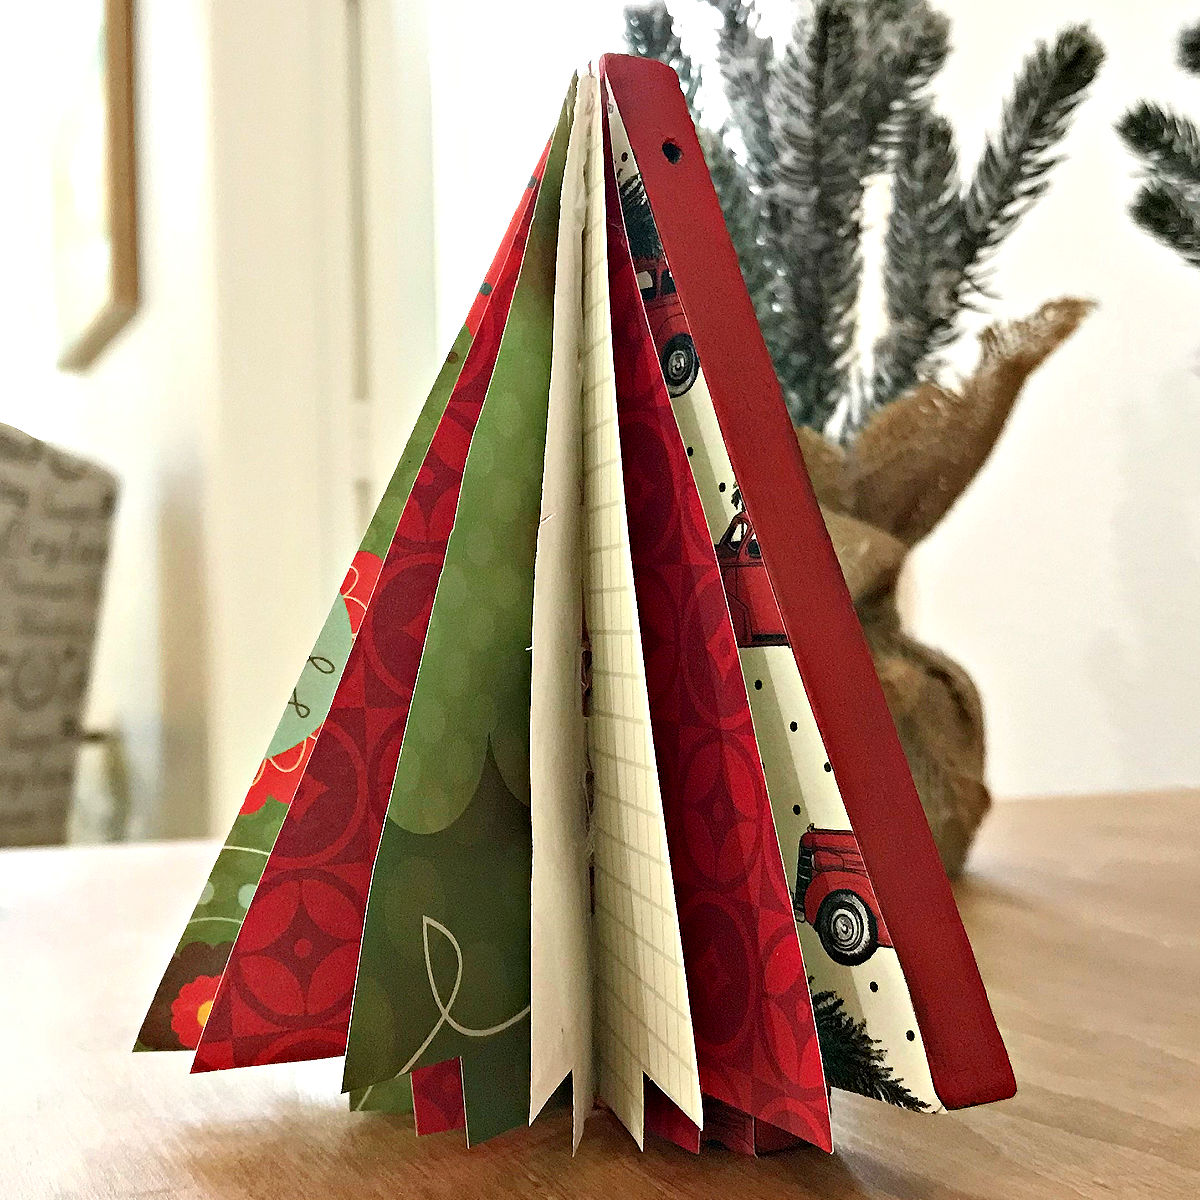
Make fun, cute, & easy 3D DIY Christmas Card Ornaments using new or old Christmas Cards. Easy Christmas Ornament Craft with video and steps.
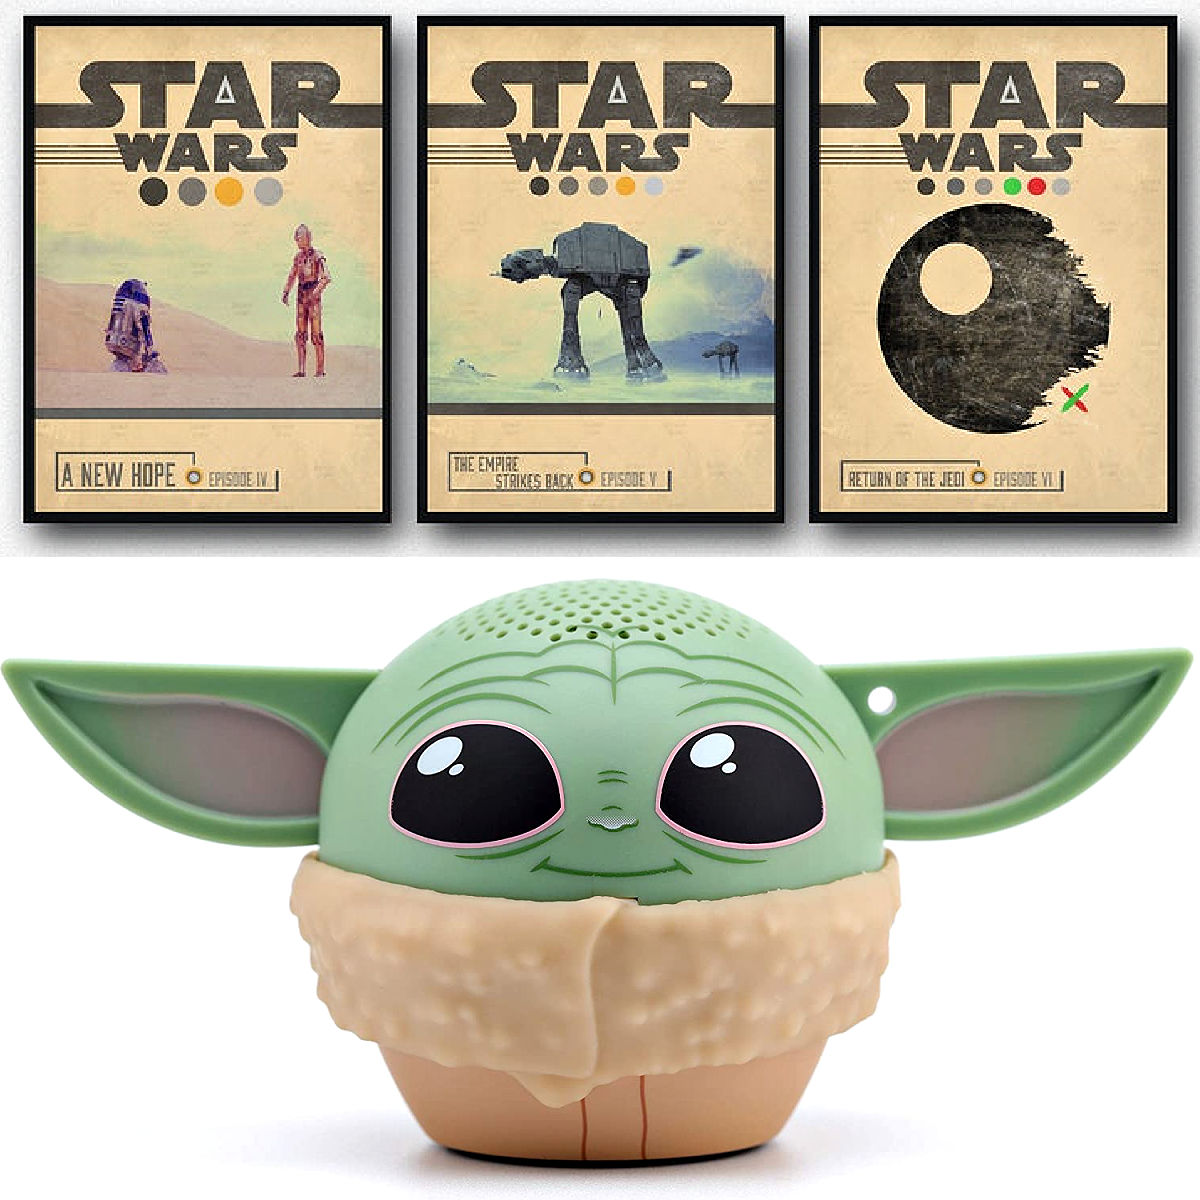
Cool Star Wars gift ideas for Her or Him, boyfriend, fangirl, kids, adults, the whole family. There is something for everyone on this list!

6 FUN DIY Christmas Ornament Crafts for Kids and Adults to make together. Try these EASY Christmas Ornament Ideas with your family.
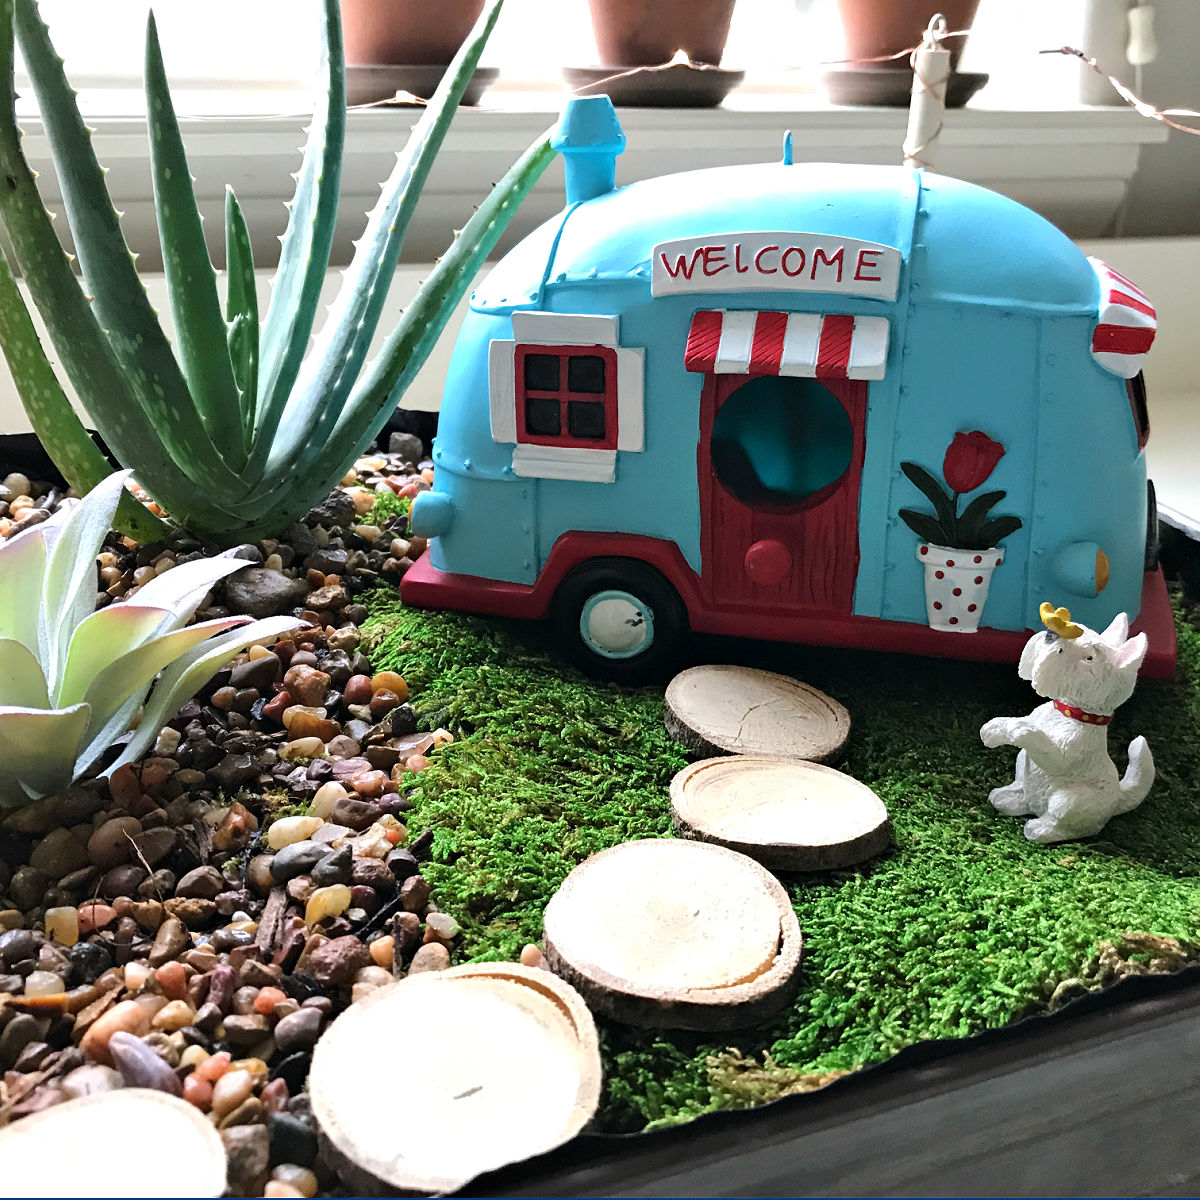
How CUTE is this indoor succulent fairy garden tray?! It’s a simple DIY. Here’s the easy steps to make your own fairy garden with succulents.
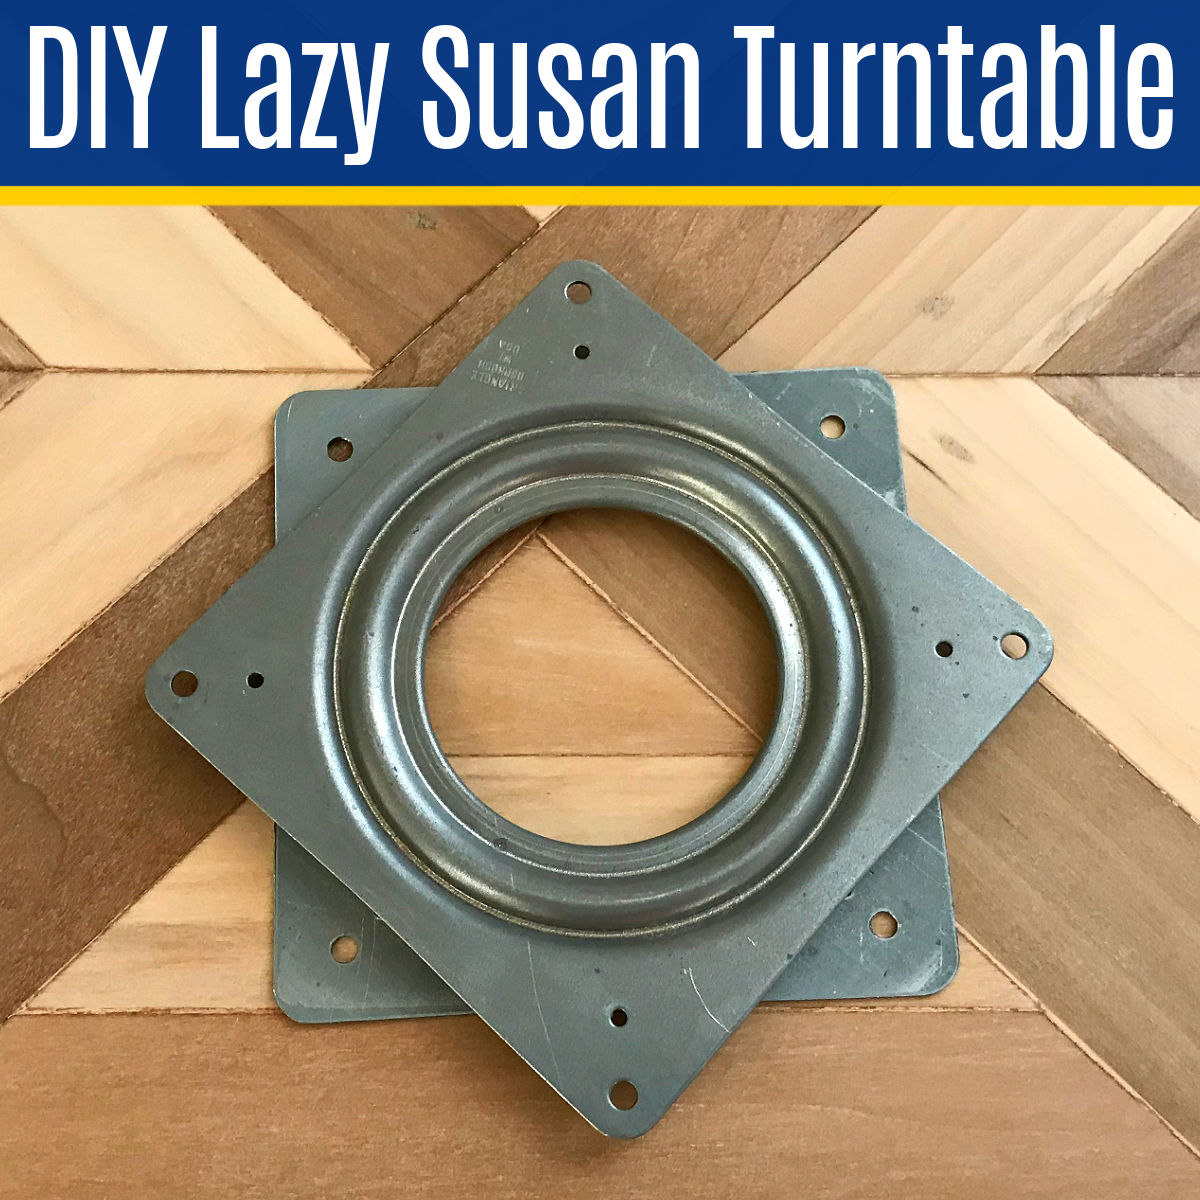
QUICK and EASY to follow written steps and walk through video to show you how to make a Lazy Susan Turntable with DIY Lazy Susan Hardware.
Here’s how to make EASY DIY Christmas Table Decorations using stuff you probably already have. With simple video ideas & tons of photos!
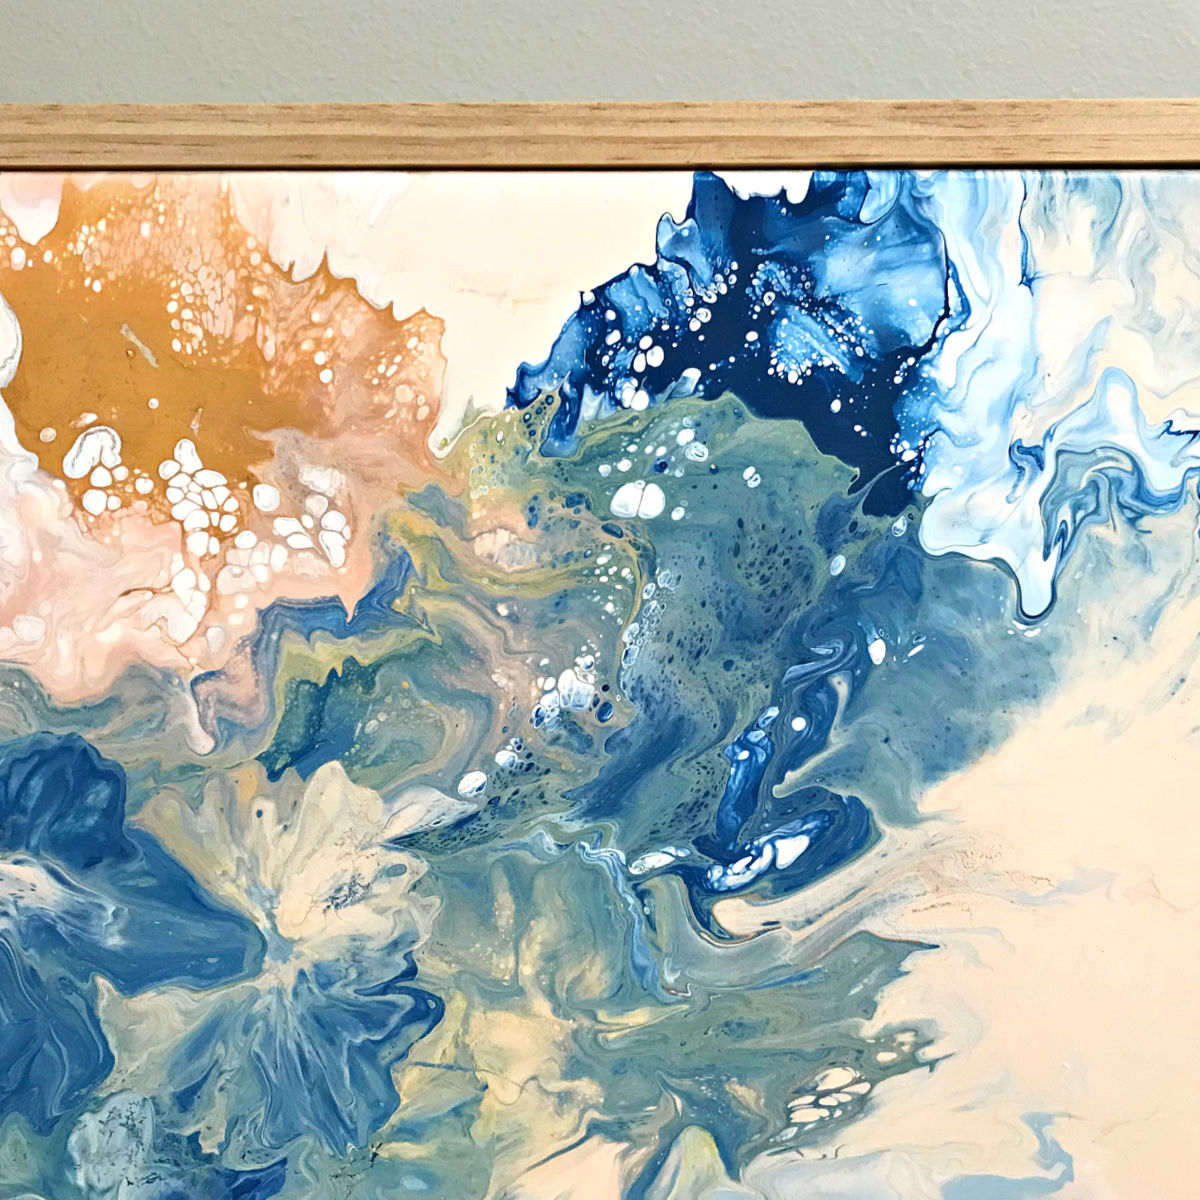
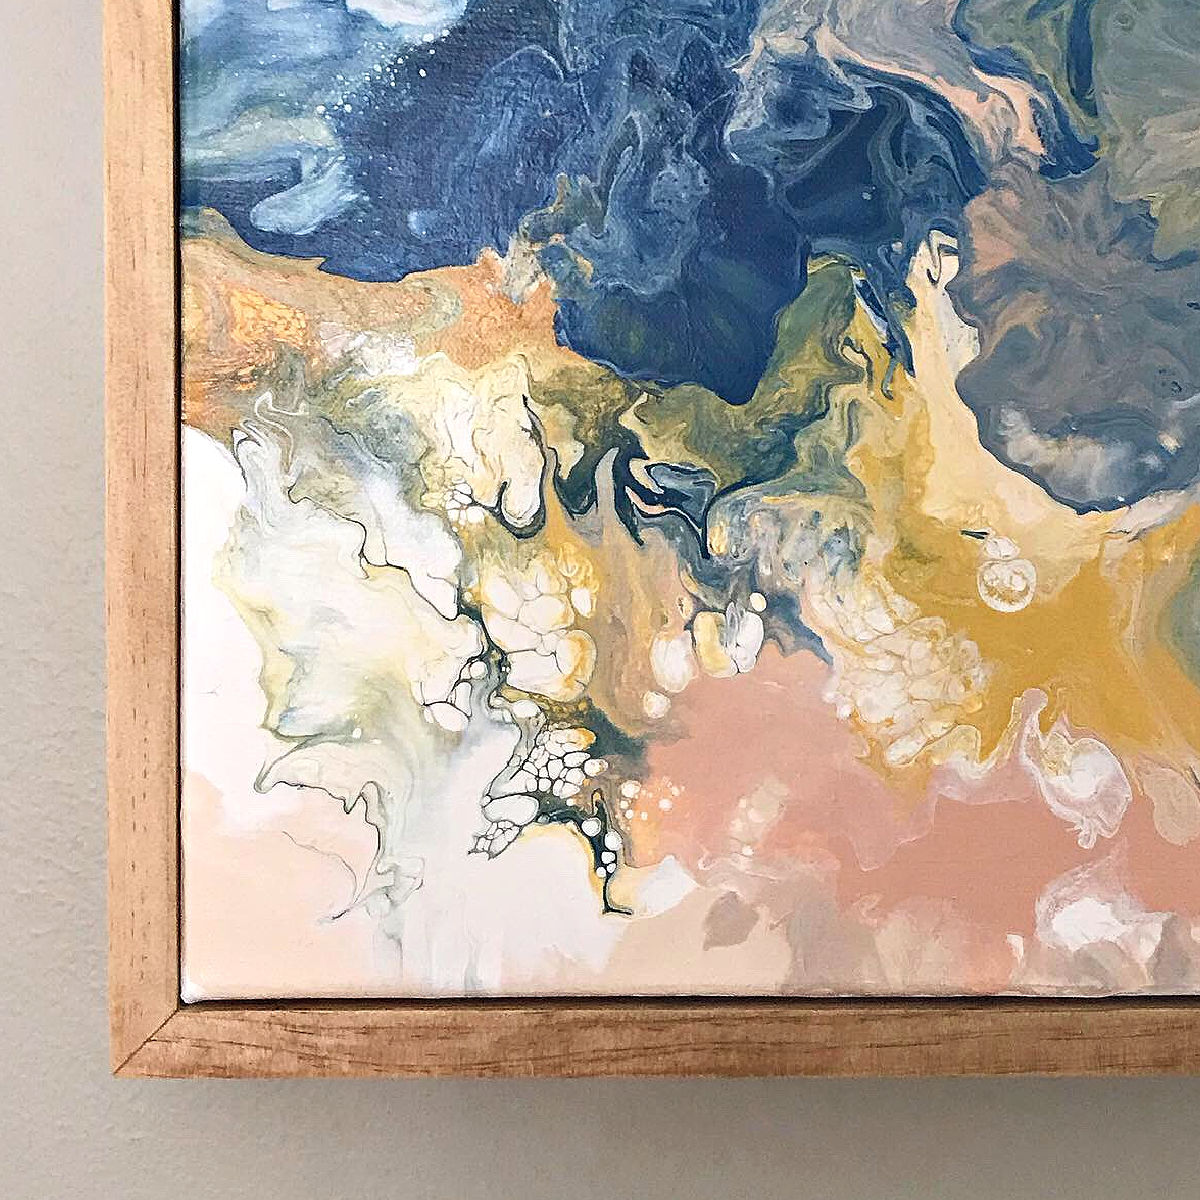
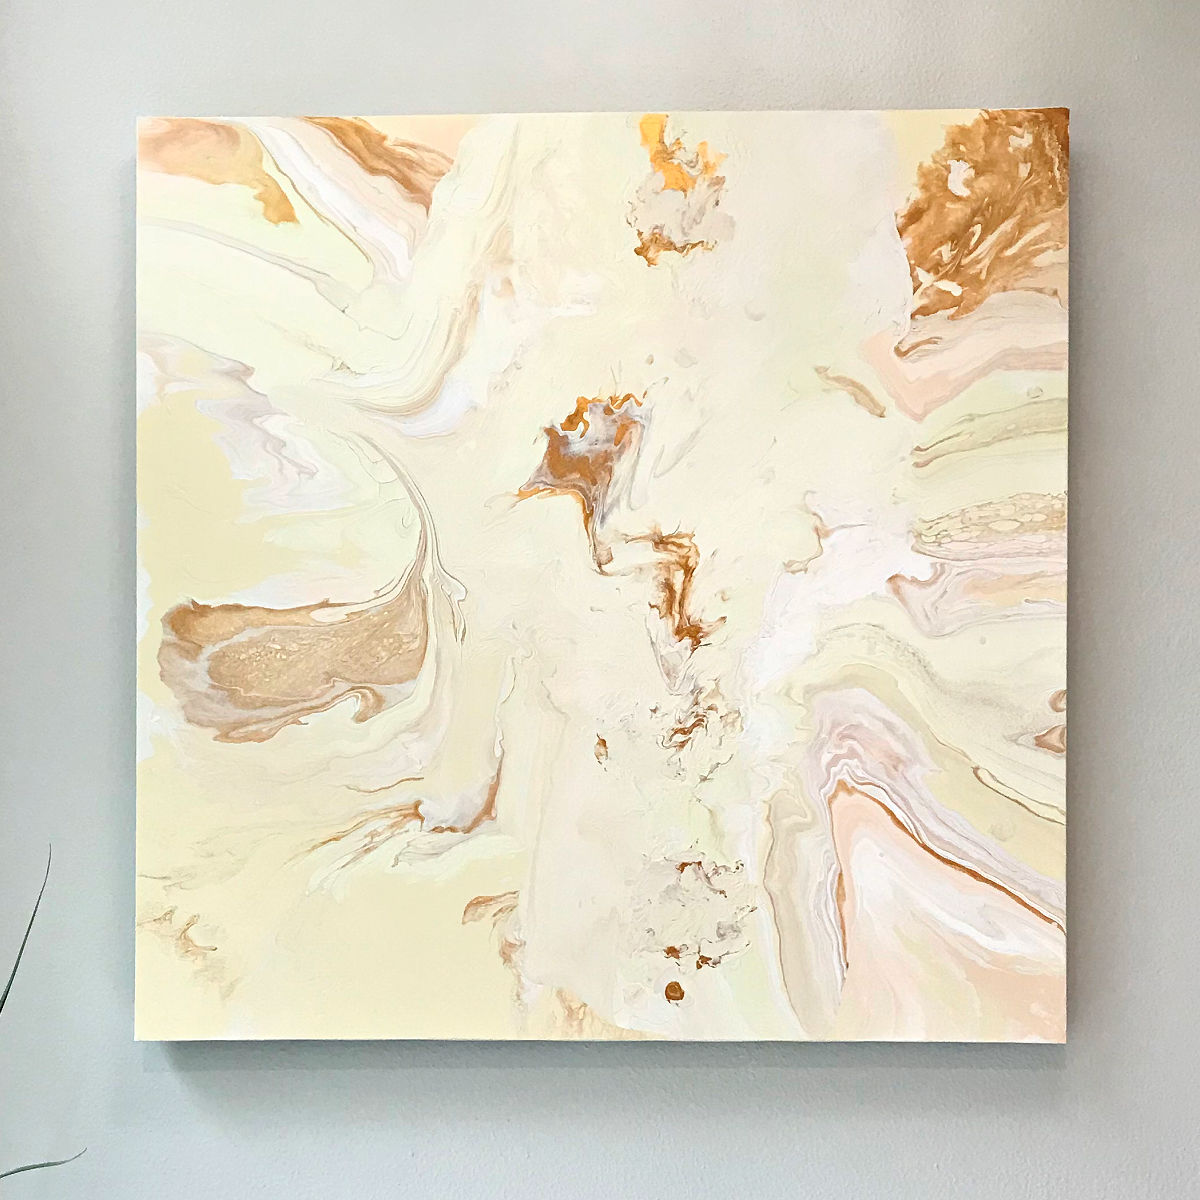
Make your own stunning canvas art for less than $20 with this pretty DIY Acrylic Paint Pouring Wall Art Idea. I love this DIY, guys!
Turn your old Christmas Cards into cute Christmas Tree ornaments. This upcycle is a simple & fun Christmas craft for even little kids!
50 GREAT DIY woodworking gift ideas for the whole family. From cheap wood gifts to big furniture builds for Christmas, birthdays & more.
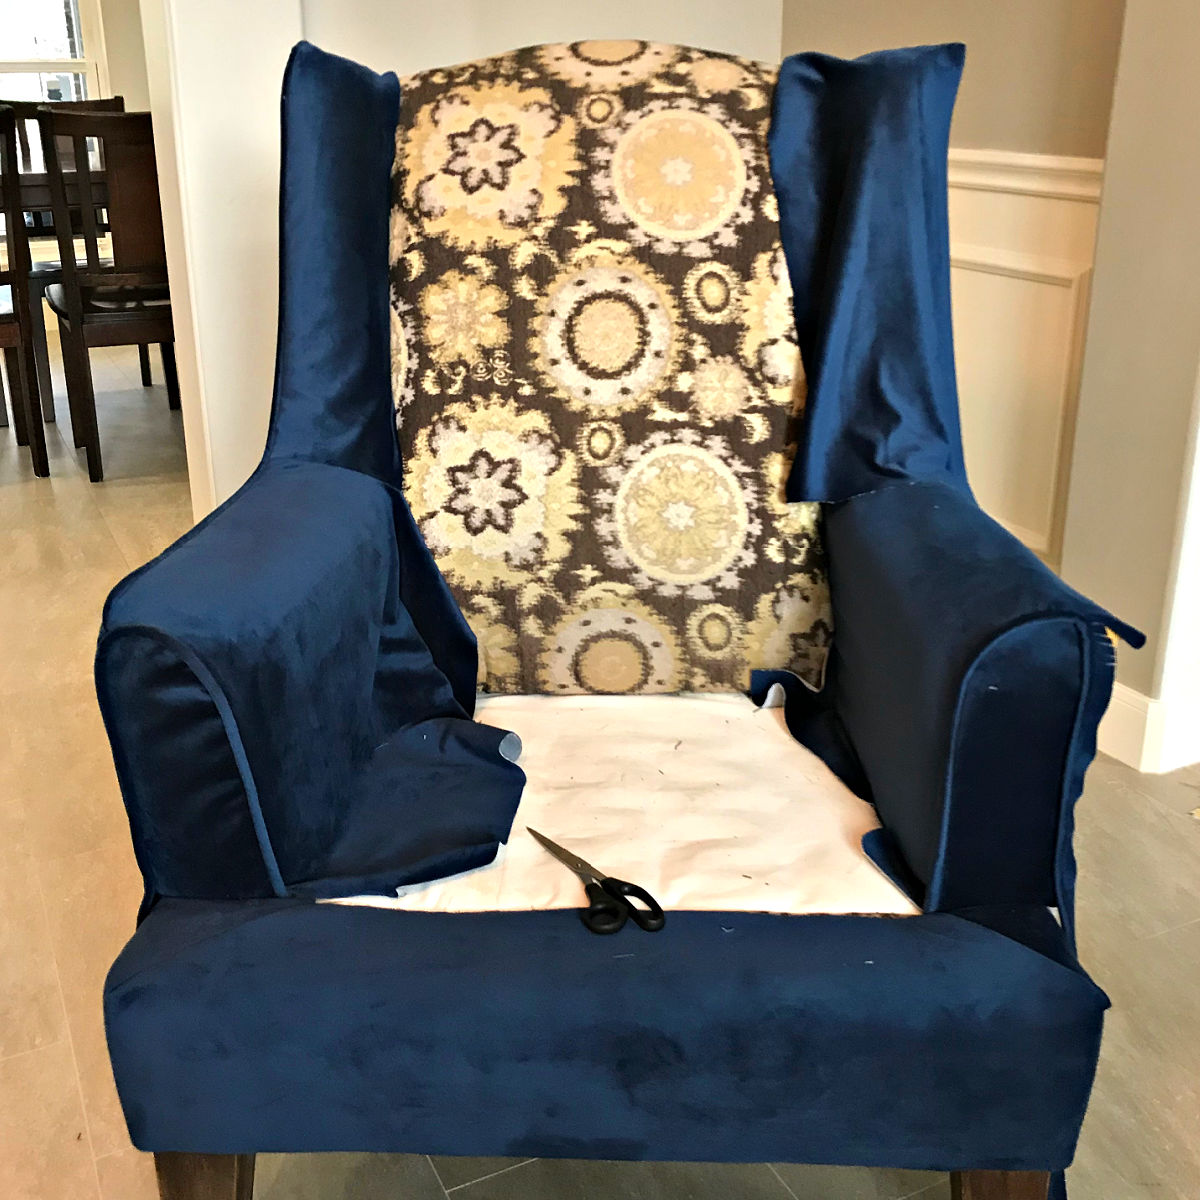
Do you want to reupholster a wingback chair? Here’s my best tips & easy steps from reupholstering a wingback chair. With costs & pros & cons.
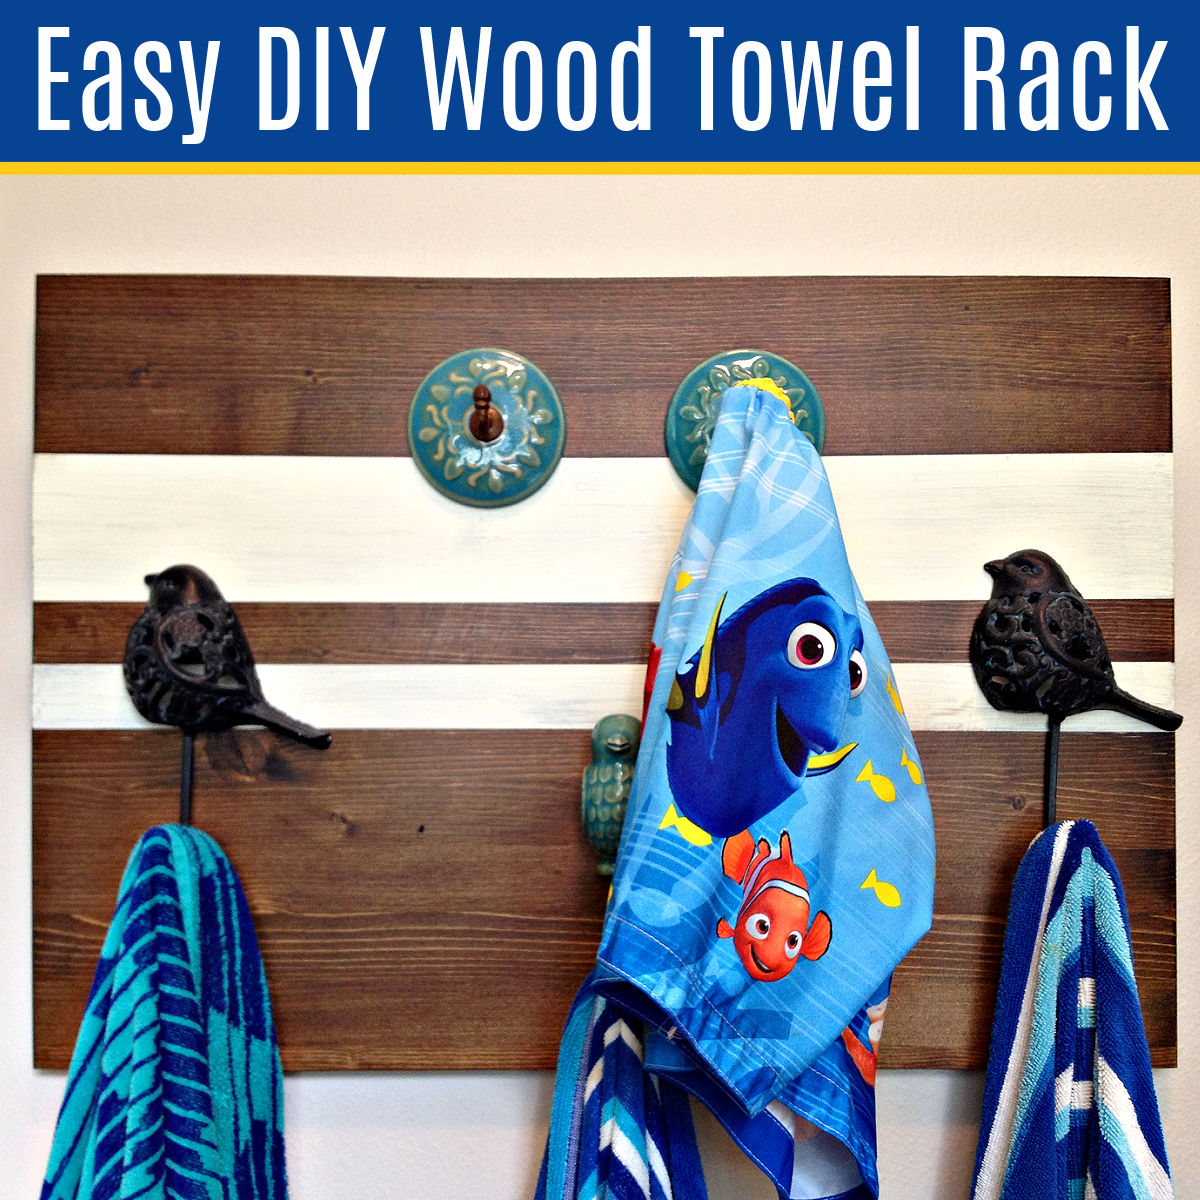
I LOVE this quick and easy home décor project! Here’s How to Make a Pretty and Easy DIY Wood Towel Rack or towel holder to match any room.
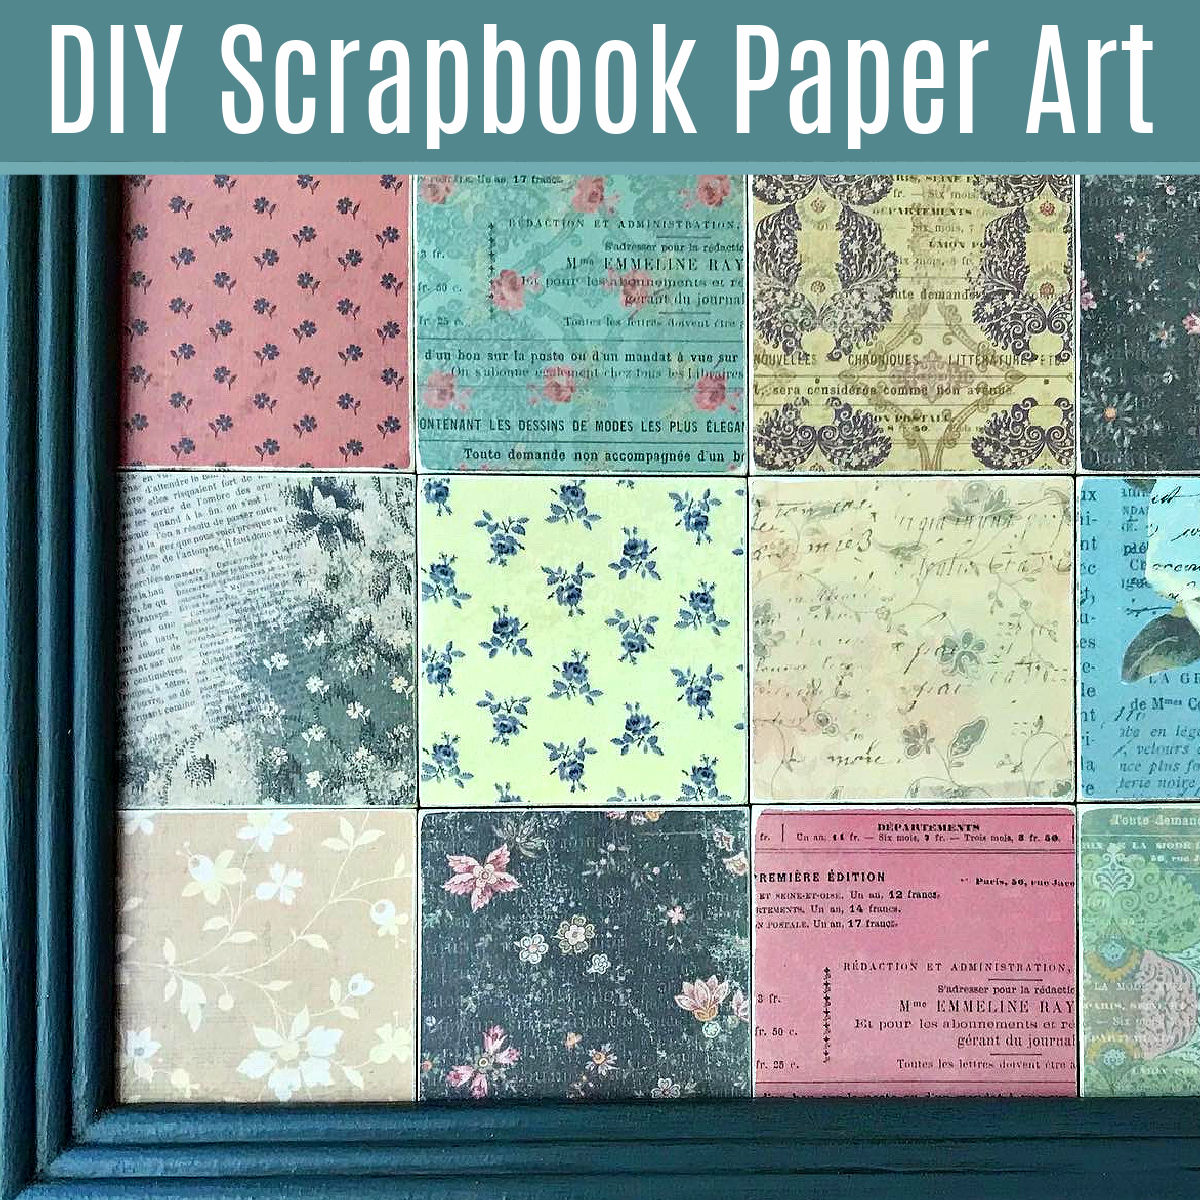
I am loving this easy craft project idea! Make your own beautiful & easy DIY Scrapbook Paper Wall Art with Mod Podge & Craft Wood Squares.
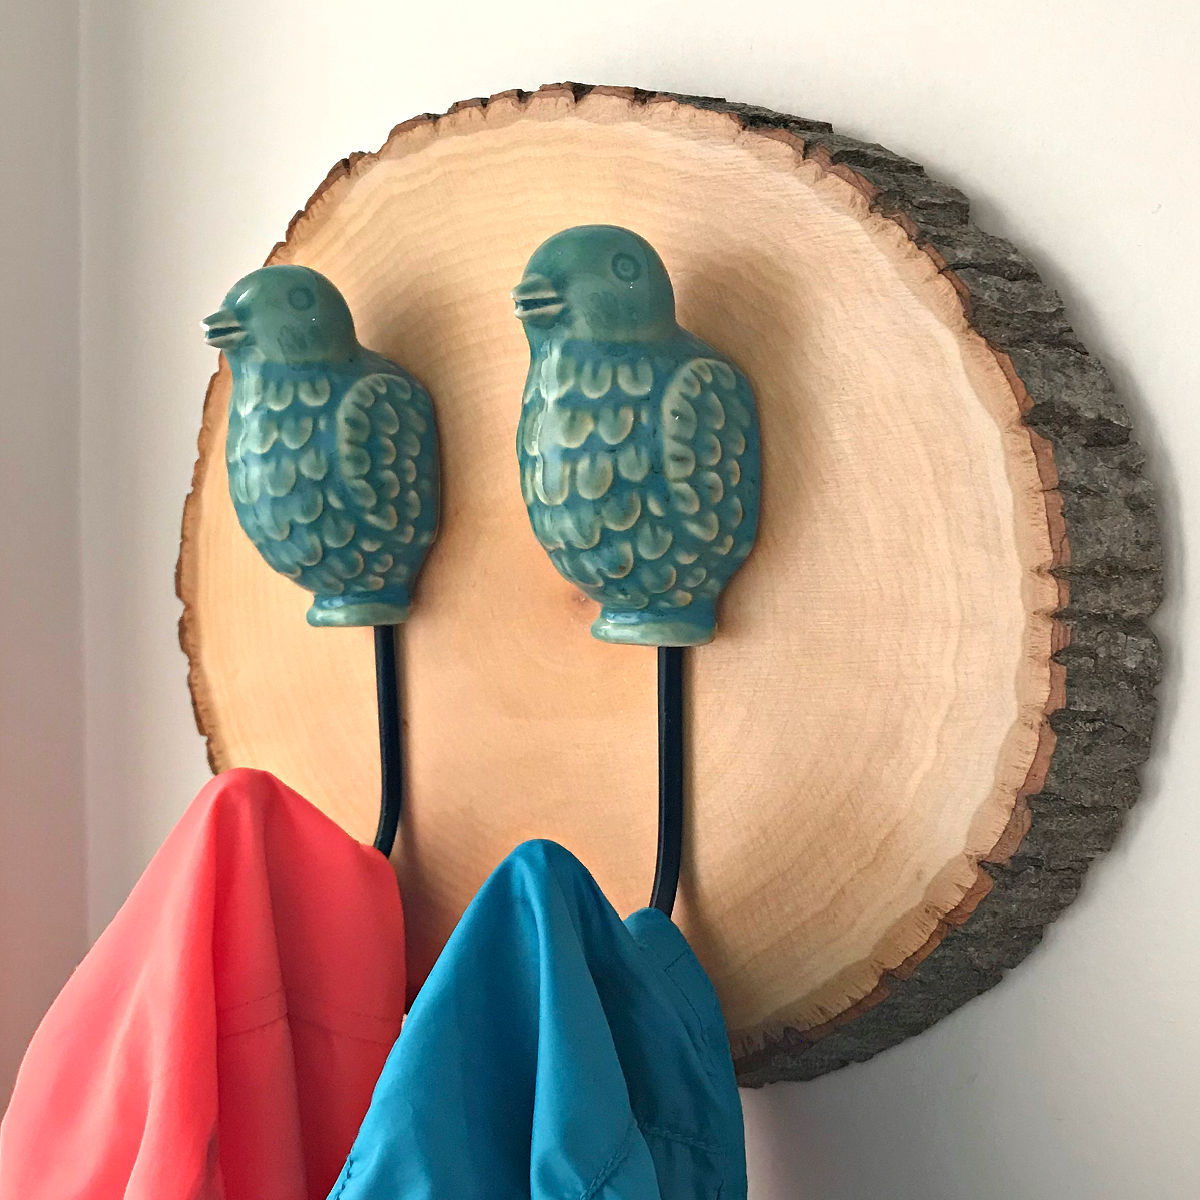
Grab a wood slice from the craft store and some cute coat hooks to make this super easy DIY Wood Slice Coat Hook. It’s beautiful & unique!
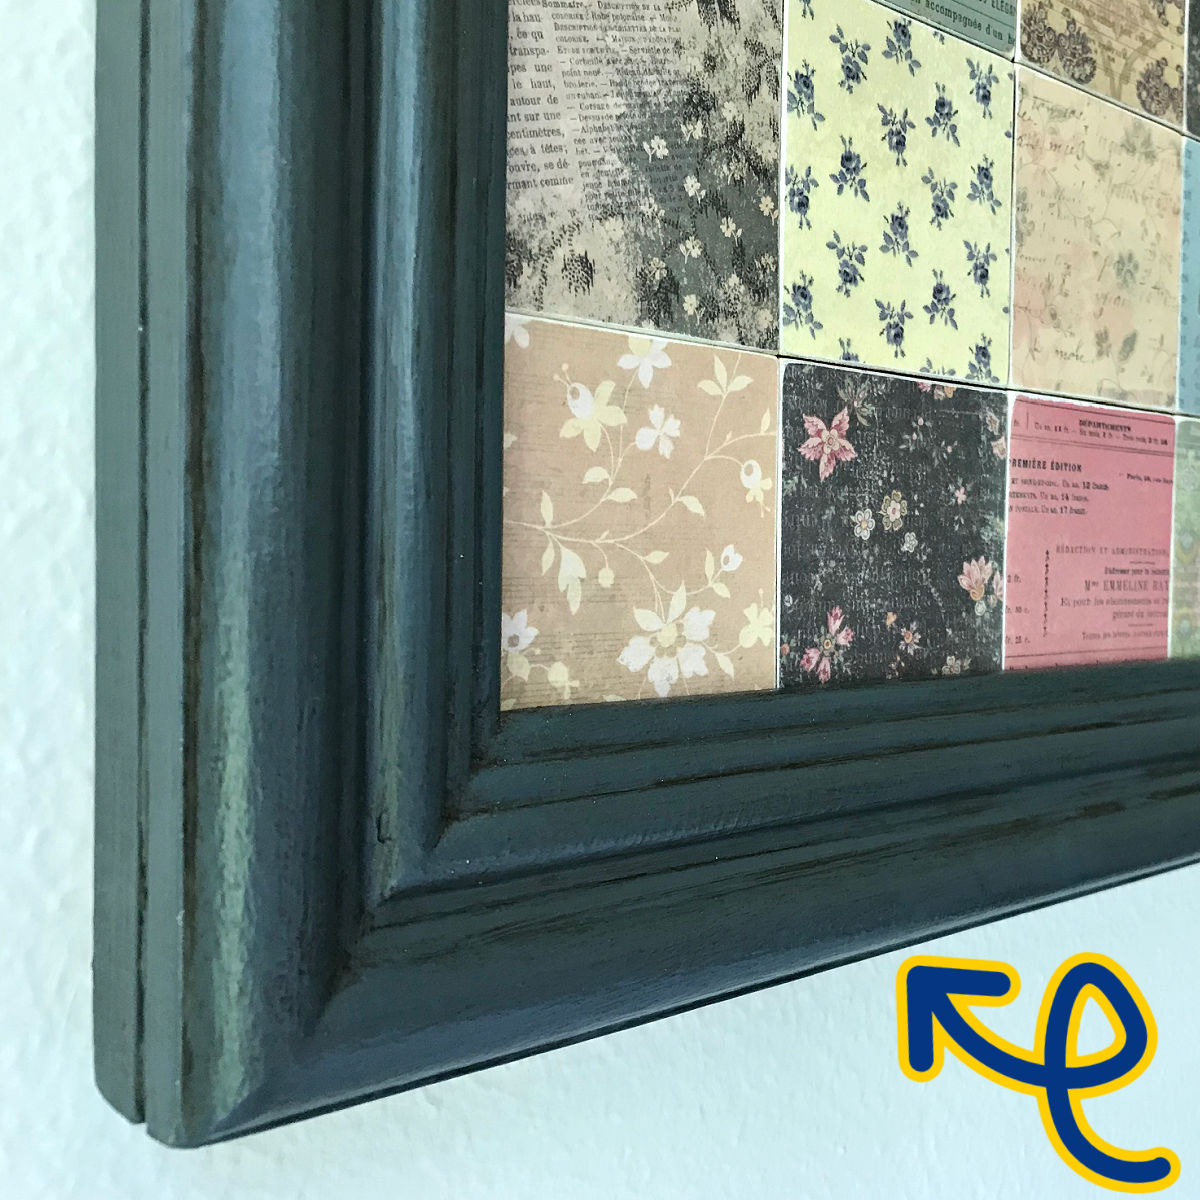
I LOVE this super easy way to make a DIY Wood Picture Frame, with 2 pieces of trim molding and a Miter Saw. Easy Steps and Video Guide.
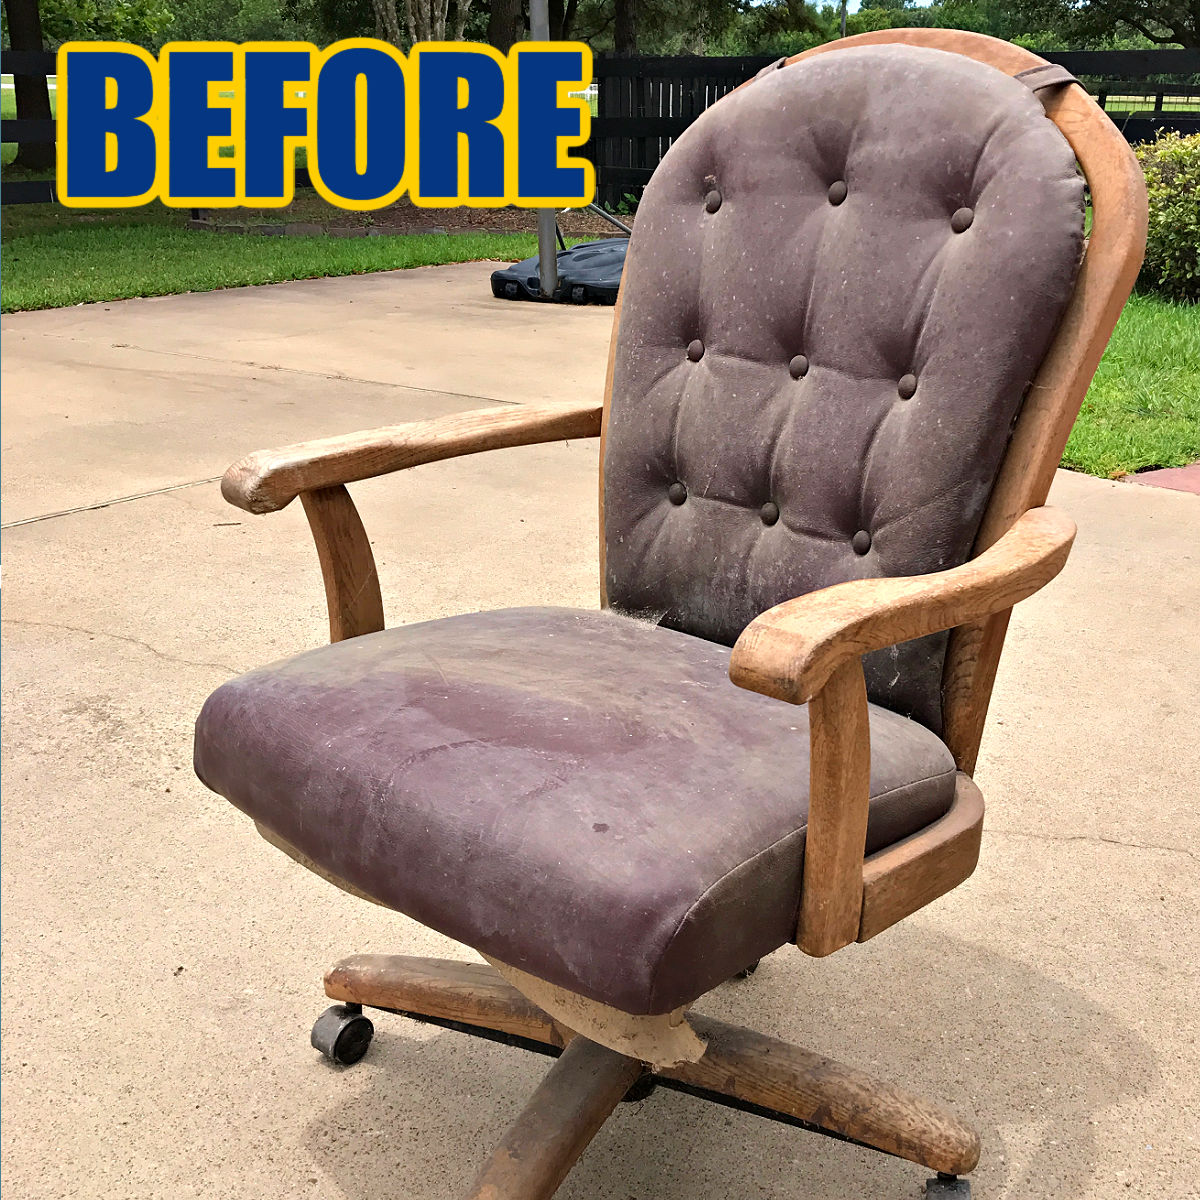
I LOVE this beautiful DIY Office Chair Makeover. With before and after photos. And easy tips to reupholster, paint, and replace wheels.
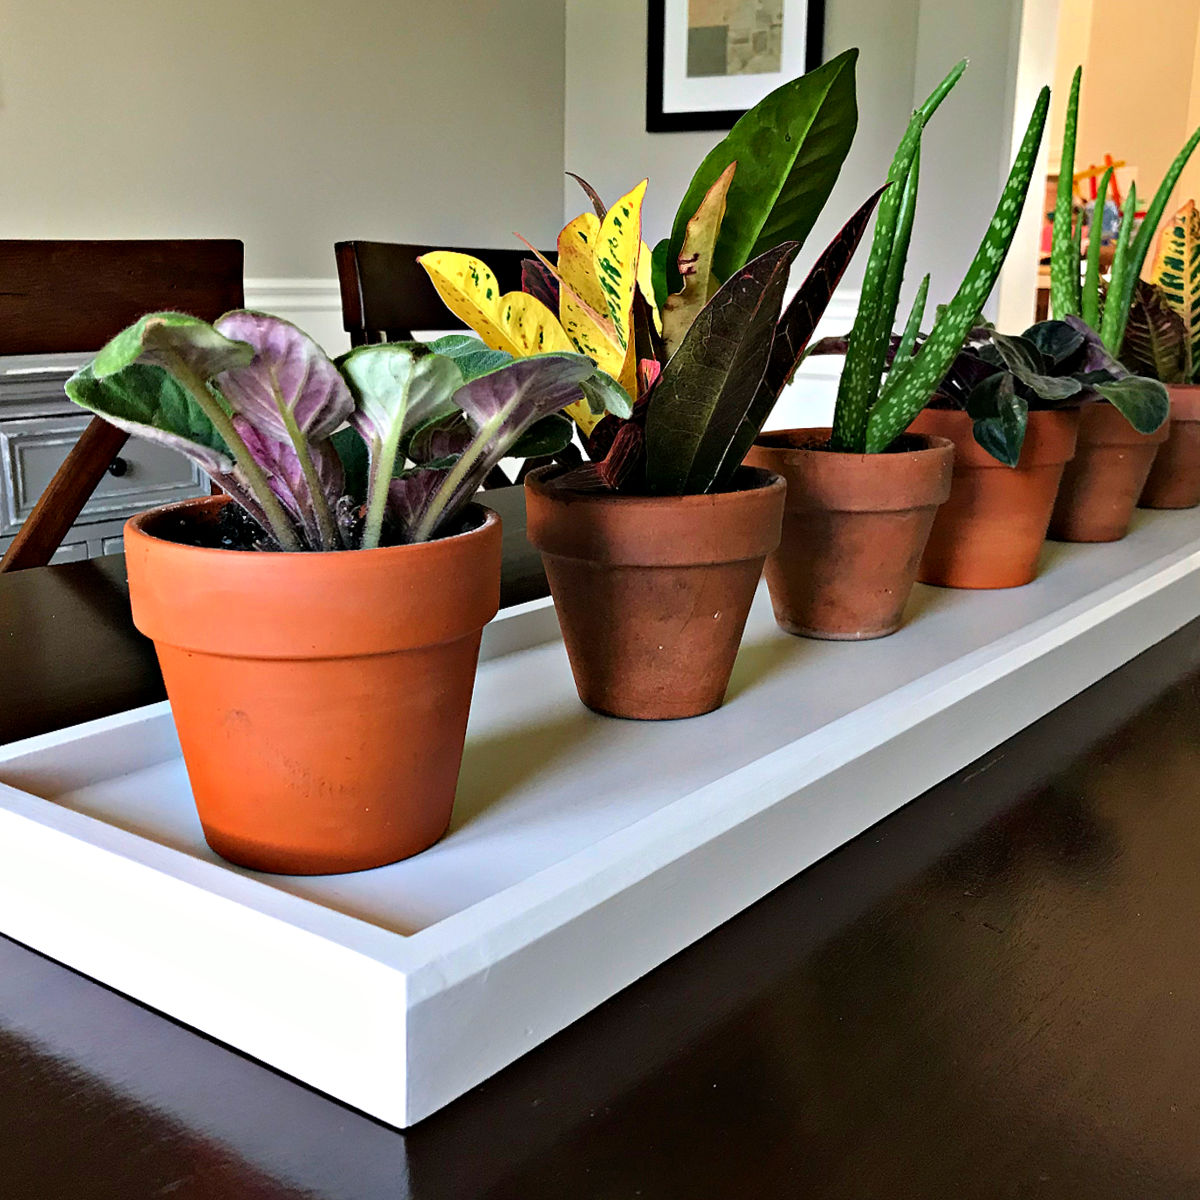
Easy to follow steps and build video for this beautiful DIY Long Wood Tray. Great build for beginner woodworkers.
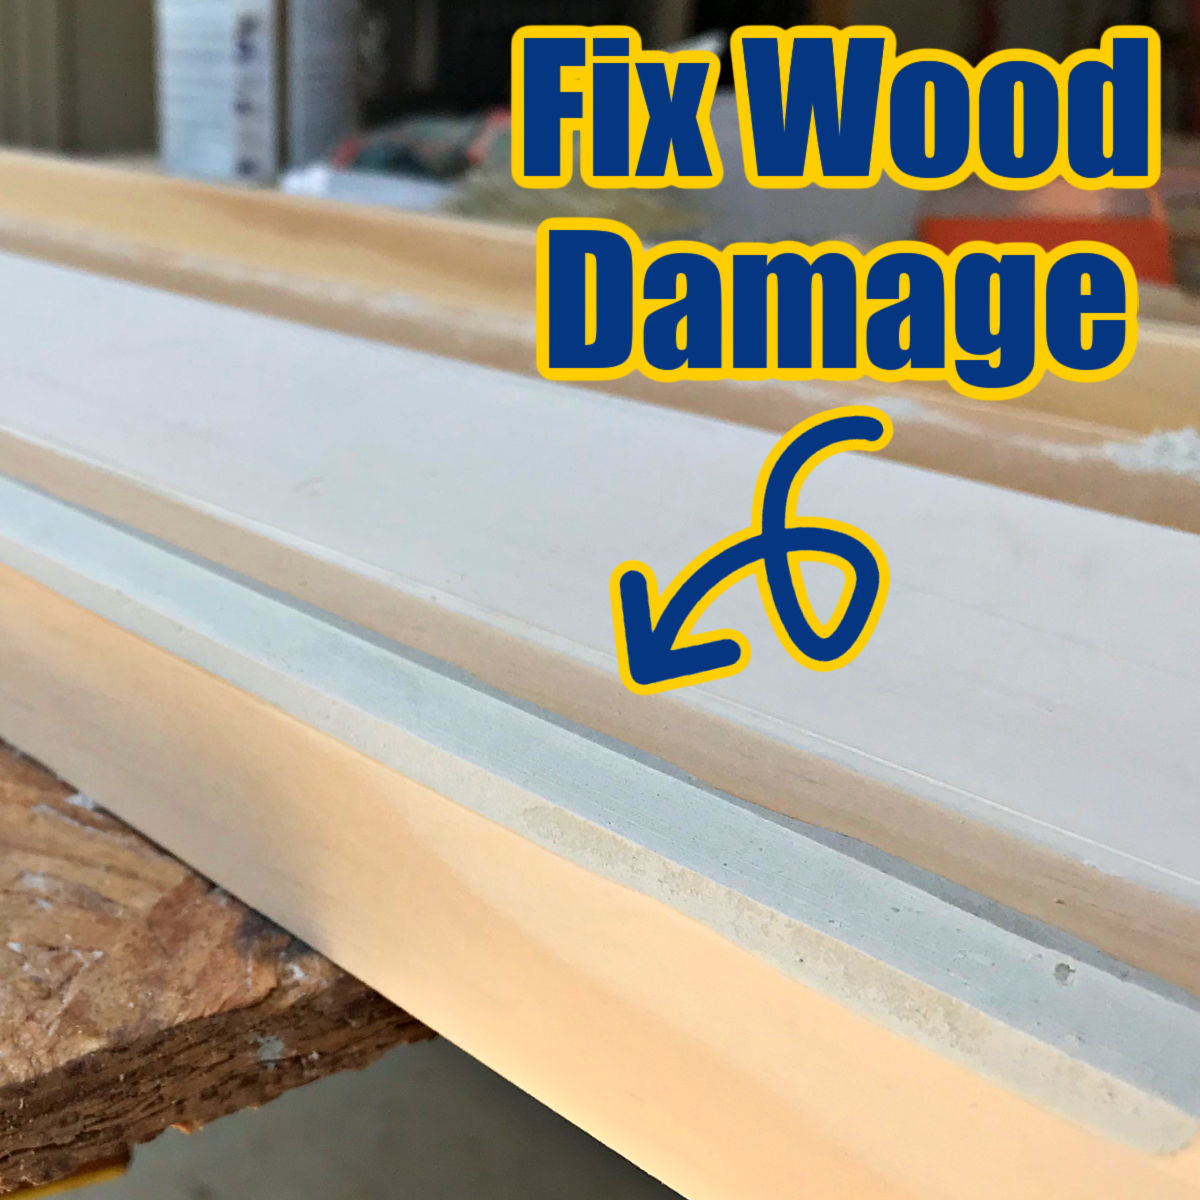
Easy to follow guide for mixing and using Bondo All Purpose Putty to fix damaged wood furniture or mistakes on woodworking projects. How to Fix Damaged Wood Furniture with Bondo Well, I really messed up my latest woodworking project. But, I wasn’t worried, at all. I have used Bondo All Purpose Putty to patch a … Read more
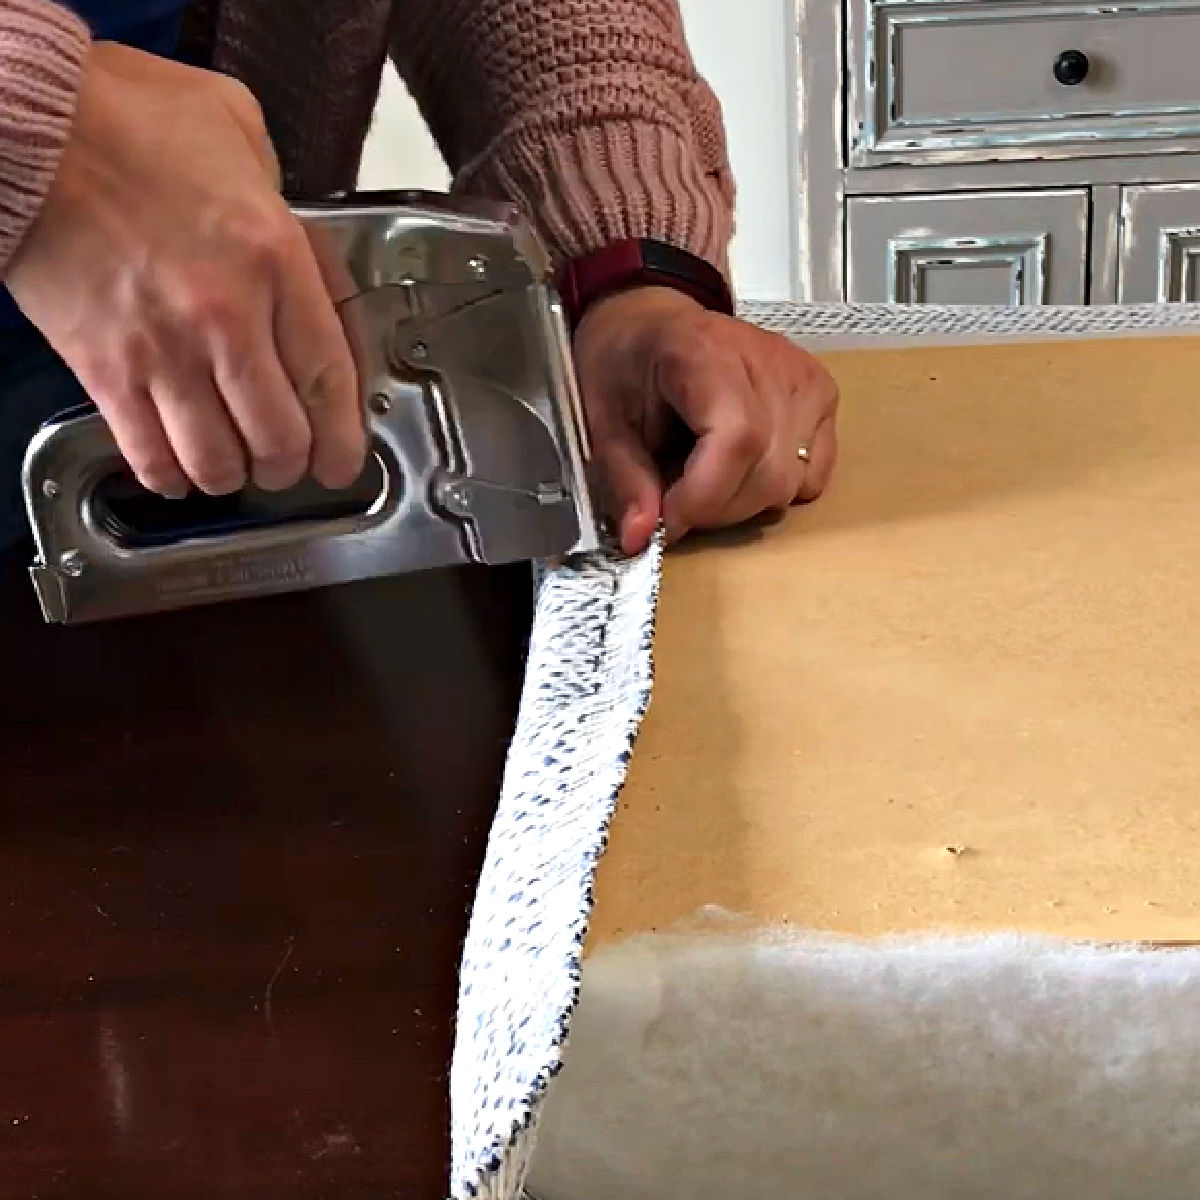
I LOVE this easy DIY to Make a No Sew Bench Seat with a Staple Gun. You can make a beautiful padded cushion seat on plywood in no time!
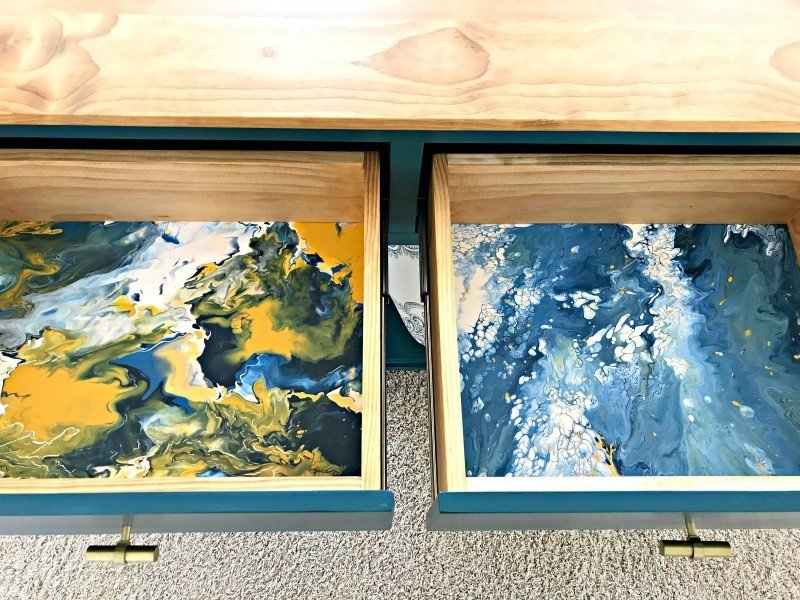
Easy Steps and Video showing how to Paint over an Old Canvas with a DIY Acrylic Pour Art. I LOVE this DIY to reuse old canvas art.
This Fun & Easy Dutch Style DIY Acrylic Pour Tutorial is a great way to make unique, pretty, and low cost art. With video to show you how!