How To Use Easy Off Oven Cleaner Fume Free (Easy Steps, Tips, FAQs & Video)
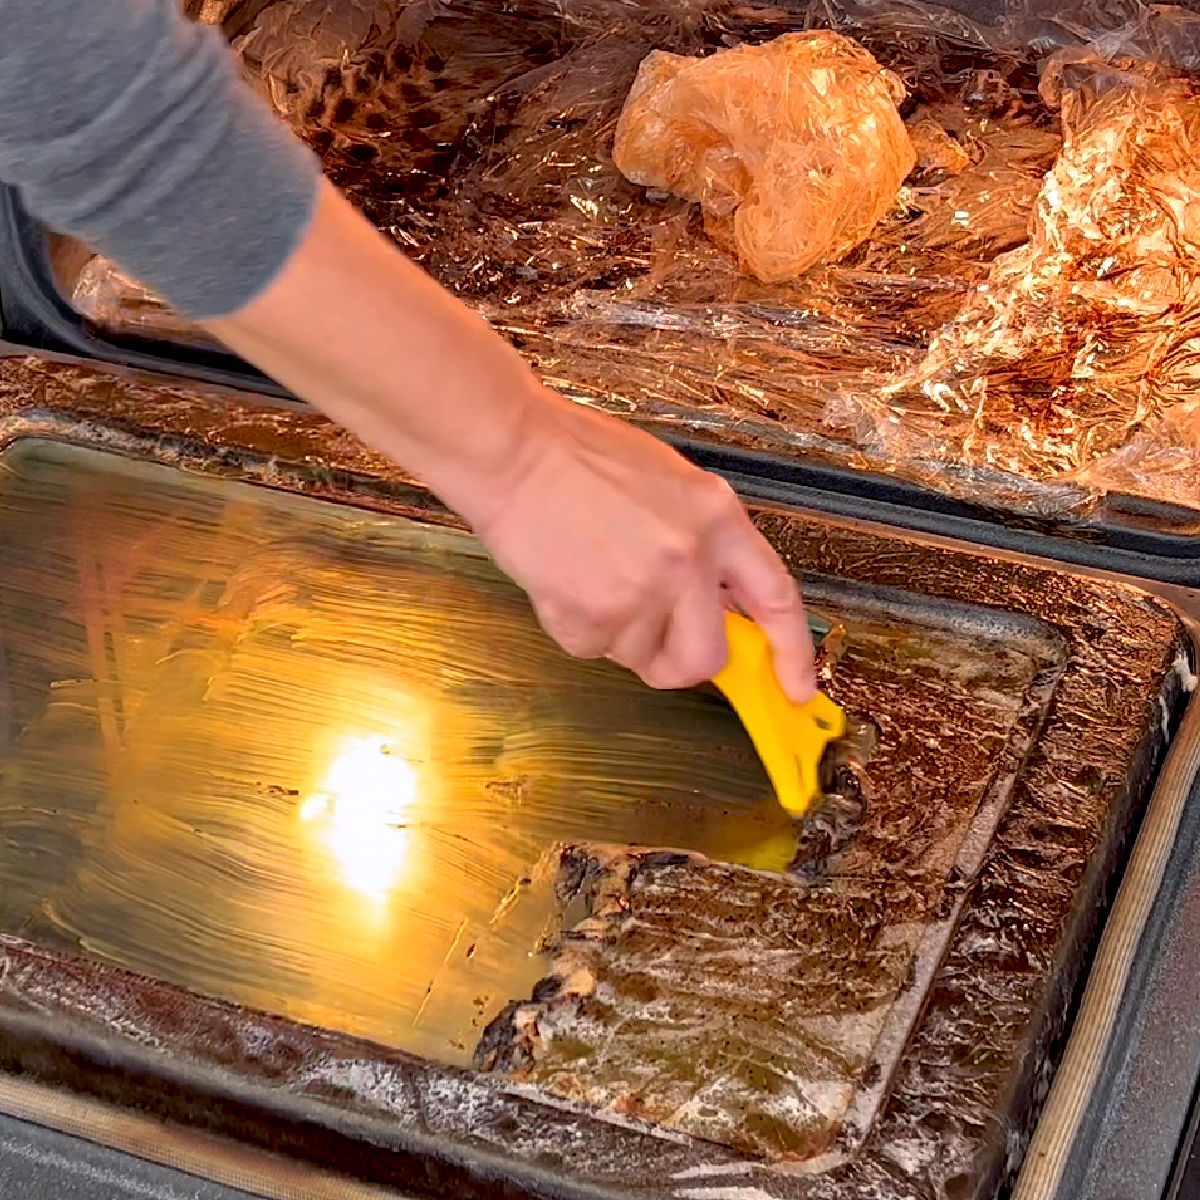
Using Easy Off Oven Cleaner on a SUPER DIRTY oven is SO EASY. Here’s how to use Easy Off Oven Cleaner Fume Free, tips, and a video guide.

Using Easy Off Oven Cleaner on a SUPER DIRTY oven is SO EASY. Here’s how to use Easy Off Oven Cleaner Fume Free, tips, and a video guide.
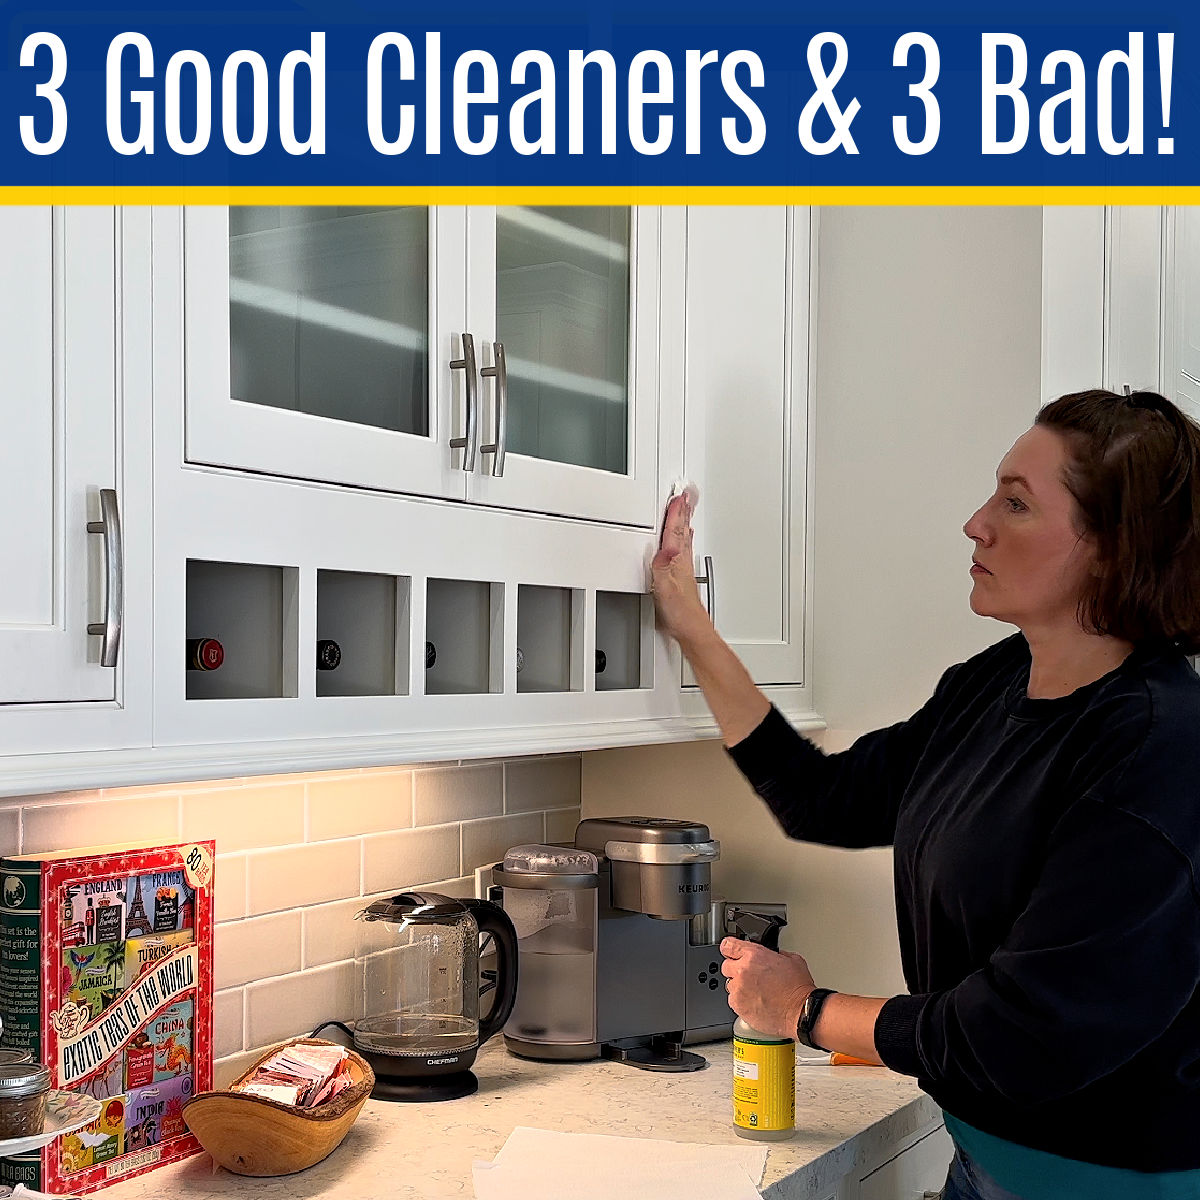
Good news! White cabinets aren’t hard to clean. After 10 years with them, here’s the 3 best ways to clean white kitchen cabinets & 3 I avoid.
If you have an unused Dining Room, here’s 24 great ways to repurpose a Dining Room into a useful space! Includes some very low cost options!
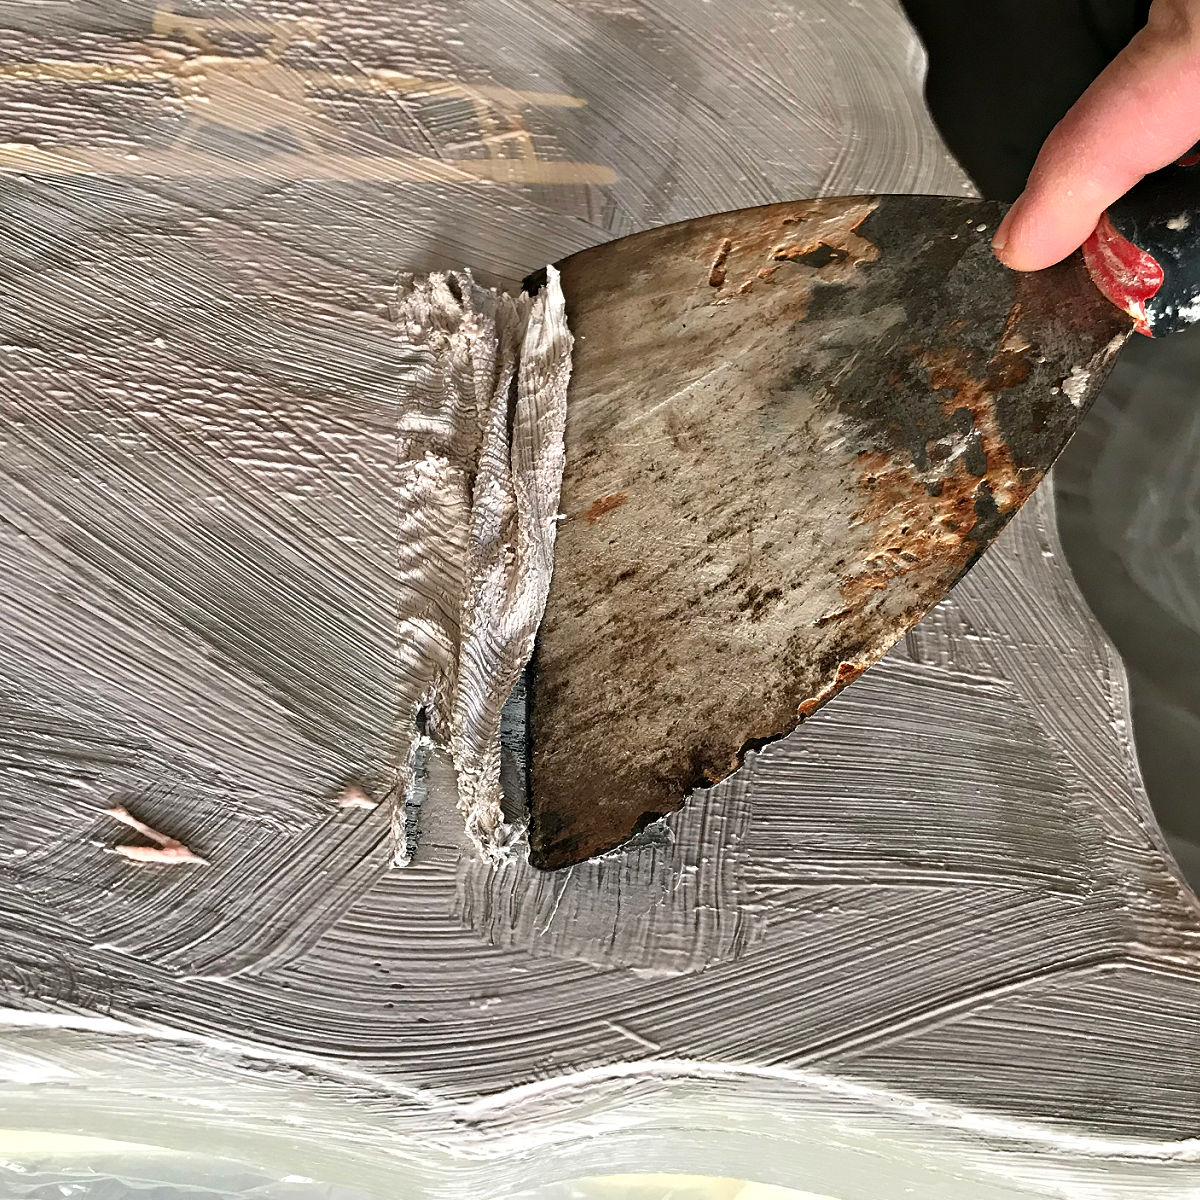
If your Citristrip dried before you could scrape it off, don’t worry! Here’s the 5 BEST ways to remove dried Citristrip residue on furniture.
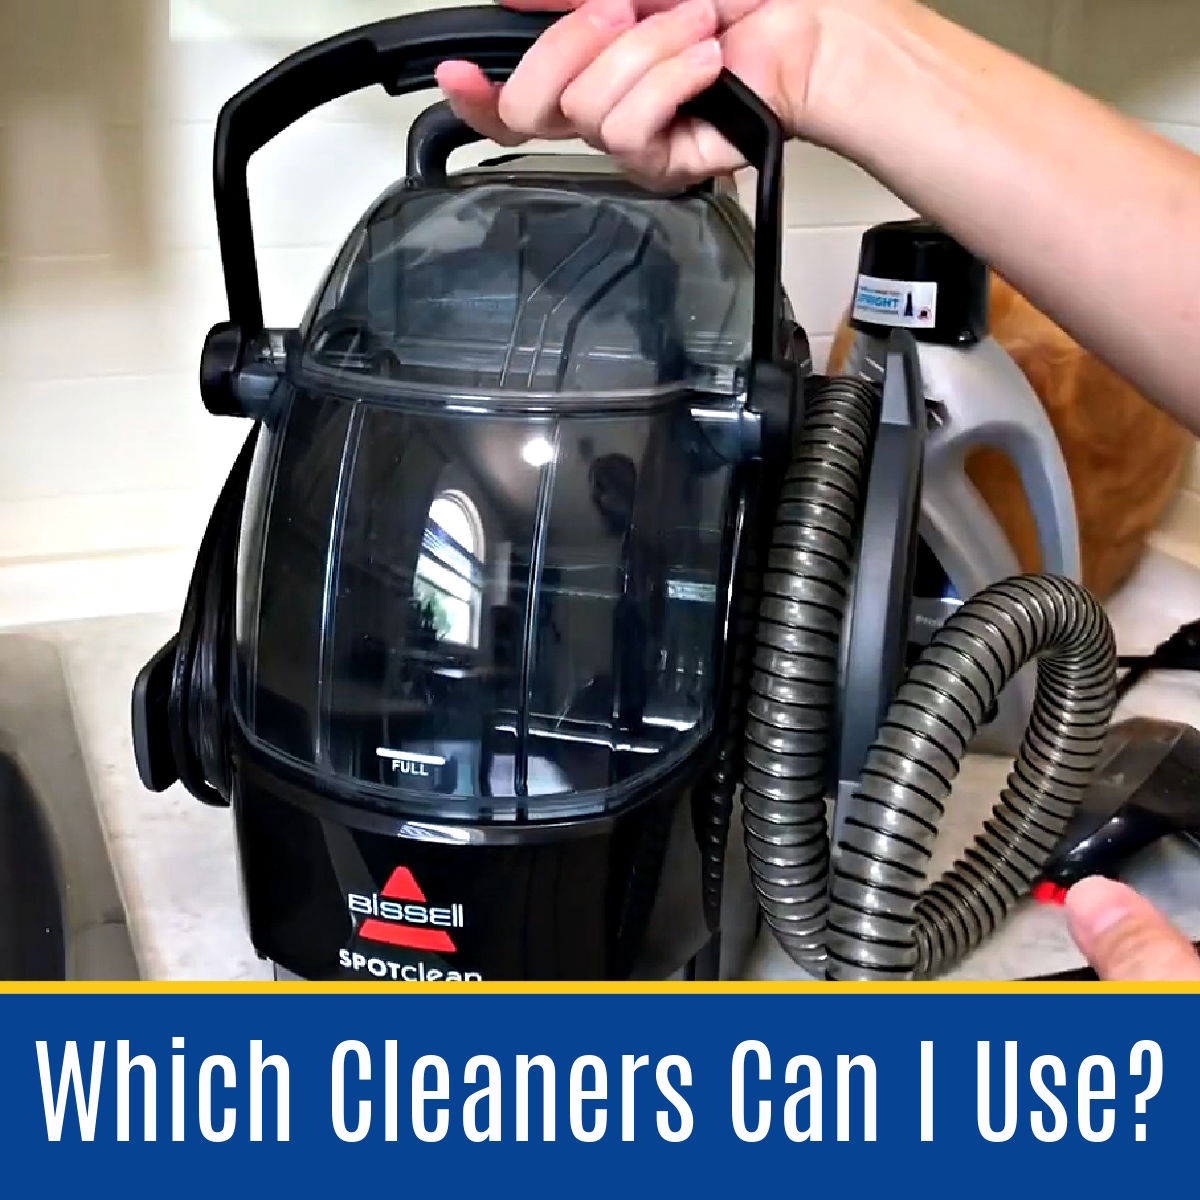
What can I use instead of Bissell cleaning formula? Here’s the 6 best Bissell Cleaning Solution alternatives. With easy cleaning tips!
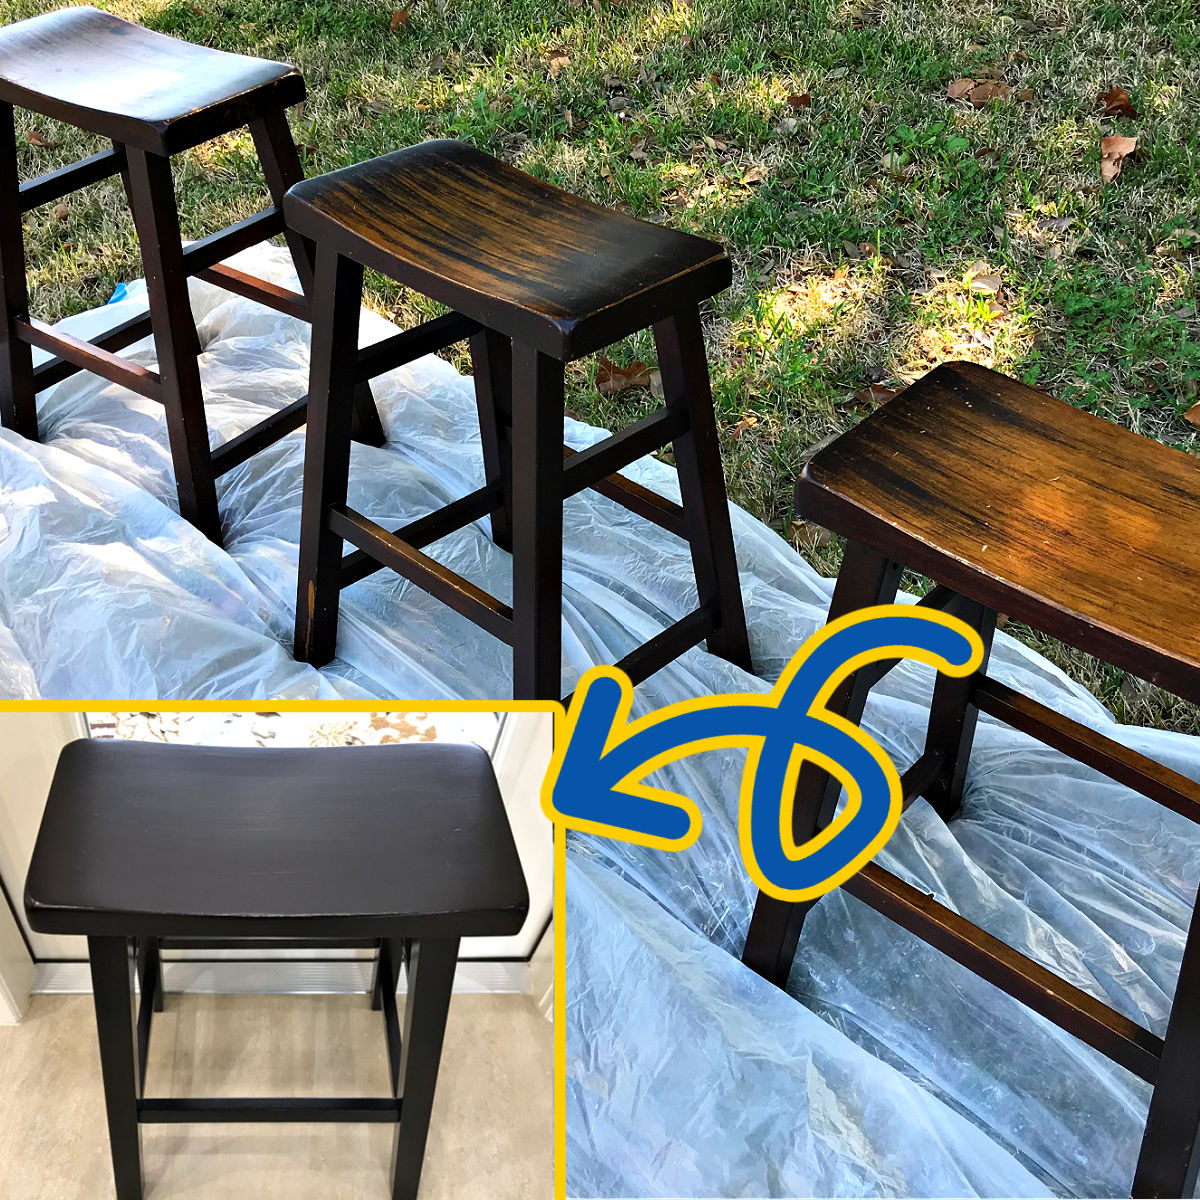
Can you stain wood furniture without sanding or stripping the finish? Yes, it’s so easy! Here’s the easy DIY steps & video to show you how.
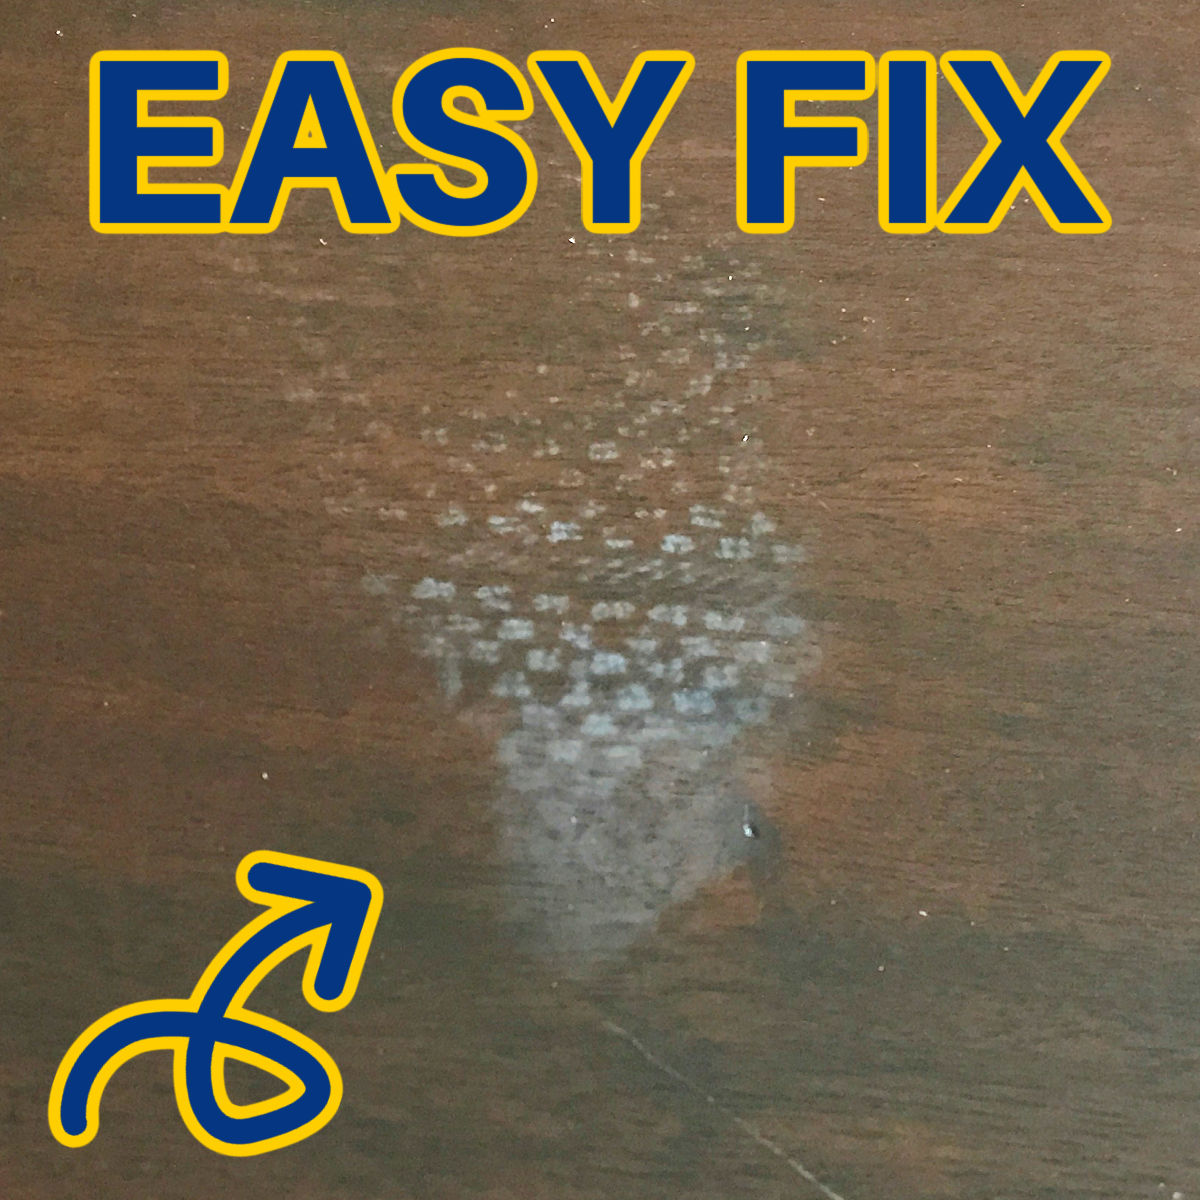
Try this EASY 1-minute fix to Remove Heat Stains from Wood furniture. You really can get rid of heat marks on wood with this quick DIY!

Wanna get rid of cable & still watch TV? SAVE money cutting the cord with cable & watch TV for FREE or CHEAP with these alternatives to cable!
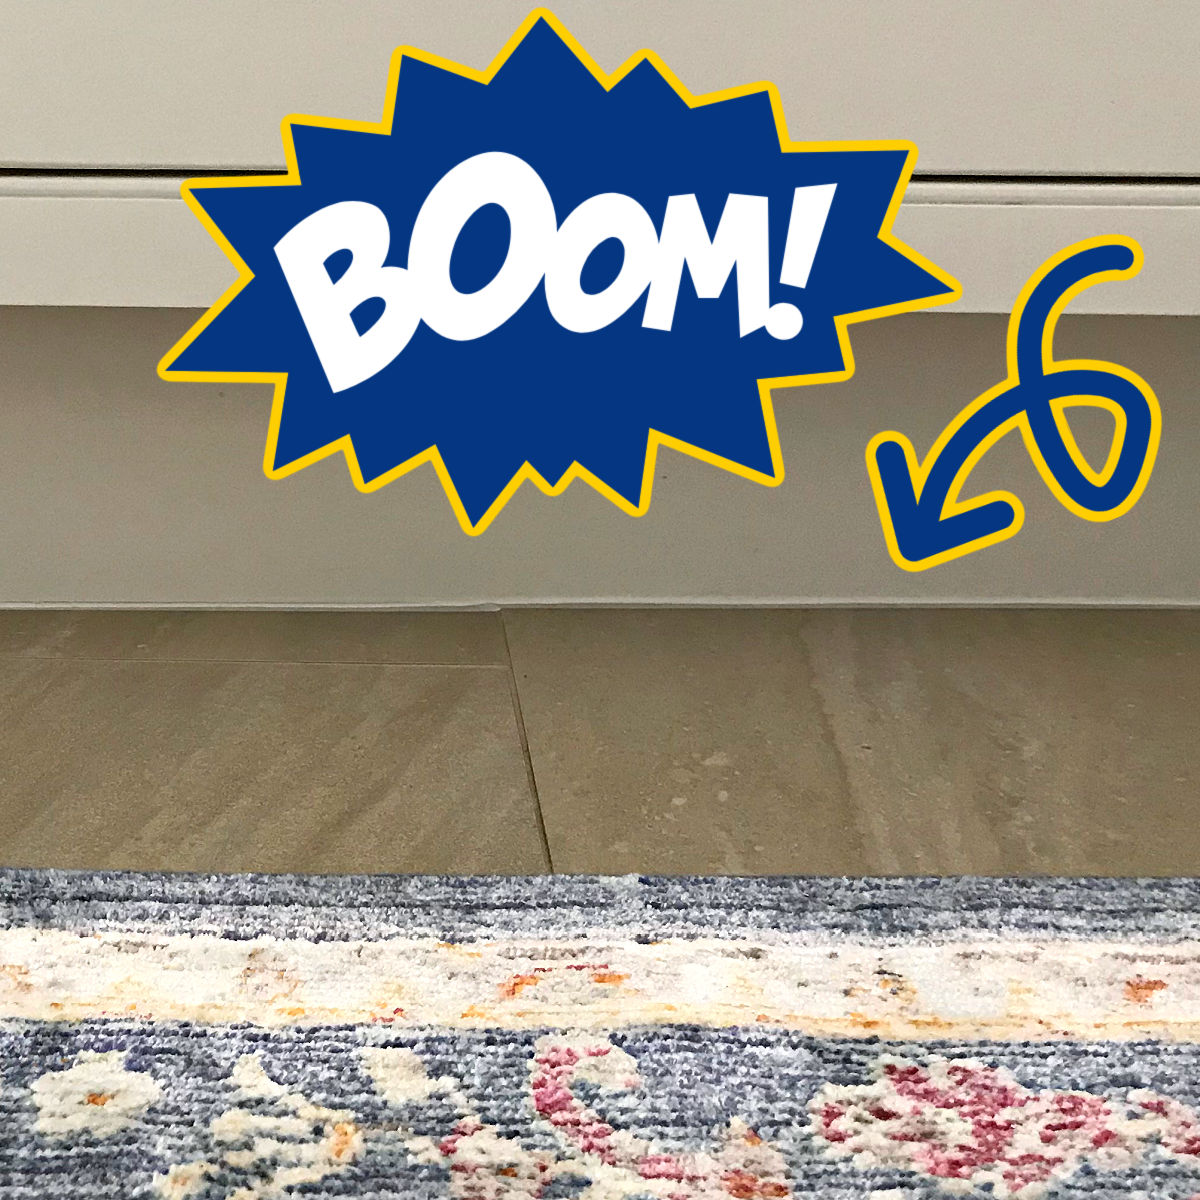
Quick & Easy Steps to Seal or Fill the Gap Between Cabinets and Floors. Works under kitchen cabinets and in the gap between vanity and floor.

Here’s 11 Affordable Ways to Feel & Look Younger in your 40’s! Tips that actually work for me. Number 1 on this list is a MUST DO.

I LOVE this EASY DIY Swing Set Frame. Build a 4×4 swing set frame in just AN HOUR. This A-frame swing set is strong enough for adults & kids.
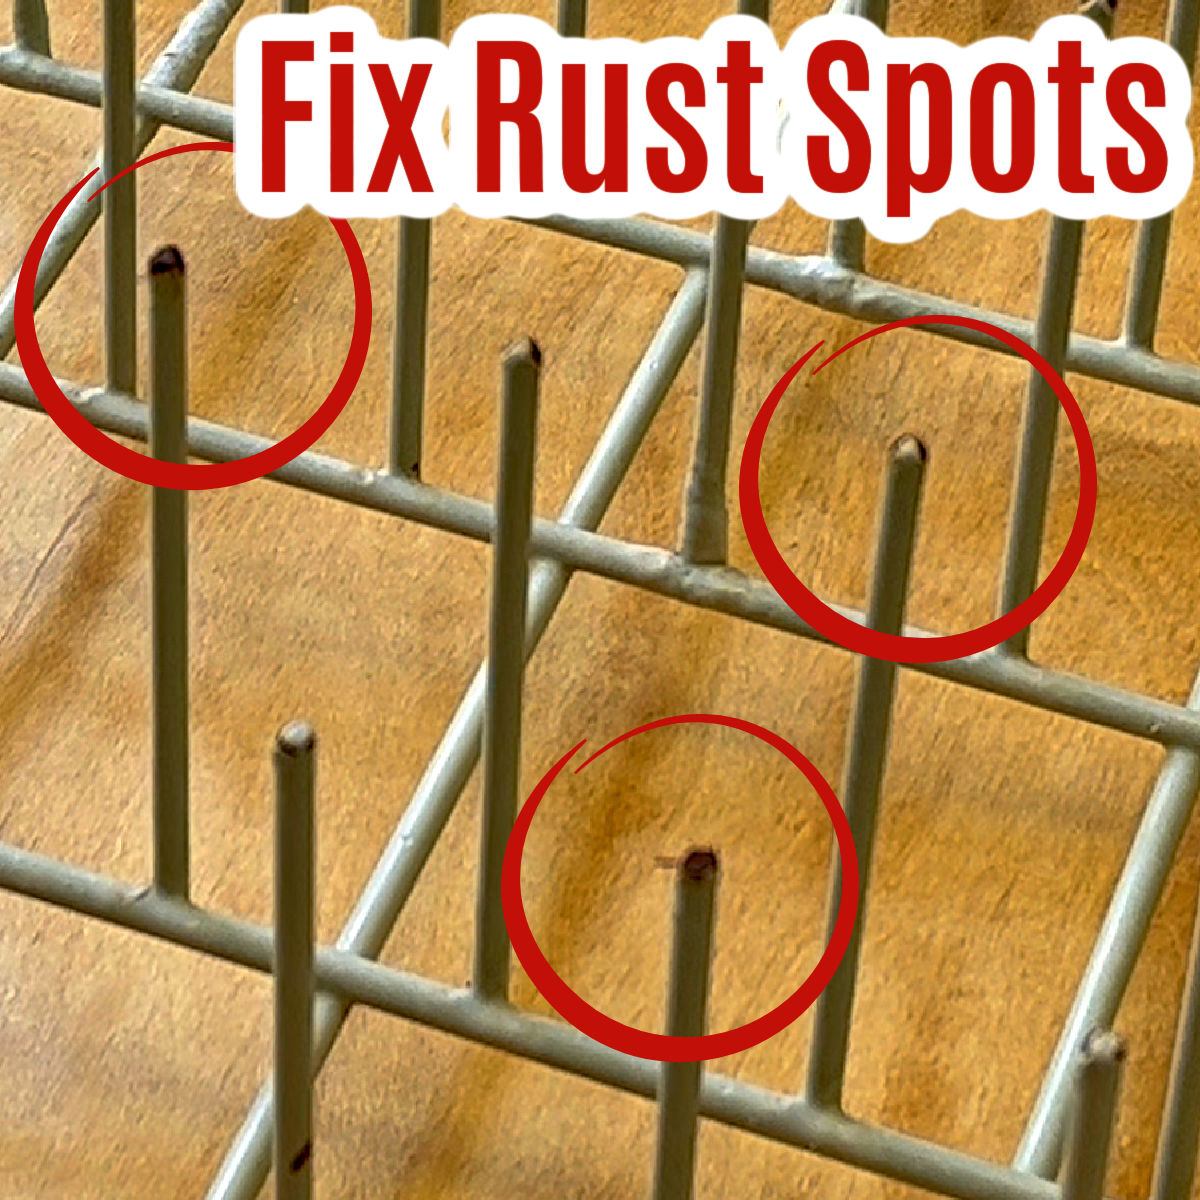
New dishwasher racks can cost hundreds. But, there’s a cheap & easy way to repair a rusty dishwasher rack. Anyone can do this!

Wondering what to do with a Formal Living Room?? Here’s 18 great ways to repurpose an unused Formal Living Room into a useful space!
QUICK & EASY steps to build a DIY canvas frame, using 1×2’s. This beautiful wood frame is my favorite way to frame canvases. Finish in 1-day!
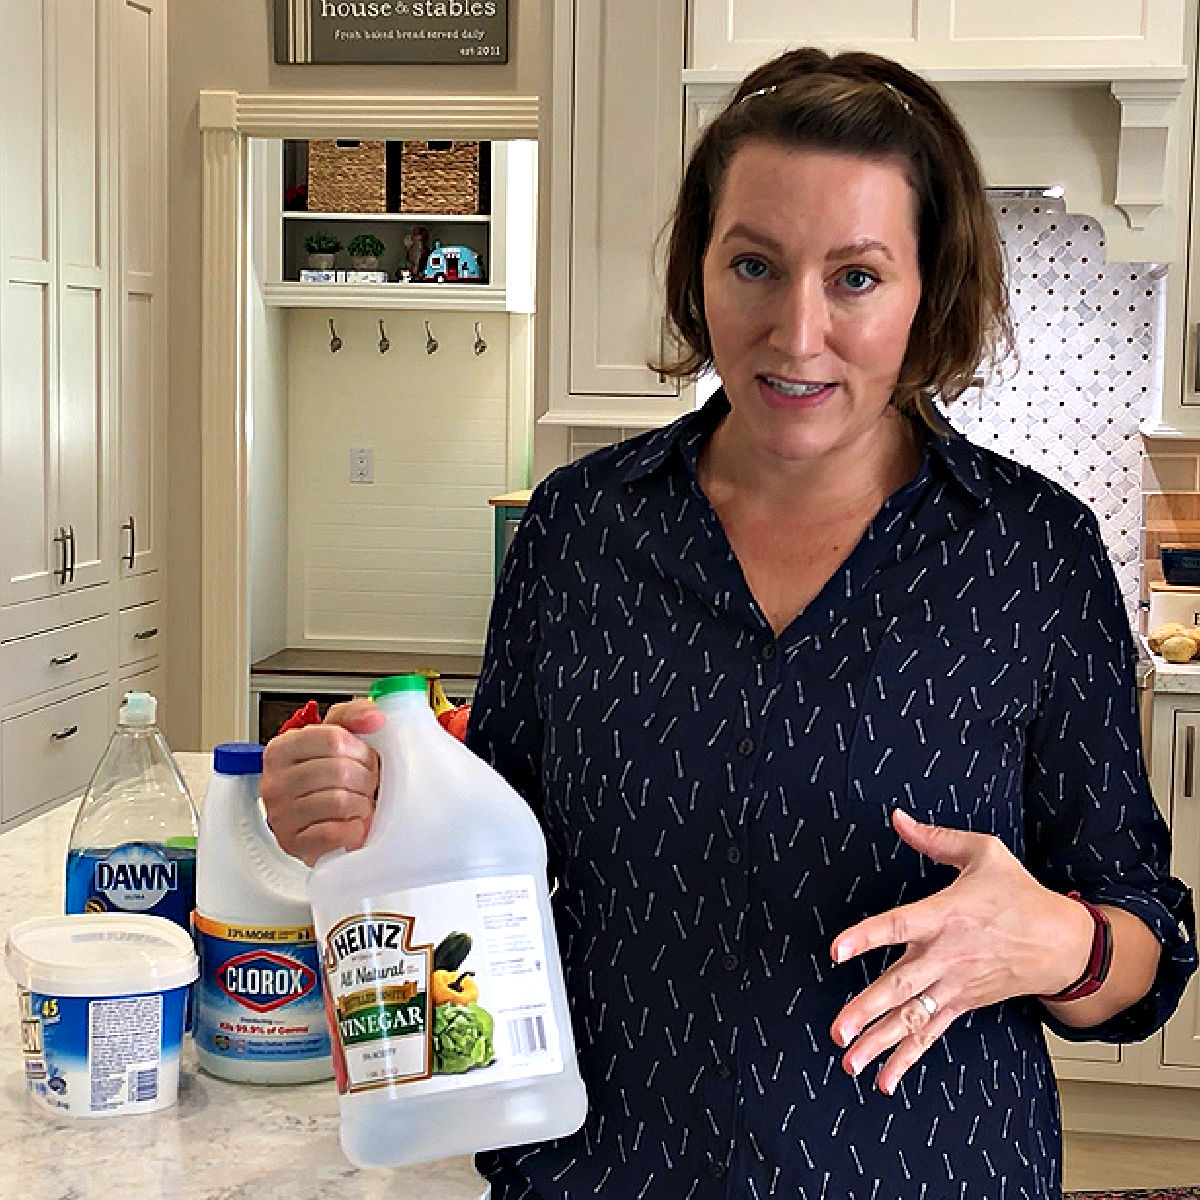
Here’s the POPULAR DIY grout cleaners that damage grout or the sealer. Read this before using Vinegar, Toilet Bowl Cleaner, or any hacks!

These ideas work! Here’s 16 great ways to make a dark room brighter. From QUICK & EASY updates to remodeling tips to make a room brighter.
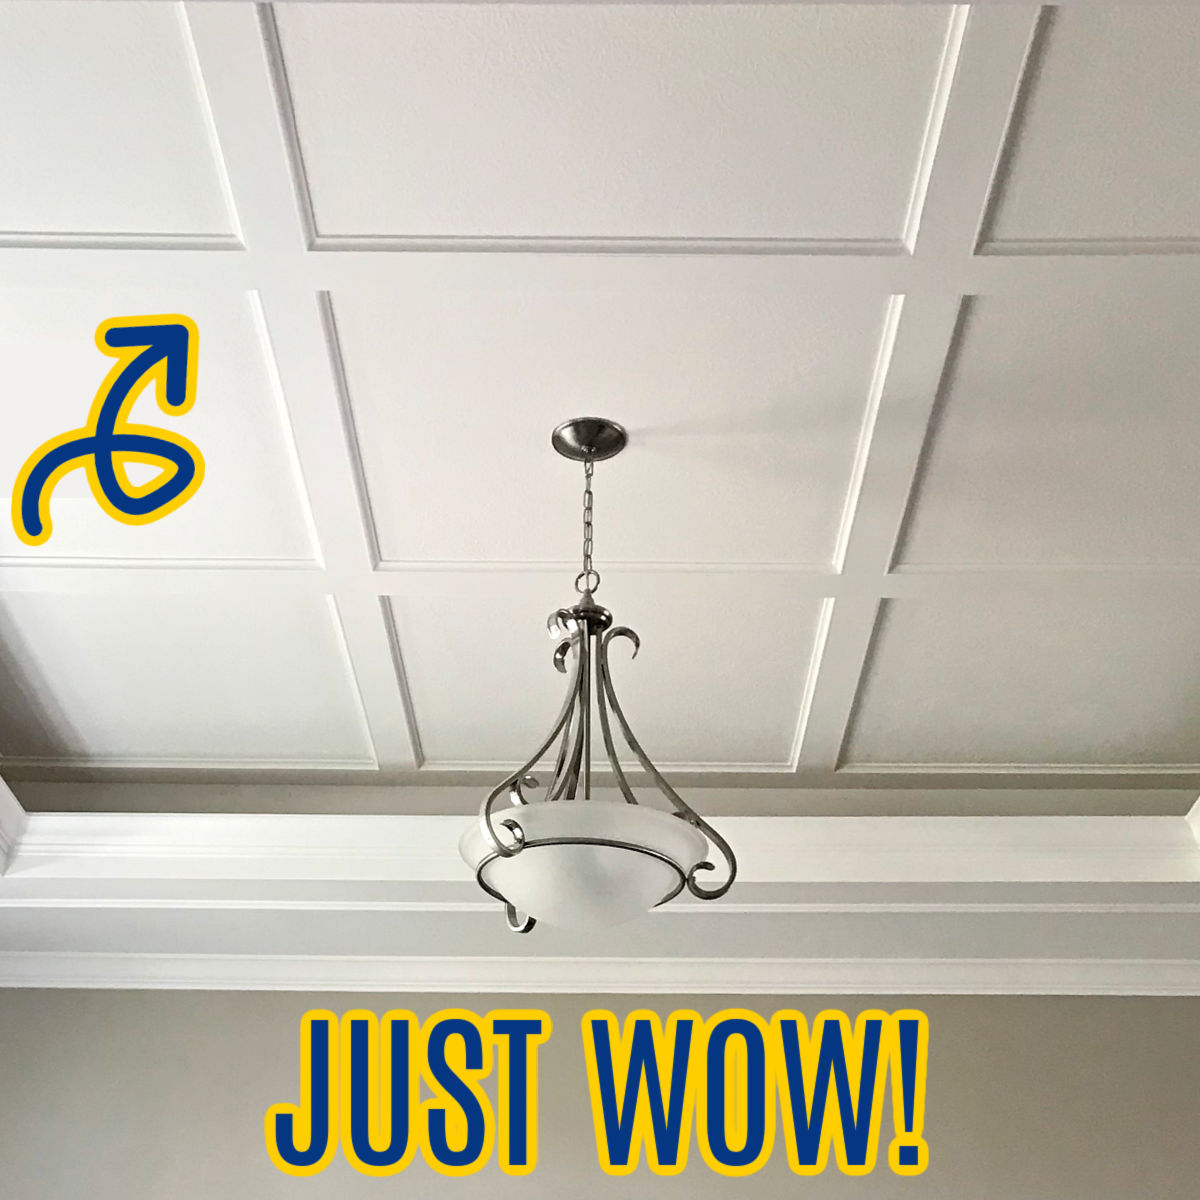
I LOVE this beautiful DIY coffered ceiling design. Steps, photos, and how-to video for this EASY flat coffered design using 1×4’s & cove.
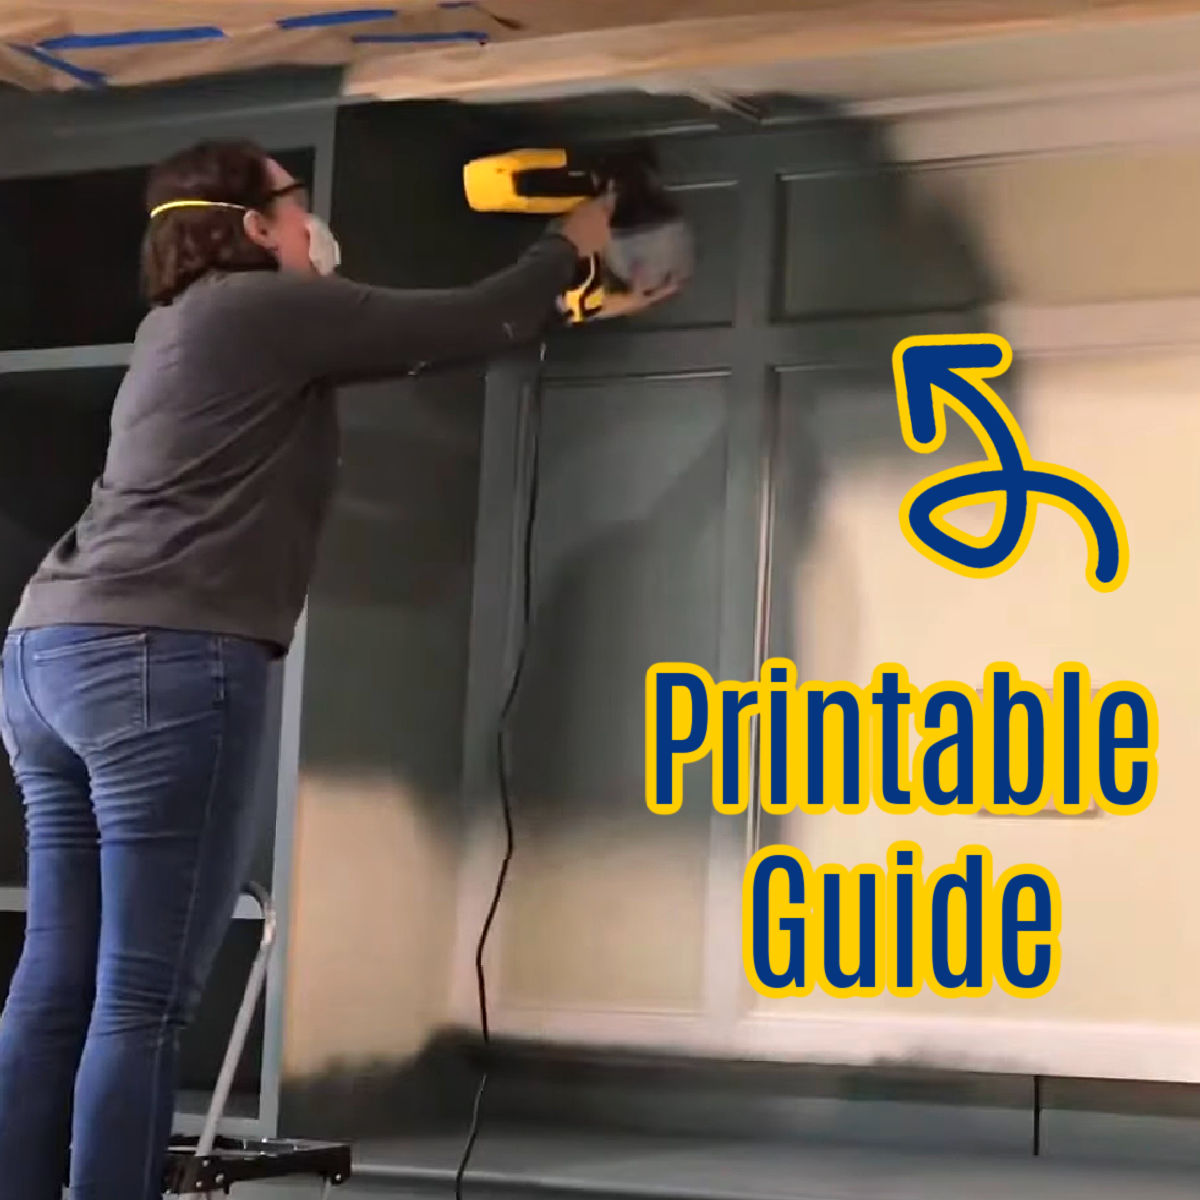
Easy DIY Steps & Video for How to Paint Built In Bookshelves and Cabinets. With Answers to Tons of Common Questions & a Printable Guide.
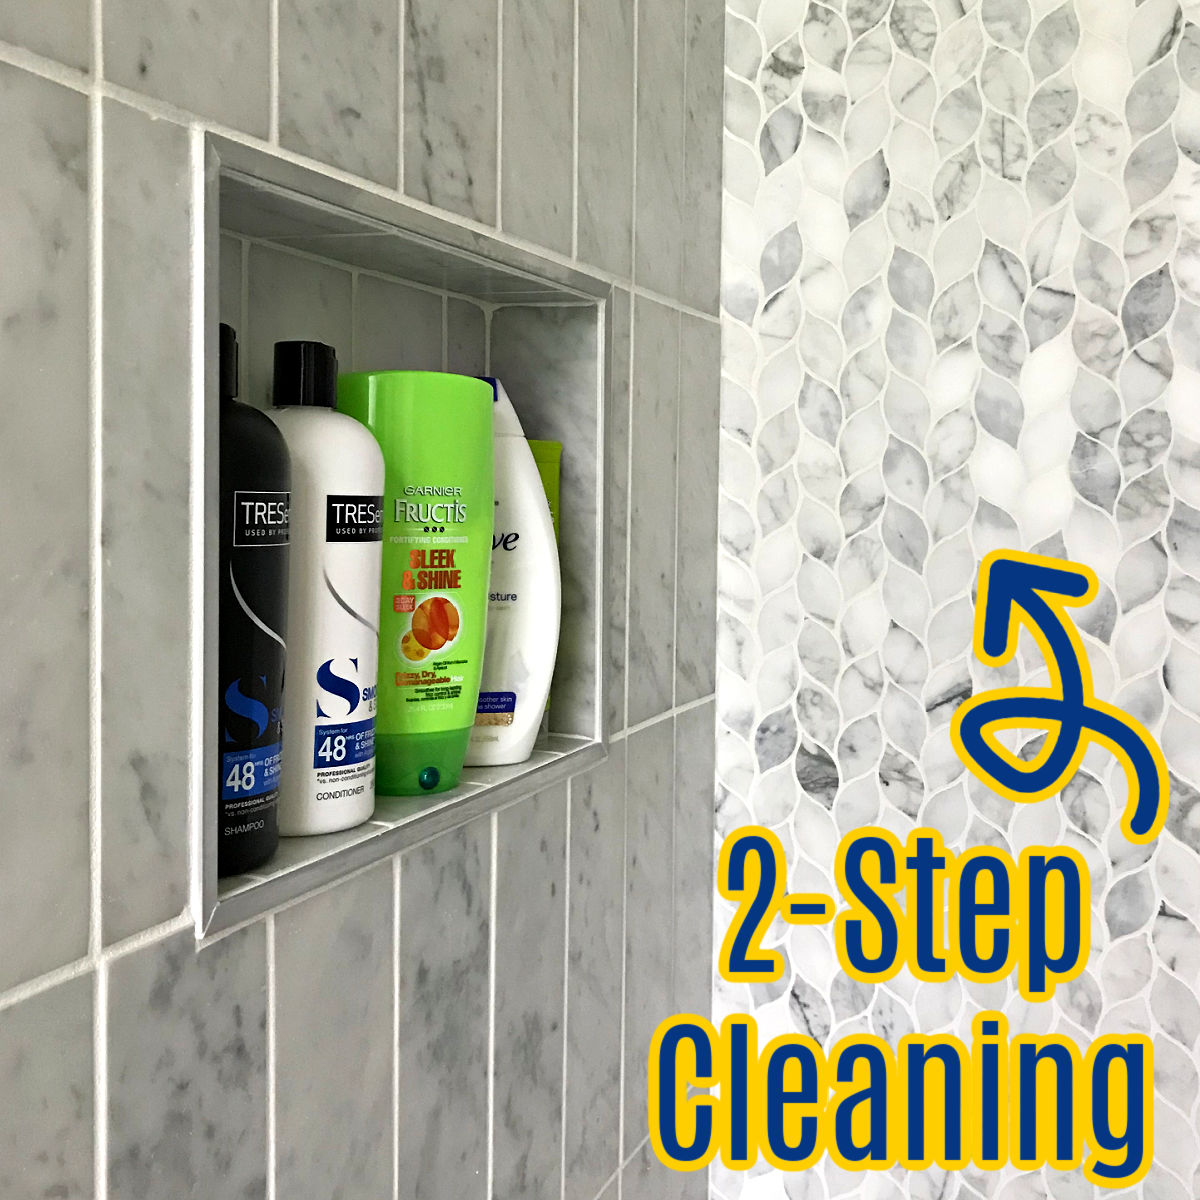
The SIMPLE & EASY way I clean marble shower tile & grout. These steps are SAFE on marble, they’ve kept my shower looking NEW for 4 years.
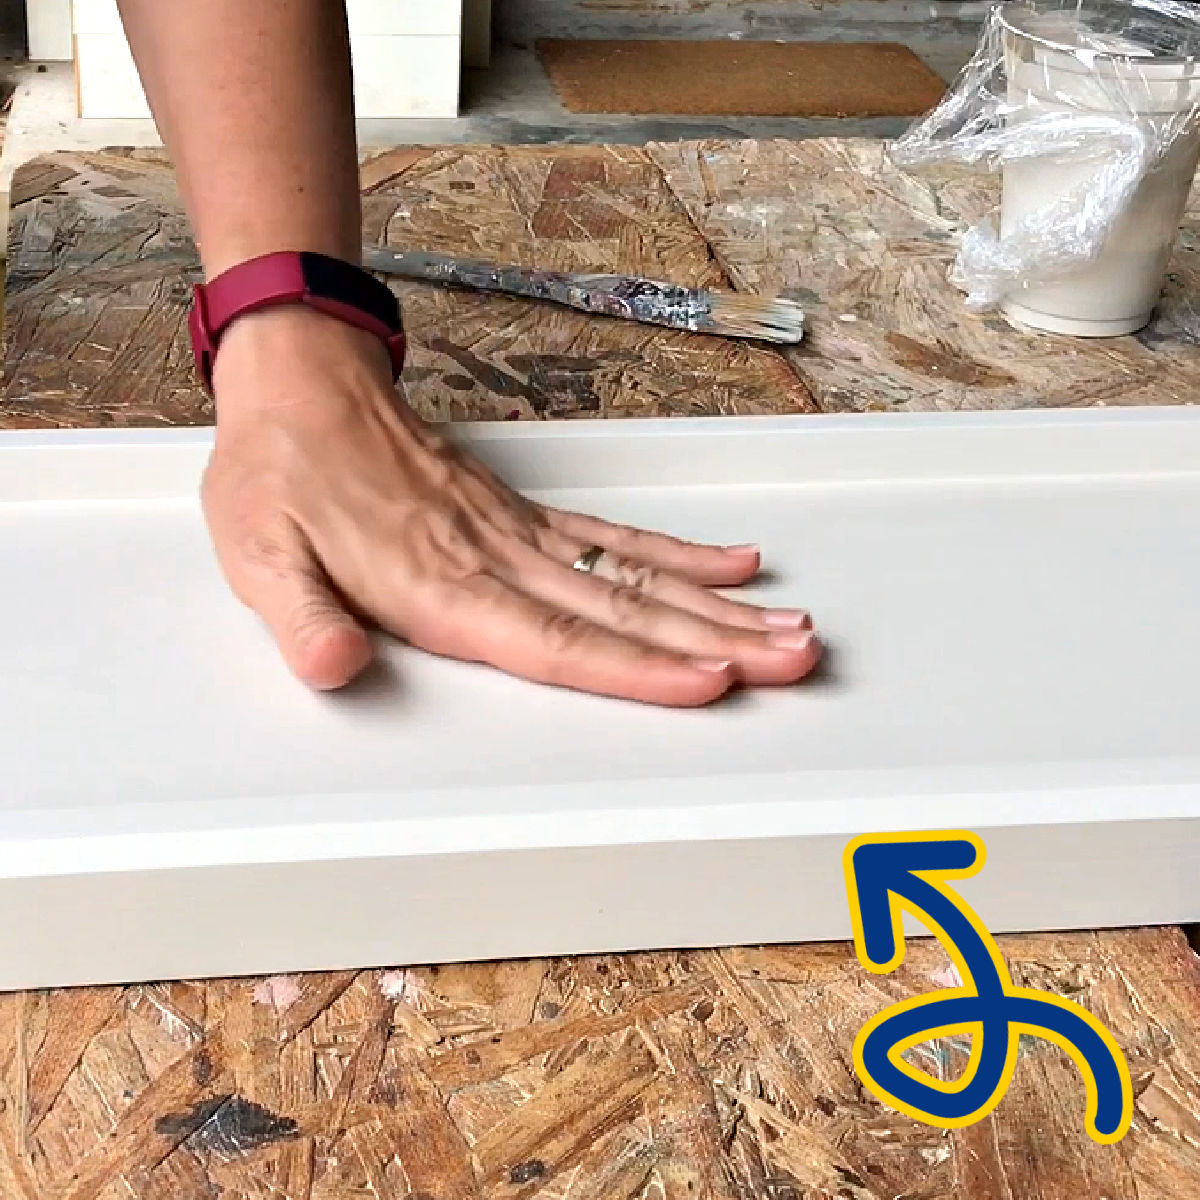
The EASIEST way to get a beautiful, smooth finish with chalk paint. Includes FAQ’s, wet sanding tips, & how to avoid streaky chalk paint!
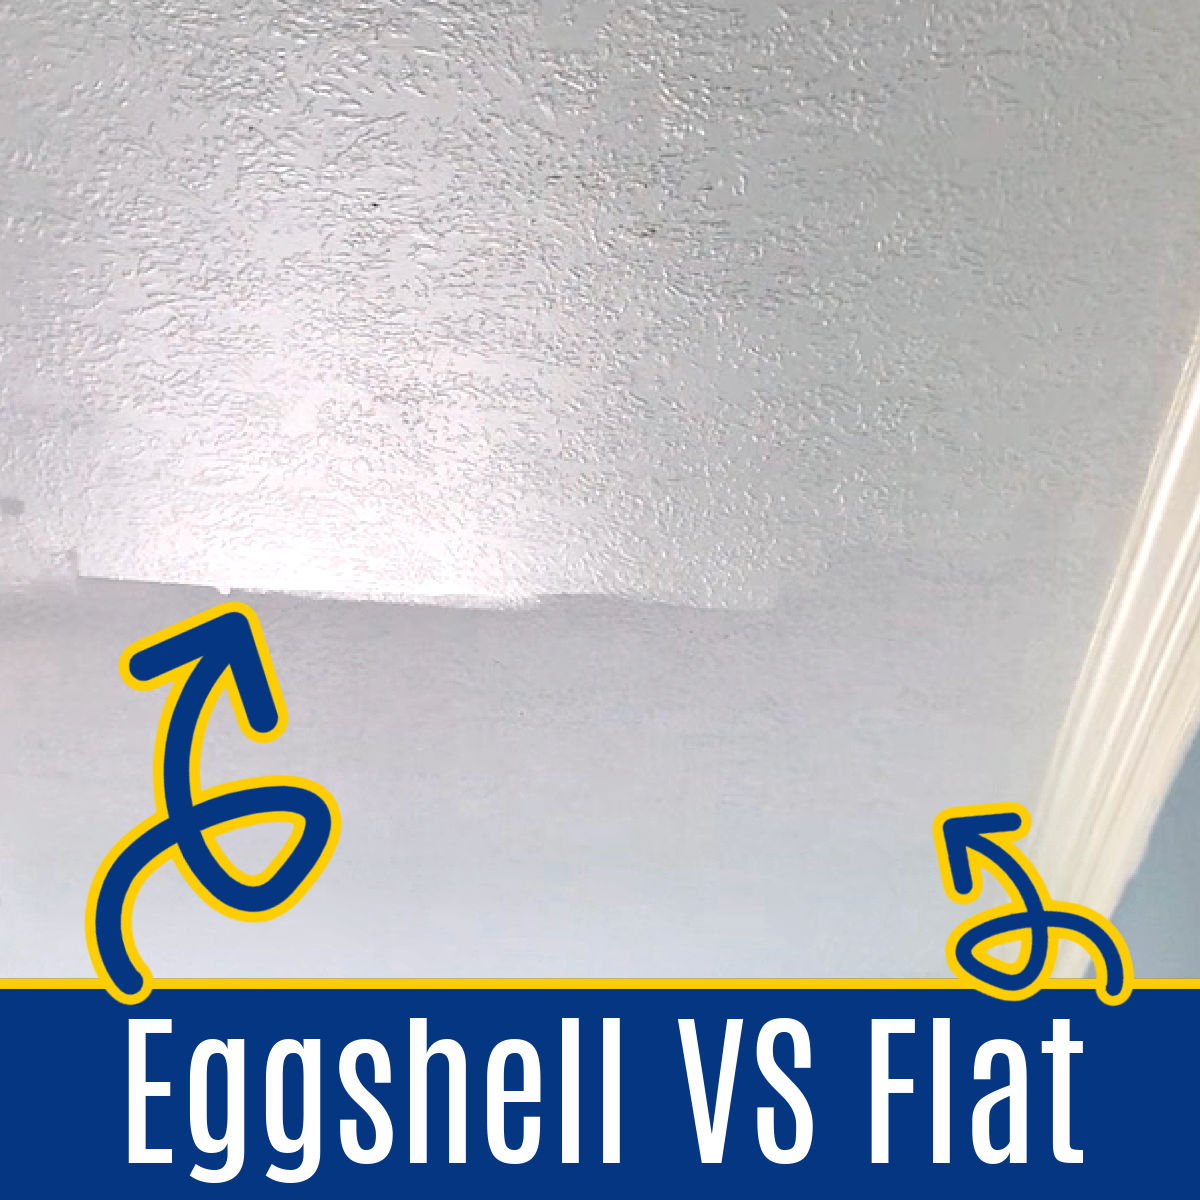
The old rules for ceiling paint sheen are wrong?? See 7 rooms comparing Flat vs Eggshell ceiling paint to pick the best ceiling paint finish.
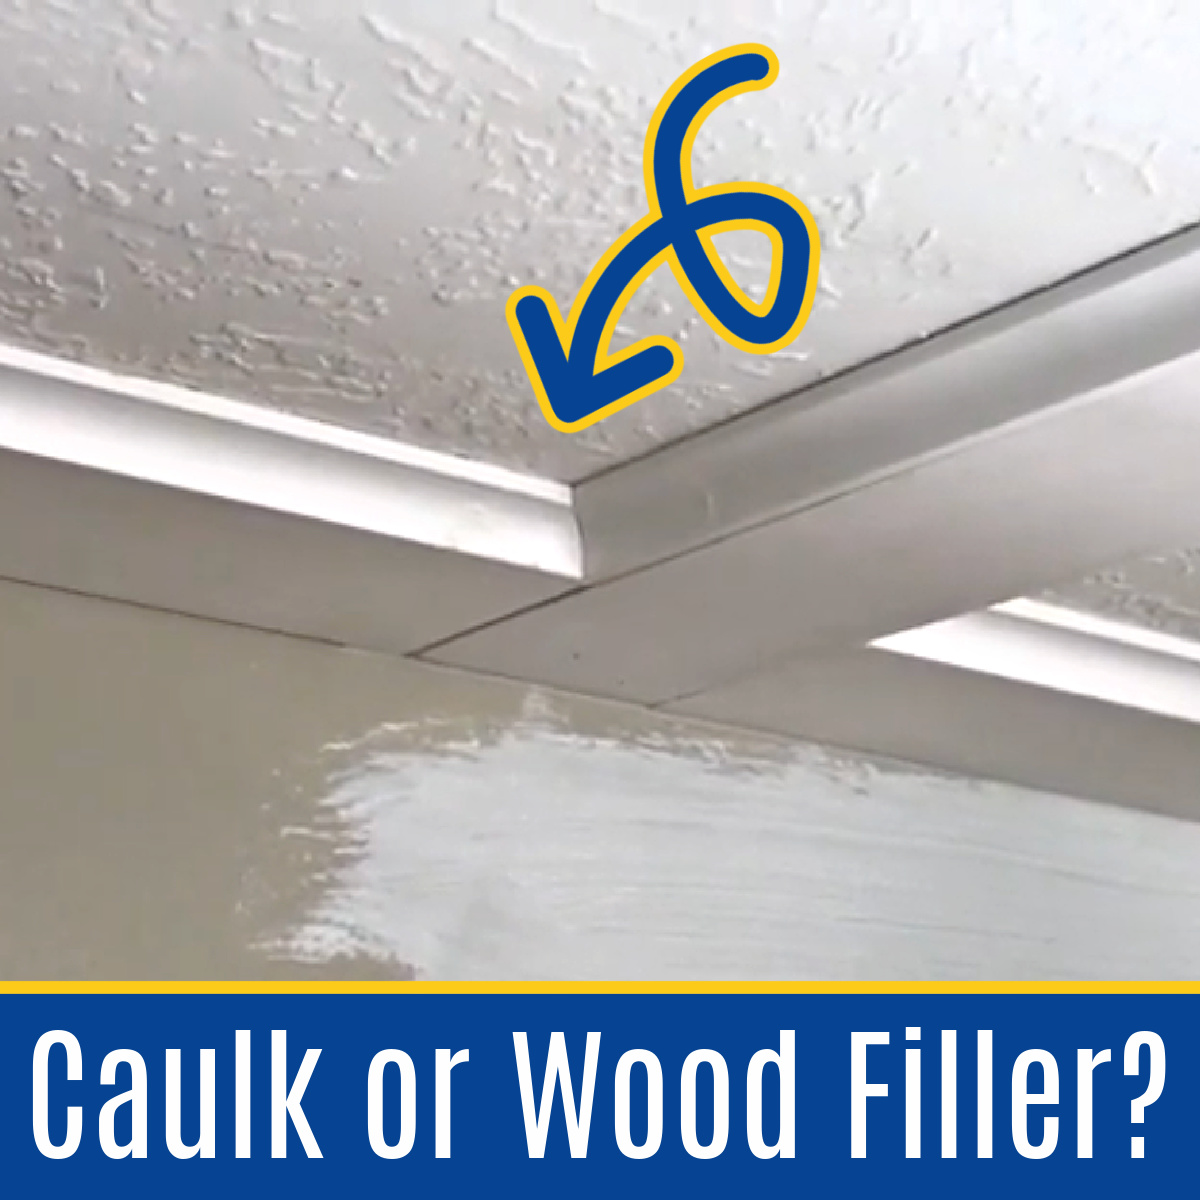
WHEN & HOW to use CAULK or WOOD FILLER on wood trim, baseboards, crown molding, miters, and more. Easy Beginner Guide, Video, & FAQ’s.

Here’s the most surprising PROS and CONS about moving to Houston, Texas from a Midwesterner who’s lived in the Houston suburbs for 10 years.
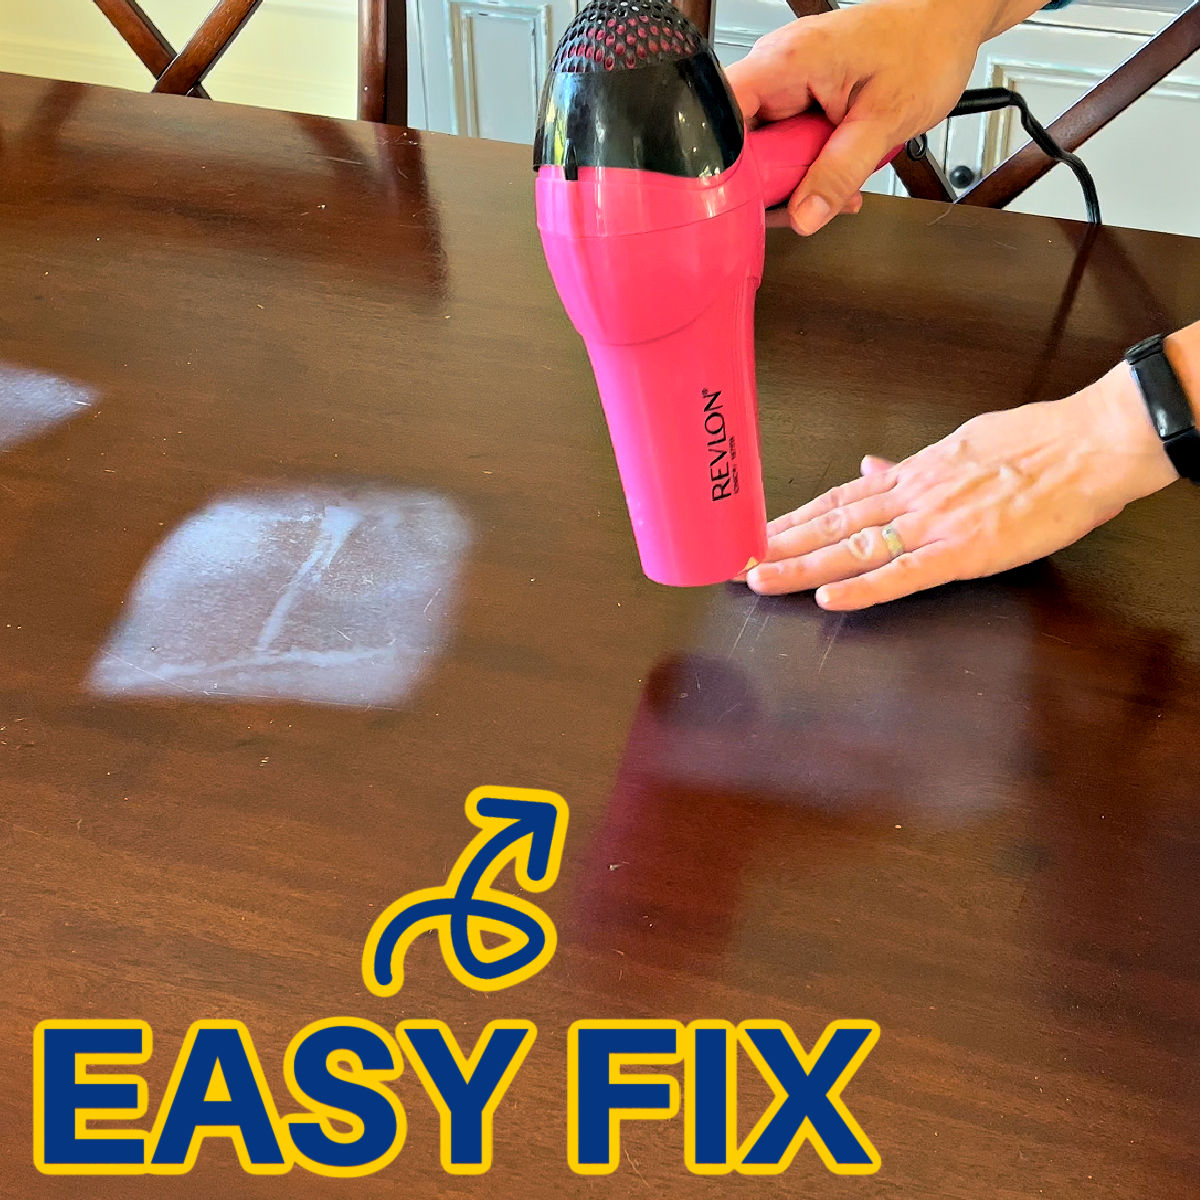
I put 4 big white heat marks on wood to test 7 EASY ways to get heat stains out of wood. Surprisingly 3 WORKED, 4 FAILED! Here’s the steps!

16 BEST perennials for Zone 9 landscaping: sun-loving, LOW MAINTENANCE, COLORFUL flowers or plants that attract hummingbirds & butterflies!
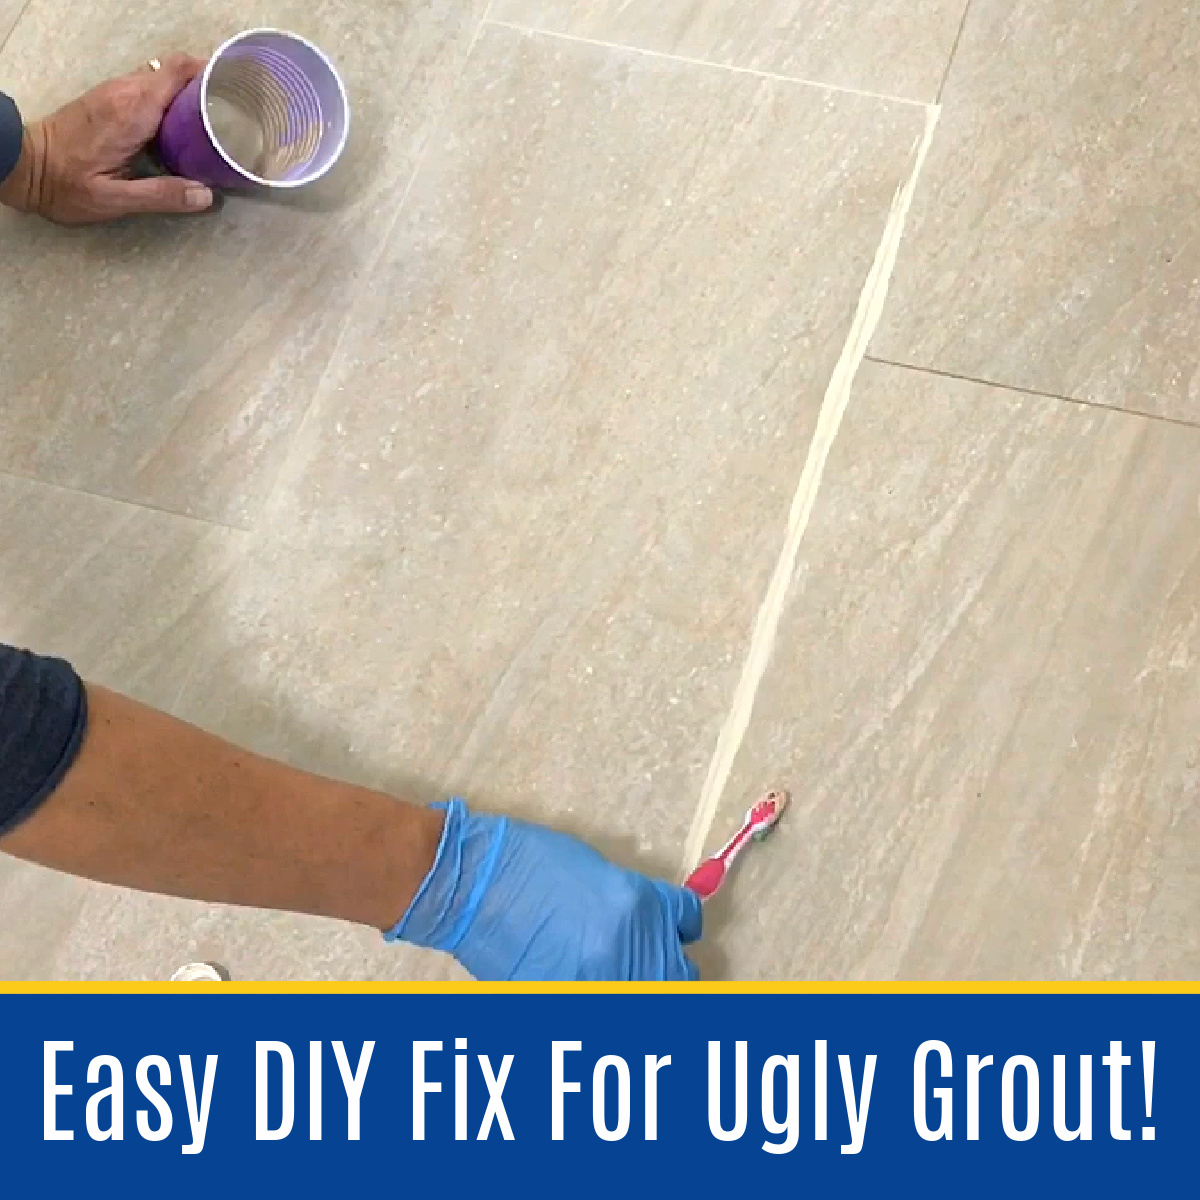
I LOVE this EASY DIY for how to whiten grout. You can make your grout LOOK NEW again and seal it from stains with this grout whitener!
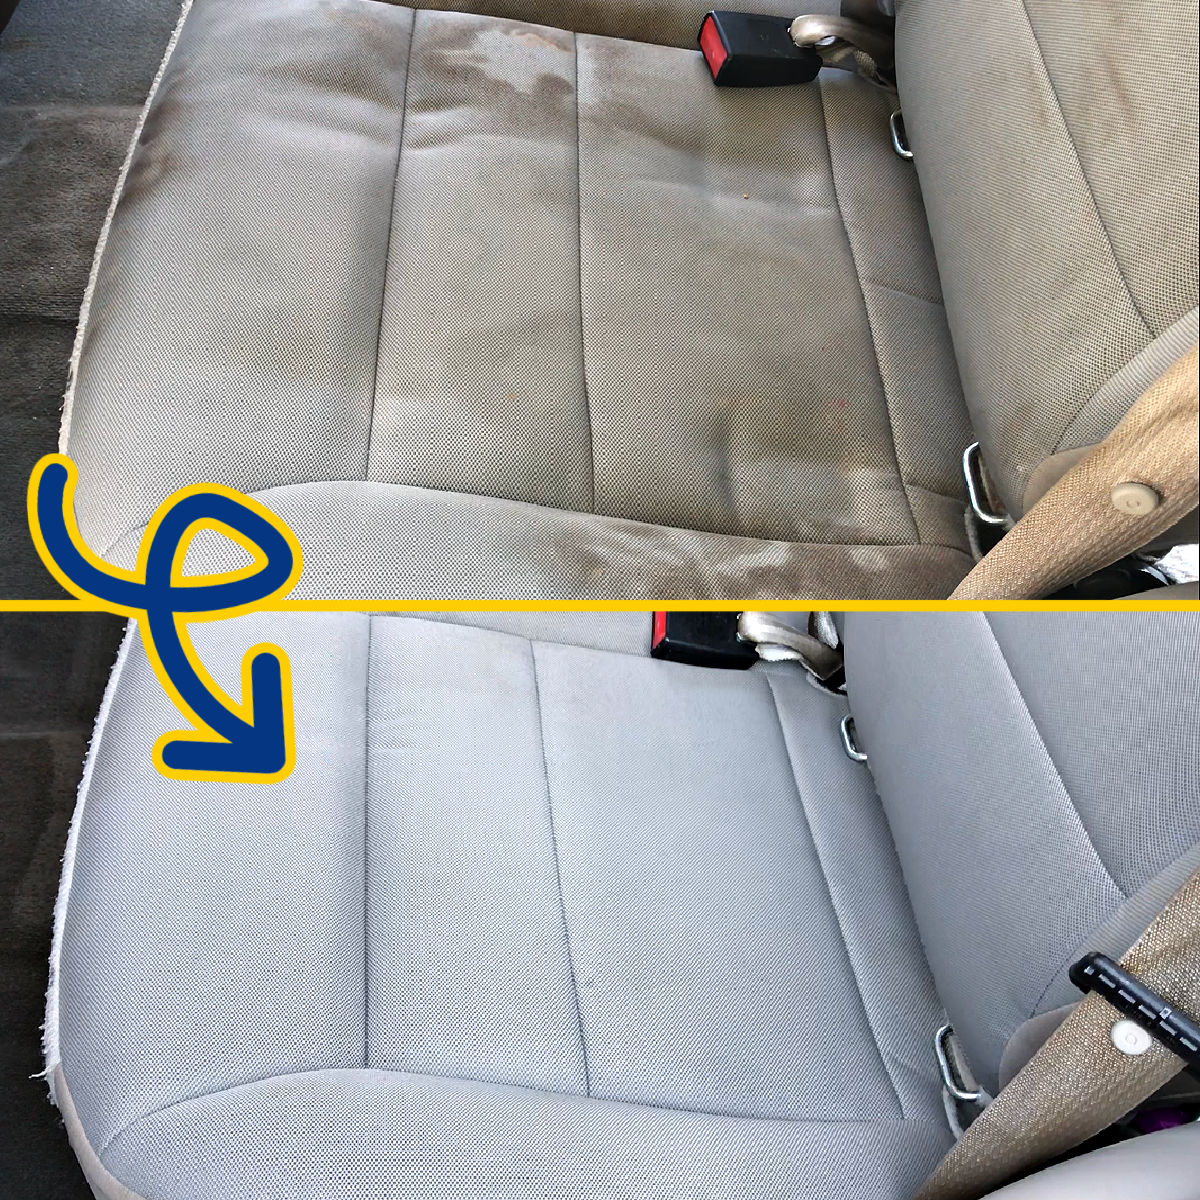
Anyone can Deep Clean Car Seats At Home with these easy steps. In less than an hour, my fabric car seats and carpet look NEW!

Read my 18 TOP PROS & CONS of painting exterior brick before you paint a brick house. With full before & after for our white brick house.
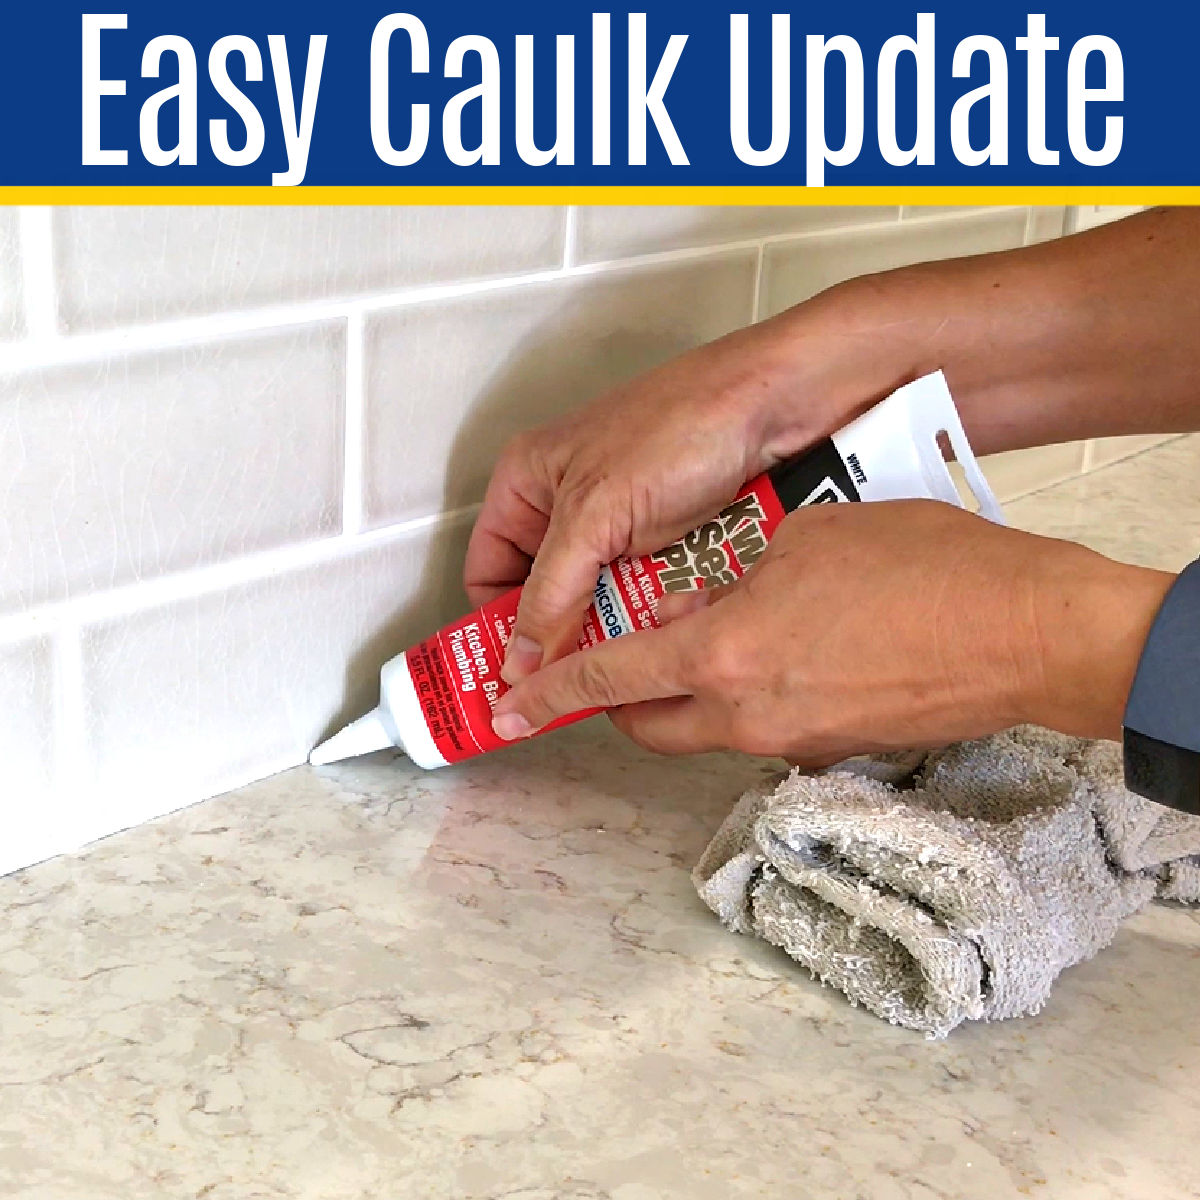
Easy DIY Steps & Video for How to Caulk A Kitchen Counter. With Answers to Common Questions. Replace your old grout in under an hour.
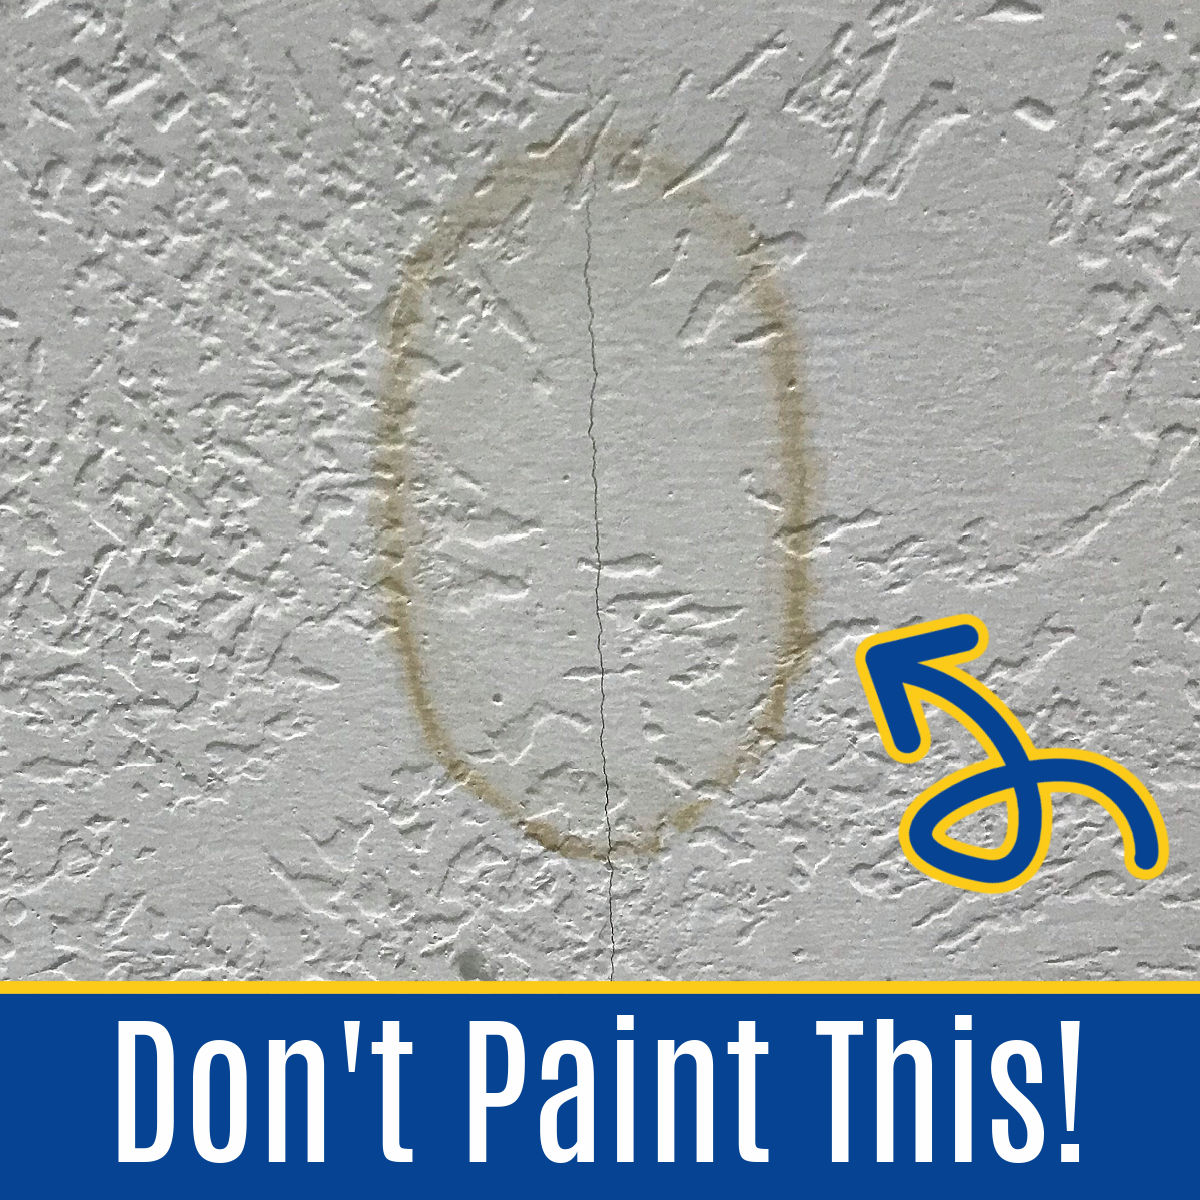
Here’s a DIY fix that seems like magic, it works so well. At least, that’s what my neighbor called it when she used this bleach mixture to fix water stains on ceiling leaks in her house. 😉 How to Fix Water Stains on Ceiling Leaks This easy DIY is really the easiest way to get … Read more
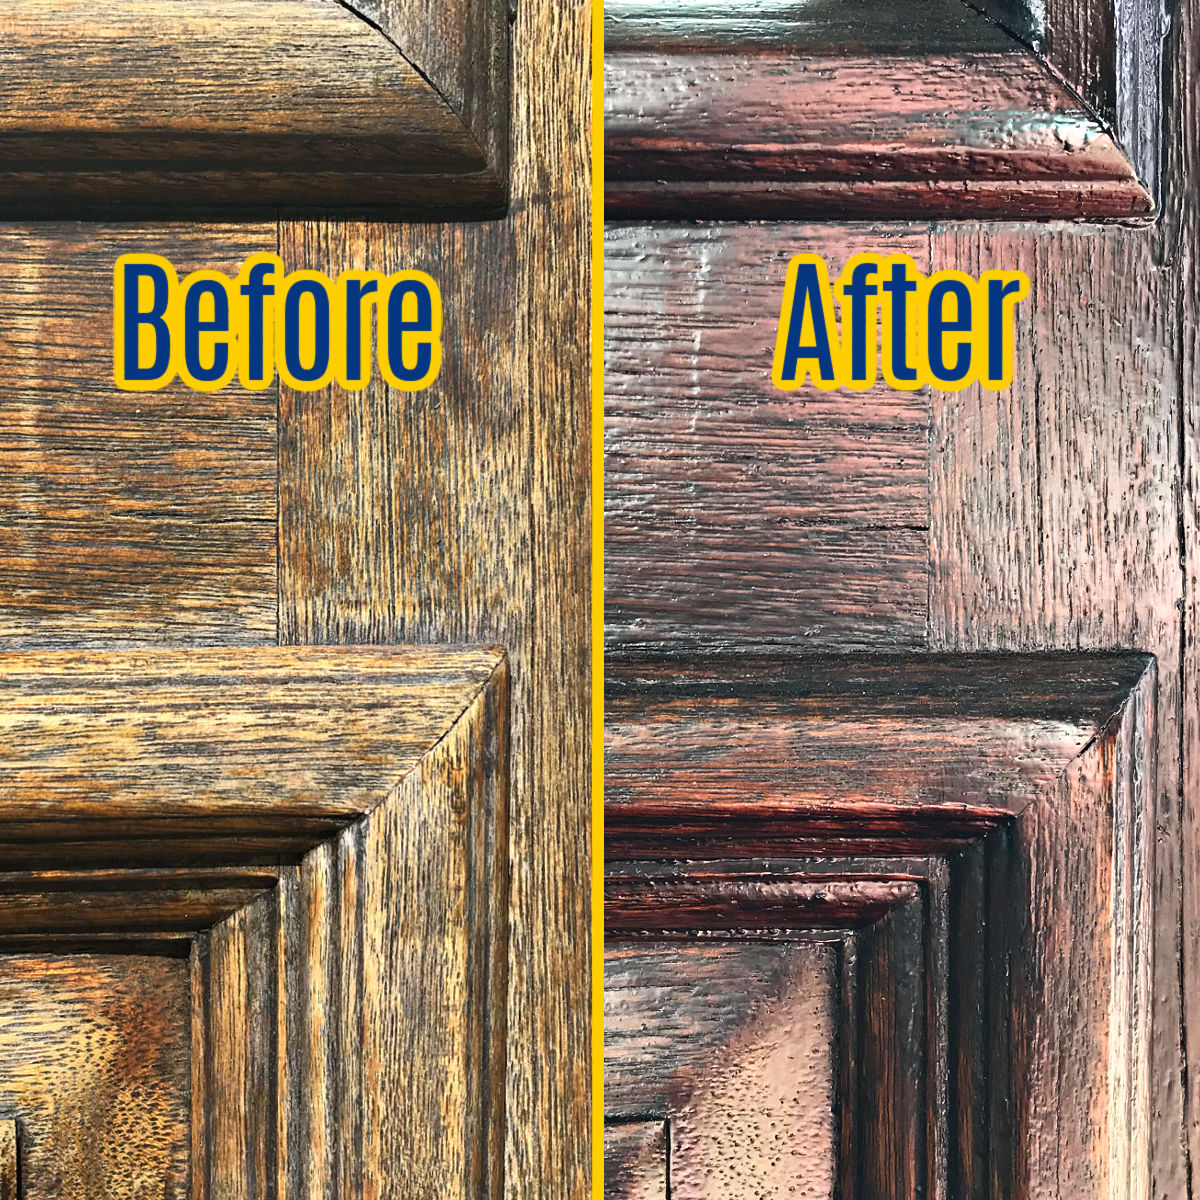
This easy DIY for How to Restain a Door without stripping it or even removing it gives your home huge curb appeal in less than a day! How to Restain A Door Without Removing It If you want to know how to refinish a weathered front door, I have a quick solution that’ll work for … Read more
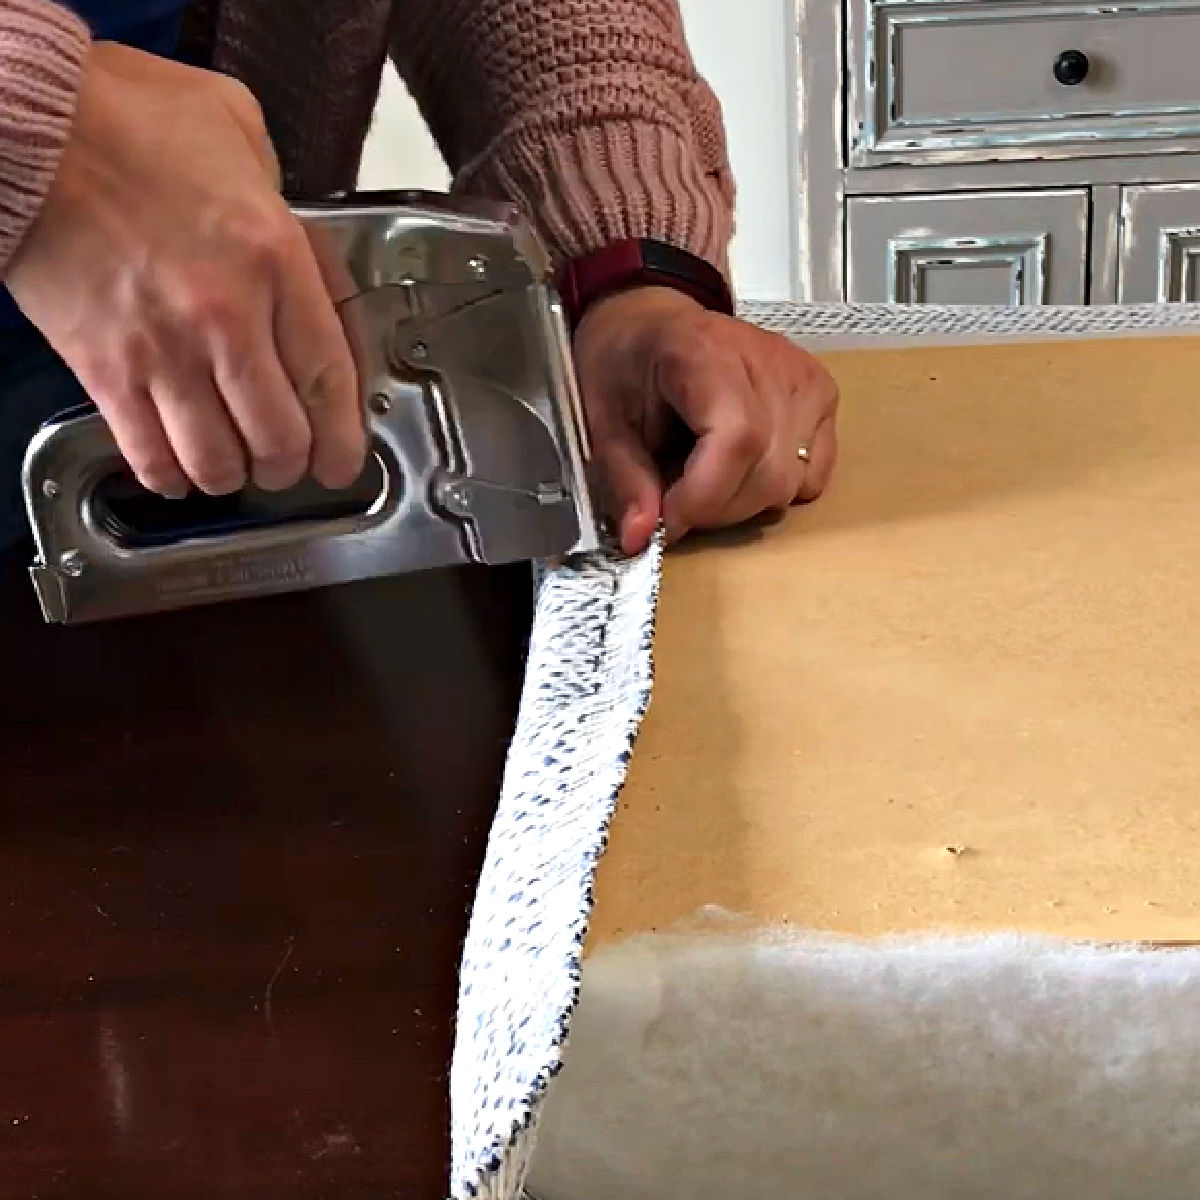
I LOVE this easy DIY to Make a No Sew Bench Seat with a Staple Gun. You can make a beautiful padded cushion seat on plywood in no time!